A few months ago the sister of a friend got a little baby dog.
She asked me if I could make a pendant with the first pic when the new family member arrived at her new home.
This is just one way to use printed designs for cabochons.
They make perfect personalized gifts for birthdays, weddings and other occasion.
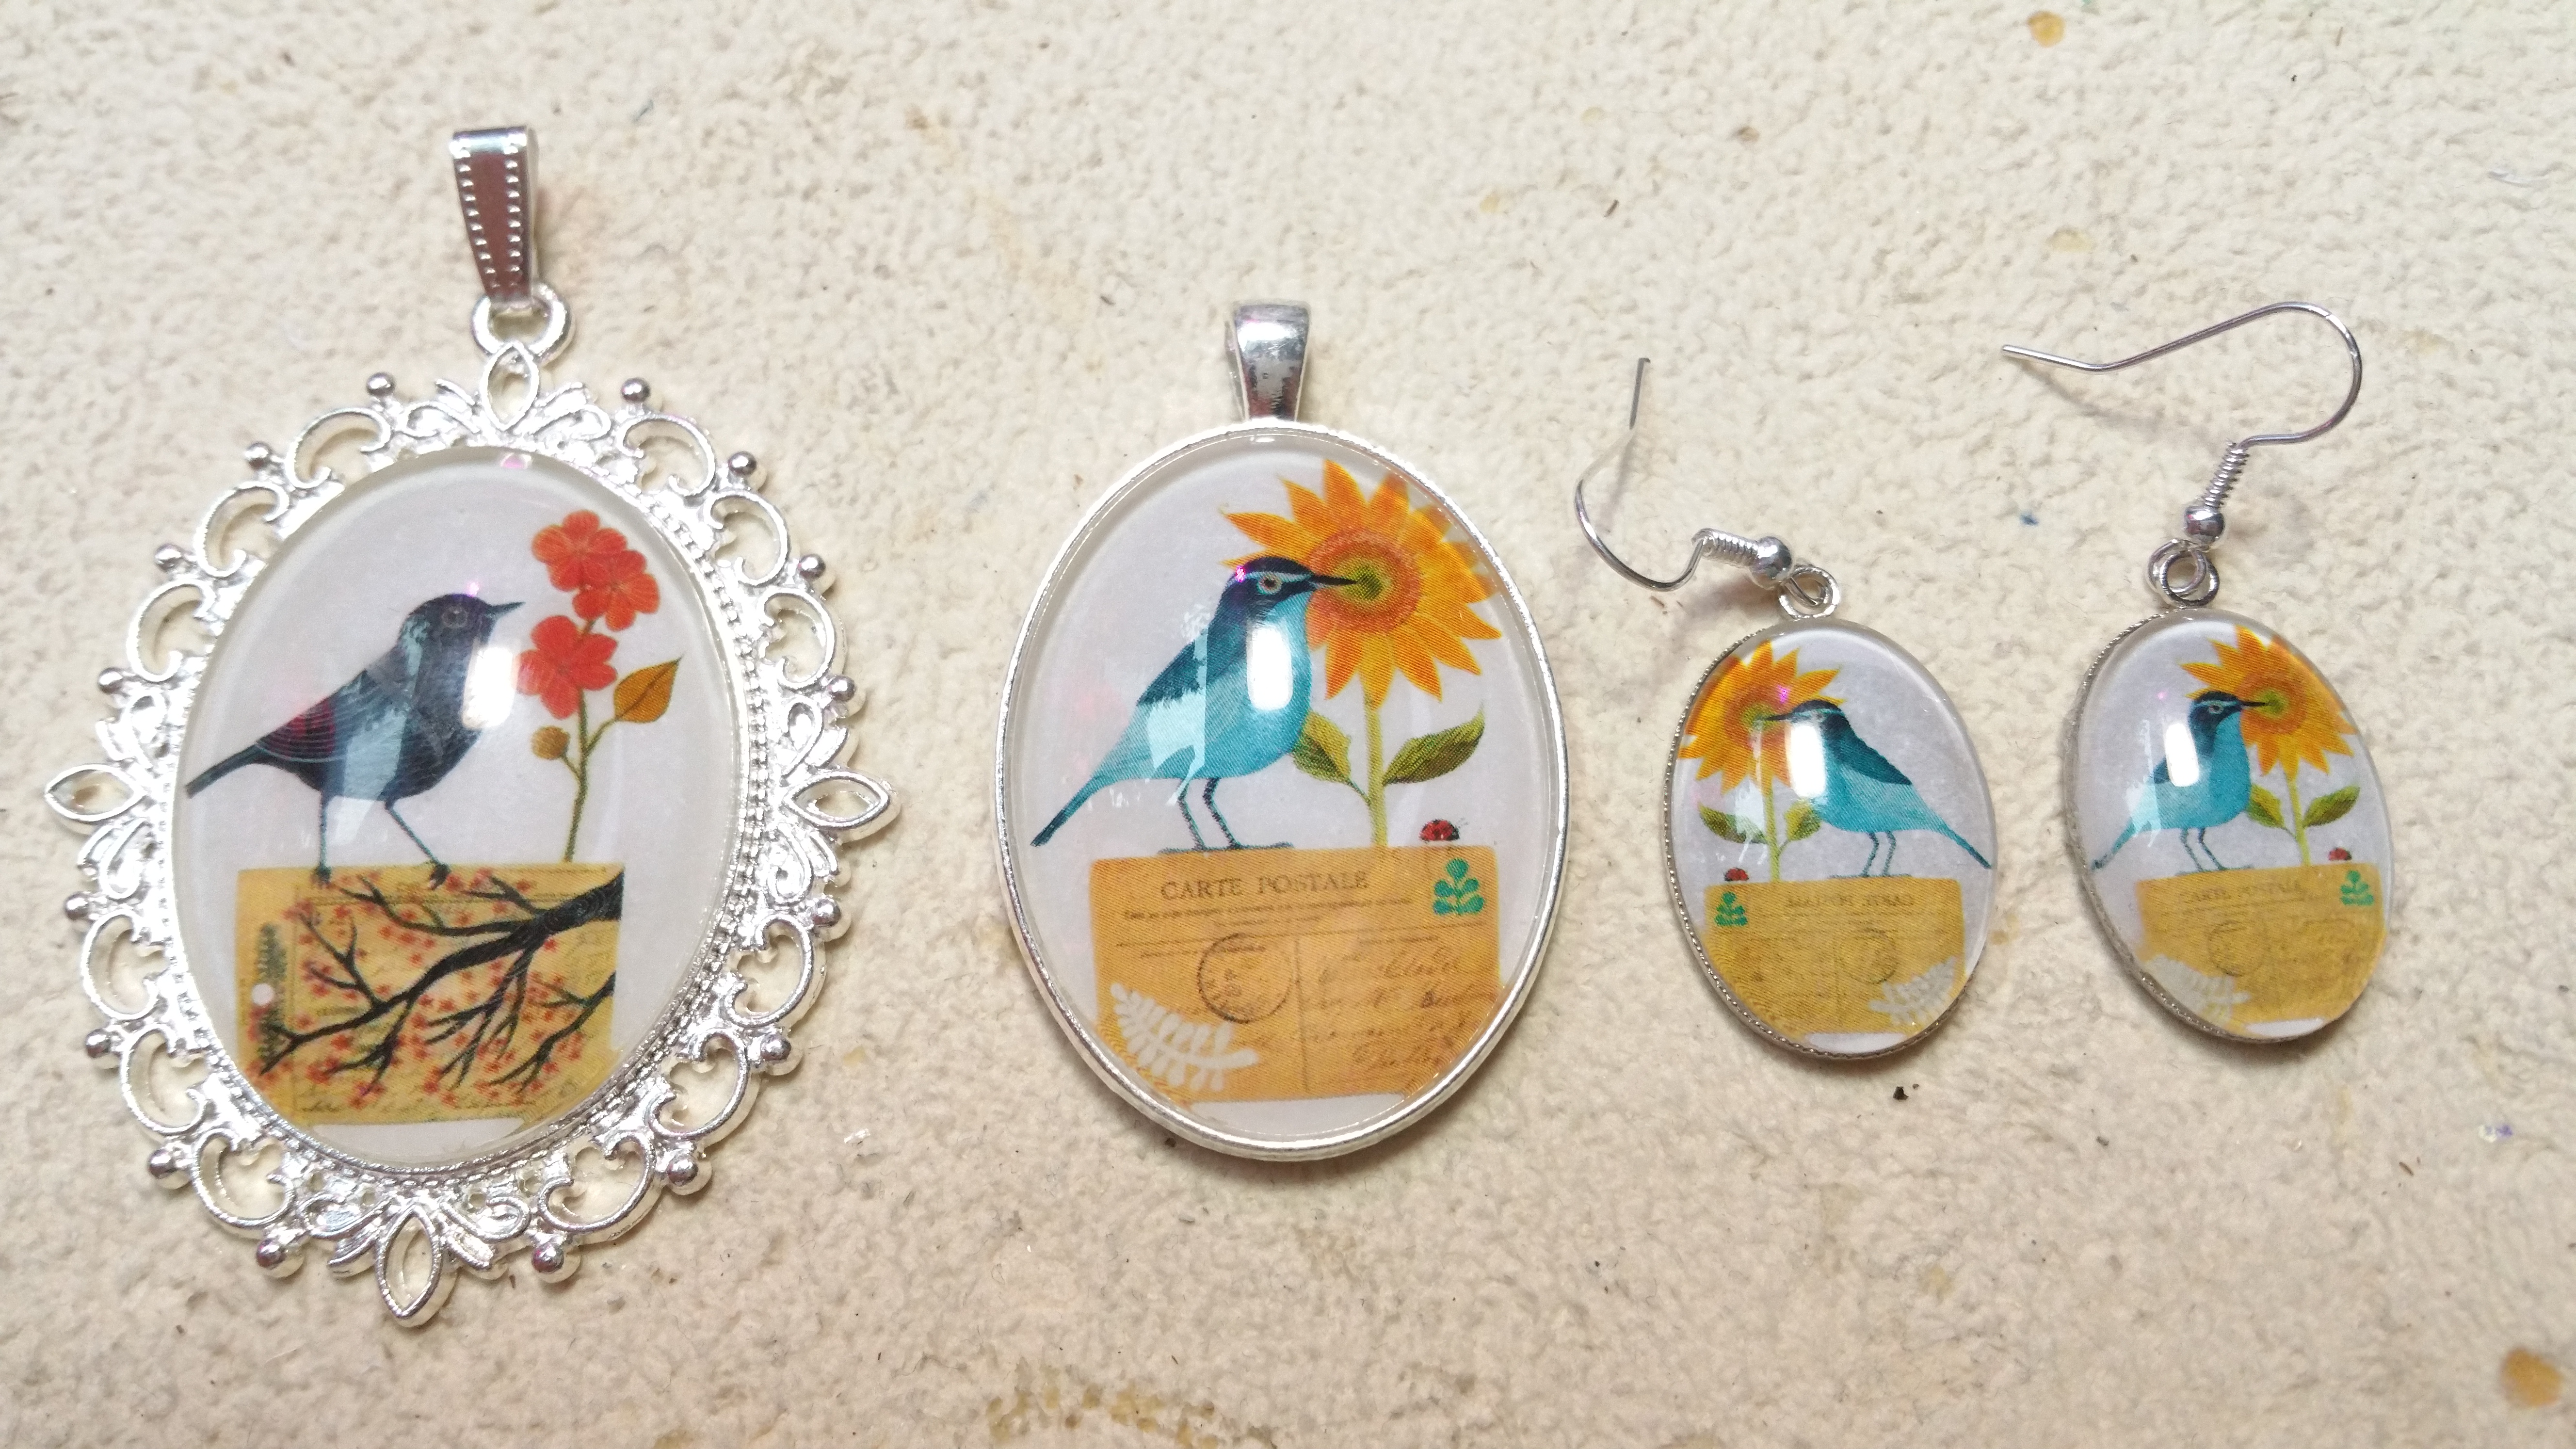
And since those cabochons can be turned into different kind of jewelry or accessoirs the possibilities are endless!!
But let me show you how I do it 🙂
You’ll need:
- glass cabochon(s) in the desired size
- a digital photo or graphic you wann use
– Careful!! If you wanna use graphics from the net there may be problems with the copyright!! - a special word file for the printout
– see below - word (software)
– I don’t have the latest version, but I am sure that the description is more or less the same way - imaging software
– I use a very old photoshop version, but for most free versions can do the same - laser printer
– inkjet ink can’t withstand the glue and destroys the print - thick, white paper
– I use sheets with 250 g/m². If you use thinner paper the glue makes the paper translucent which is very bad when you glue it into a blank. - glue
- scissors
- jewelry blanks (optional)
The very frst step is to check the digital picture file.
Is it to dark or to light?
Maybe you need to adjust it with the imaging software.
Also you should make sure if the picture fits the cabochon form you want to use it for.
If you picture is in landscape format and you only want to use a part of it, you should crop it.
Make sure that the graphic has appox. the same proportions as the cabochon.
The word file with placeholders for the graphics helps you in designing and resizing the graphics or photos.
You also see instantly what your cabochon will look like.
The file has various sizes and shapes of placeholders.
I try to fit as many as possible onto one shhet of paper since it is more expensive than normal paper.
Here’s what you do:
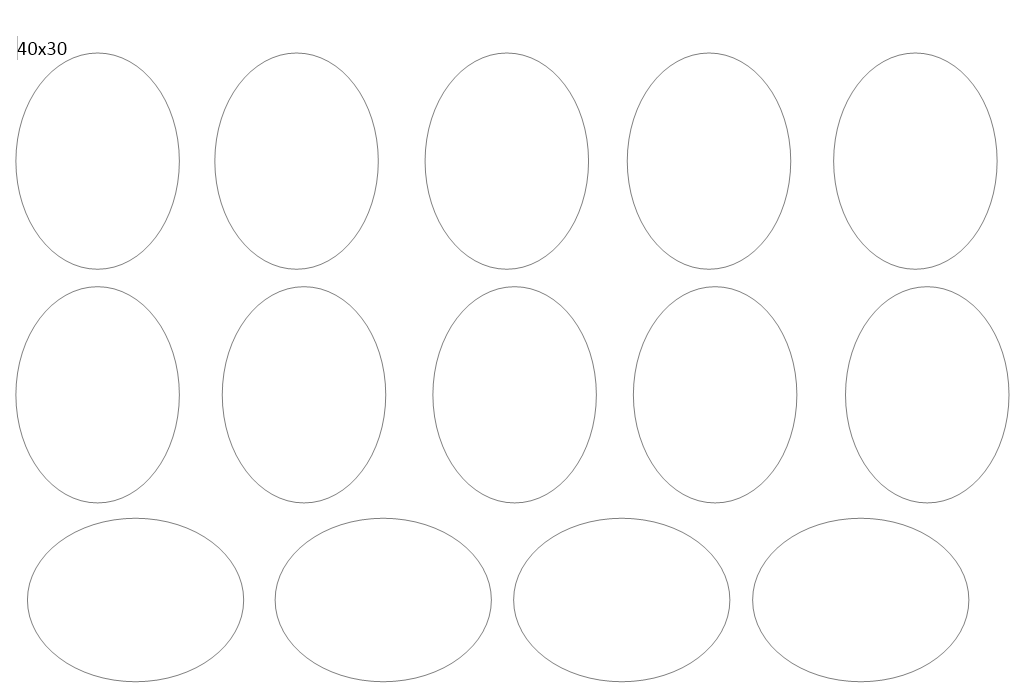
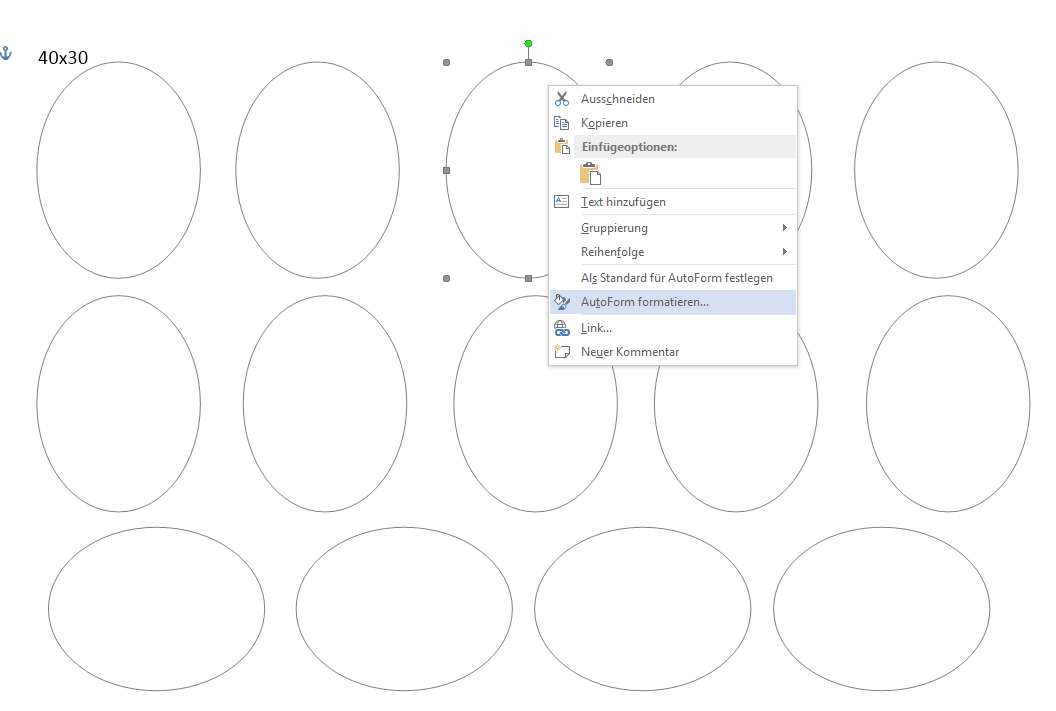
In the word file you go to ‘insert’ ‘shapes’, choose the one that looks like an oval. Now the cursor becomes a cross and you draw the shape onto the page by pushing the left mouse key and holding it while drawing the shape.
Don’t worry about the location, size and shape. That will be all adjusted in the next step.
Please let me know if there is a better wording. Thx!
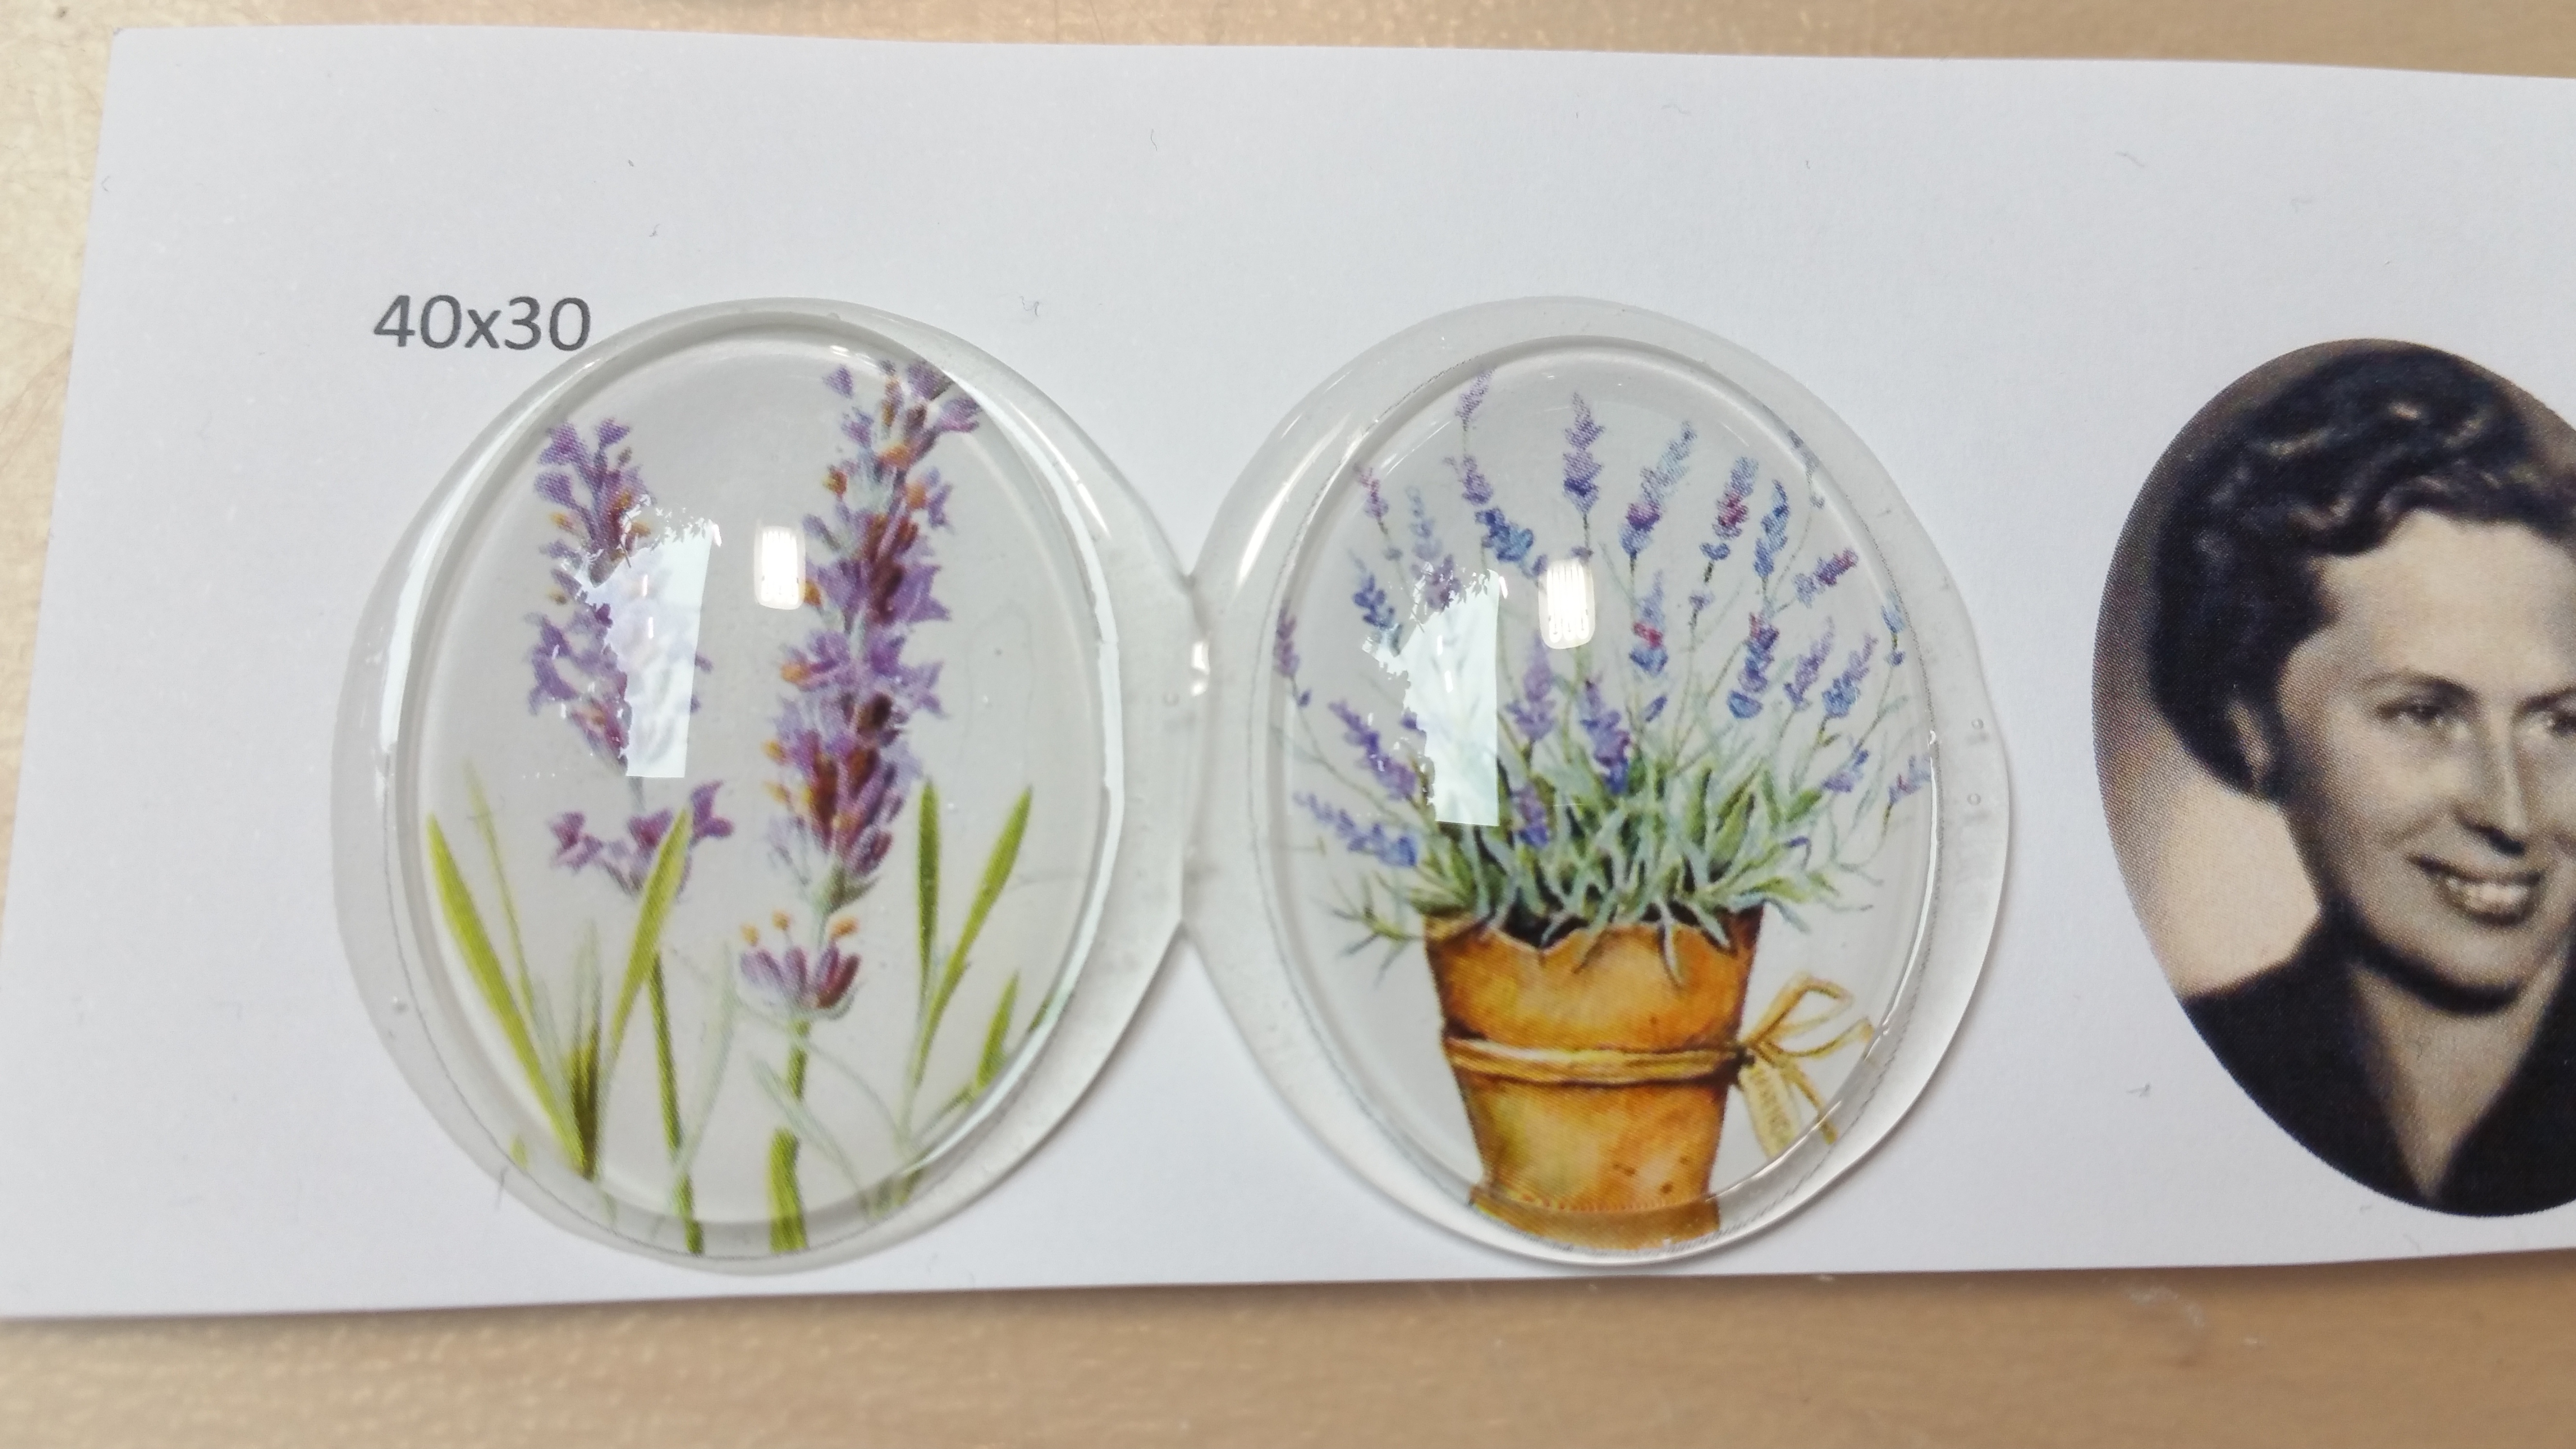
In this case I wanted to design some cabs that are 40×30 mm.
Go to the shape you just drew on your page and make a right mouse click into it.
Now a menu opens and where you see the little bucket it says somehting like ‘adjust autoform’.
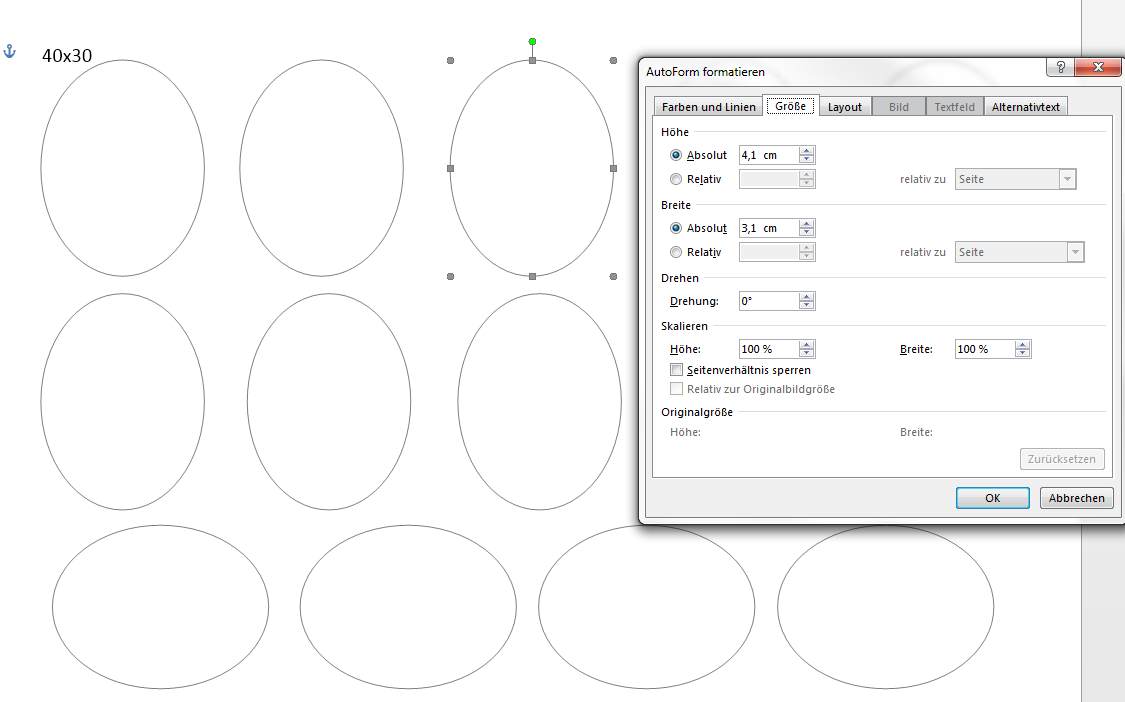
On the top you have different sub menus. Click on the one that says ‘size’.
There enter the desired values in ‘height absolute’ and ‘width absolute’.
You can see that I chose 4.1 cm and not 4 cm. It is always better to make the design a bit larger so that the cabochon fits perfectly into it.
Now we fit the graphic into the form.
If you have closed the menu open it again.
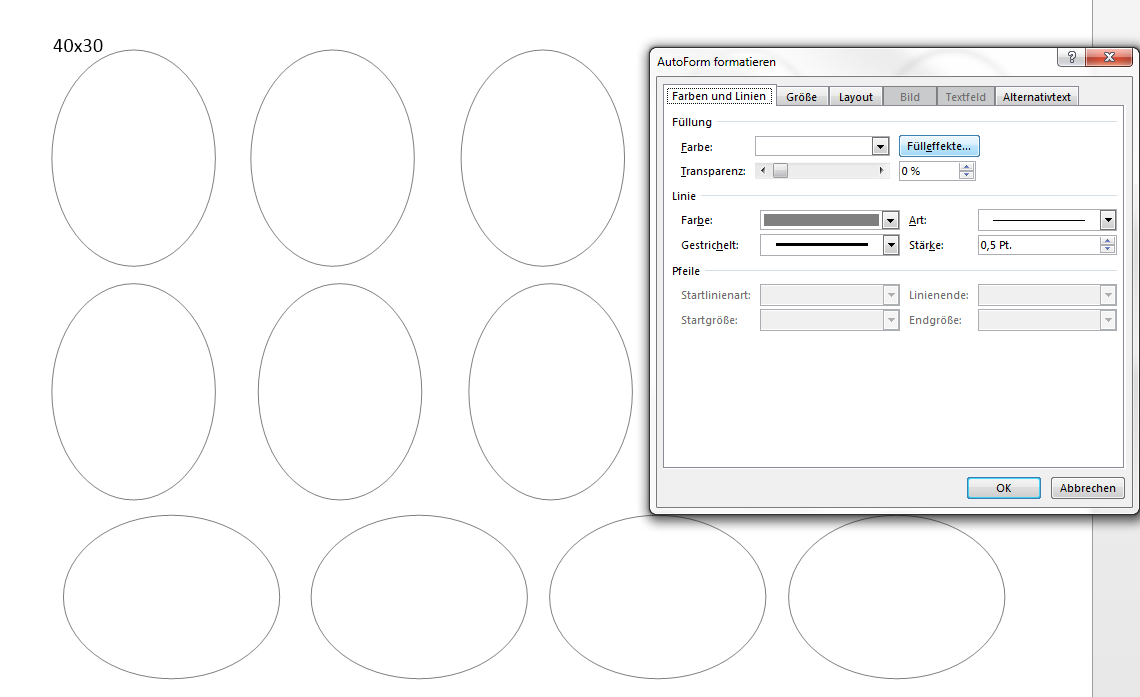
Now we go to the sub menu ‘colors and lines’.
If you have a graphic with a white background I suggest you make the outline of the form visible. I always make a thin grey line.
At this stage you can move the shape to the top. Now copy and paste the shape and move it next to it.
Repeat that step as often as you like to fill the whole page.
And of course you can adjust the size of each autoform.
Now click on the button ‘filling effects’.
Now a second little window opens an you need the sub menu ‘graphic’.
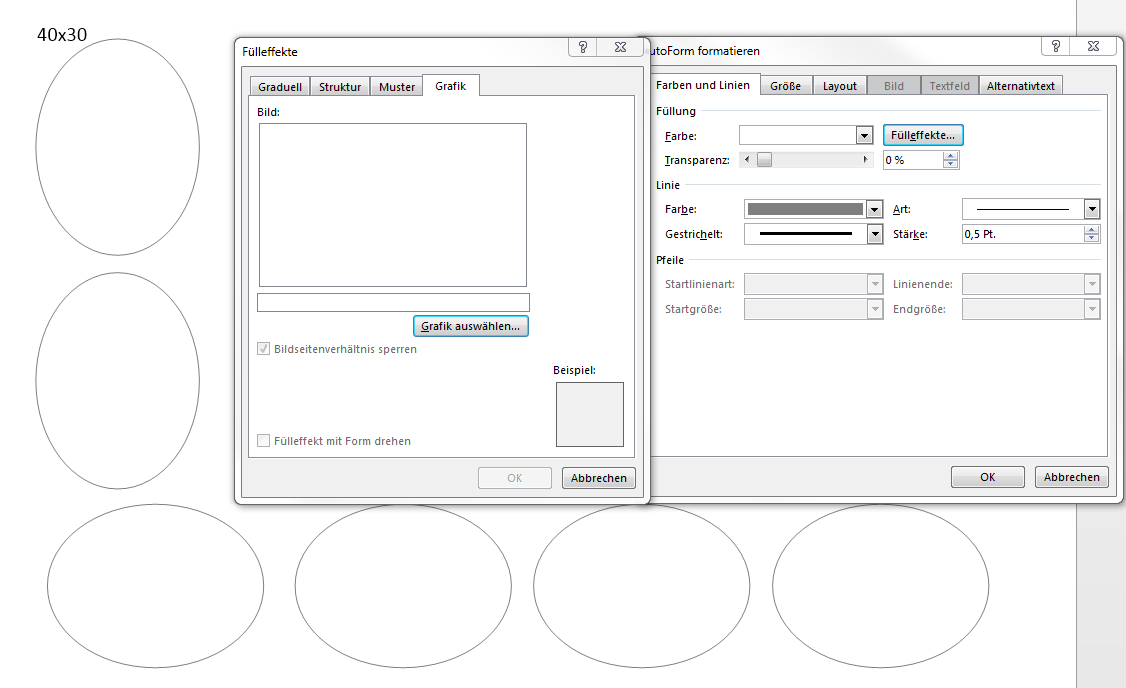
If you click on the button ‘choose graphic’ you can choose the picture or graphic you want.
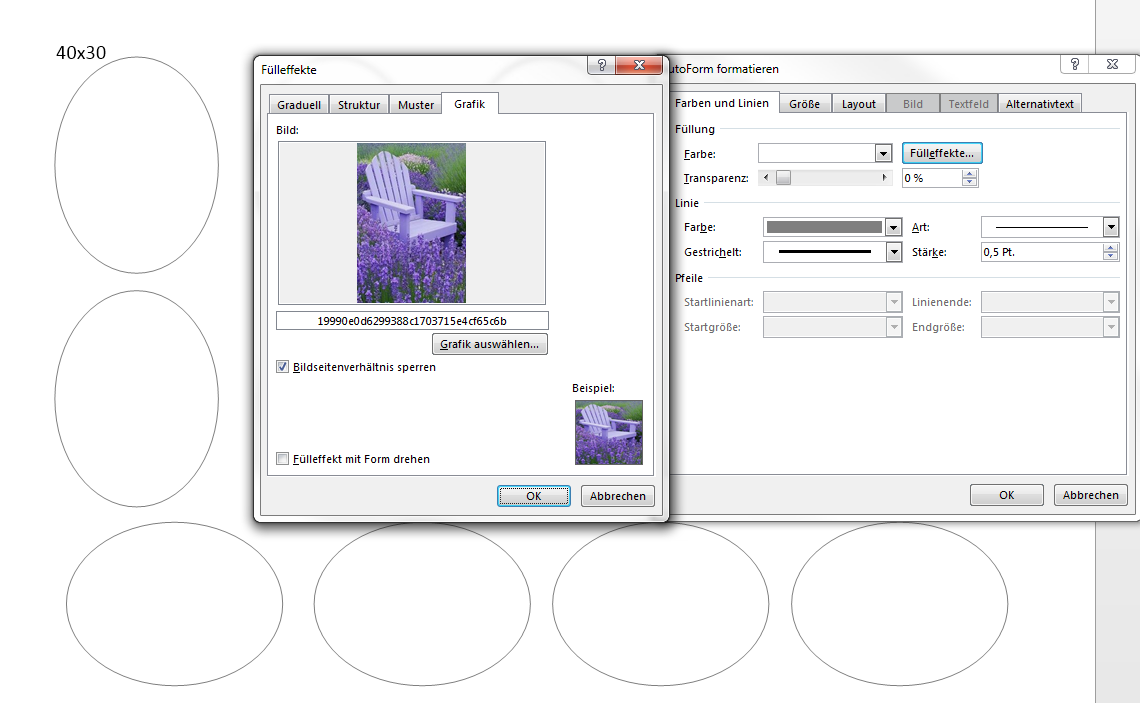
I decided I’m in a purple mood…..
After confirming the selection by clicking on ‘ok’ it is finished.
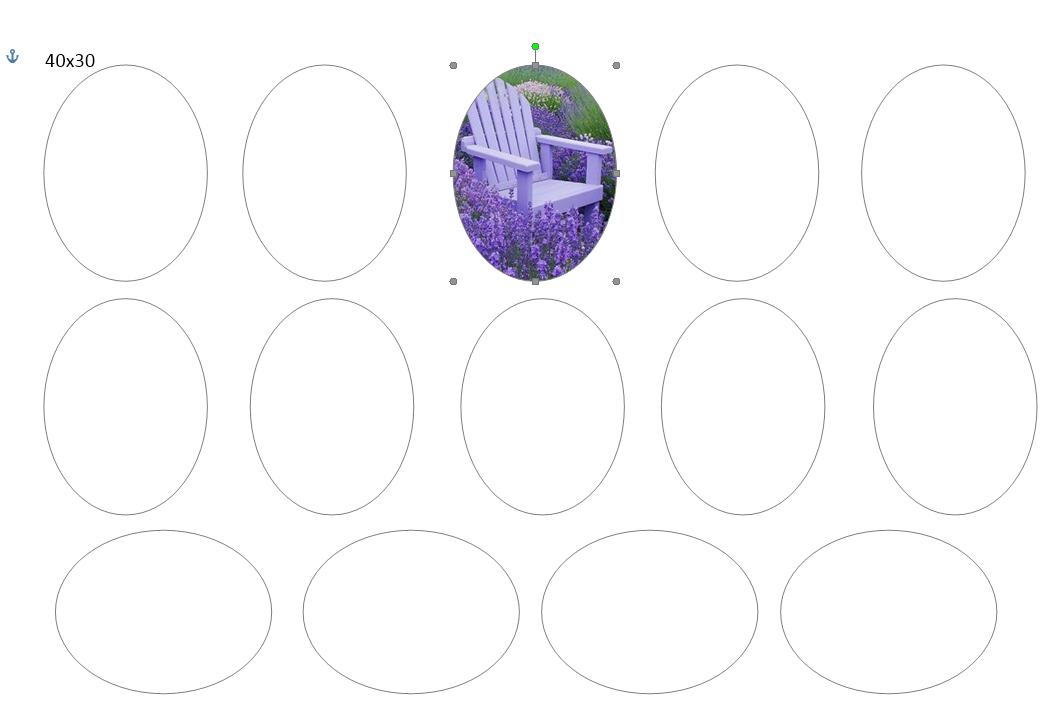
It almost looks perfect for me.
But I don’t like the way the chair is cut off at the left top corner.
So, back to the beginning, crop the picture a bit at the bottom or the right side and safe as copy.
NEVER, I repeat NEVER, overwrite the original file!!!
Always make copies!!
It makes life way easier *lol*.
Sometimes you have to try a bit until it fits perfectly.
After designing the word file you need to print the page on a laser printer in a high resolution graphics mode.
This is important for the following reason: the glass cabochons have a “magnifying glass effect” due to the domed shape. The higher the resolution the less you will see the rasterized details of the image print.
Now the glass cabochons are glued to the print-out.
The glue must be suitable for glass.
But be aware! Most of the solvent-based glues might destroy the print by smearing the design.
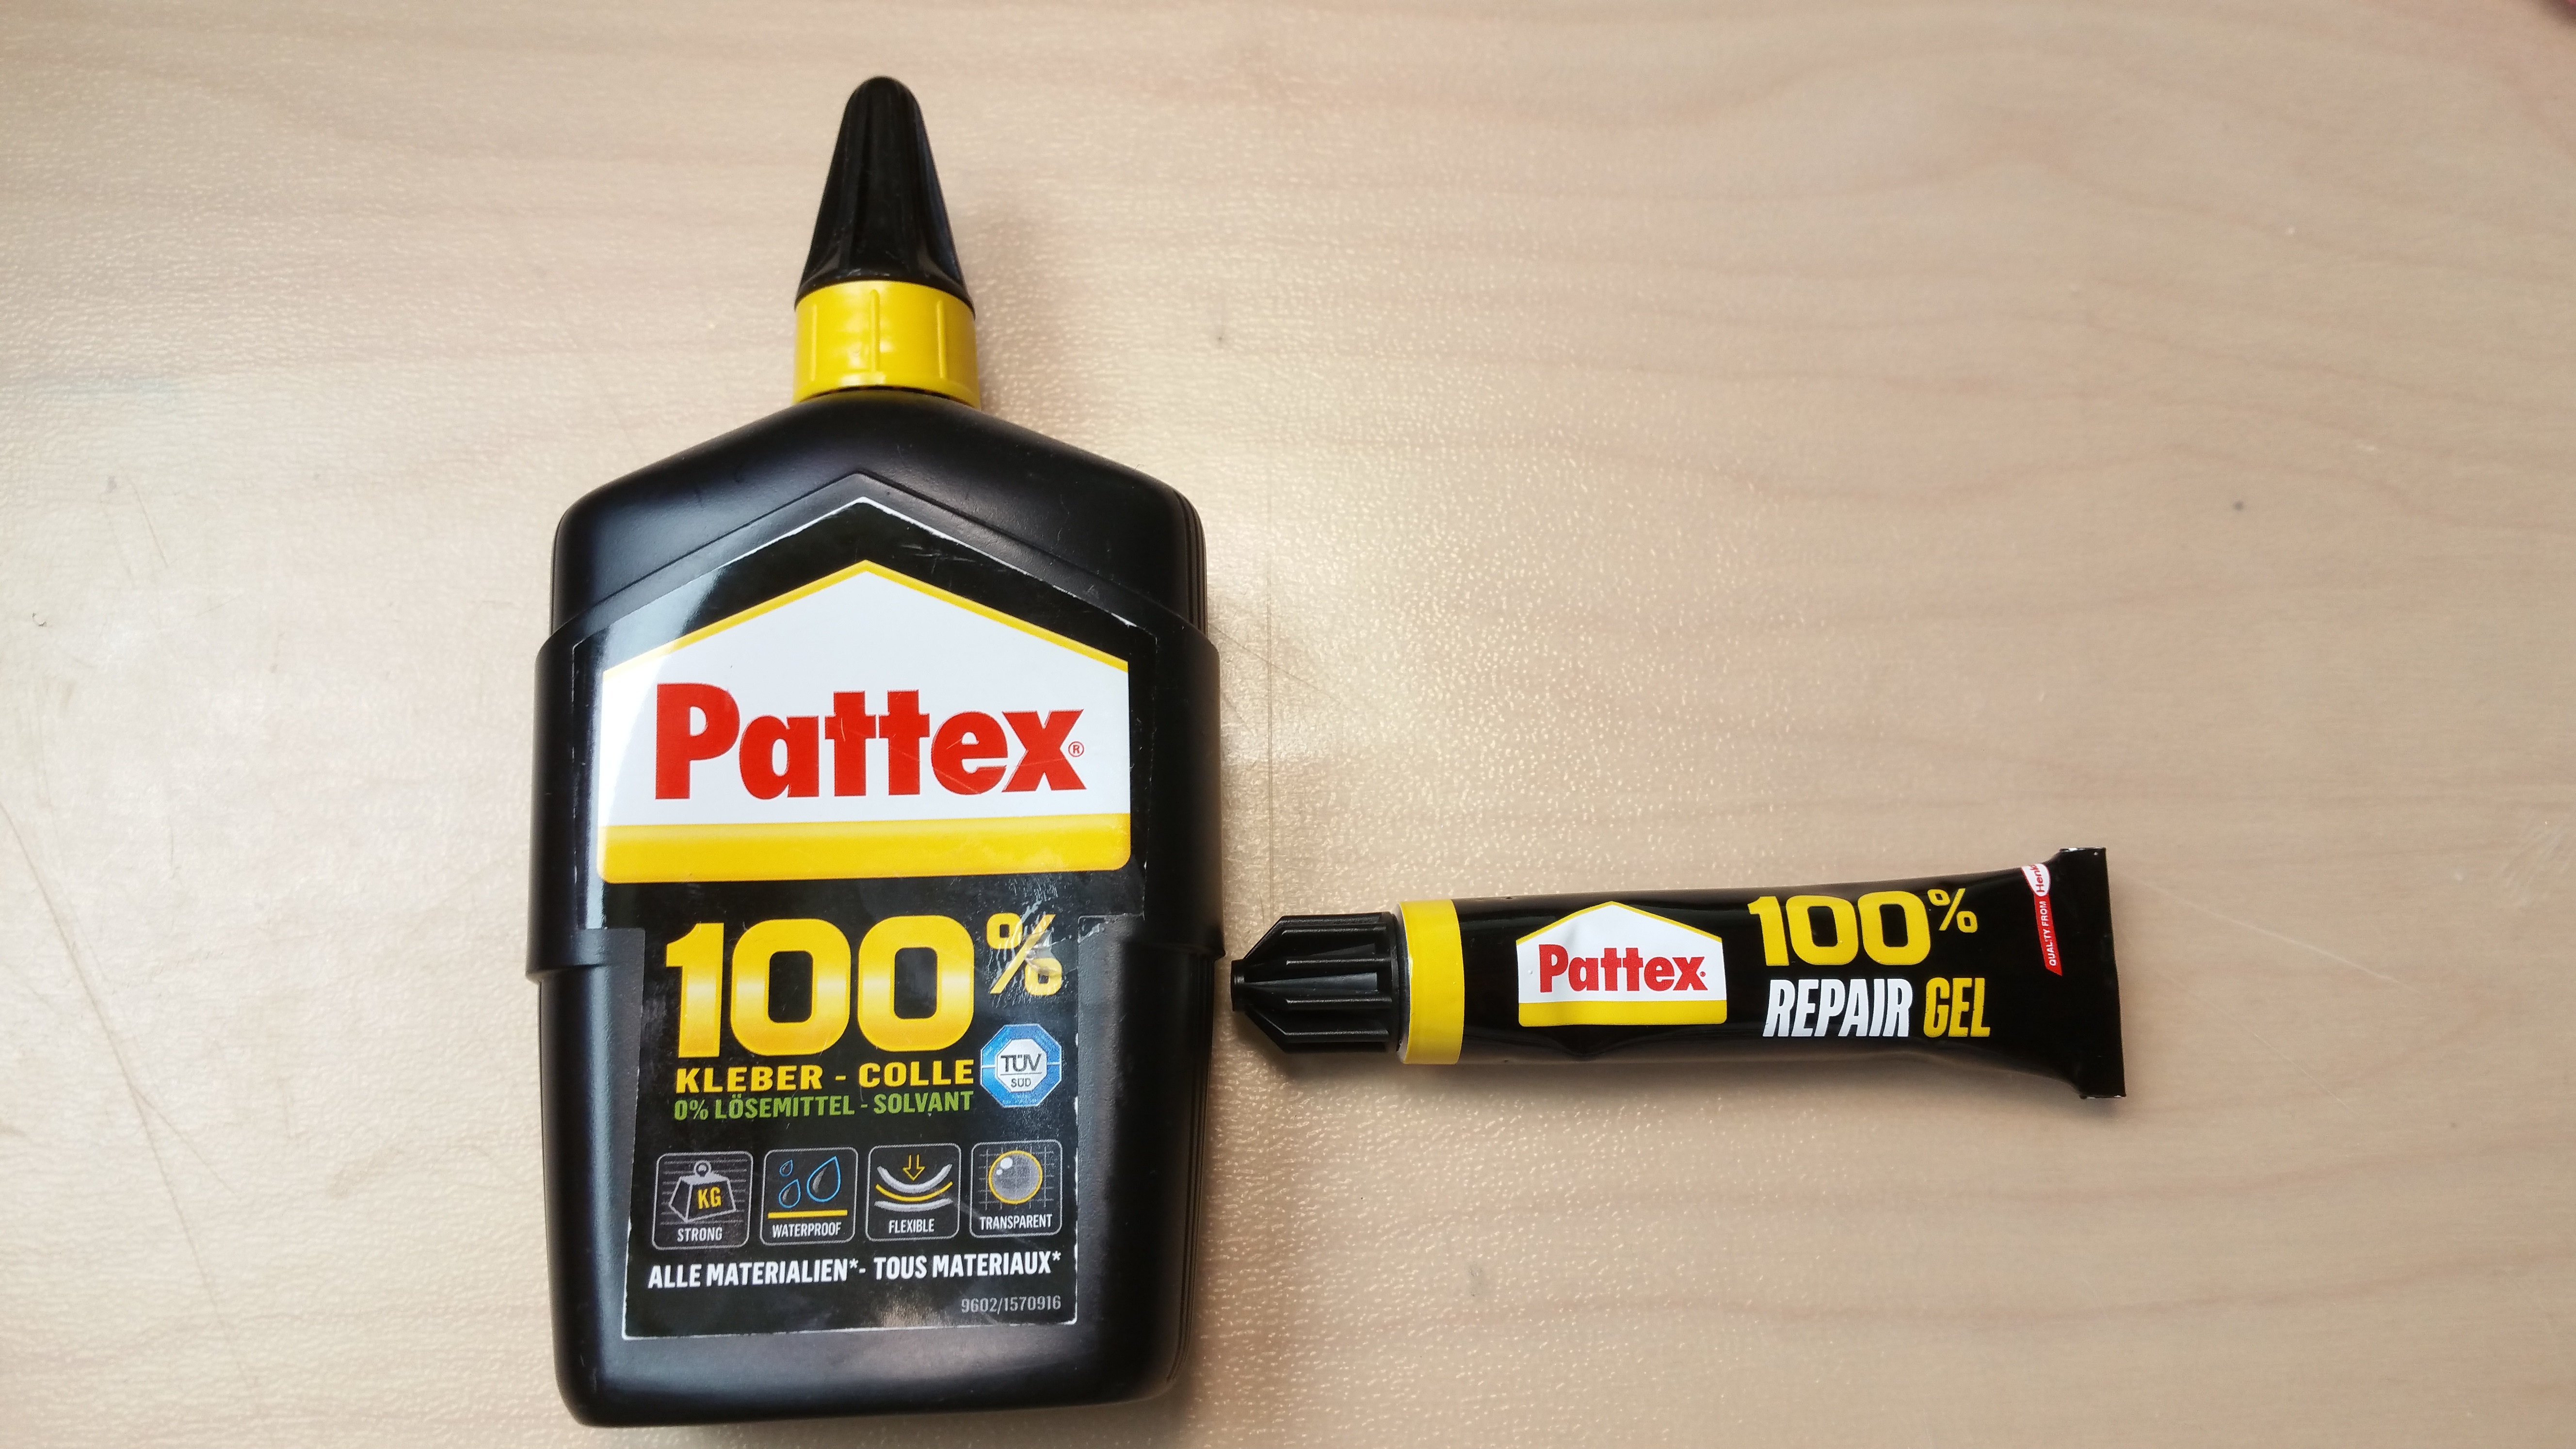
These are the glues I use. They work best for this job.
If you know any alternatives please let me know.
E6000 does not work, tried that one…..

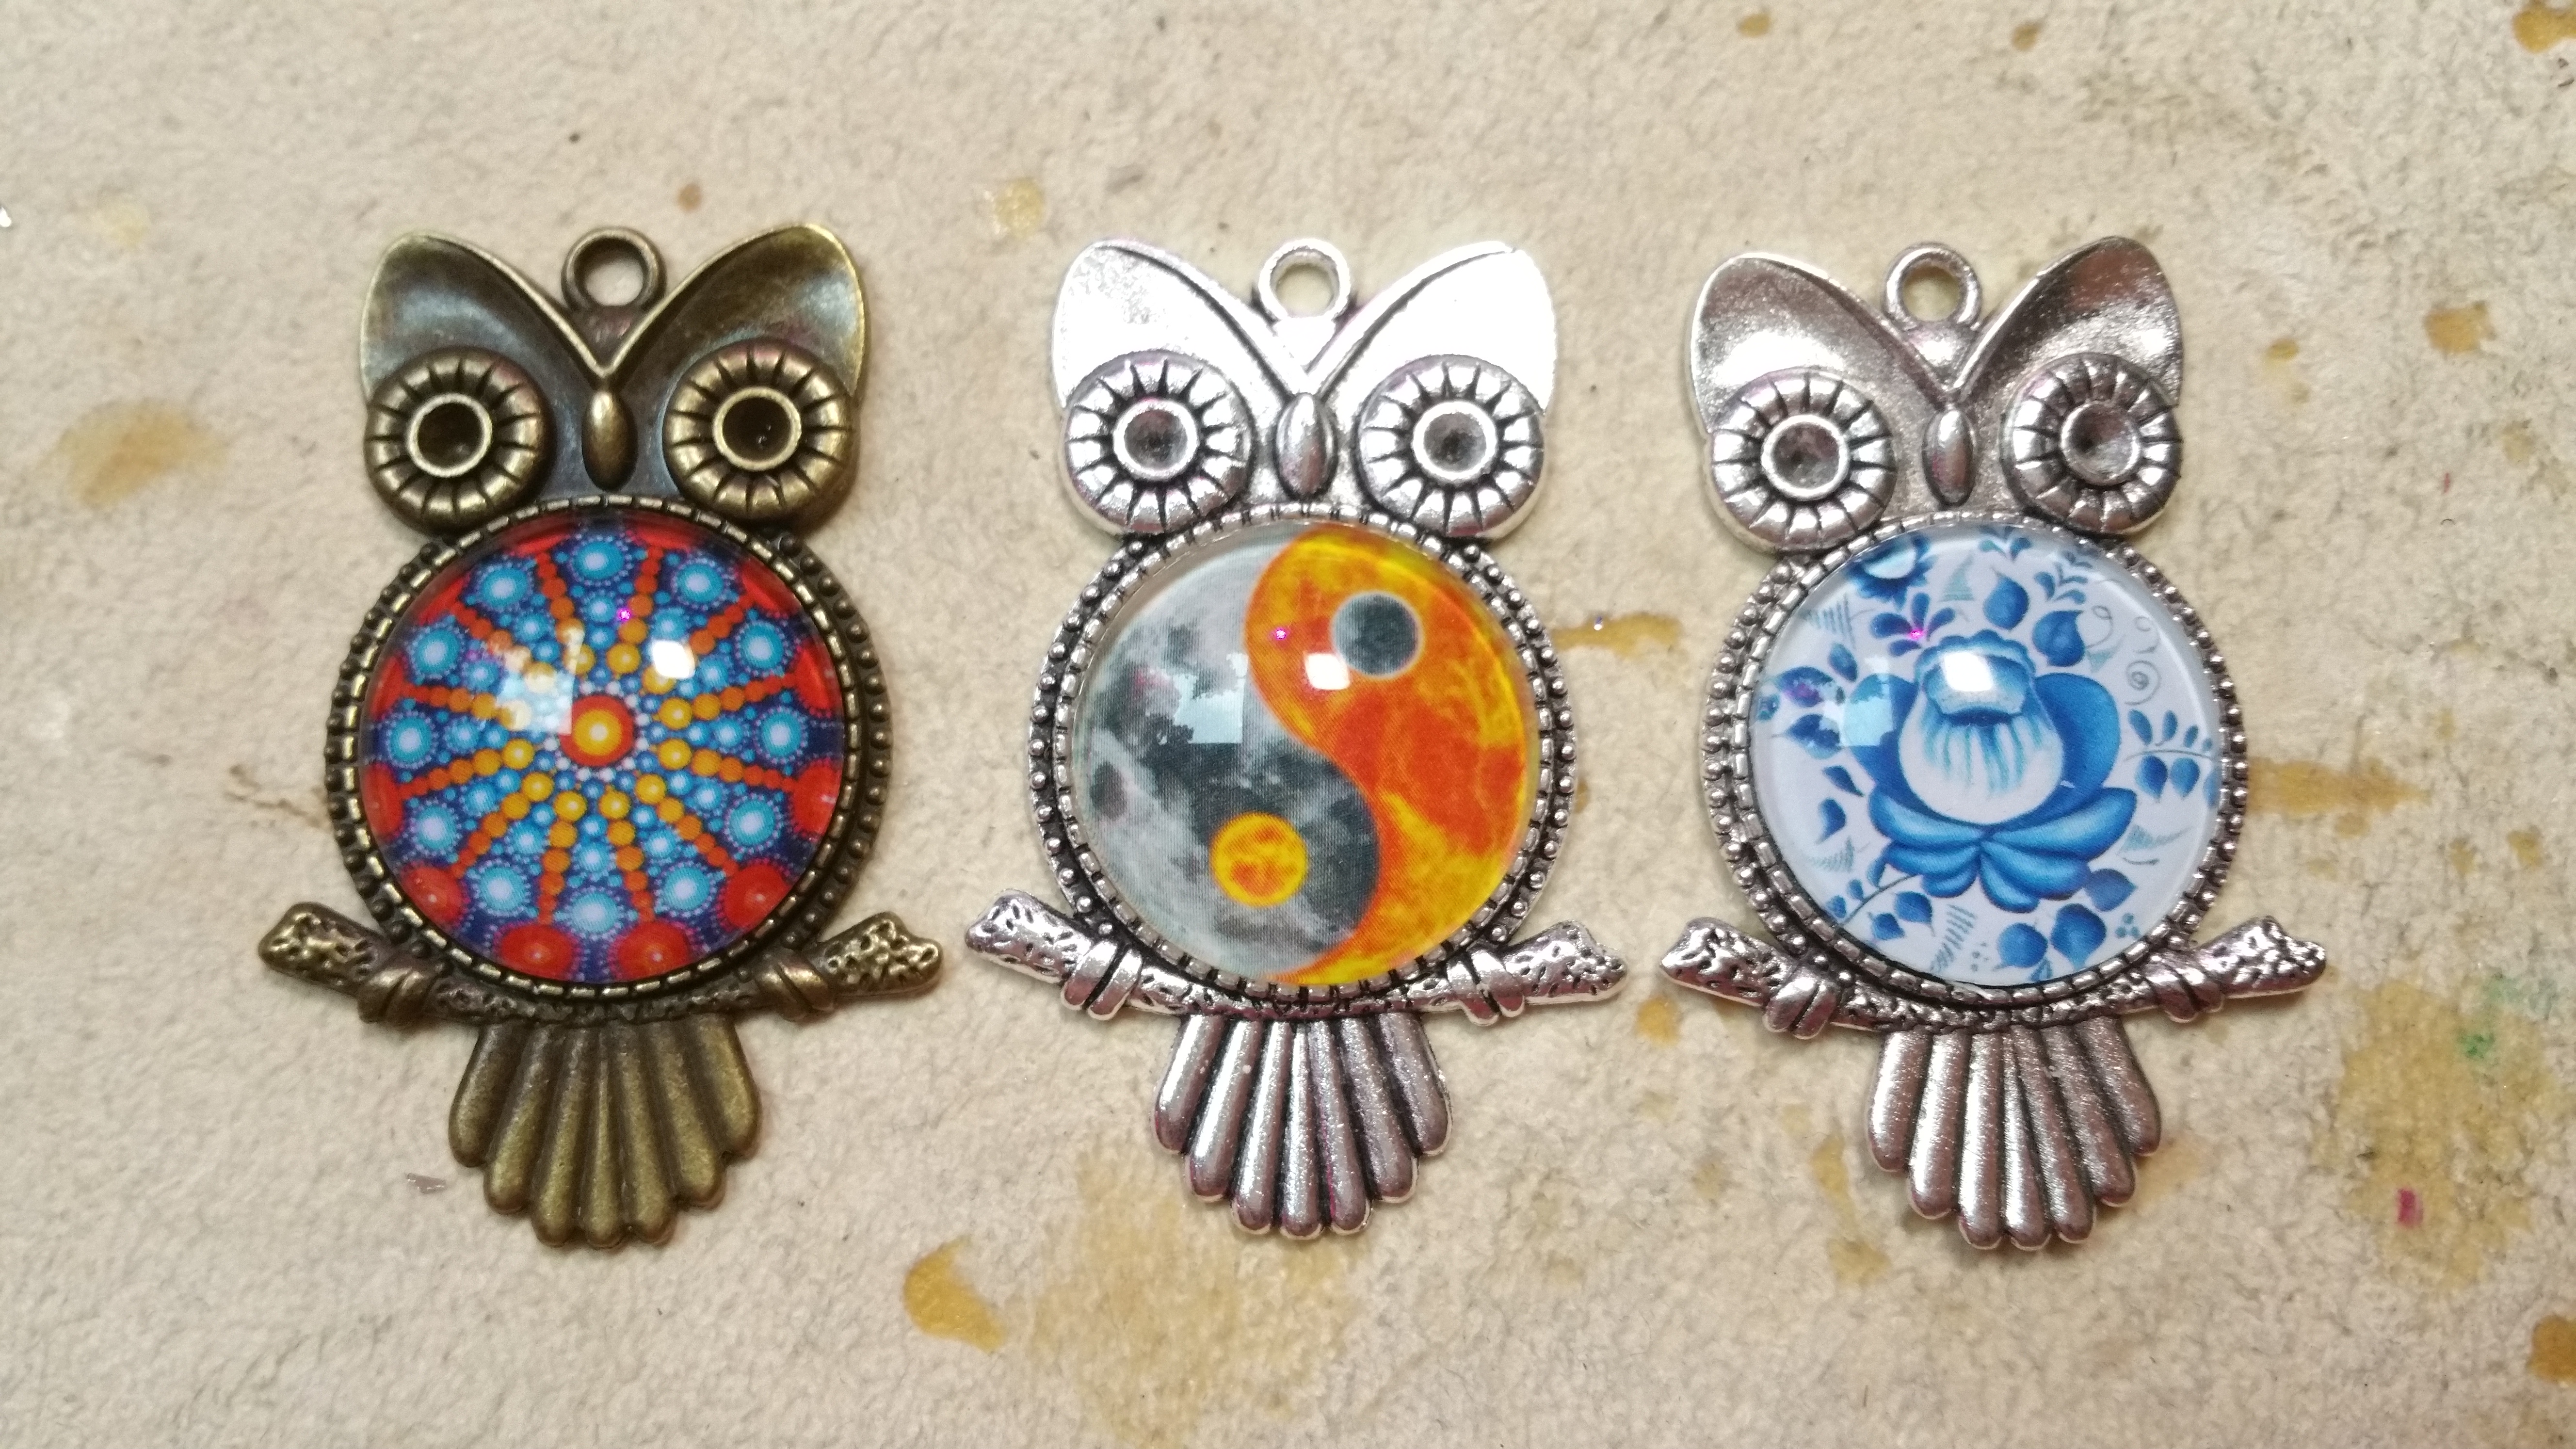
Btw, the amazing woman in the middle is my late granny in her younger days……
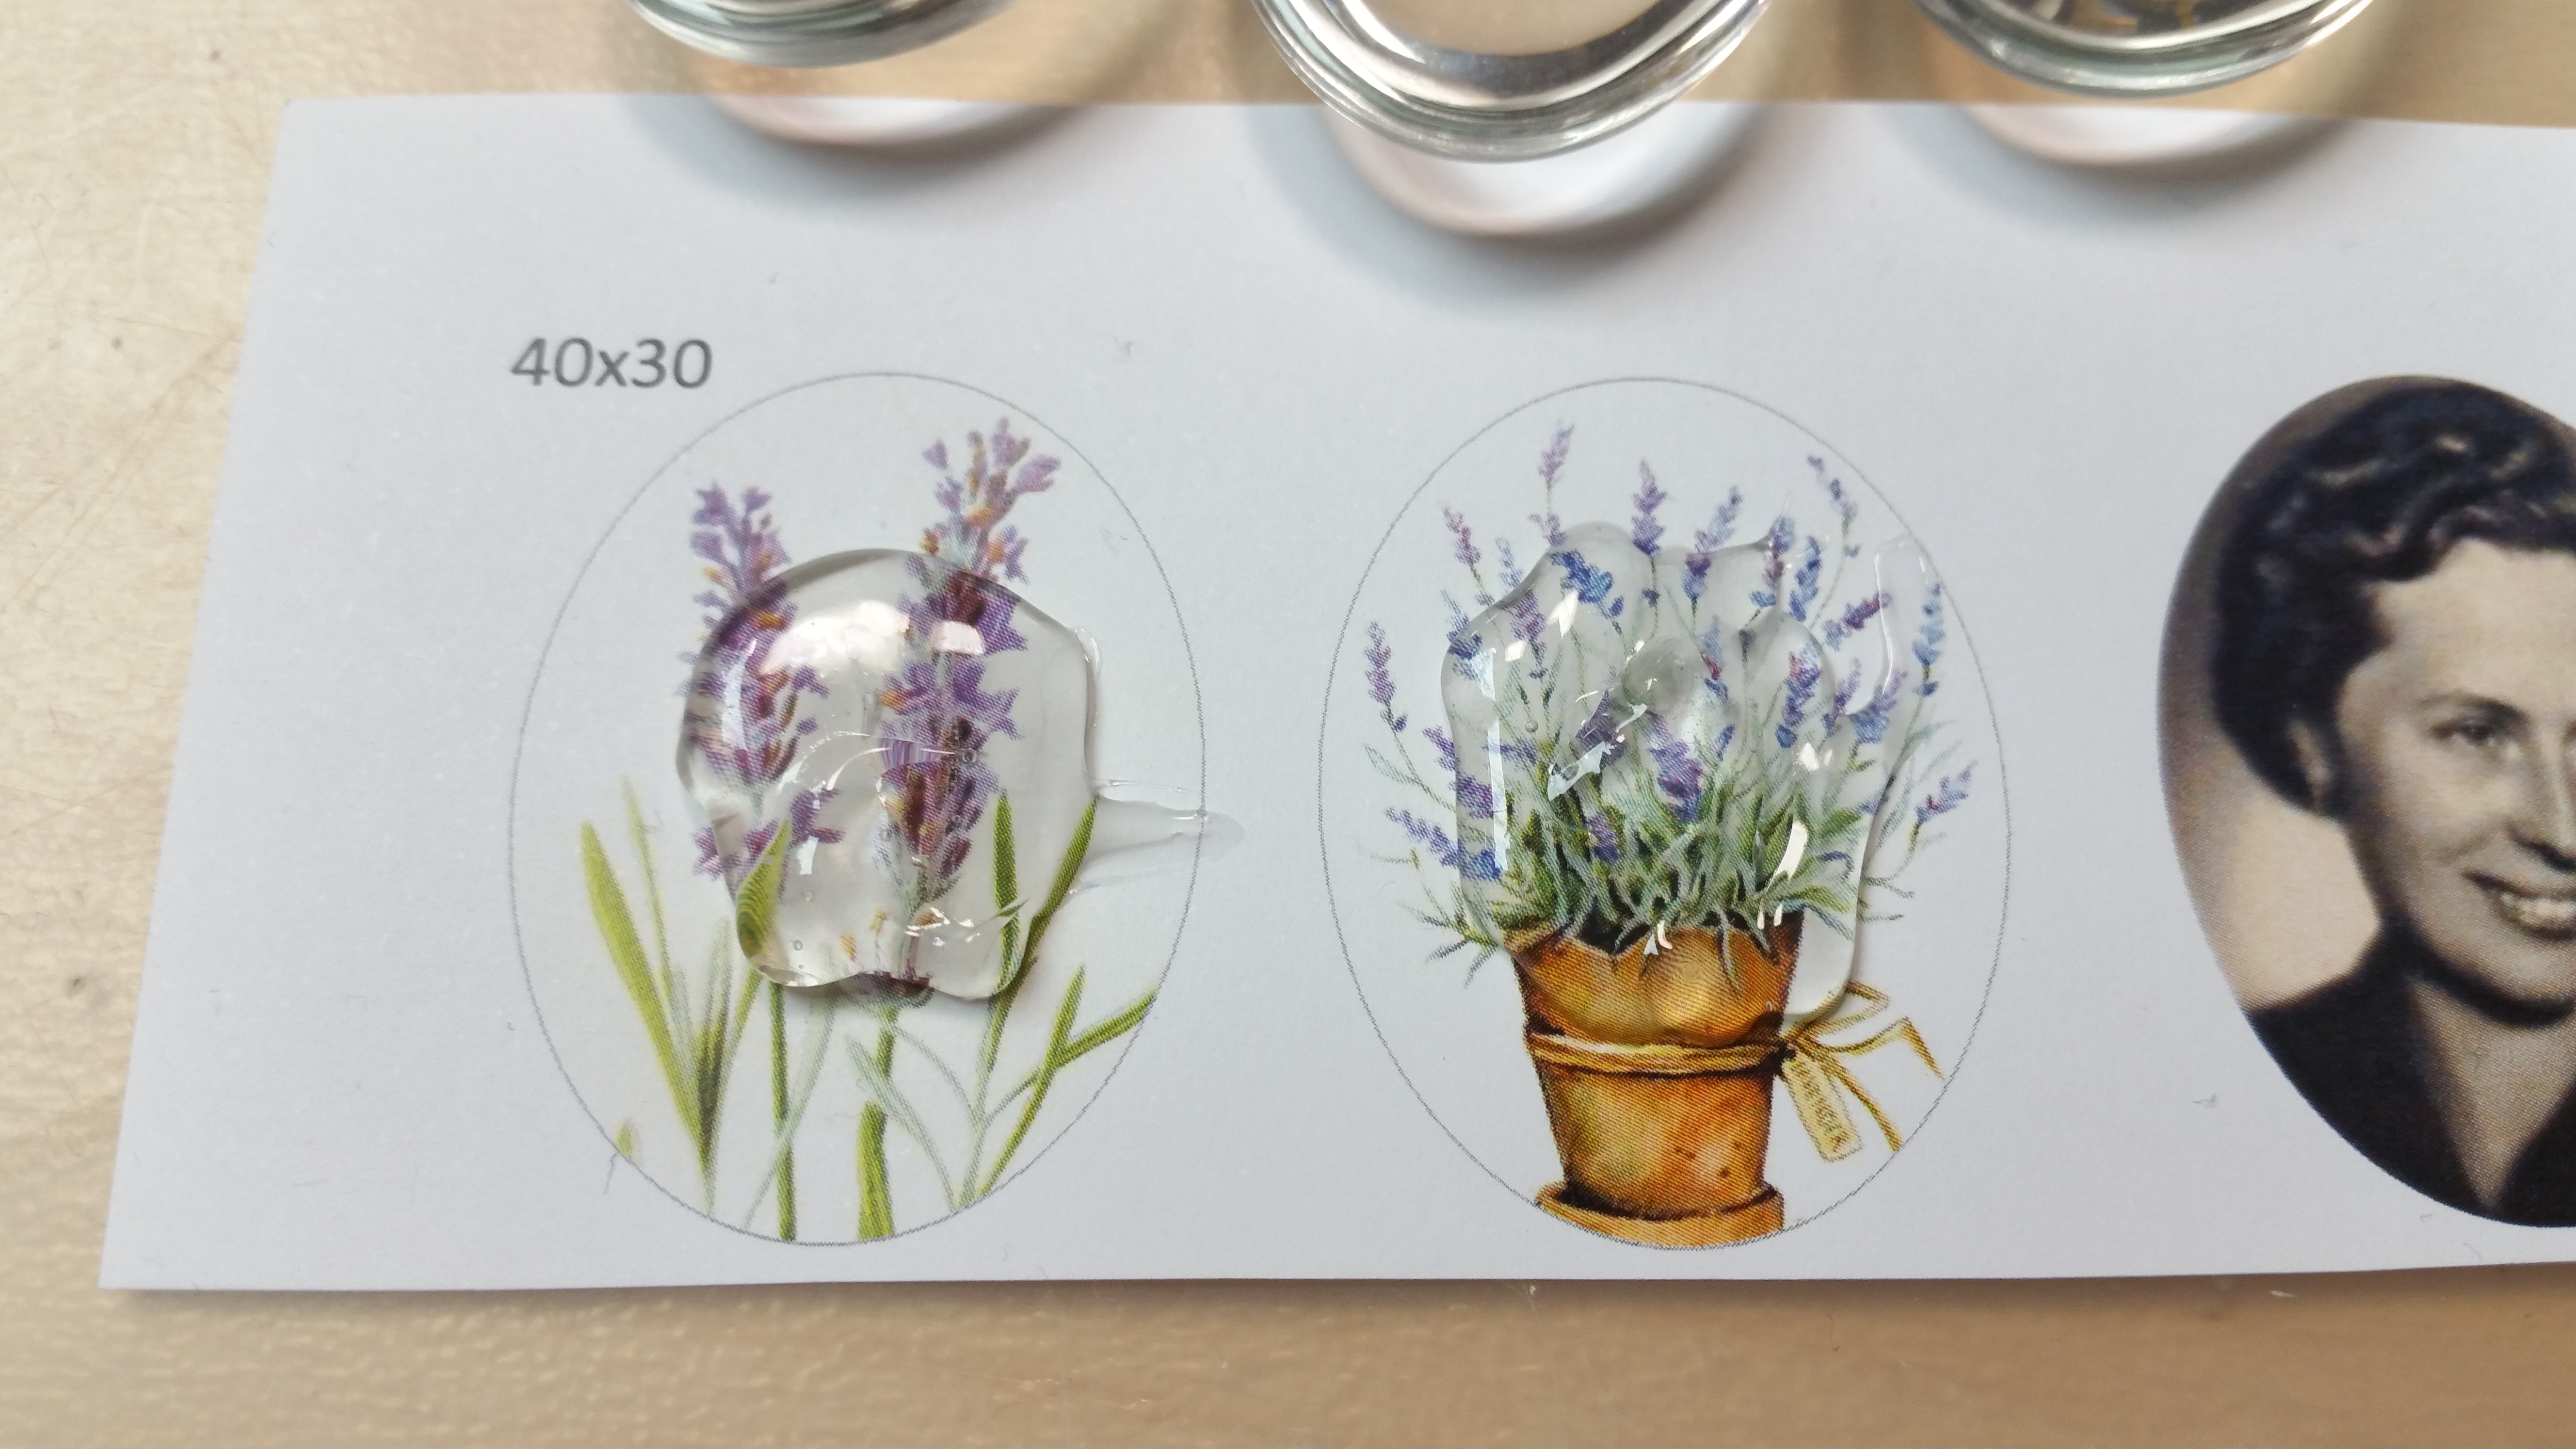
Now squeeze the glue onto the design. Make a nice little heap in the middle and avoid air bubbles.
I tend to take a little more than might be necessary to make sure there are no ‘dry spots’ under the glass.
Now carefully put the cabochon onto the glue with the flat side down.
Slowly press down. I normally move the cab around a little while pressing down so that the glue gets spread evenly.
If you see any dry spots or air bubbles quickly take off the cabochon, add some more glue and repeat the step above.
This only works as long as the glue has not dried – obviously 😉
Now just make sure that everything lies evenly flat and let the glue dry.
I advise you to check the first time because if the surface is not completely horizontal the cab tend to slide on the gluefilm and suddenly the graphic is not centered anymore.
After the glue has dried completly the cabochons can be cut out.
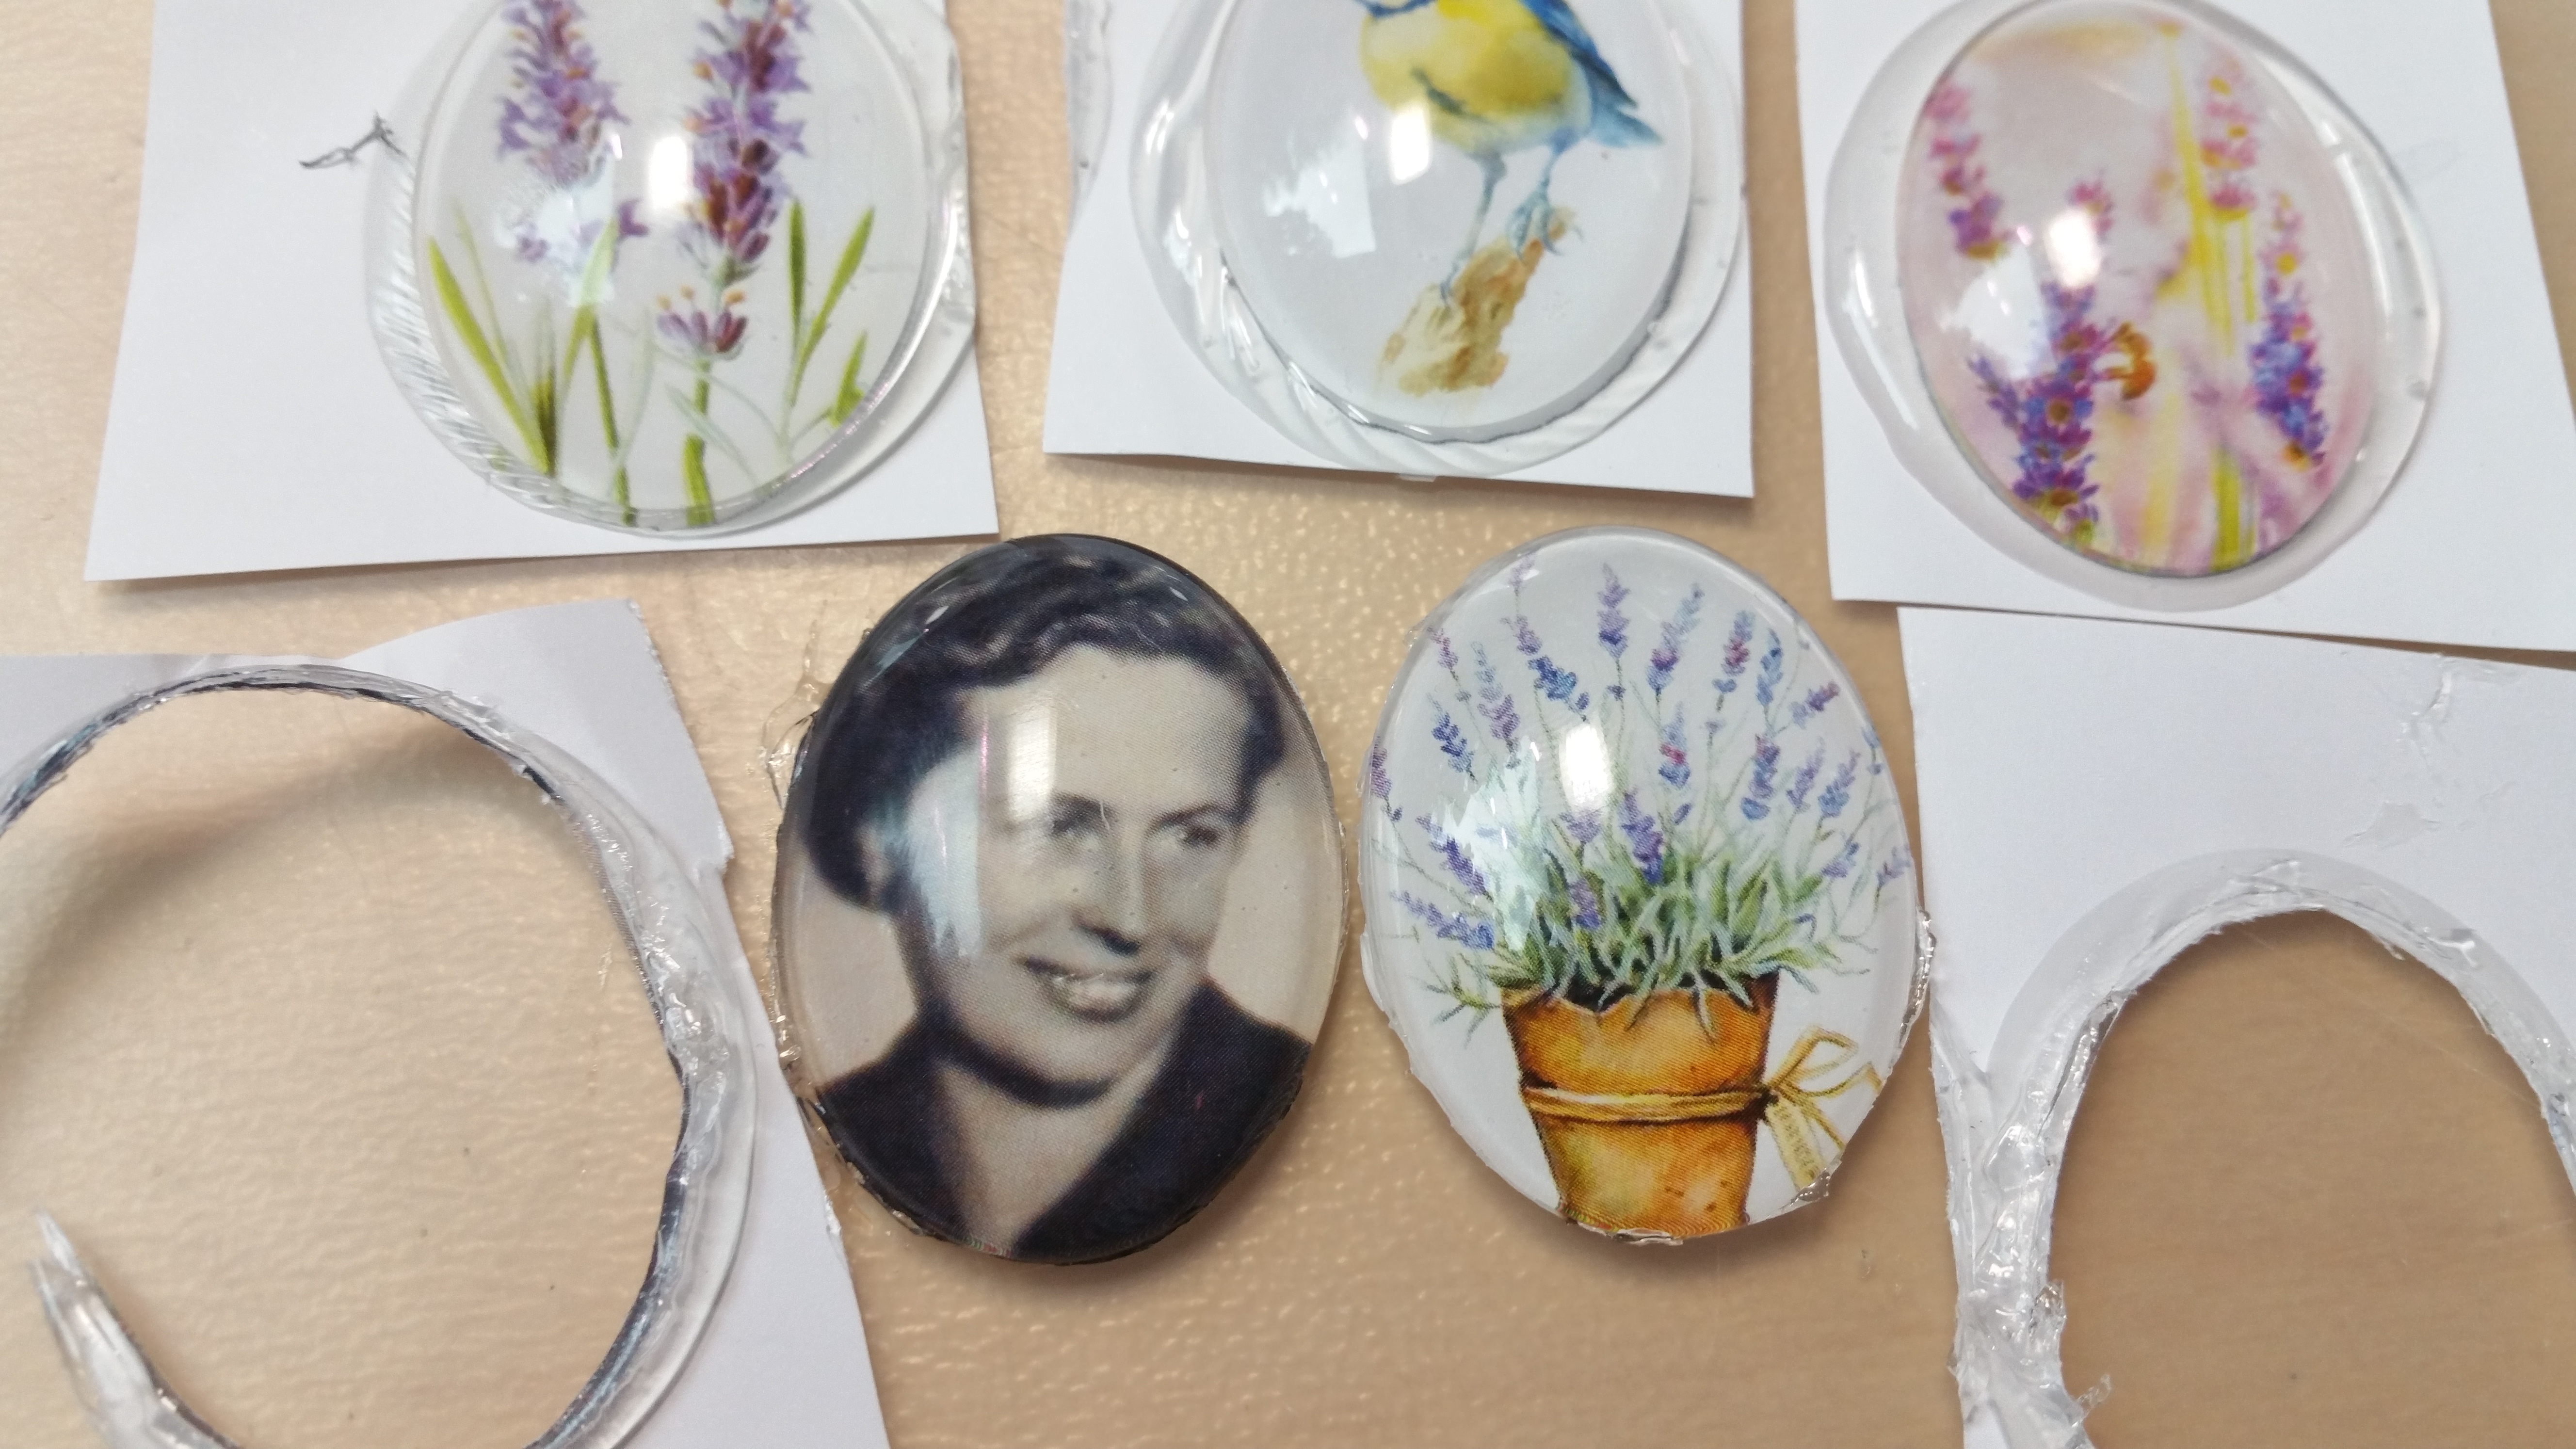
The edges probably have some glue on the upper side. I usually take some scissors and scrape it carefully off.
Then the cabs are finished.

Now you can use them and glue them into a pendant blank or use them as center piece for beadembroidery projects.

I would love to see your work! Feel free to share 🙂