If you read the article “Who am I” you might have noticed that my first contact with beads and beadwork was through “Native American Beadwork”.
For more information – also tutorials on the different stitches – check out my other website: www.native-american-beadwork.net
I learned a lot so far but always try something new.
Last year I beaded my first baseballcap.
Native American beaded caps or hats have been around for many decades. It is not sure where they originated. But they are very popular.
Also more and more Native Americans add beaded stripes to their highschool graduation caps to show pride for their heritage.
So first of all you need a baseball cap and a design.
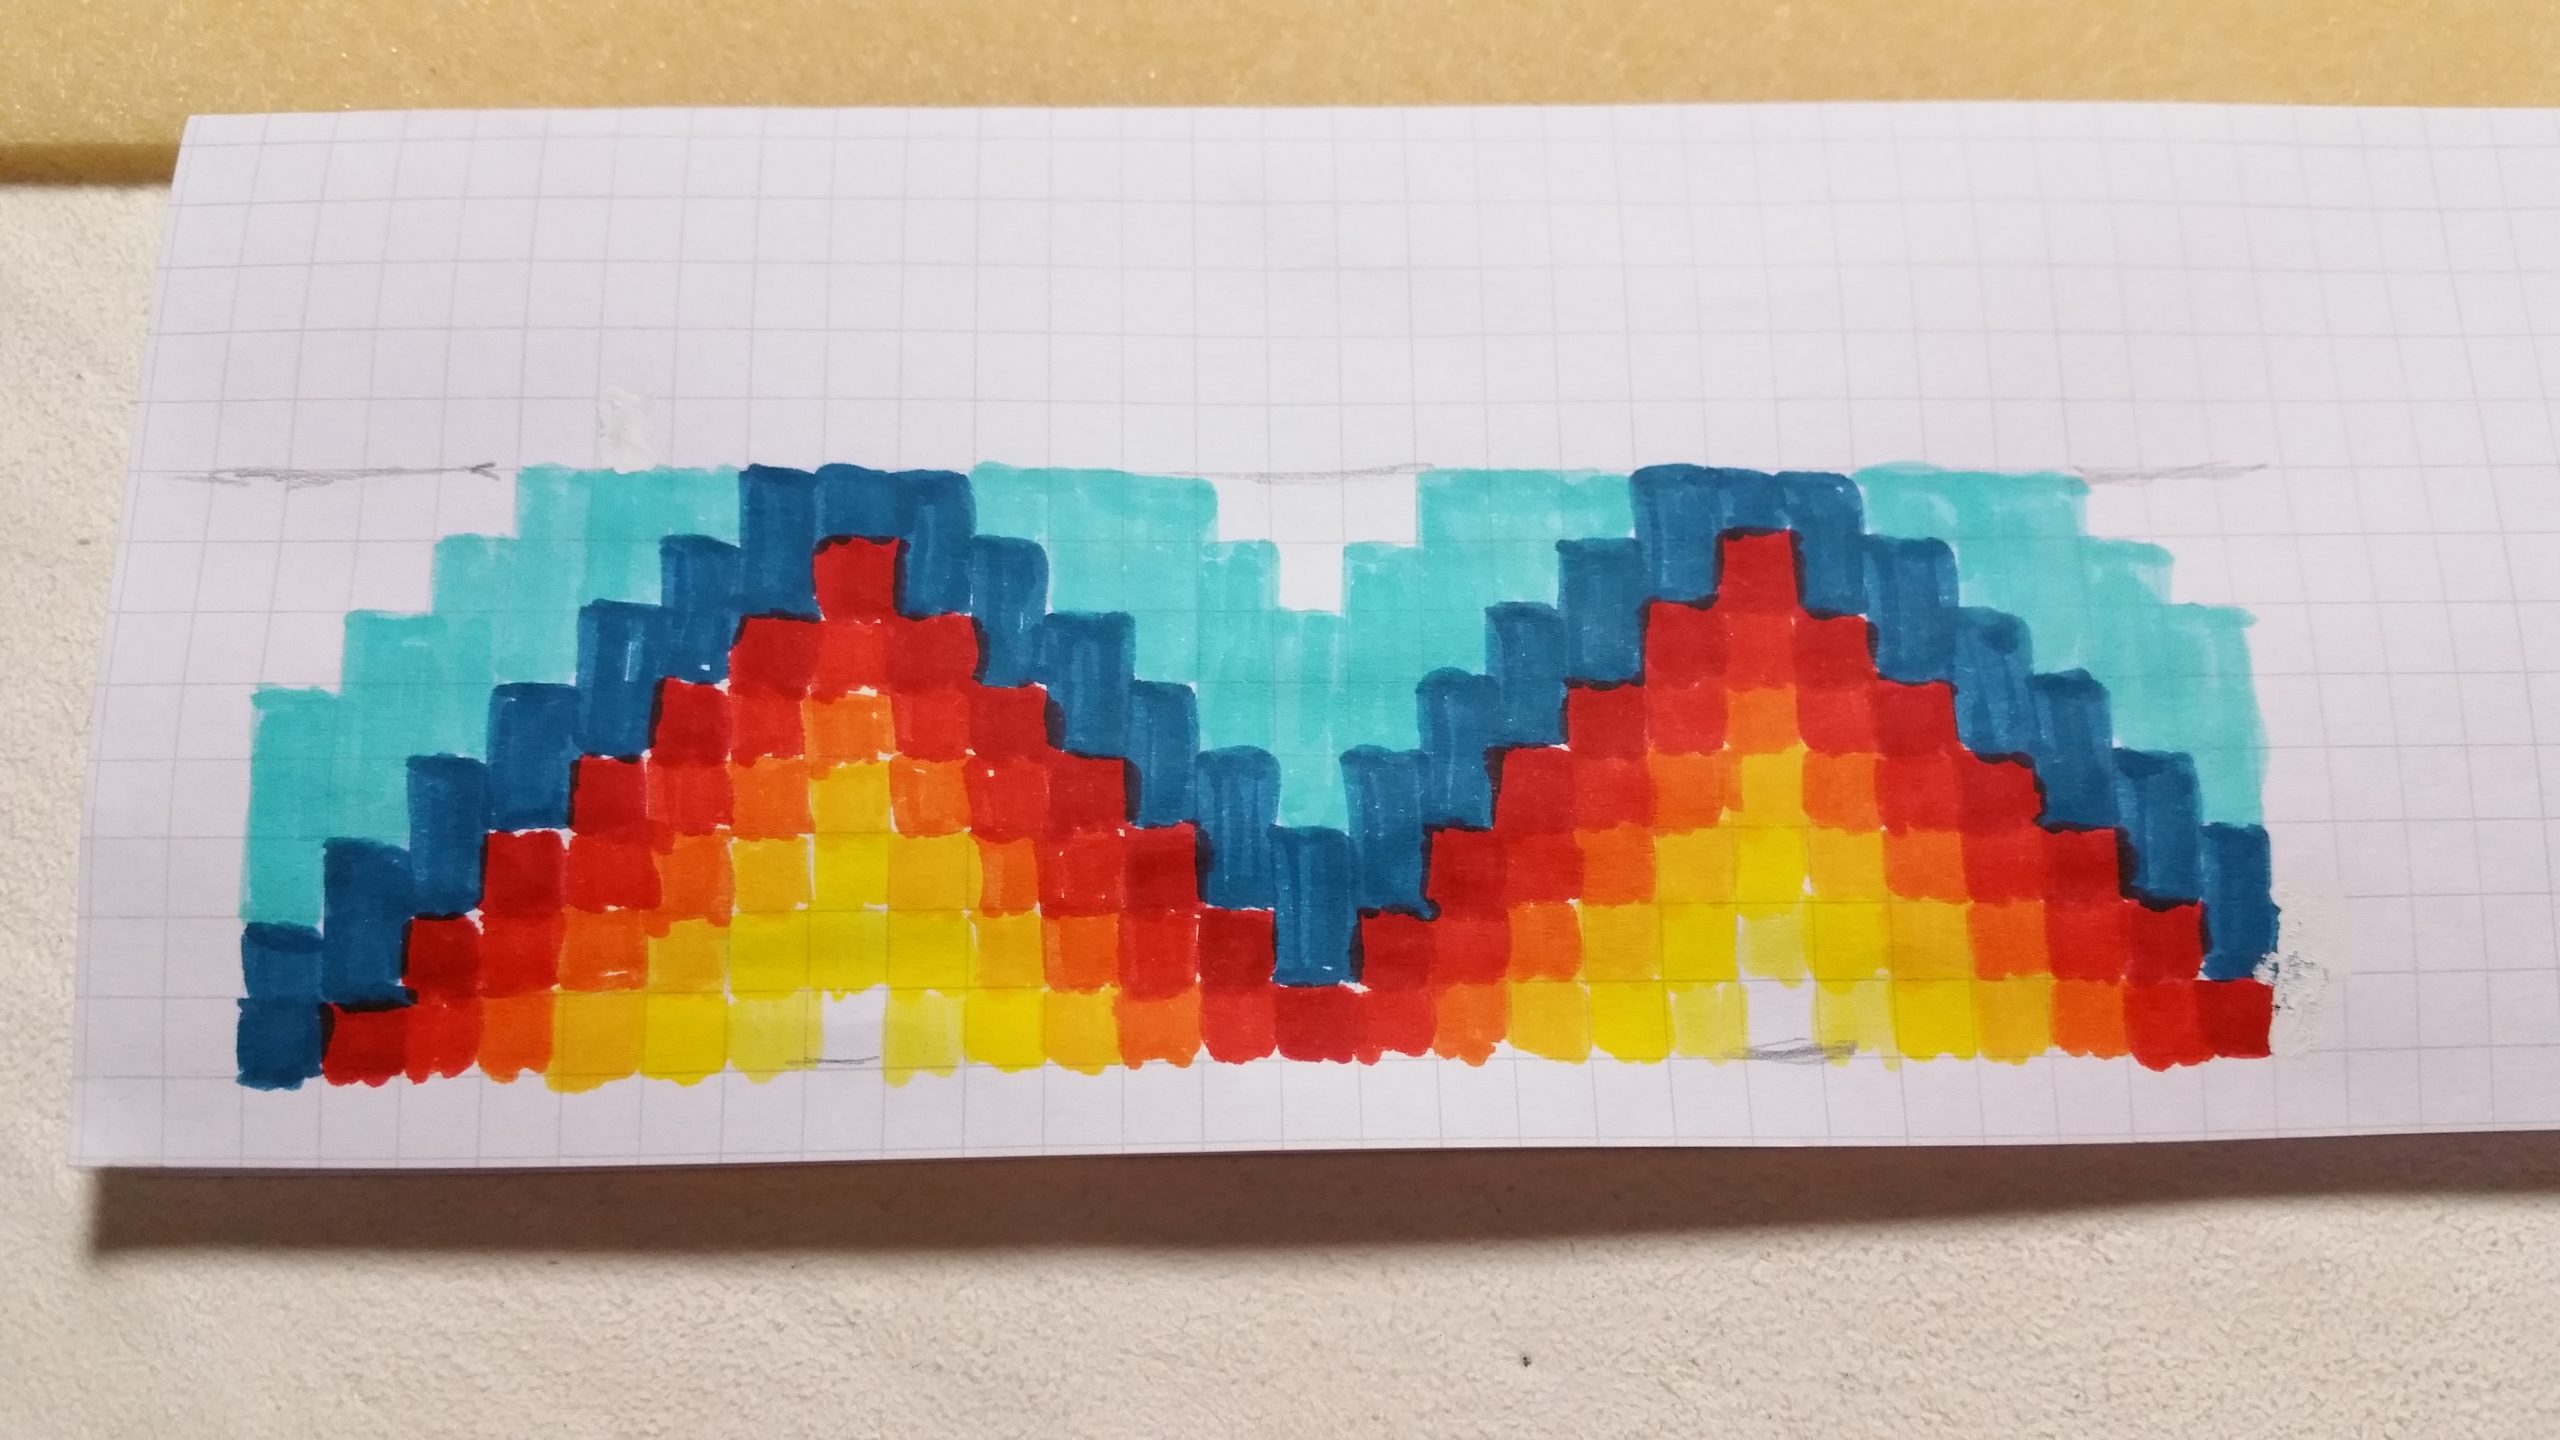
Then lay out your desired beads. Here I used seedbeads size 11/0.

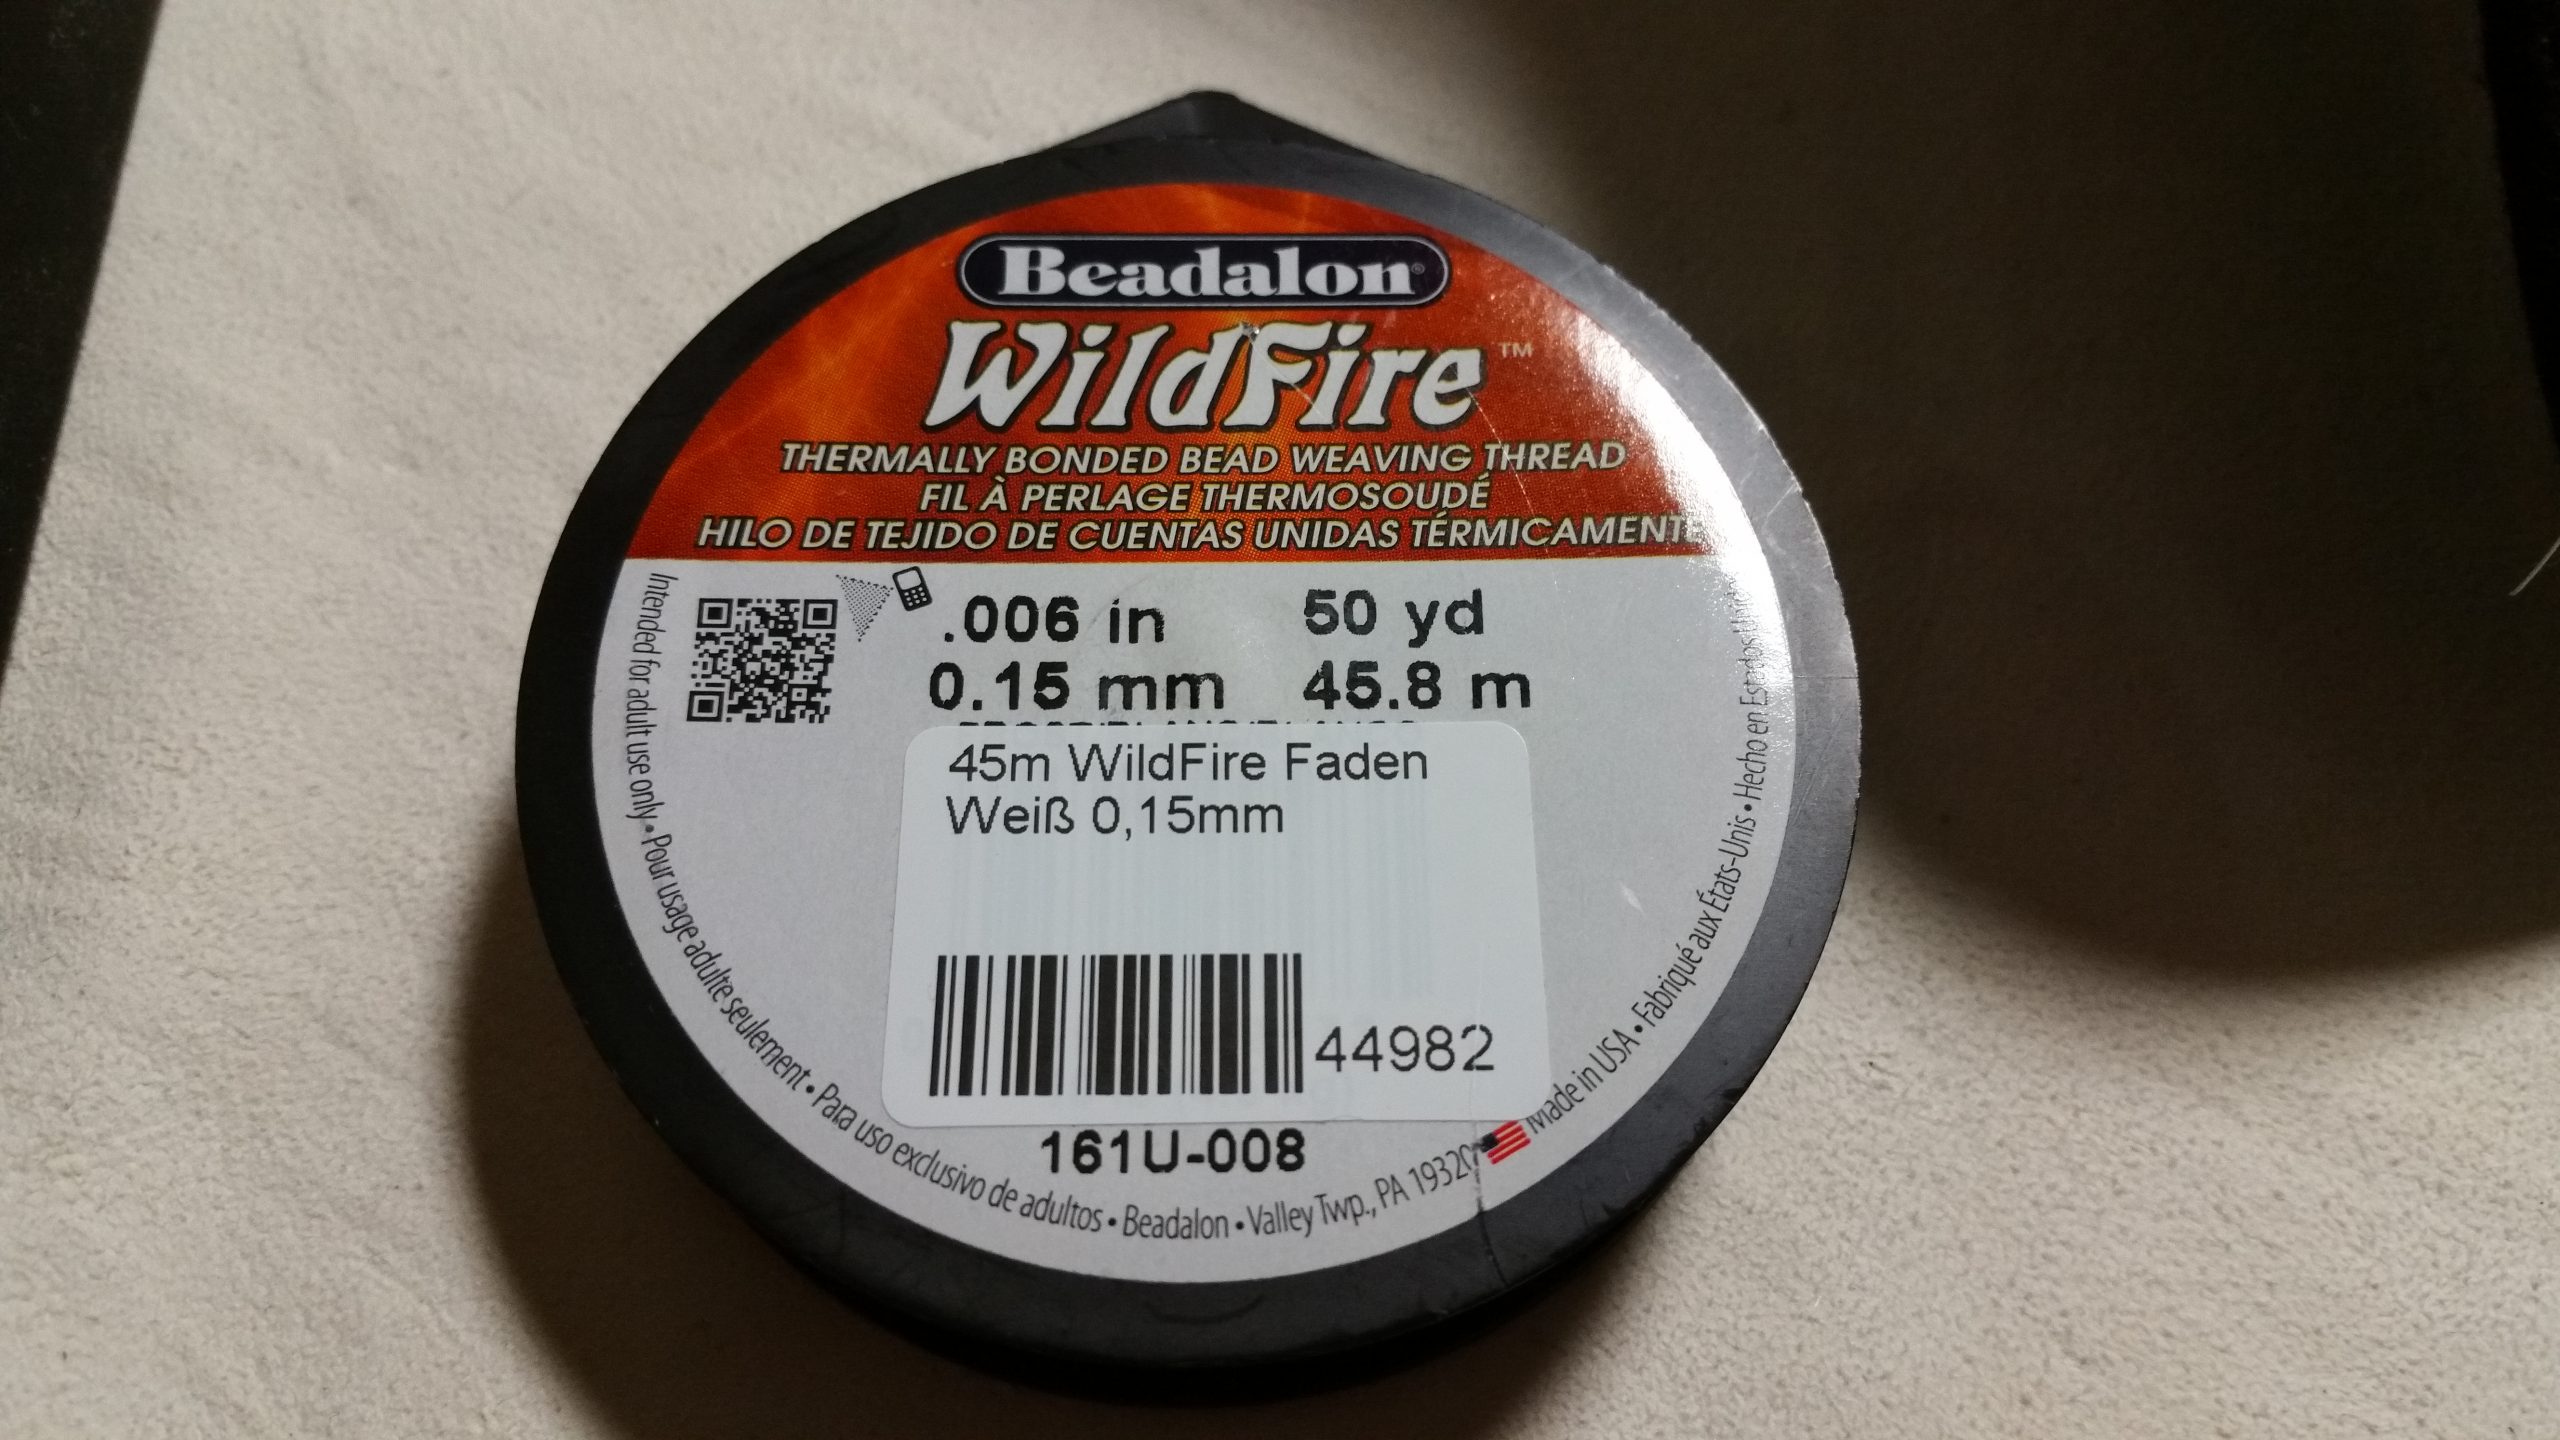
For this project I used Wildfire thread for the first time, unfortunately I only had a white one.
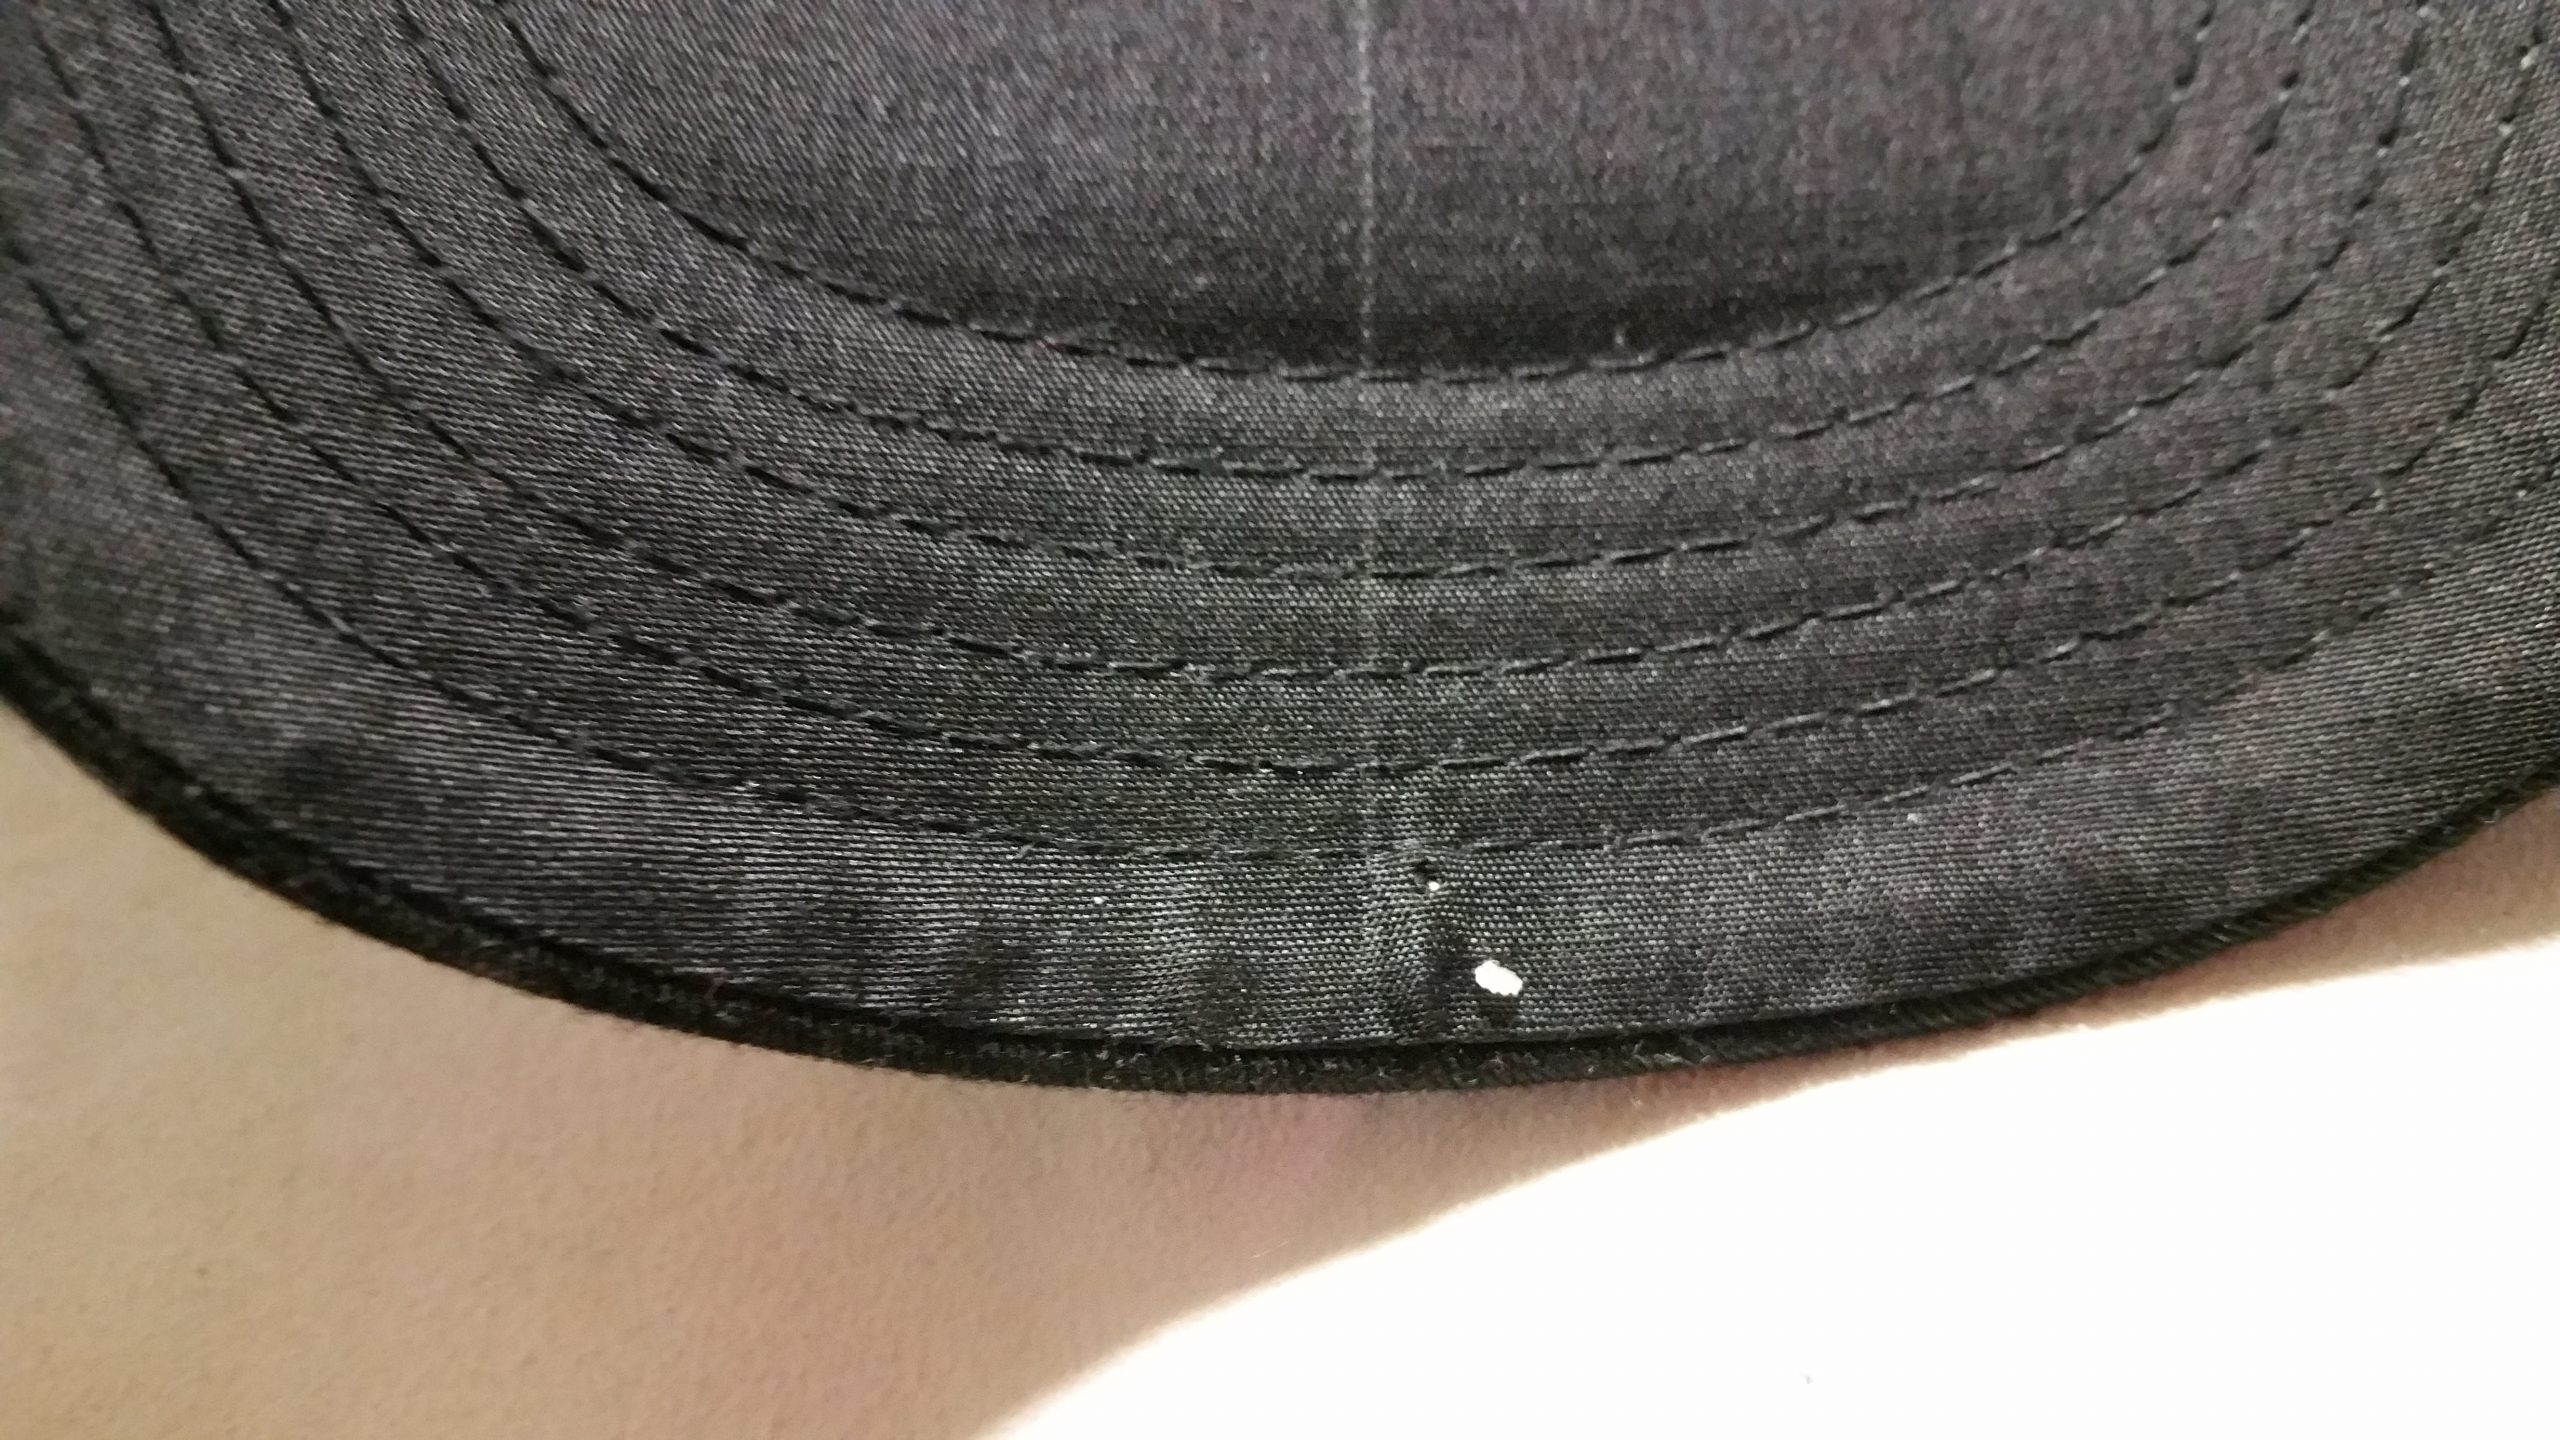
Next to needle, thread, thread conditioner and a lighter you will also need an awl. The visor has a plastic shield inside for stability.
With the beading needle you can’t punch through the shield so you need to prepunch the holes first with the awl.

When you start beading always start in the middle and work first to one side and then to the other.
In that way the design will be perfectly aligned.
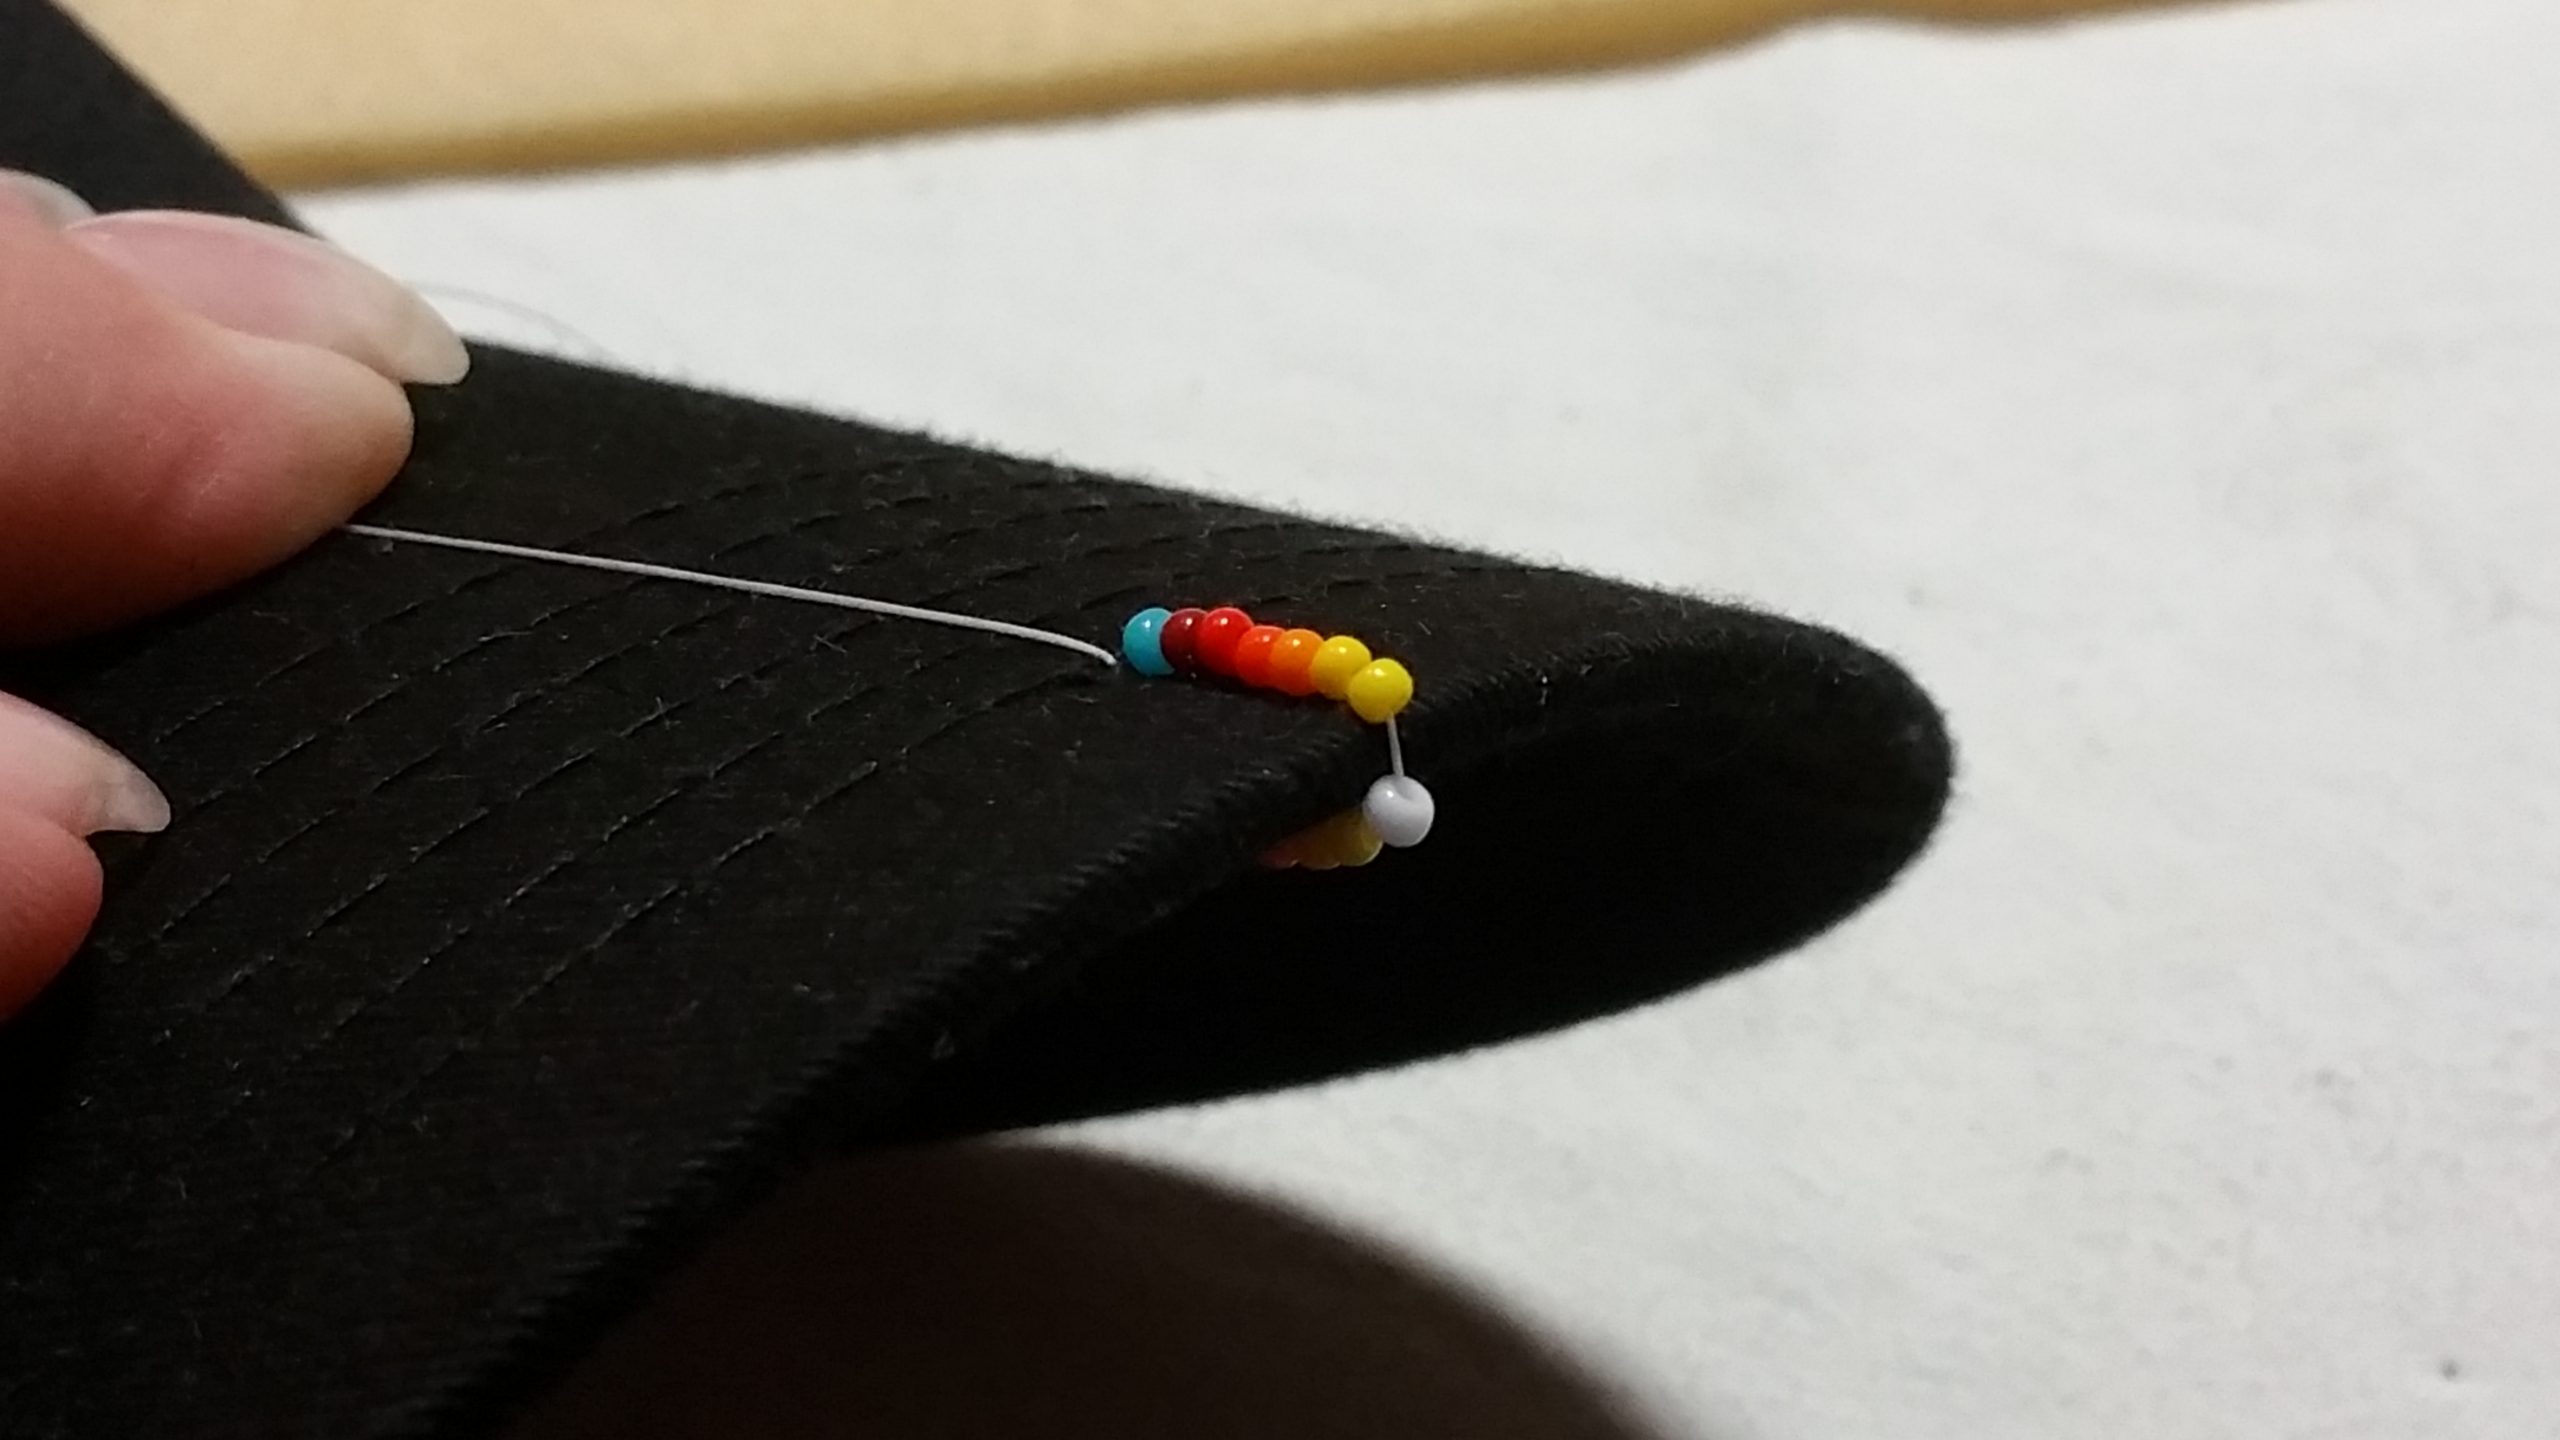
Now you need to determine the number of beads for your stitch. Since the stitch goes around the rim you also need to count the beads on the bottom.
It can also be possible that you might need to adjust your design a bit with the exact number of beads.
And from now on there are always the same steps:
– punch the hole
– lead the needle through the hole from the underside up
– pick up the beads
– lead the needle back up through the same hole from the underside
– now I lead the needle back to the underside through the hole of the previous stitch
– punch the new hole
– lead the needle through the new hole from the underside up
– pick up the beads
– lead the needle back up through the same hole from the underside up
……
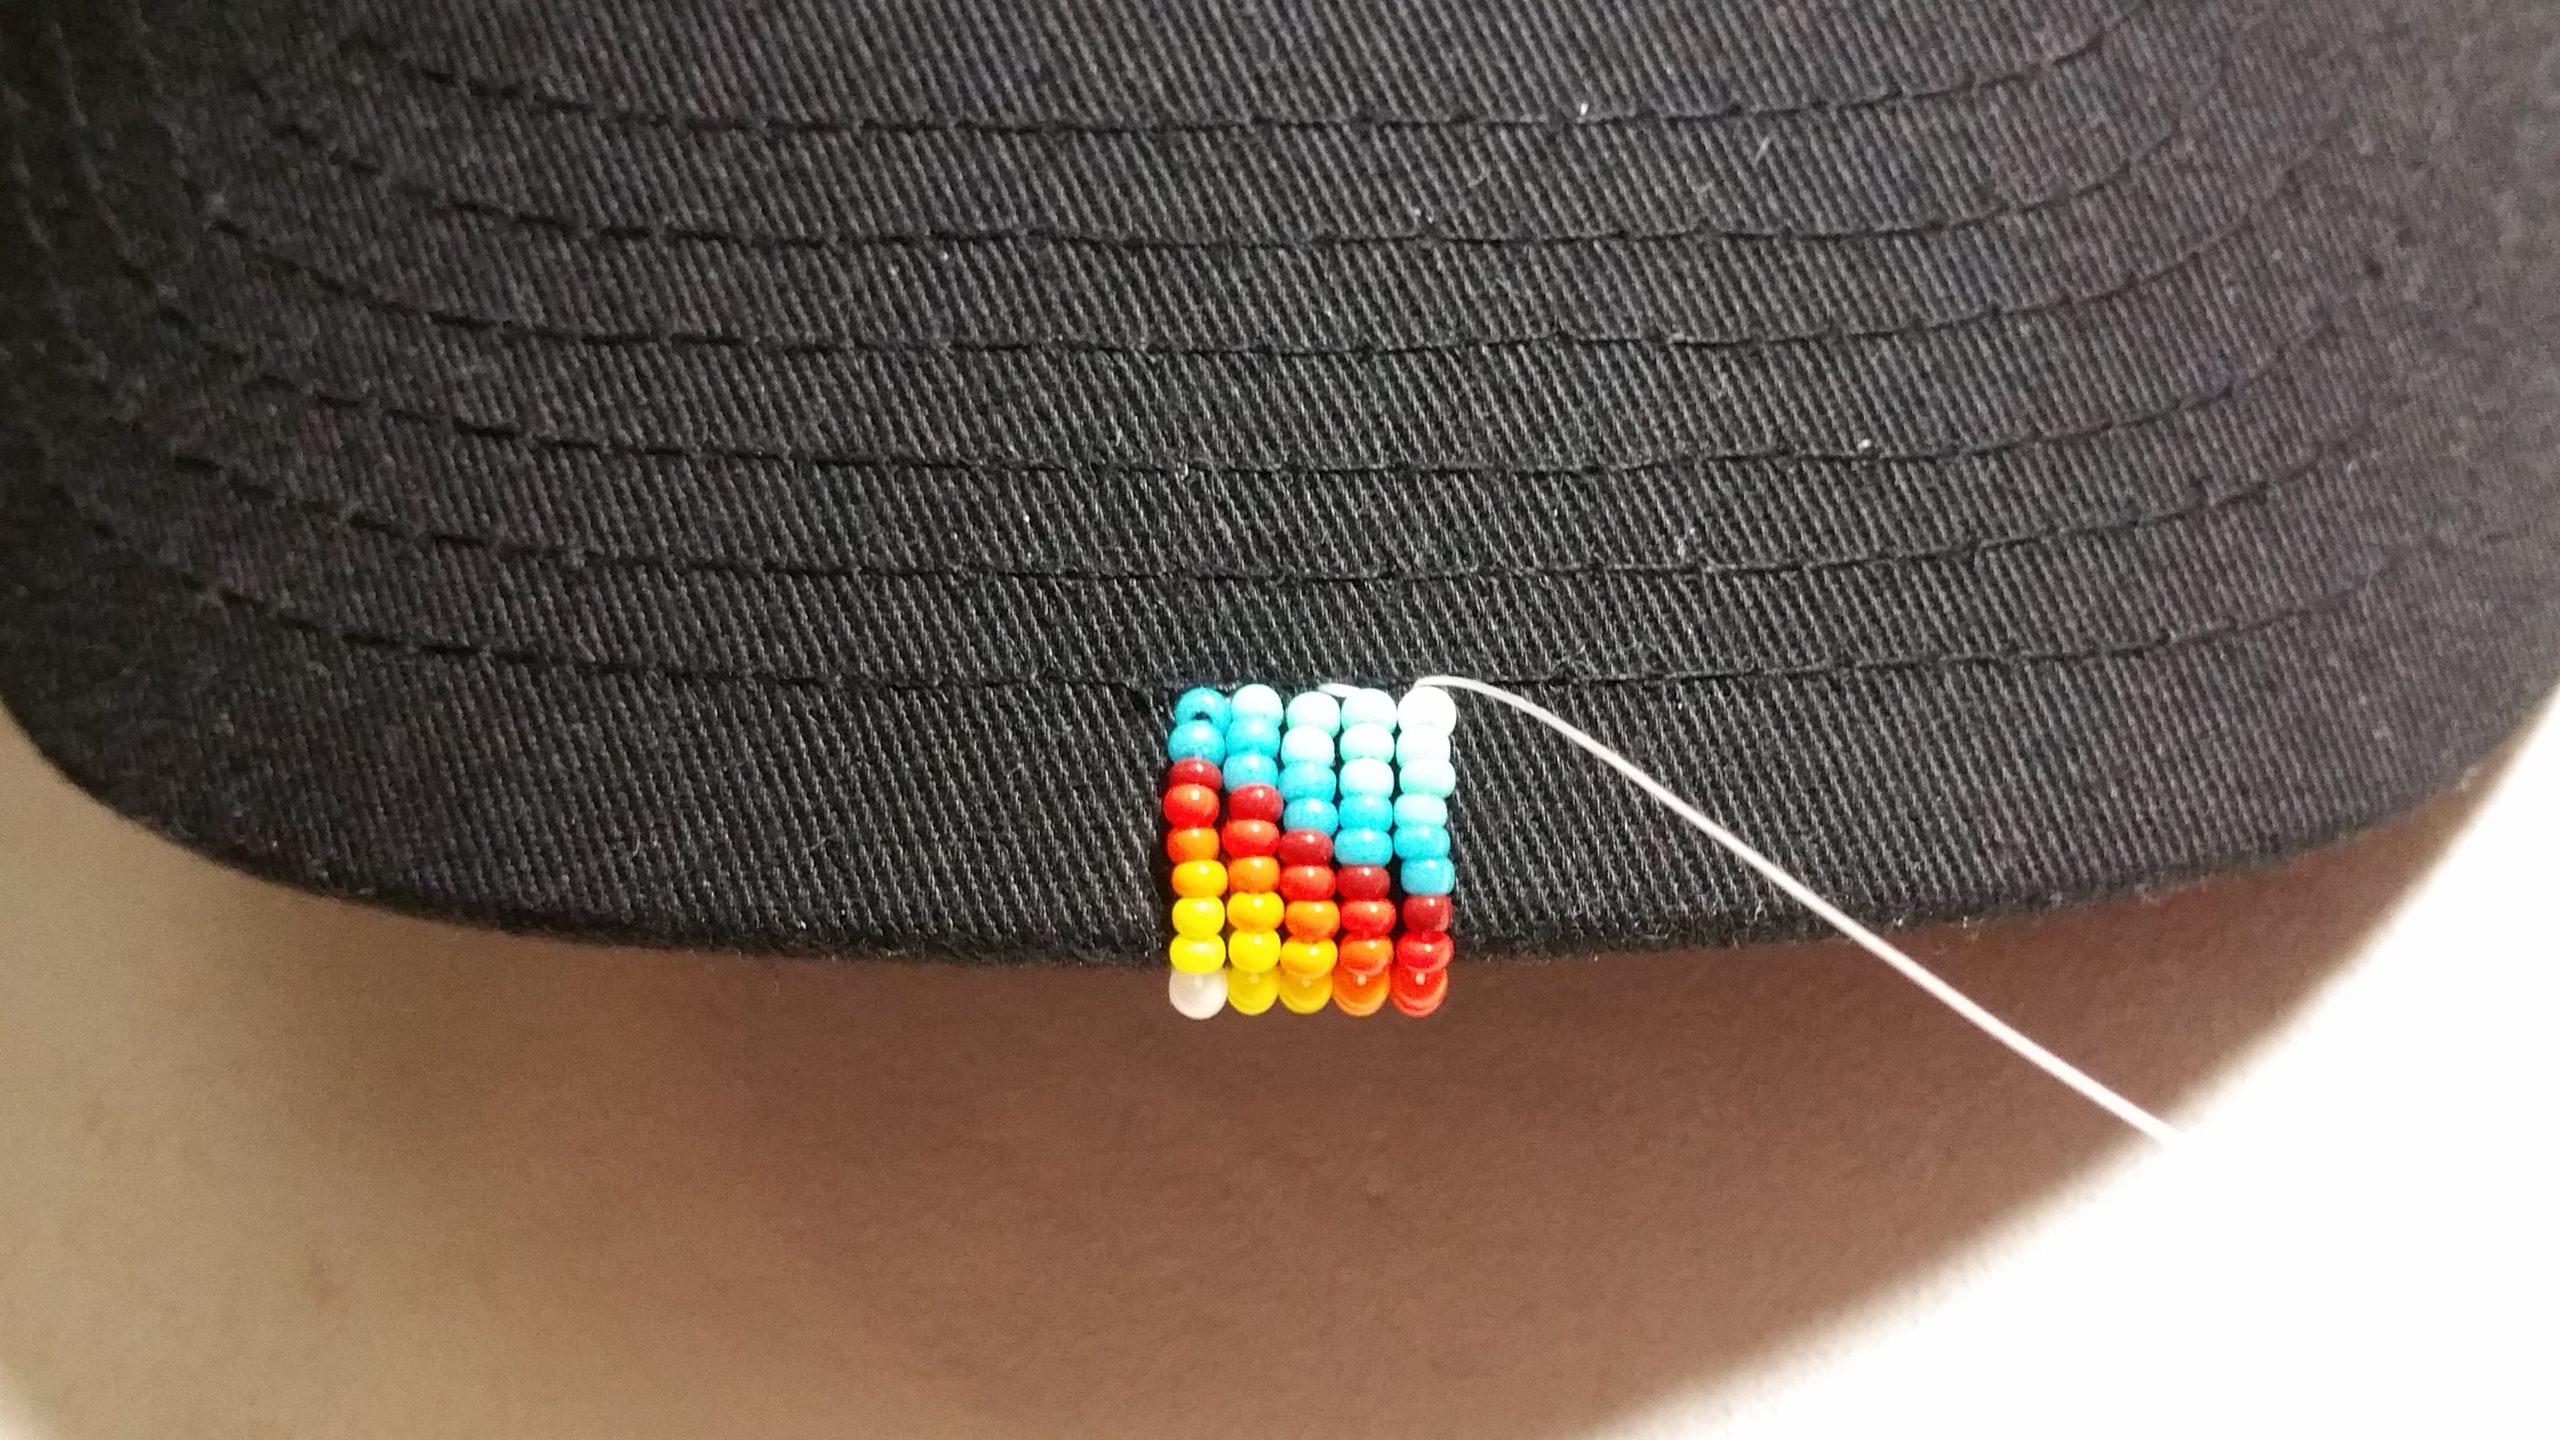
One important thing you have to keep in mind: the distance between the punched holes and therefore the distance between the stitches needs to be the size of the diameter of the beads.
Less will make the stitches pop-up because they lie too narrow next to each other.
Too much distance between the stitches will show too much from the color of the background.
When making the curves it is natural that a bit more of the background will show.
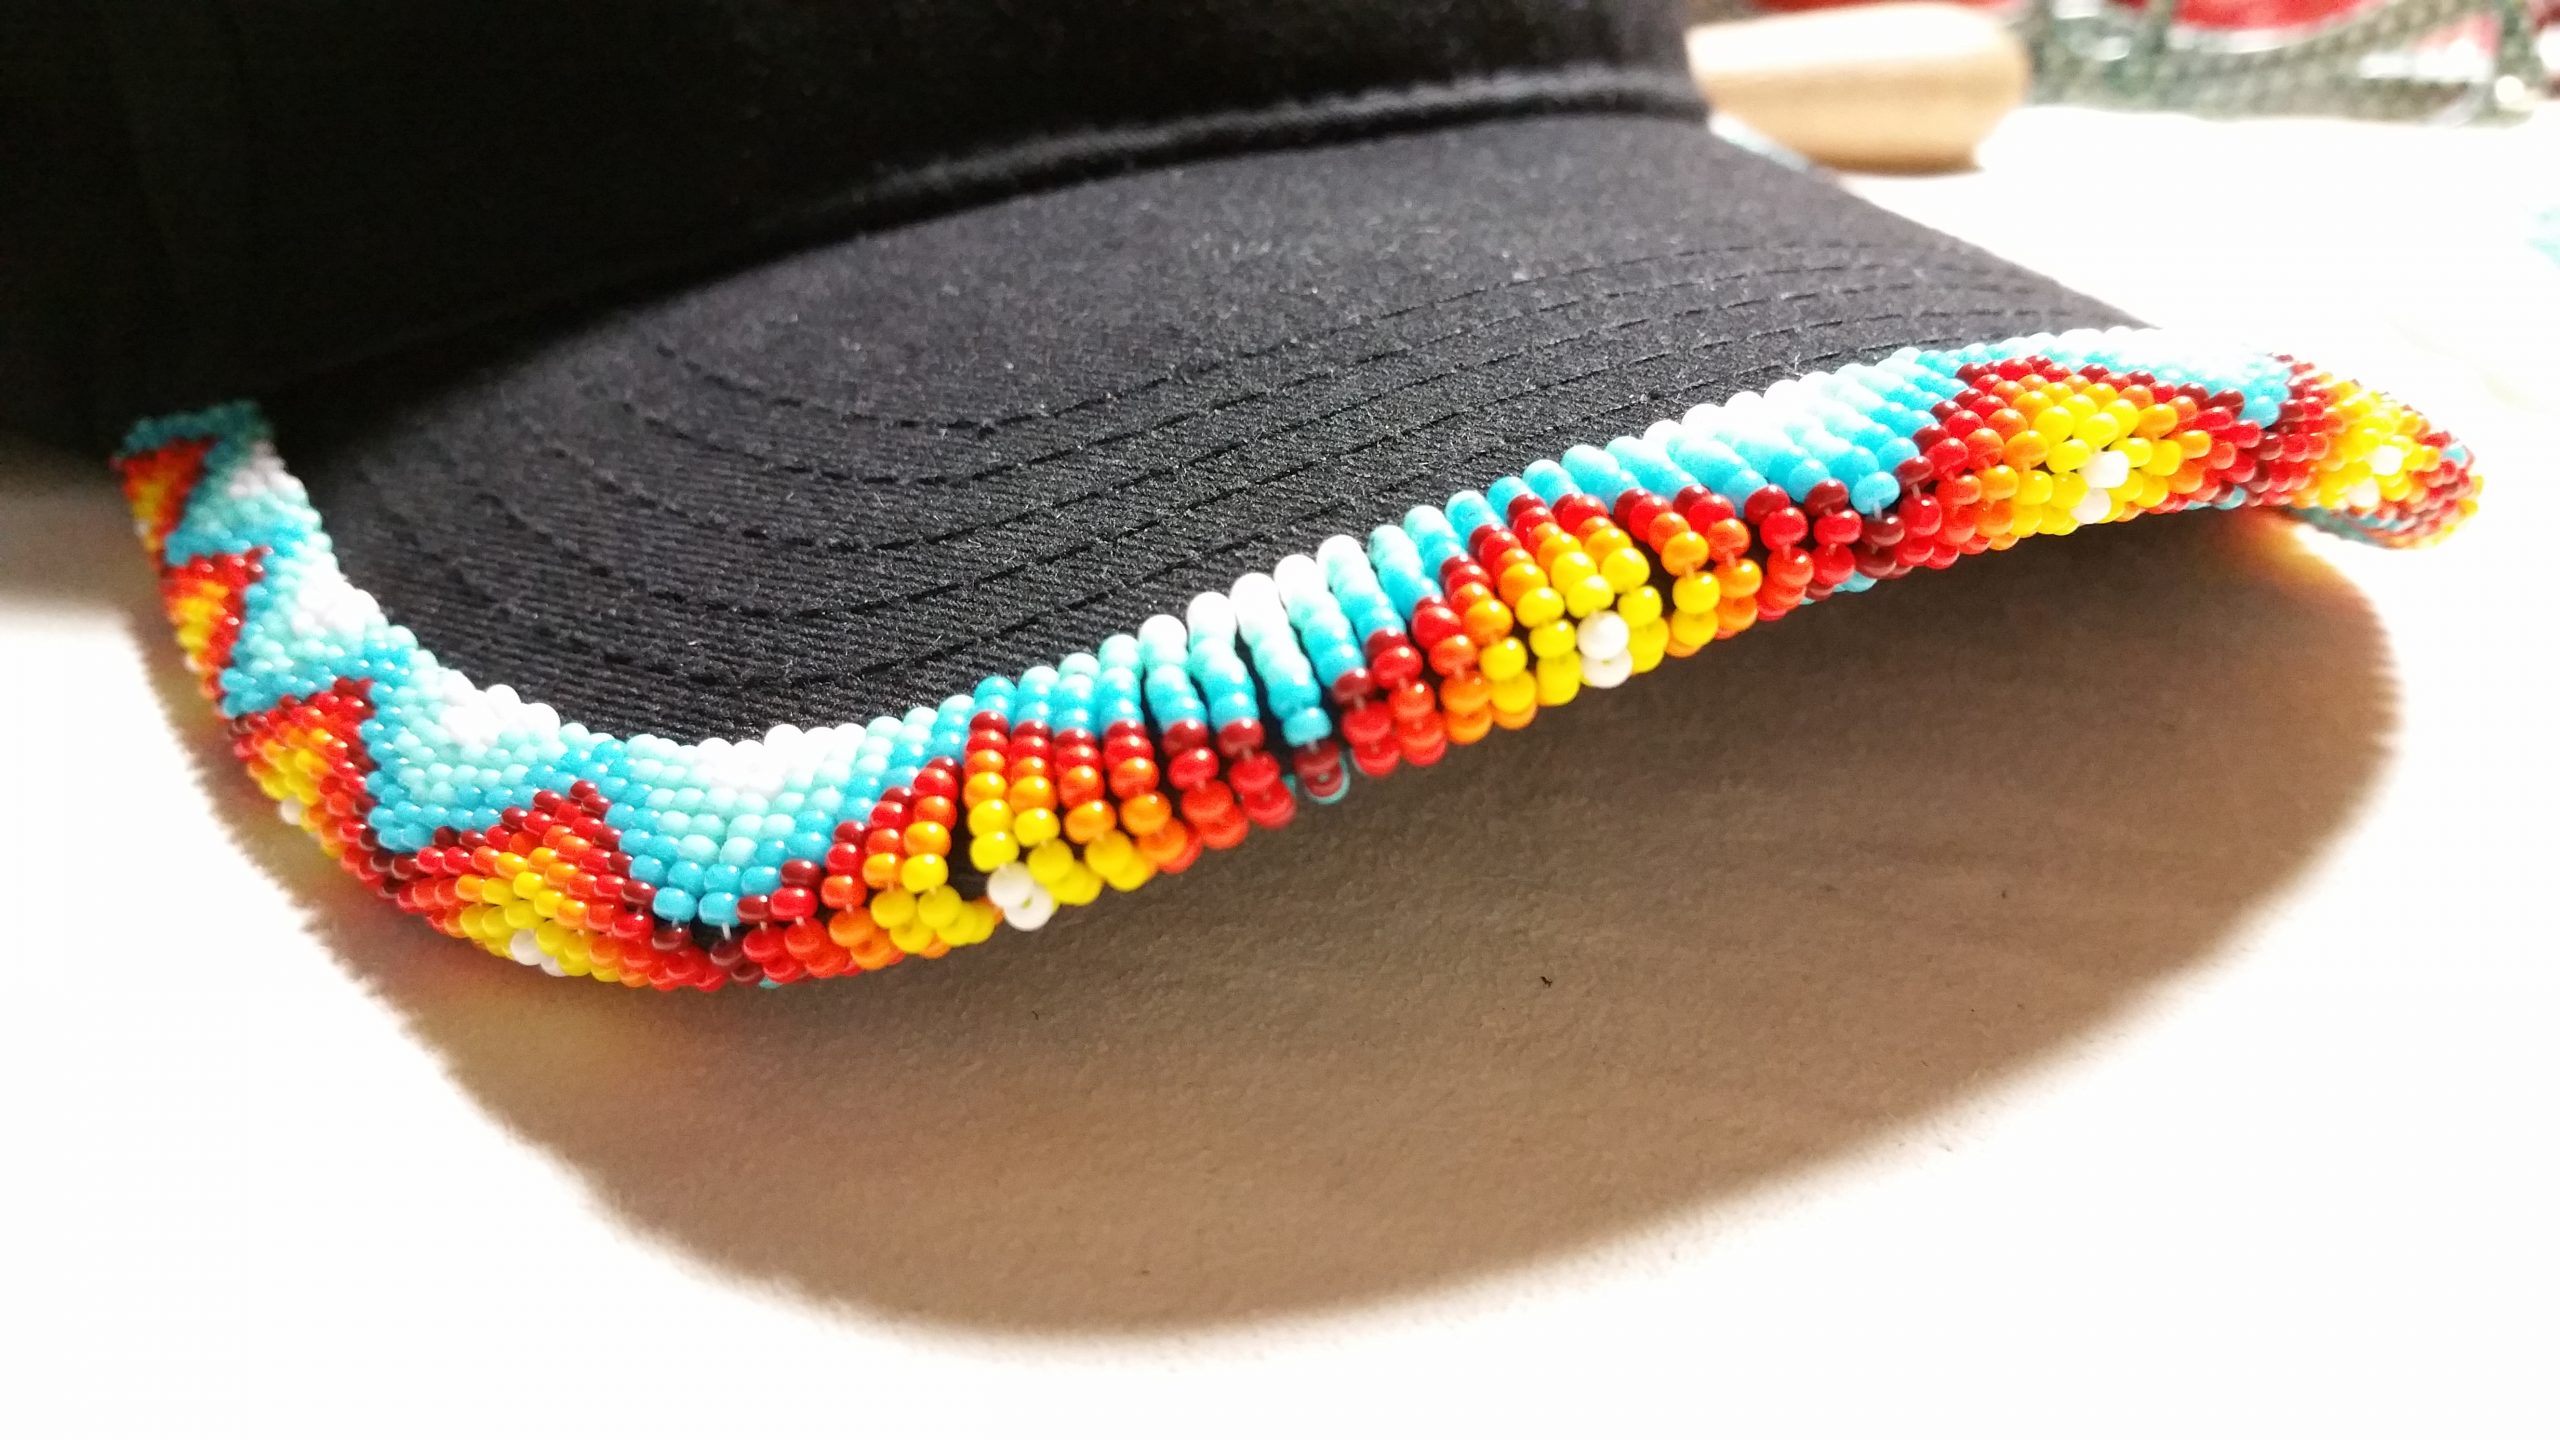
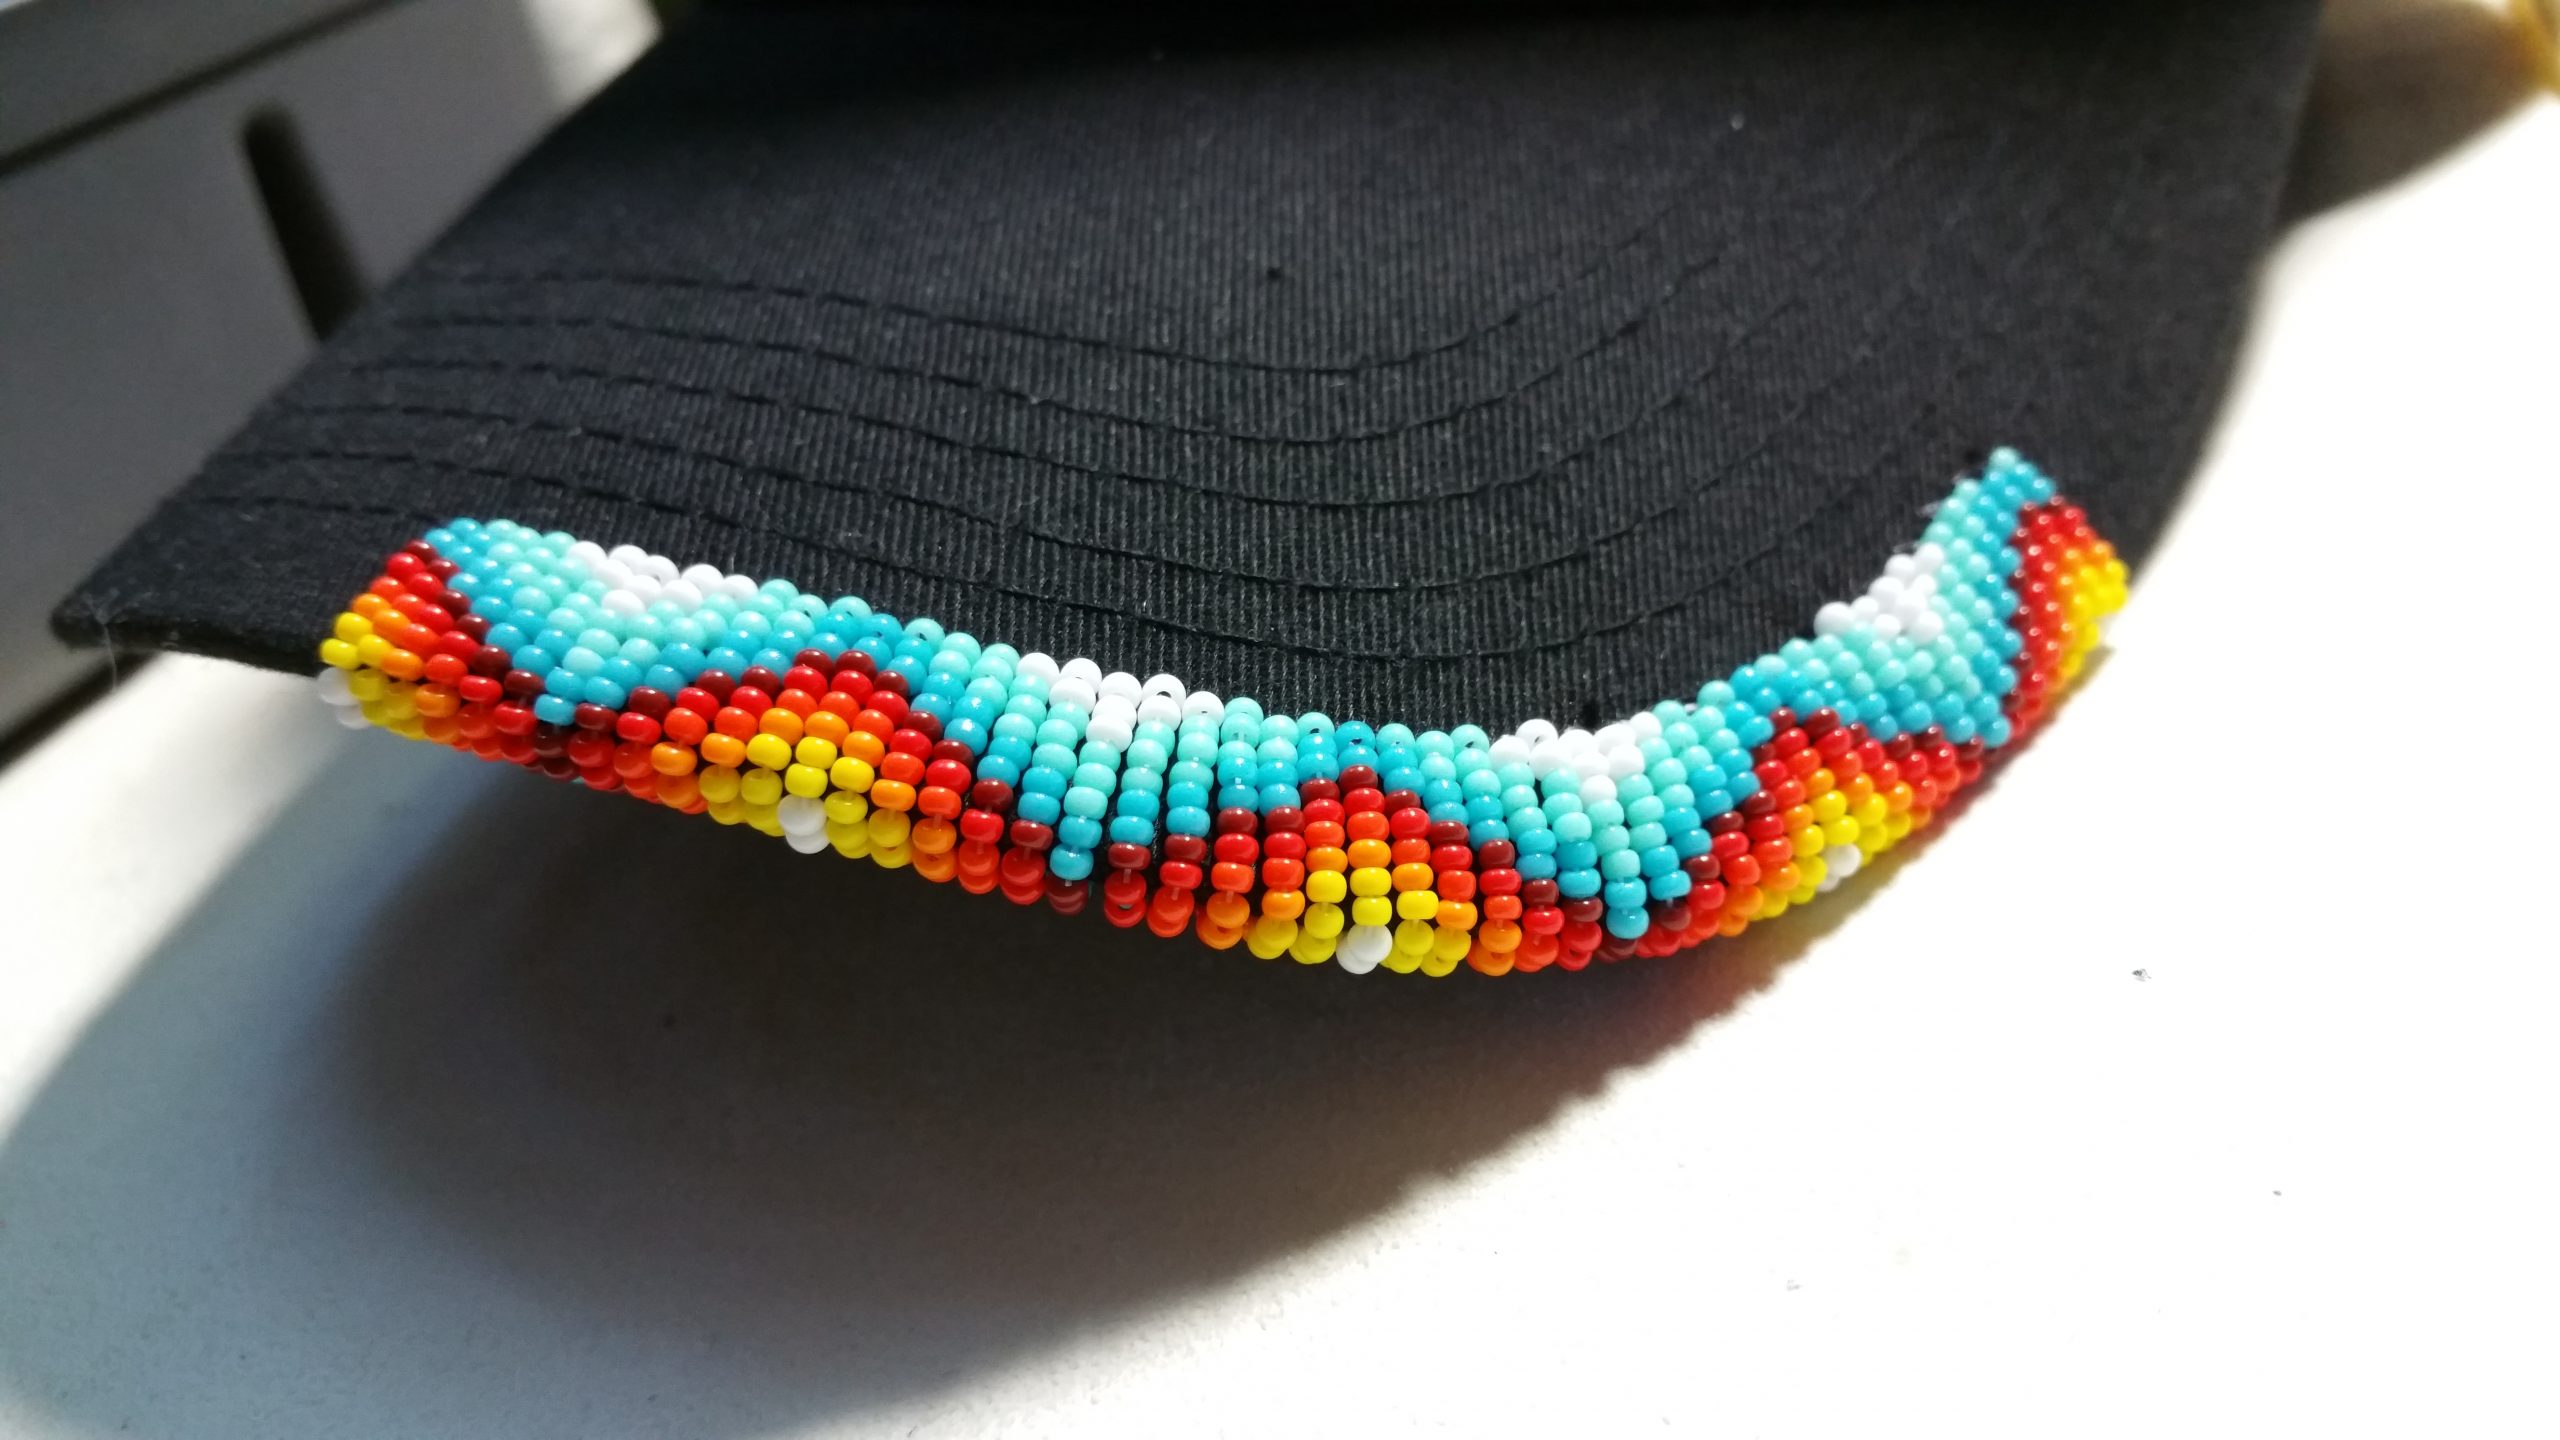
Here you can see the finished rim of the visor.
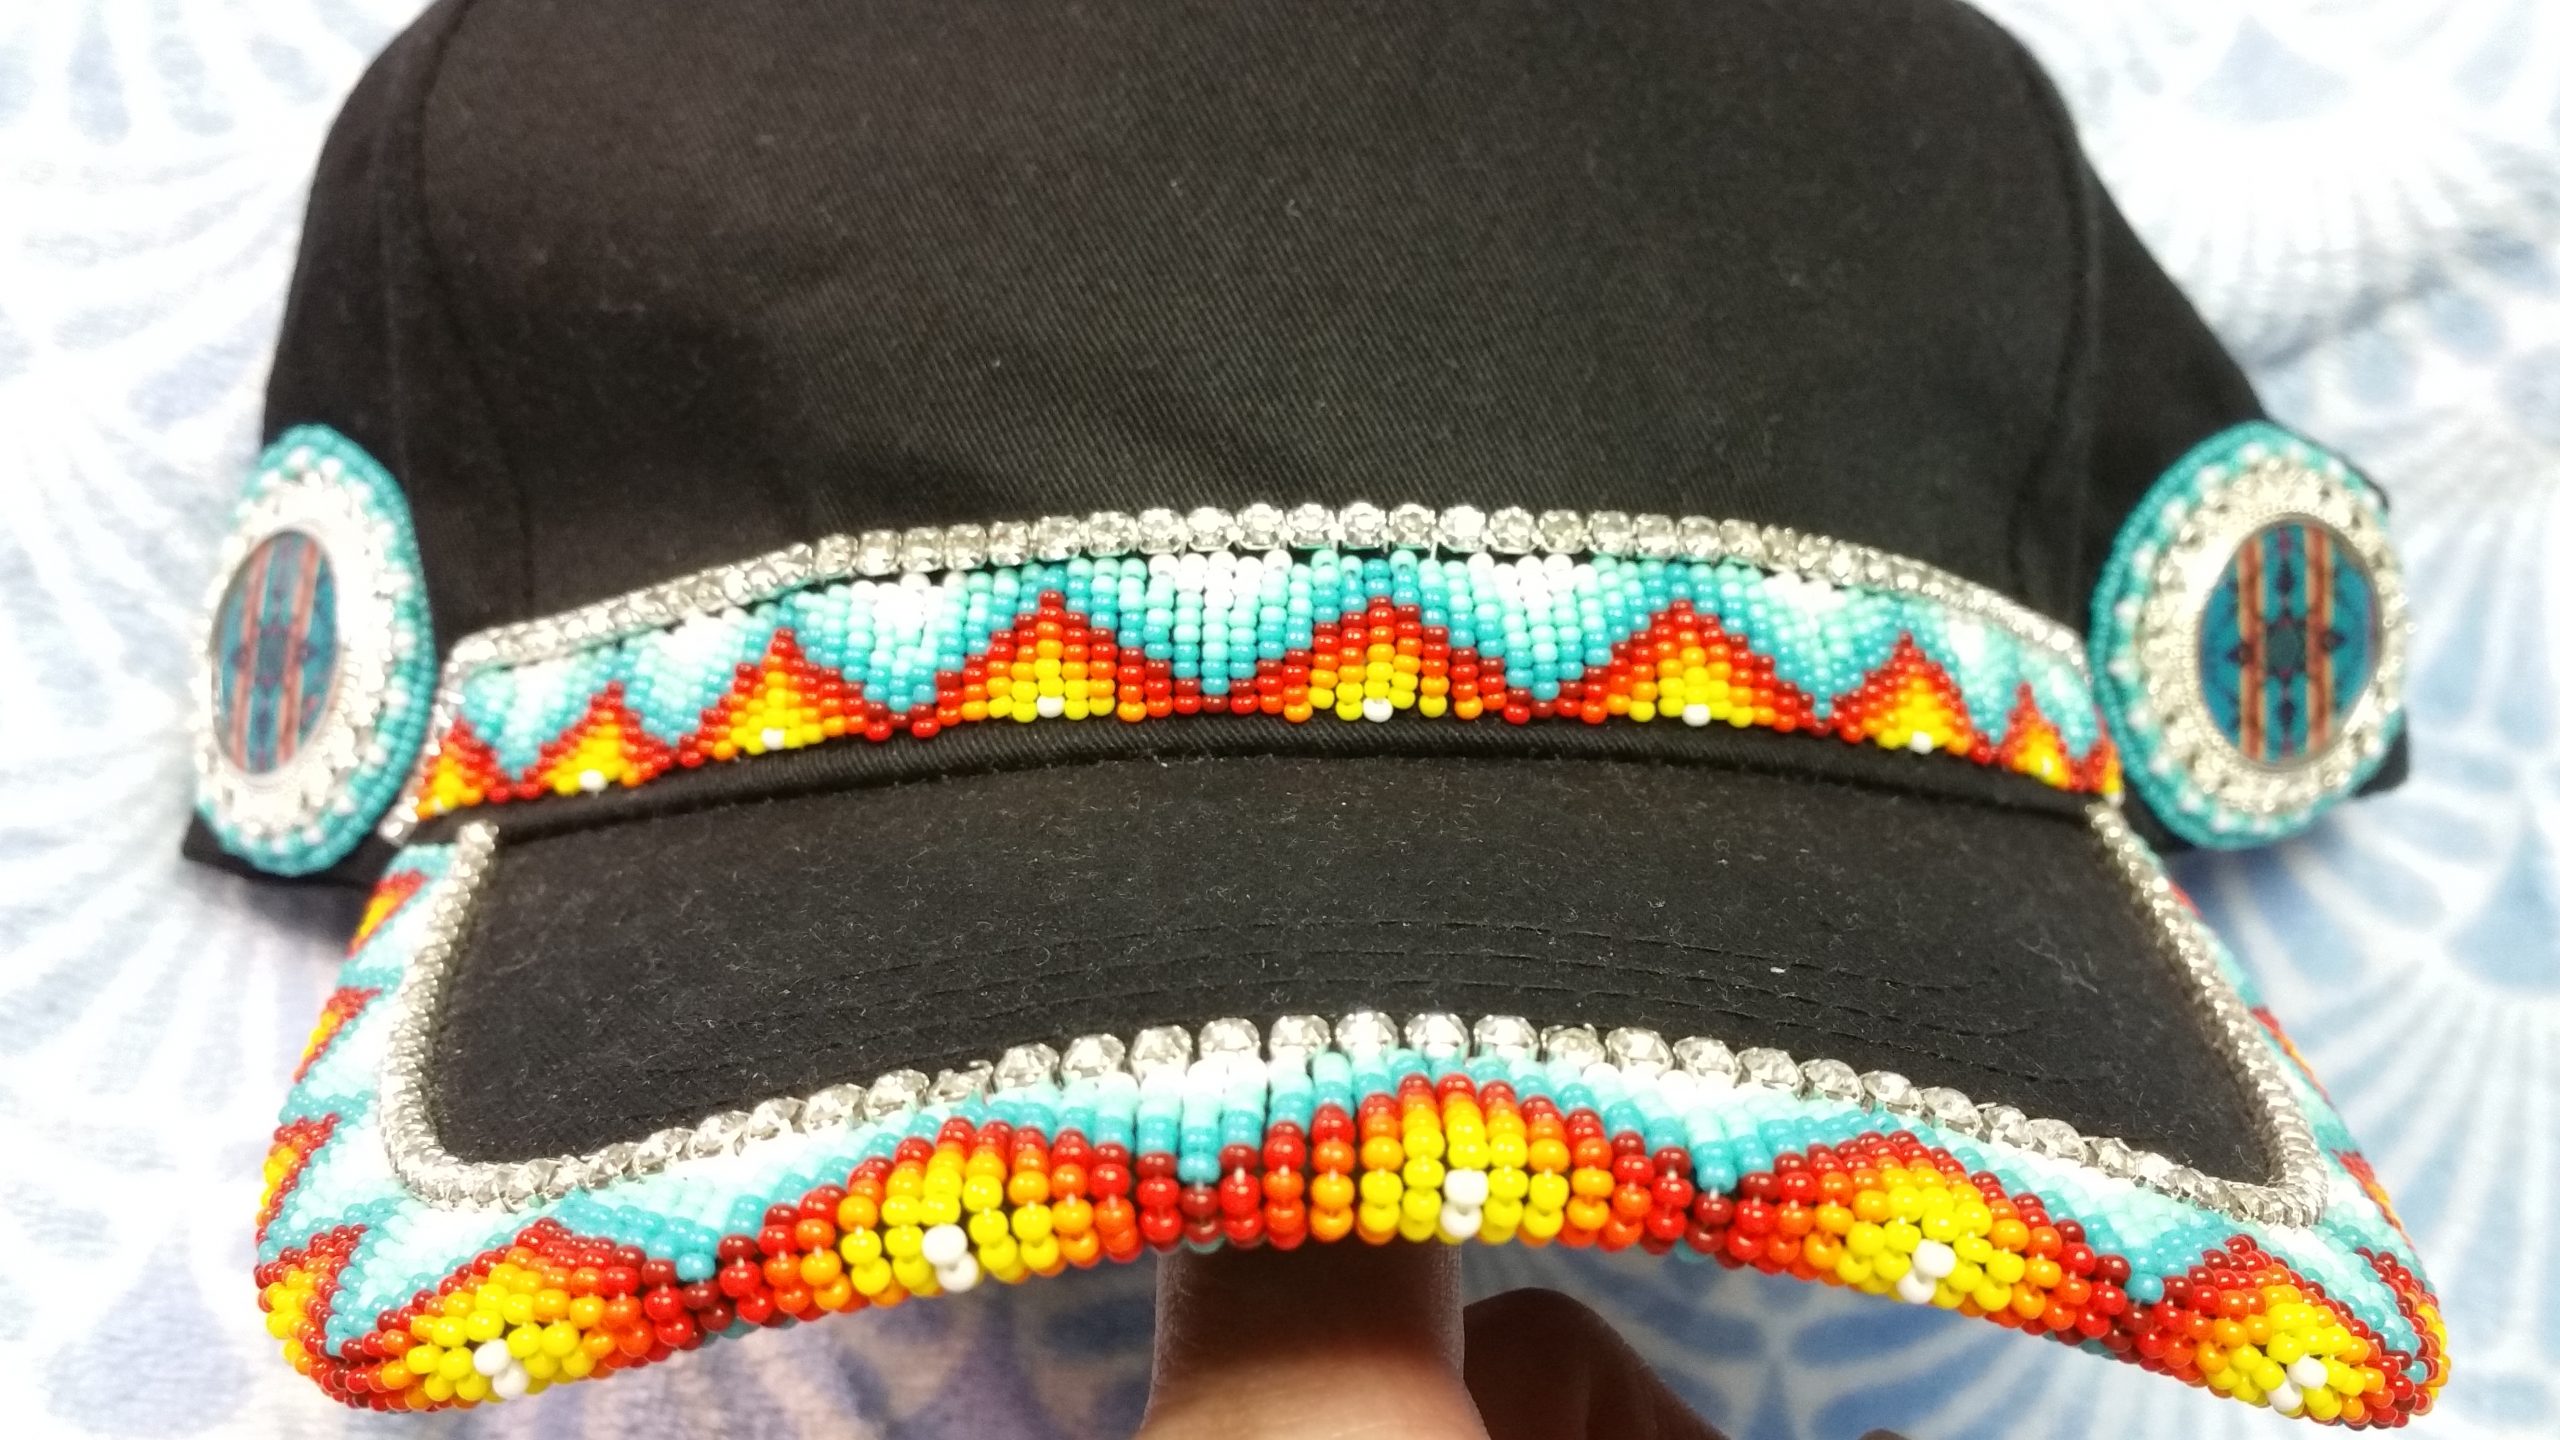
After finishing the rim I decided to make another row of beadwork and also add some rhinestones.
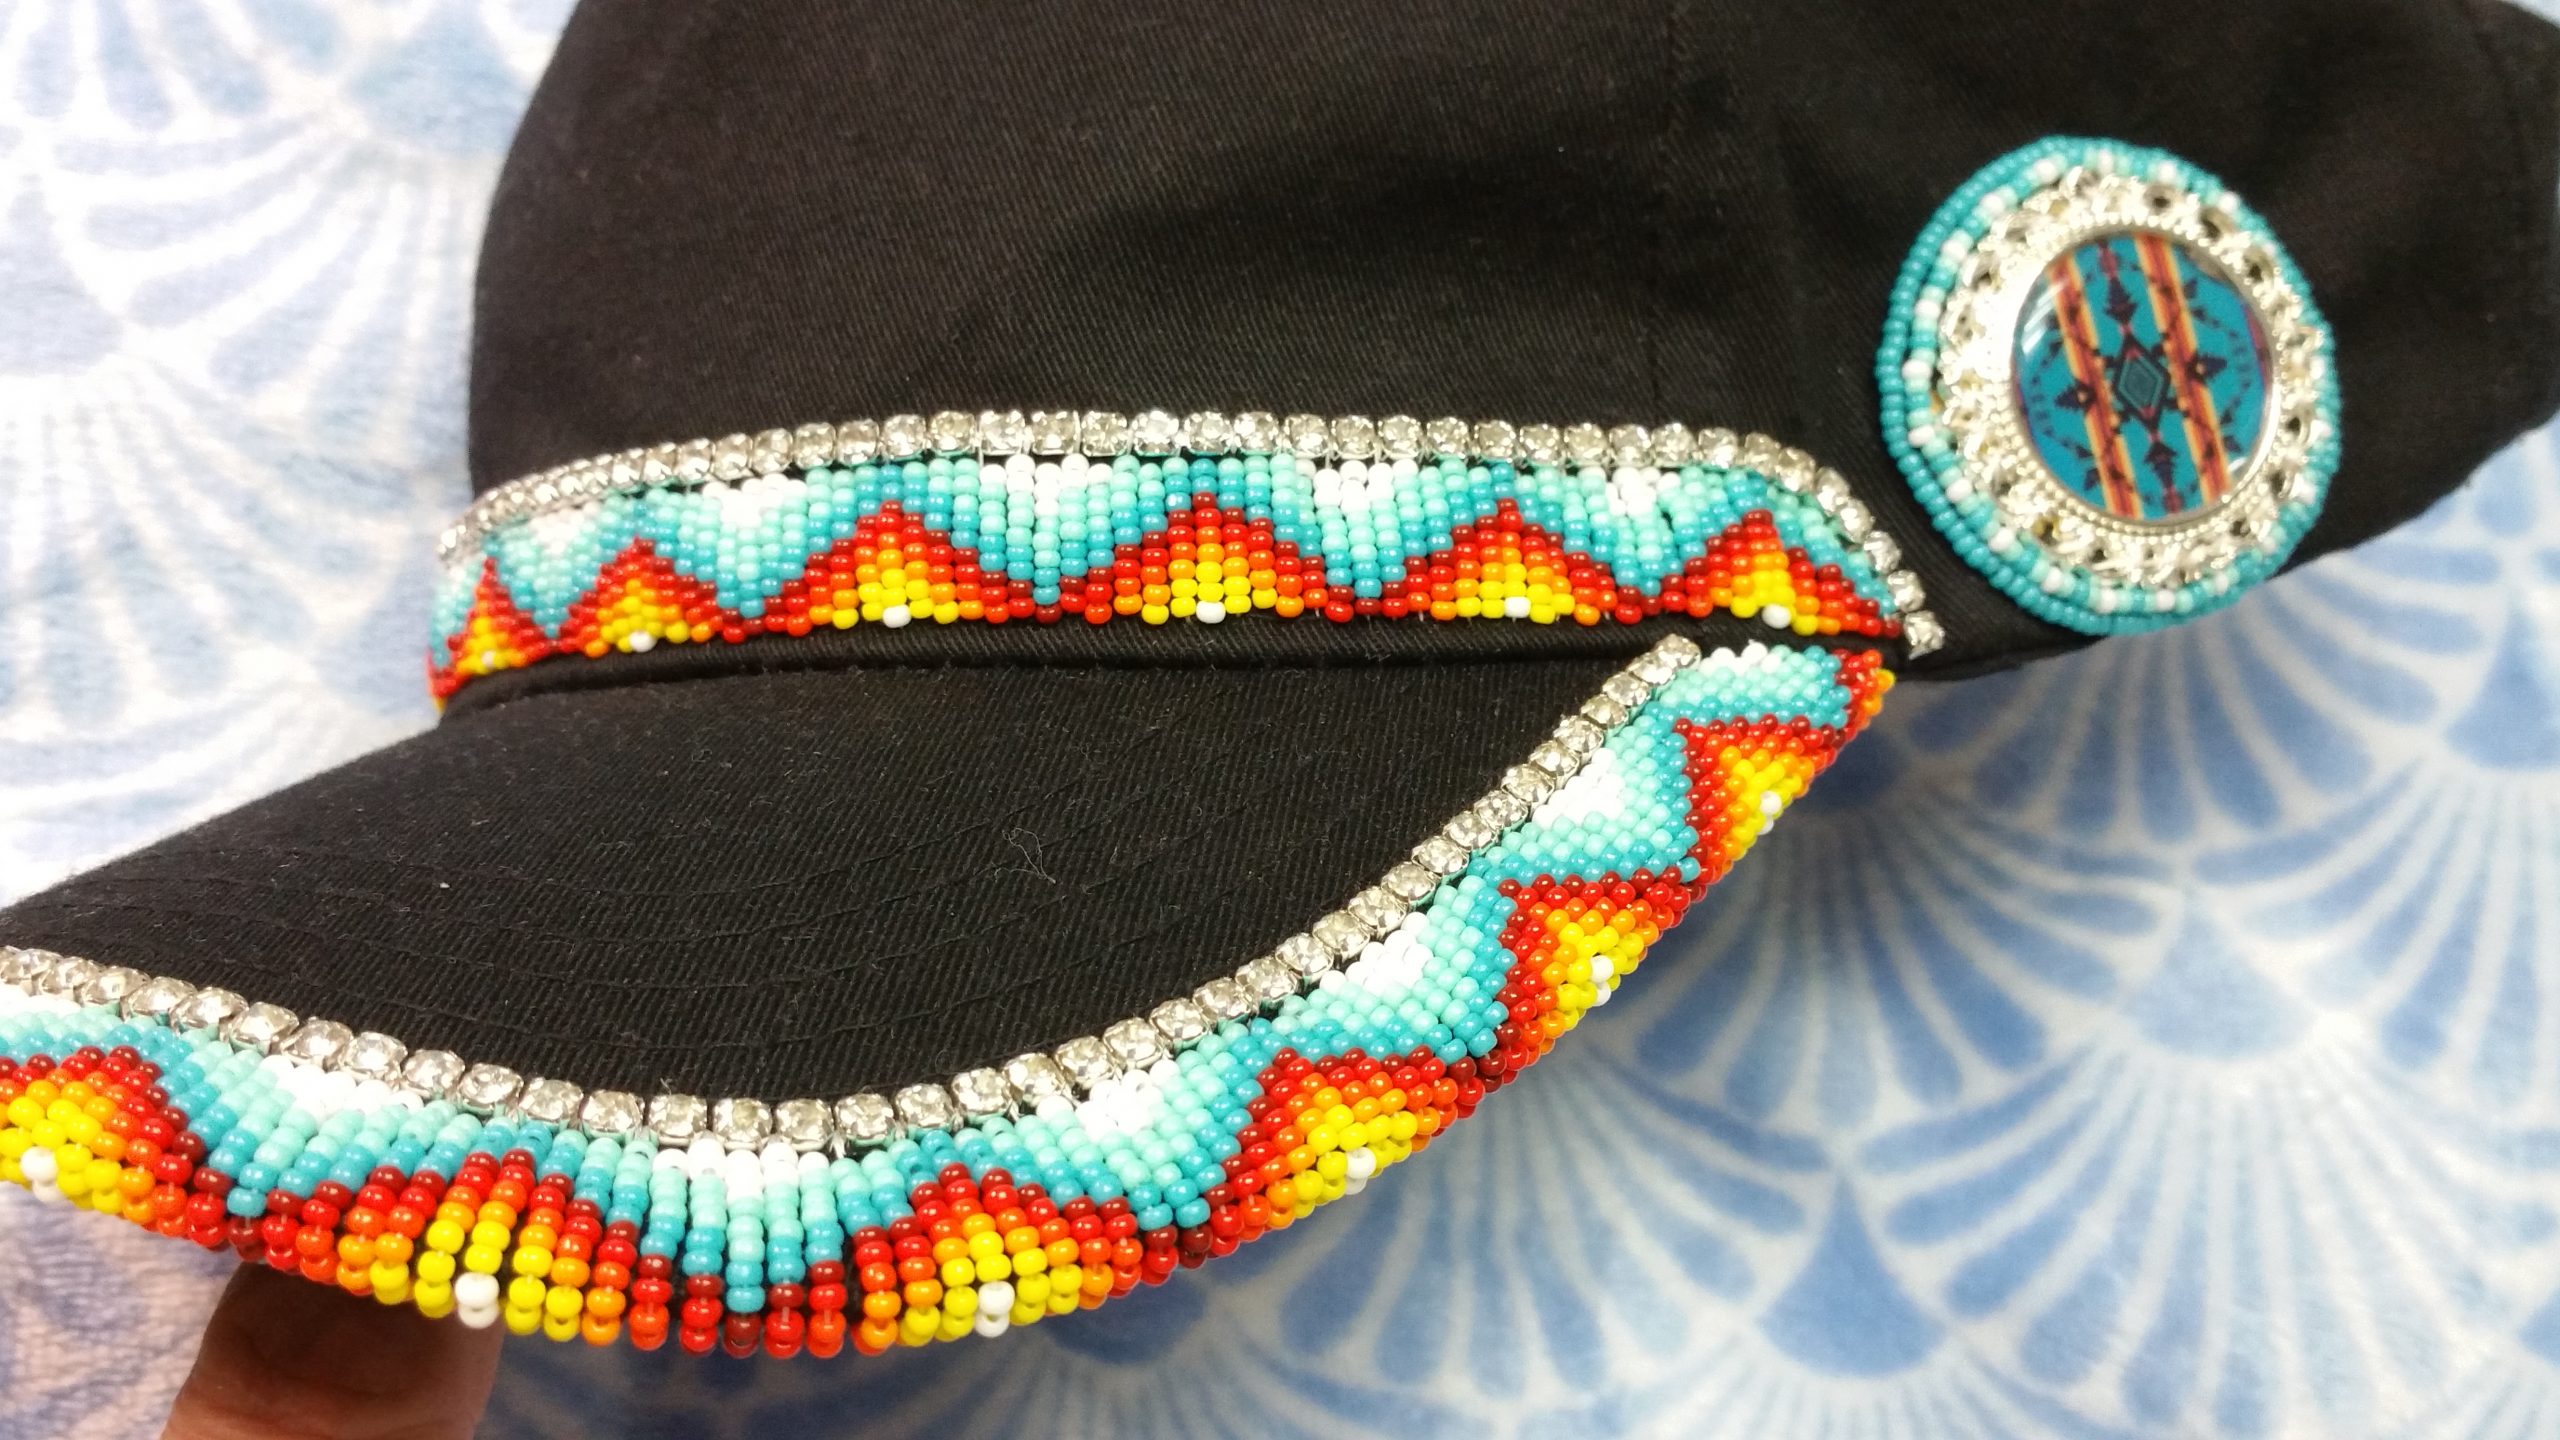
As last part of decoration I took two pendant blanks with a native american design cabochon and added them on the side.
There are many many ways to decorate a baseball cap. It is all up to you, your imagination and your likes or dislikes.
Stay safe!
Alley-Jean