This post is a little off-topic since it has nothing to do with beads or creating jewelry.
But I wanted to share this little colorful project with you anyway 🙂
Rock Painting is something I know from when I was a child.
My mom was a school teacher and also very creative.
She took part in seminars and bought books to get ideas what she could do with her kids.
And most of the time she “used” me as a testing object *lol*.
So one time we started rock painting.
If you think it is easy, you are wrong, well, partially wrong.
The most difficult part is finding the right rock with the right shape and sometimes also size.
The rest is really easy.
Today rock painting is also very popular – again – but a little different. Most rocks are decorated with quotes and flowers, sometimes also landscapes or animals, like little paintings just on another medium.
(if you browse through Pinterest you can find tons of inspiration!!)
In the 1970s it was mostly snakes, fishes and so on, whatever fitted the shape of the stone.
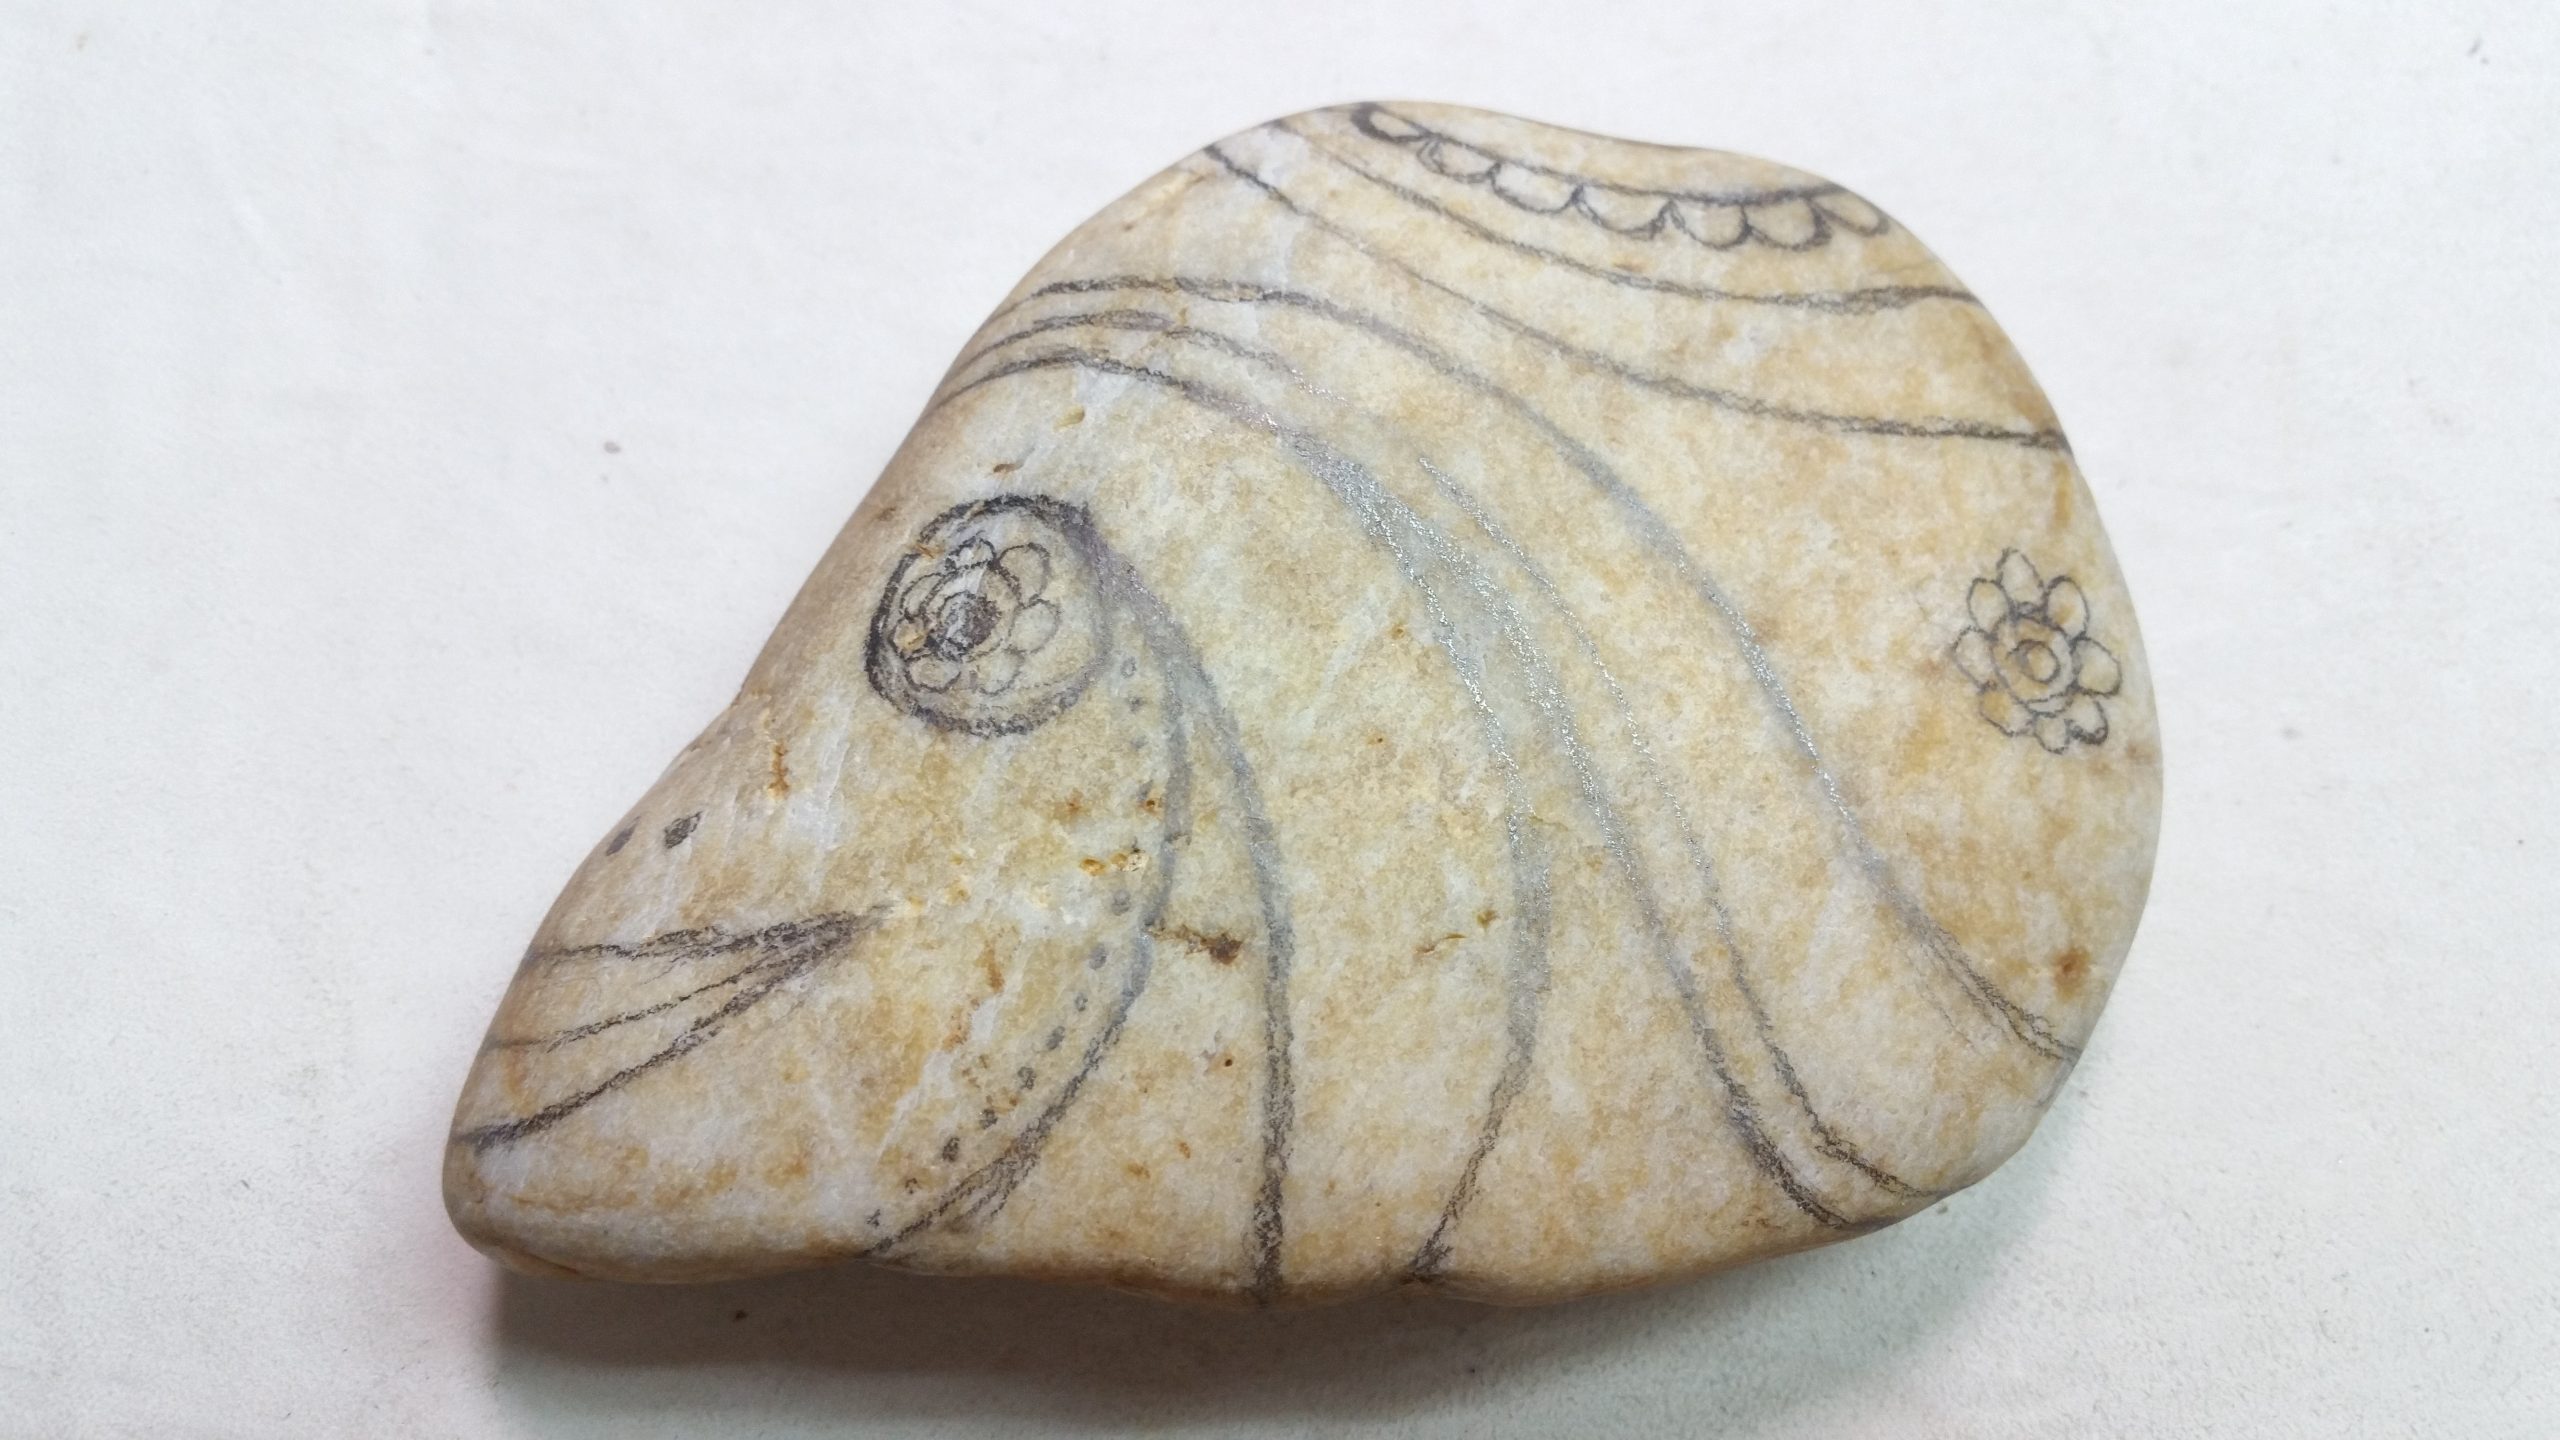
So when I found this rock I knew I had to paint it, because of this interesting shape.
This was the pic from the booklet I had in mind ……

…… and this was how I transferred it:
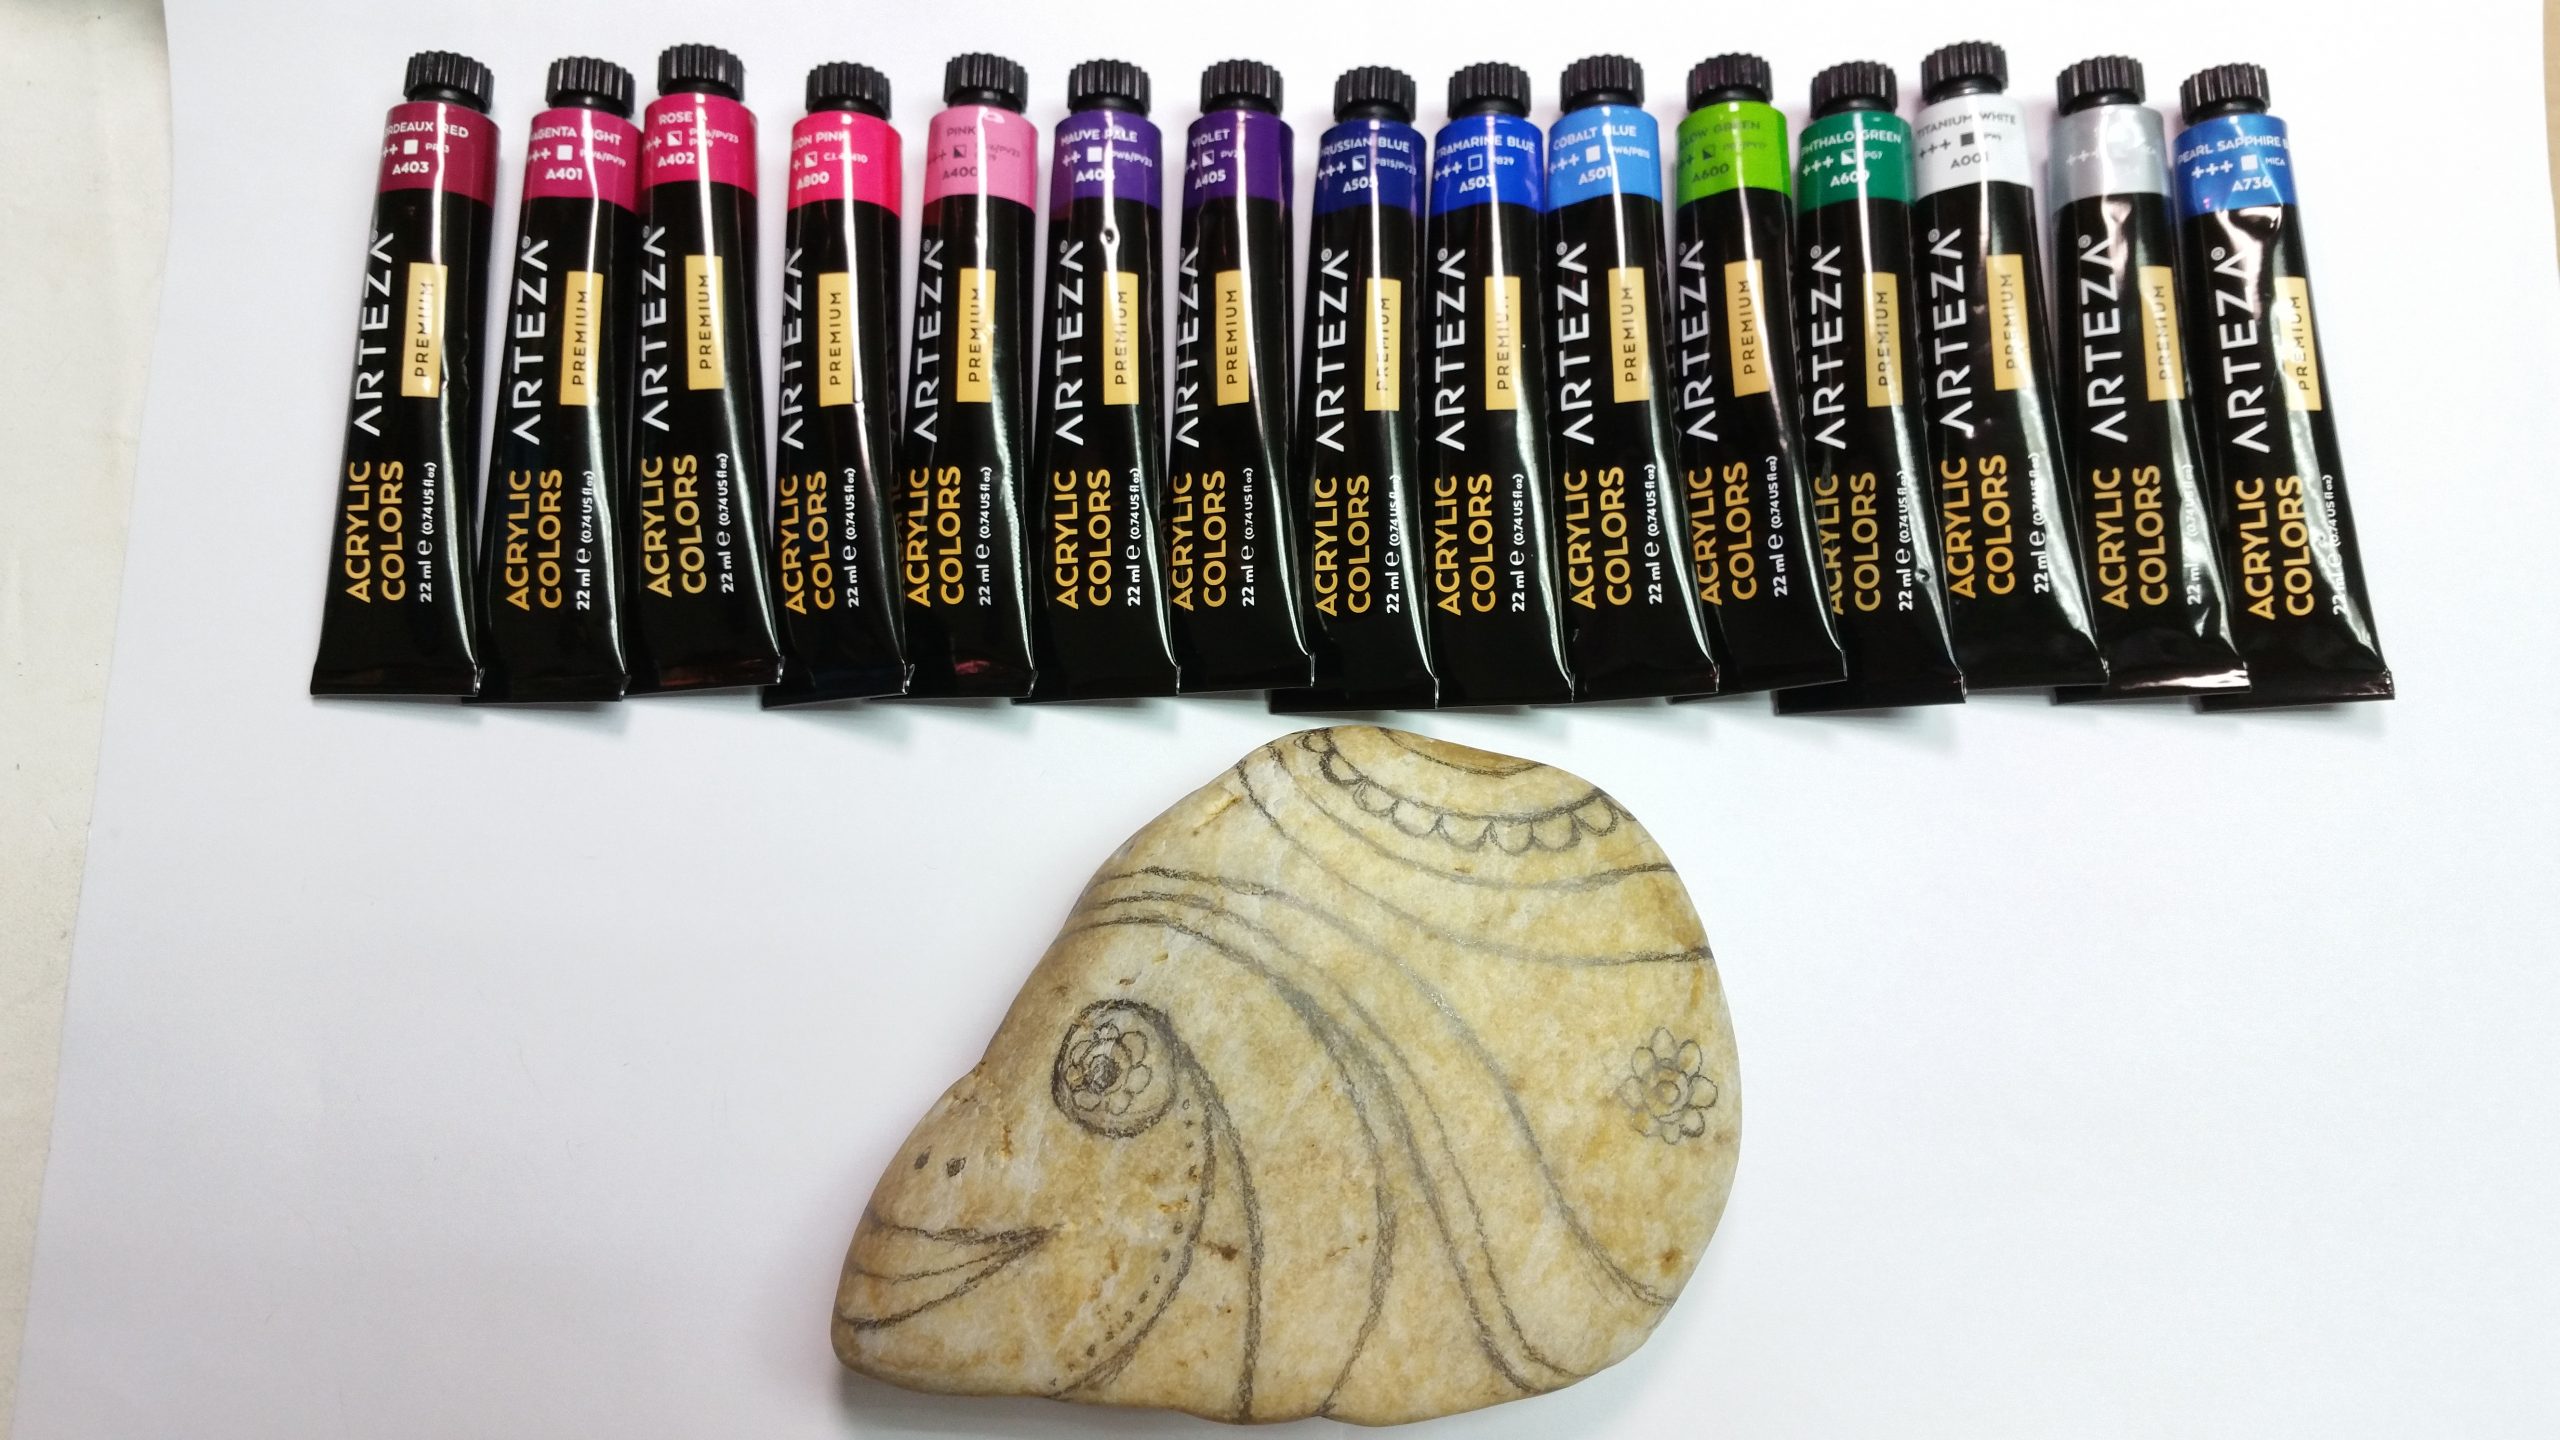
The next thing to think about … colors.
Since I had in mind to lay the finished stone in the garden into one of our flower-beds or under a tree I wanted some flashy colors that stand out against the green.
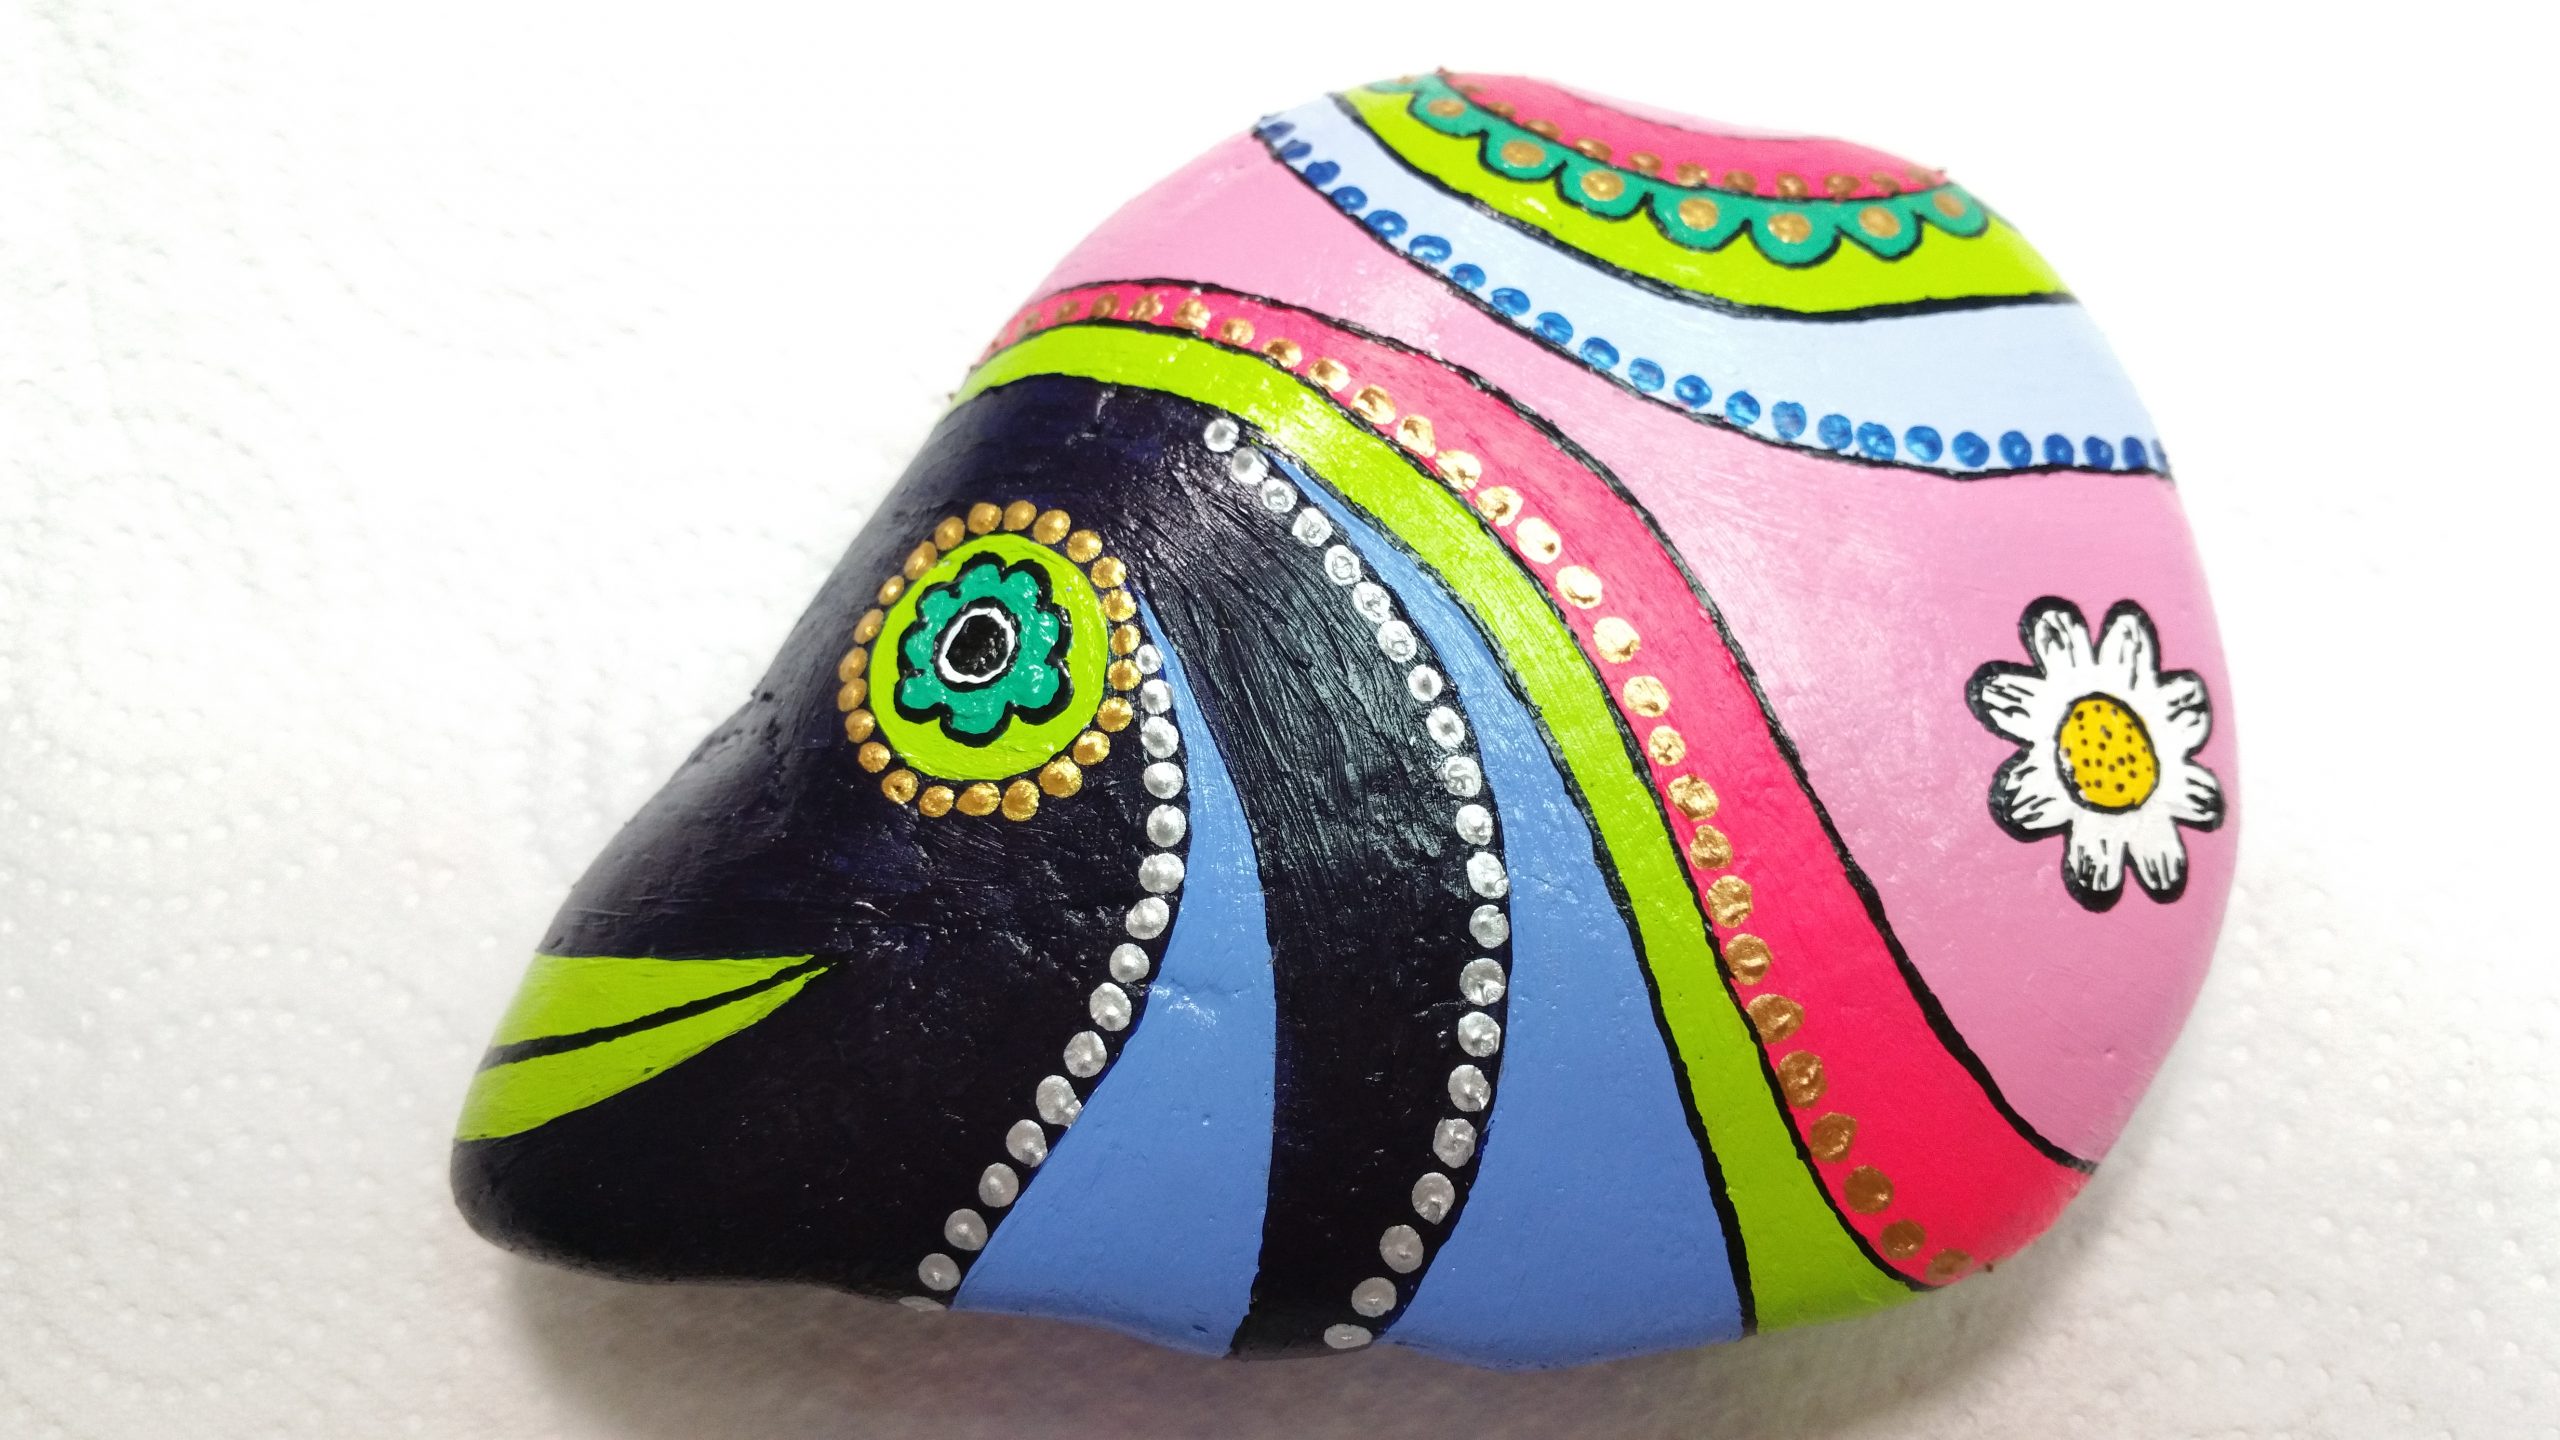
And this is what the stone looked like after the first painting part.

Only now I noticed that the colors need at least 2 layers of paint to cover the stone completely.
And the light green was to dark for me and also darker than on the outside of the tube.
So I started mixing it with white….

Way better. That was the color I had in mind….
Also the blue needed a little white in it.
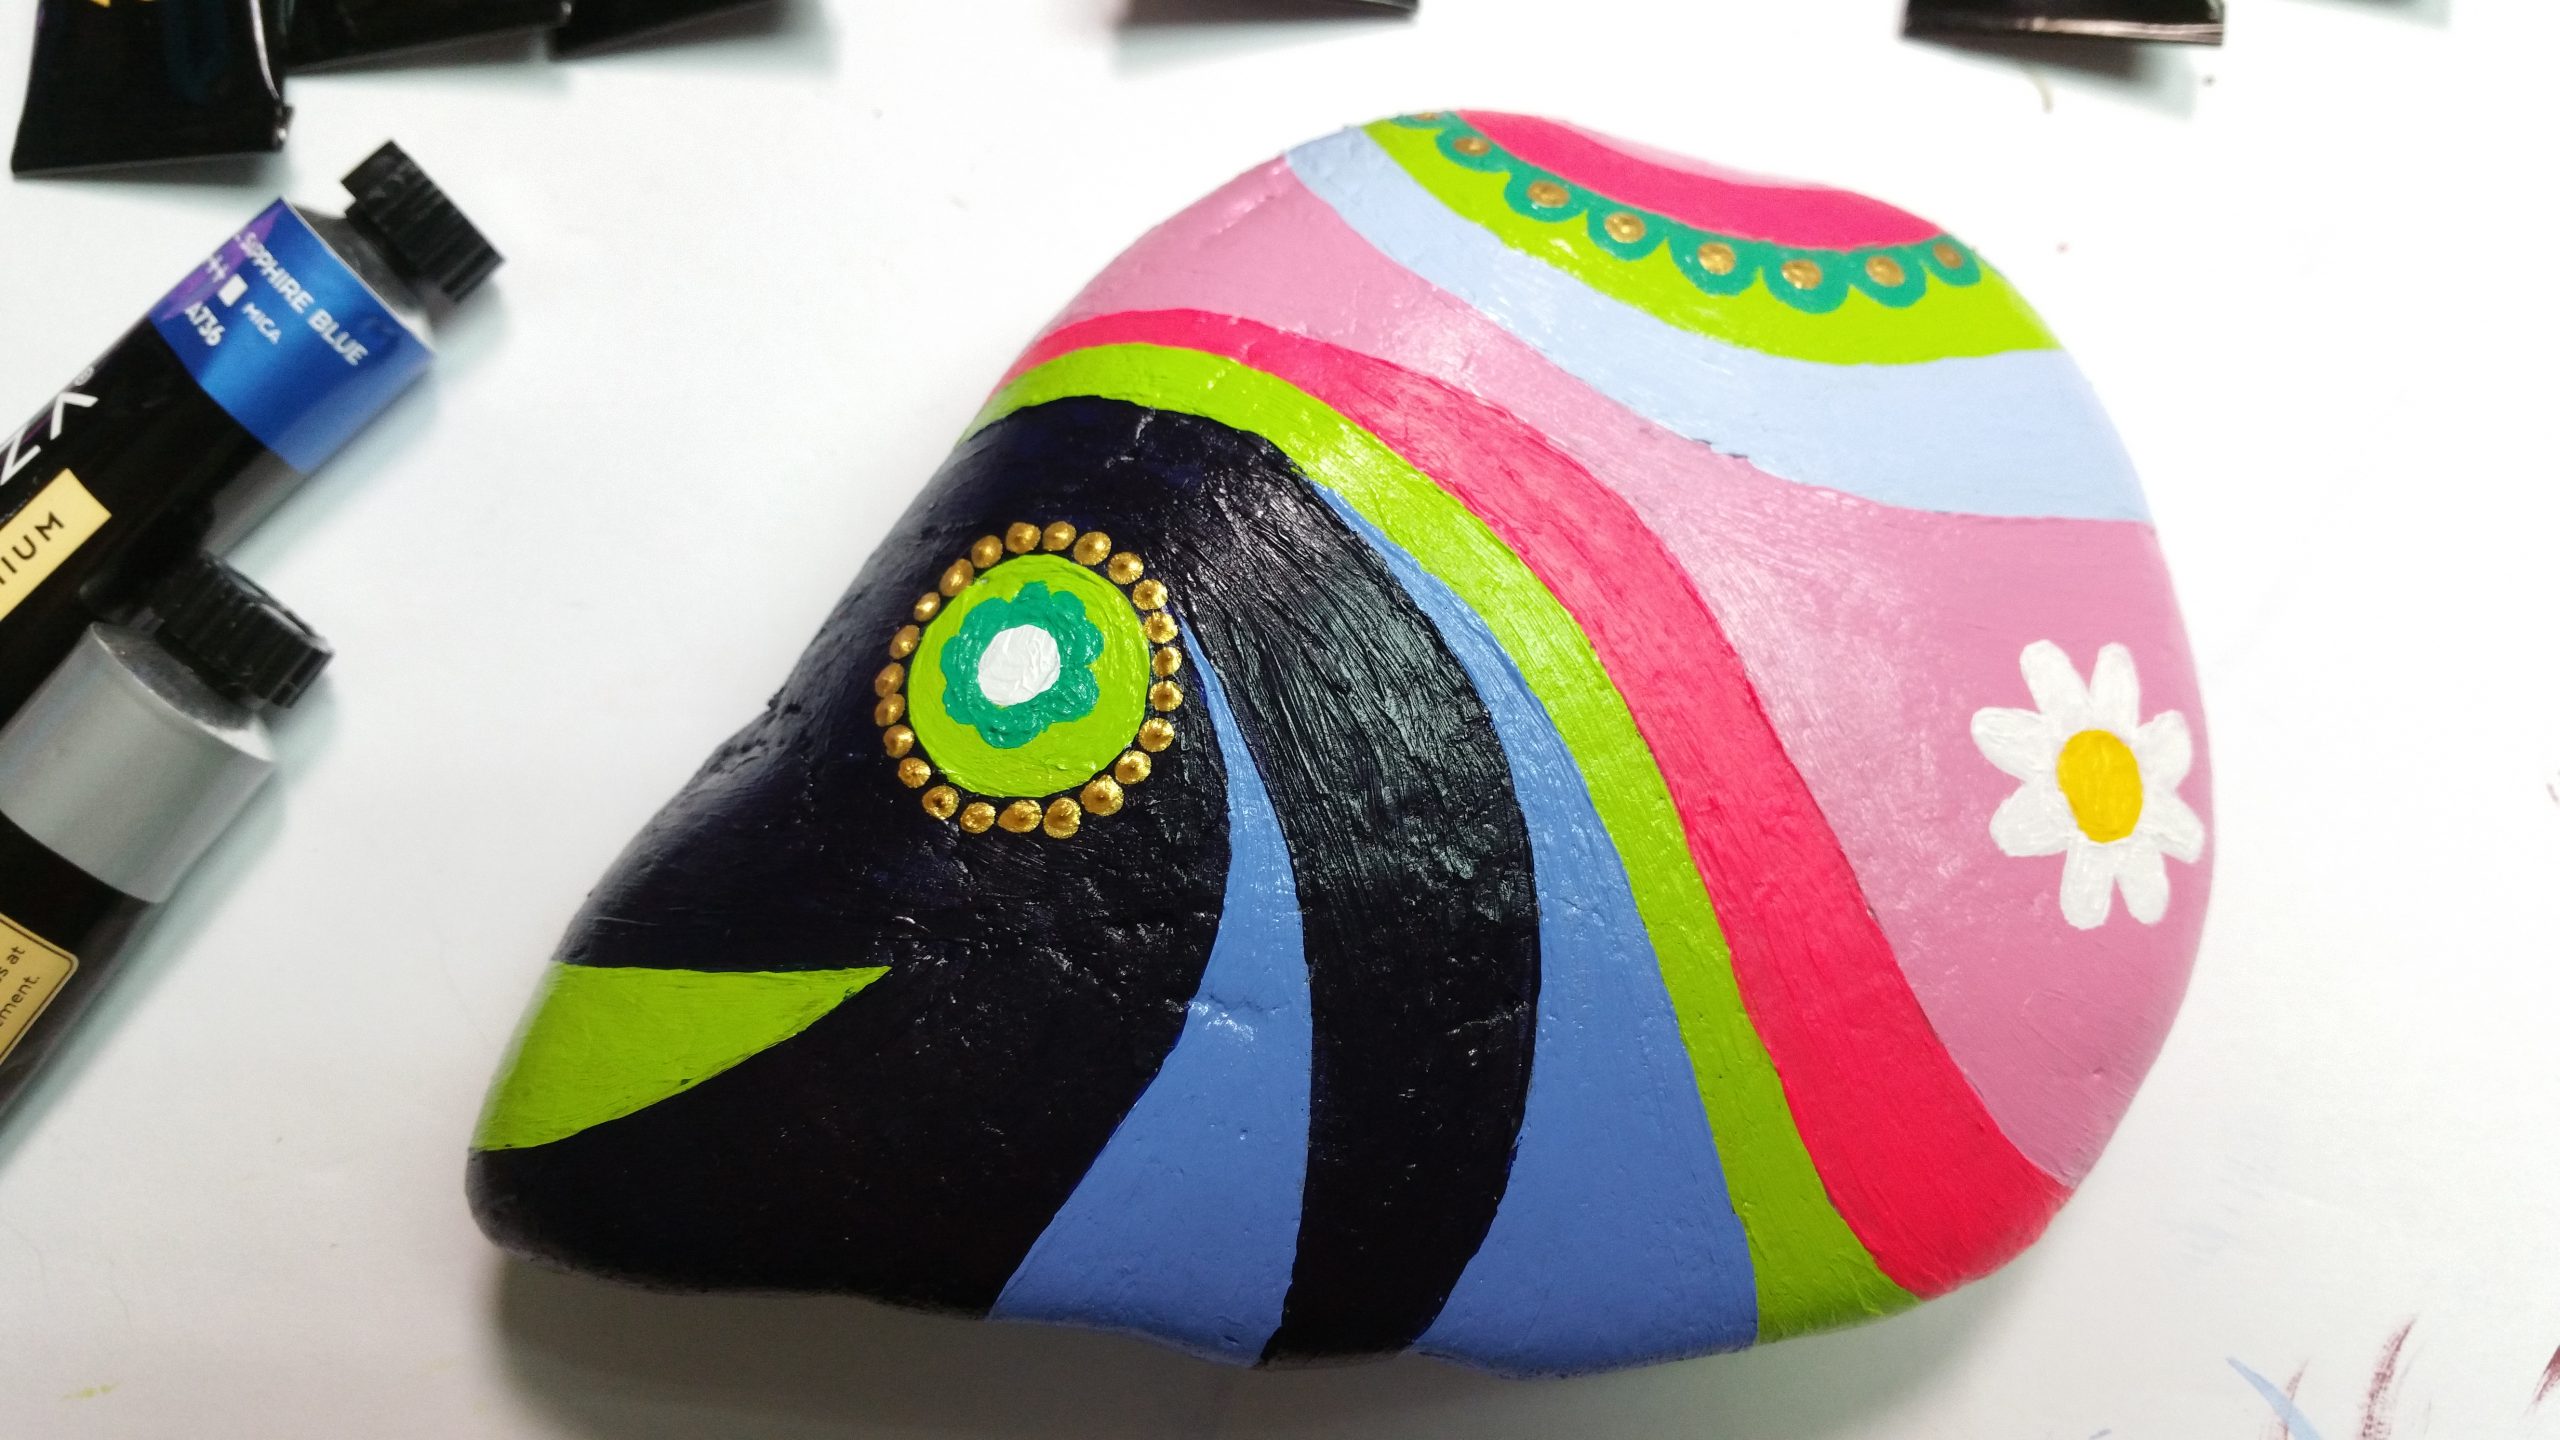
After the colors I started with silver and golden dots to highlight certain areas.

One thing I didn’t count on was that the metallic dots dried very fast because it was relatively thick and the color didn’t have time to level. So the dots stayed 3-dimensional with a small peak (you can make it out if you open the pic and zoom in).
Now all I needed to do were a few black lines at the color edges and to add some more highlights.
So I took a black acrylic pen and started drawing.
I have to admit that this was the most difficult part.
Why?
Well, the thick acrylic paint dried with brush marks. And to draw a thin line along a field of color with brush marks is not easy. The tip of the pen often gets “misled” and the line becomes crooked.
You can see those little problems in the pic above when you zoom in.
The only positive thing is that when the stone will be lying in the garden it is far away so you don’t see them.
But I guessyou can say ‘Lessons Learned‘.
The next time I will try a differrent approach.
First I will dilute the paint to become a bit thinner – hopefully it dries more evenly with less brush marks.
In addition I will add a layer of translucent varnish to make the surface even more smoother.
Then the lines should be easier to draw.
Did you ever paint rocks?
I would love to see them. Perhaps you can let me in your little secrets 😉
Stay safe!