What do you do when something didn’t work as planned?
You simply use the outcome anyway …… 😉
I found those lovely napkins and decided to make some cabs with them.
And since the paper layers of napkins are very thin I decided to paint the backside with white nailpolish so that the color of the pendant blank won’t shine through.
But then this happened:
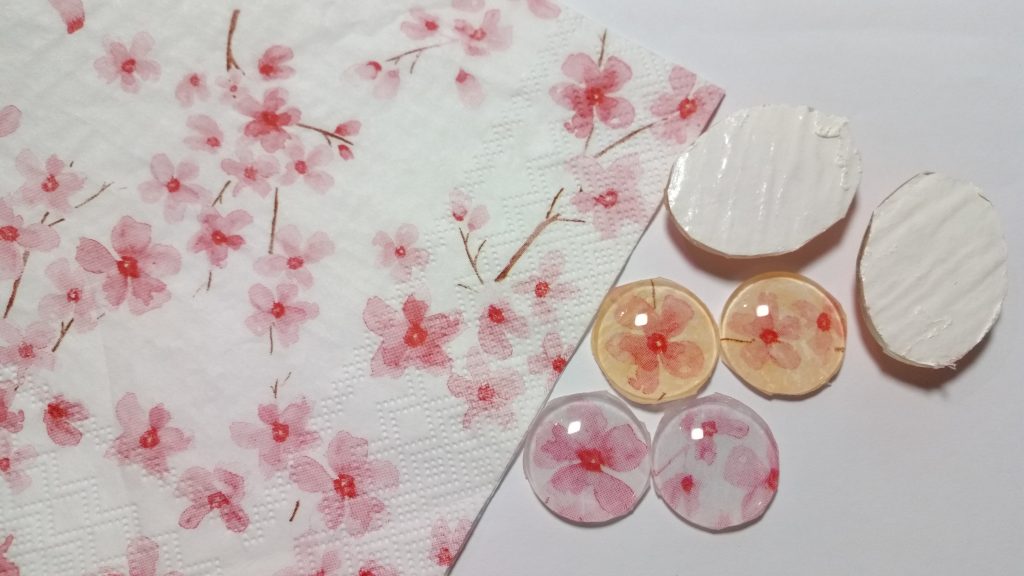
After the nailpolish had dried I saw that the color of the cabochon had changed. It got a yellowish hue.
I have no explanation what happened, just a hunch. Somehow the solvents of the nail polish may have reacted with the glue or the paper of the napkins so that everything turned yellow.
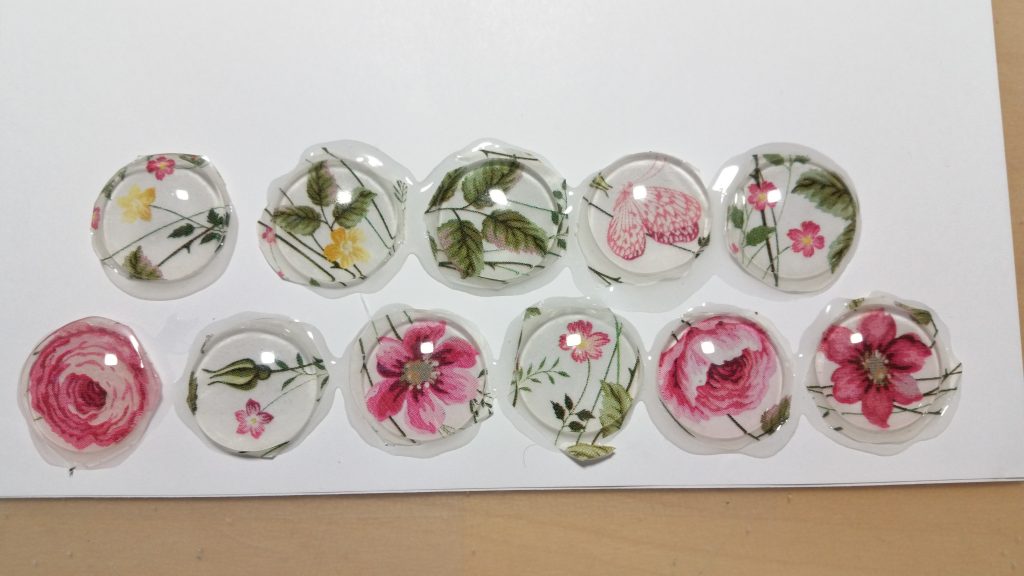
So I made another test.

After the glue had dried I roughly cut out the cabs and glued them on some plain white paper with 100g/m².
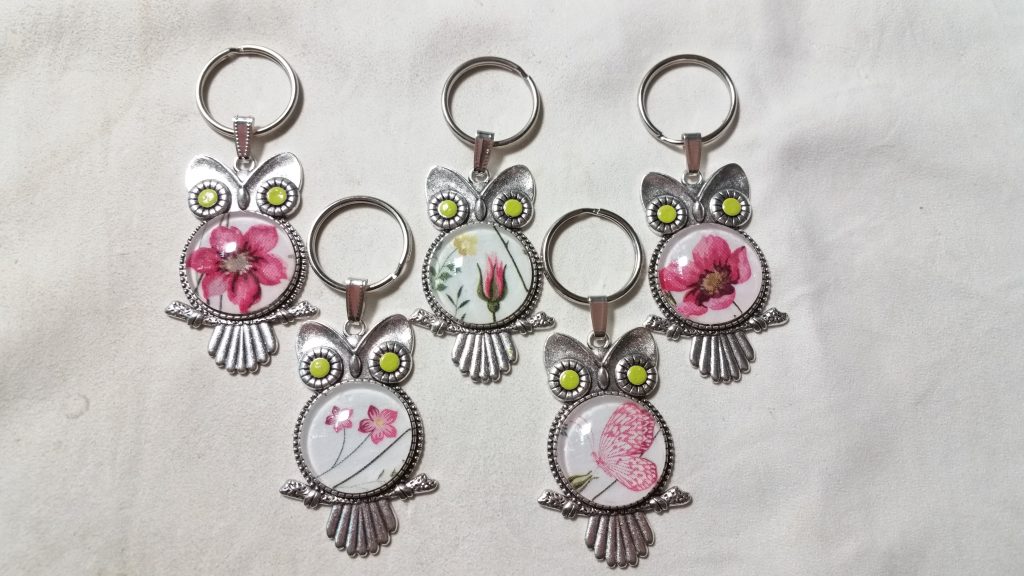
Then after the lue had dried I cut out the cabs and glued them into the owl blank. The eyes I filled with nail polish.
Almost finished.
After adding the pendant holder and the keyring the owls are finished.
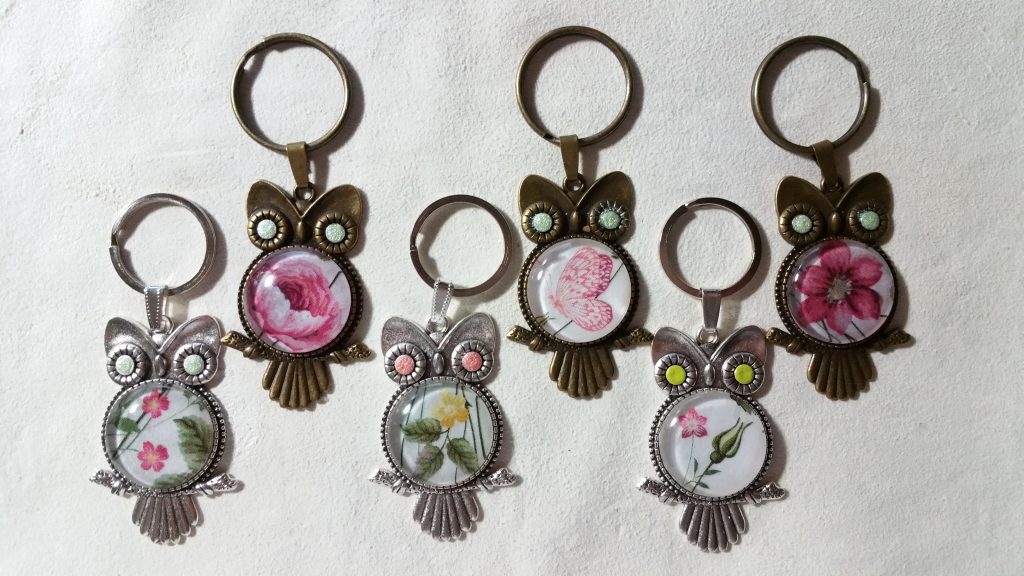
And if you change your mind you can alway remove the keyring and put the owl on a necklace 🙂
So, what do you think of my little “spring owls”?
As for the yellowish cabochons I’m gonna use them with some bronze pendant blanks. They have an antique look.
Gonna add a pic when they are finished…….

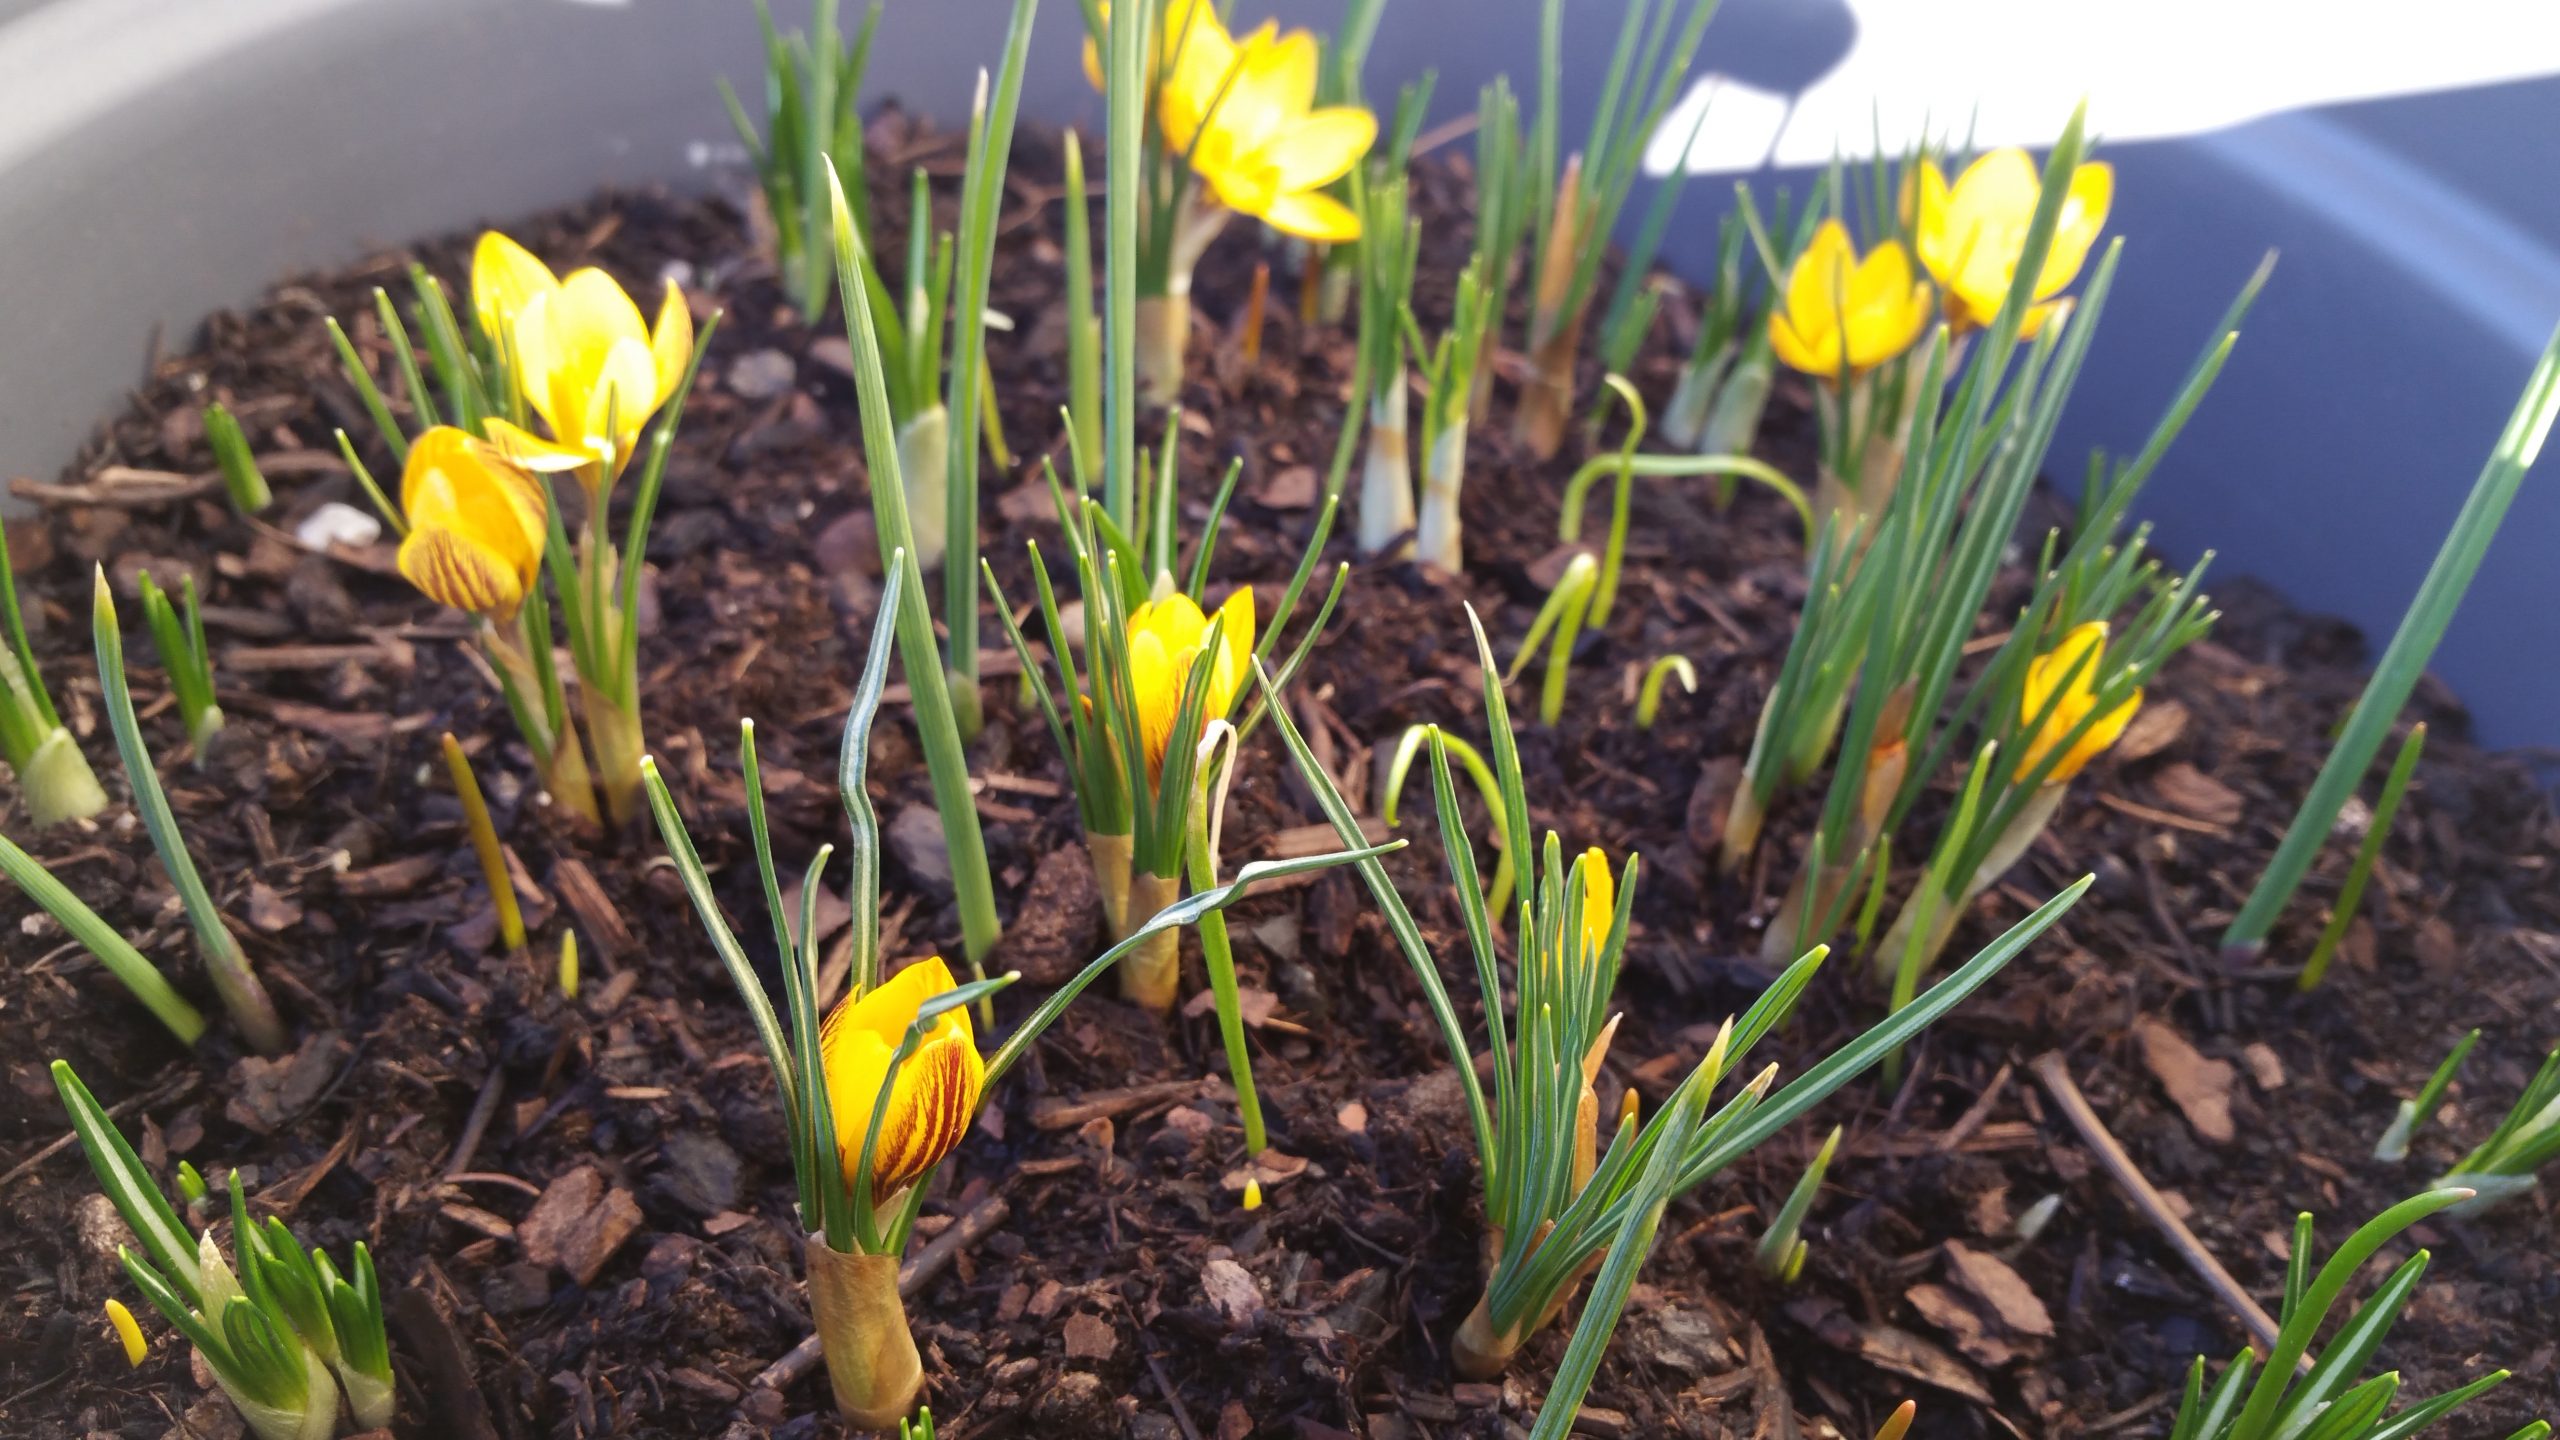
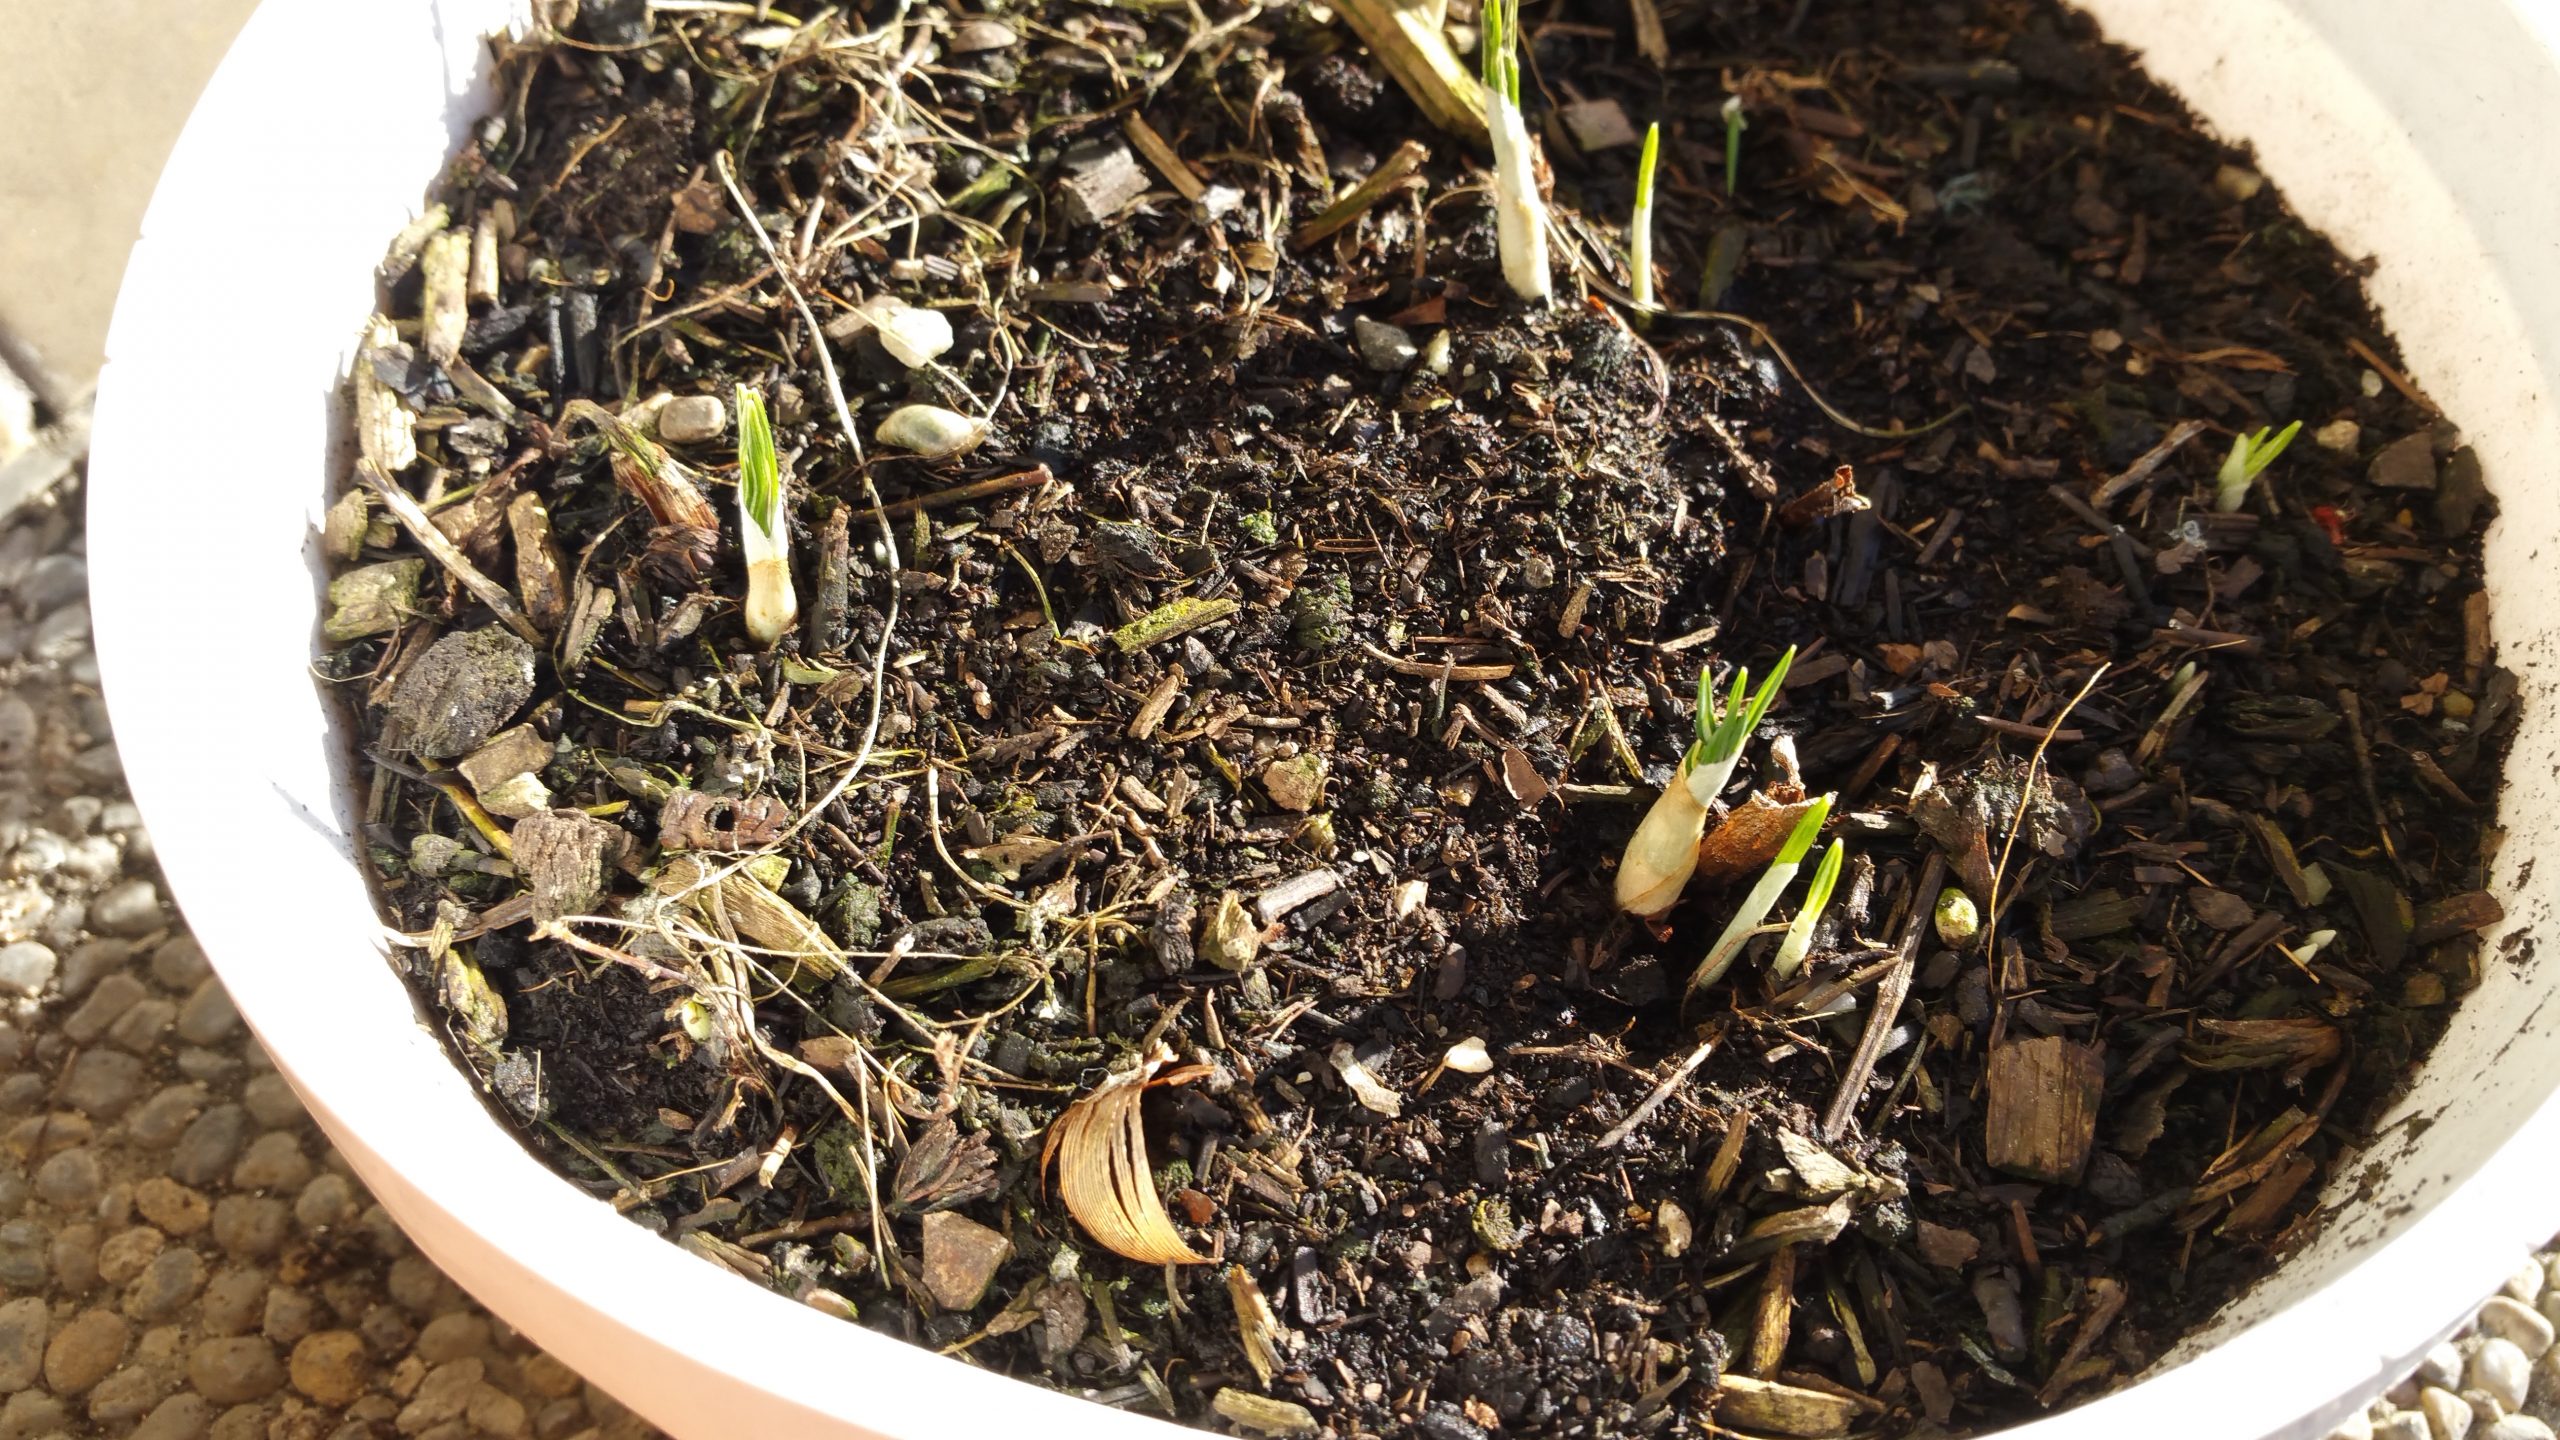
The last weeks I observed my lasagna pot closely.
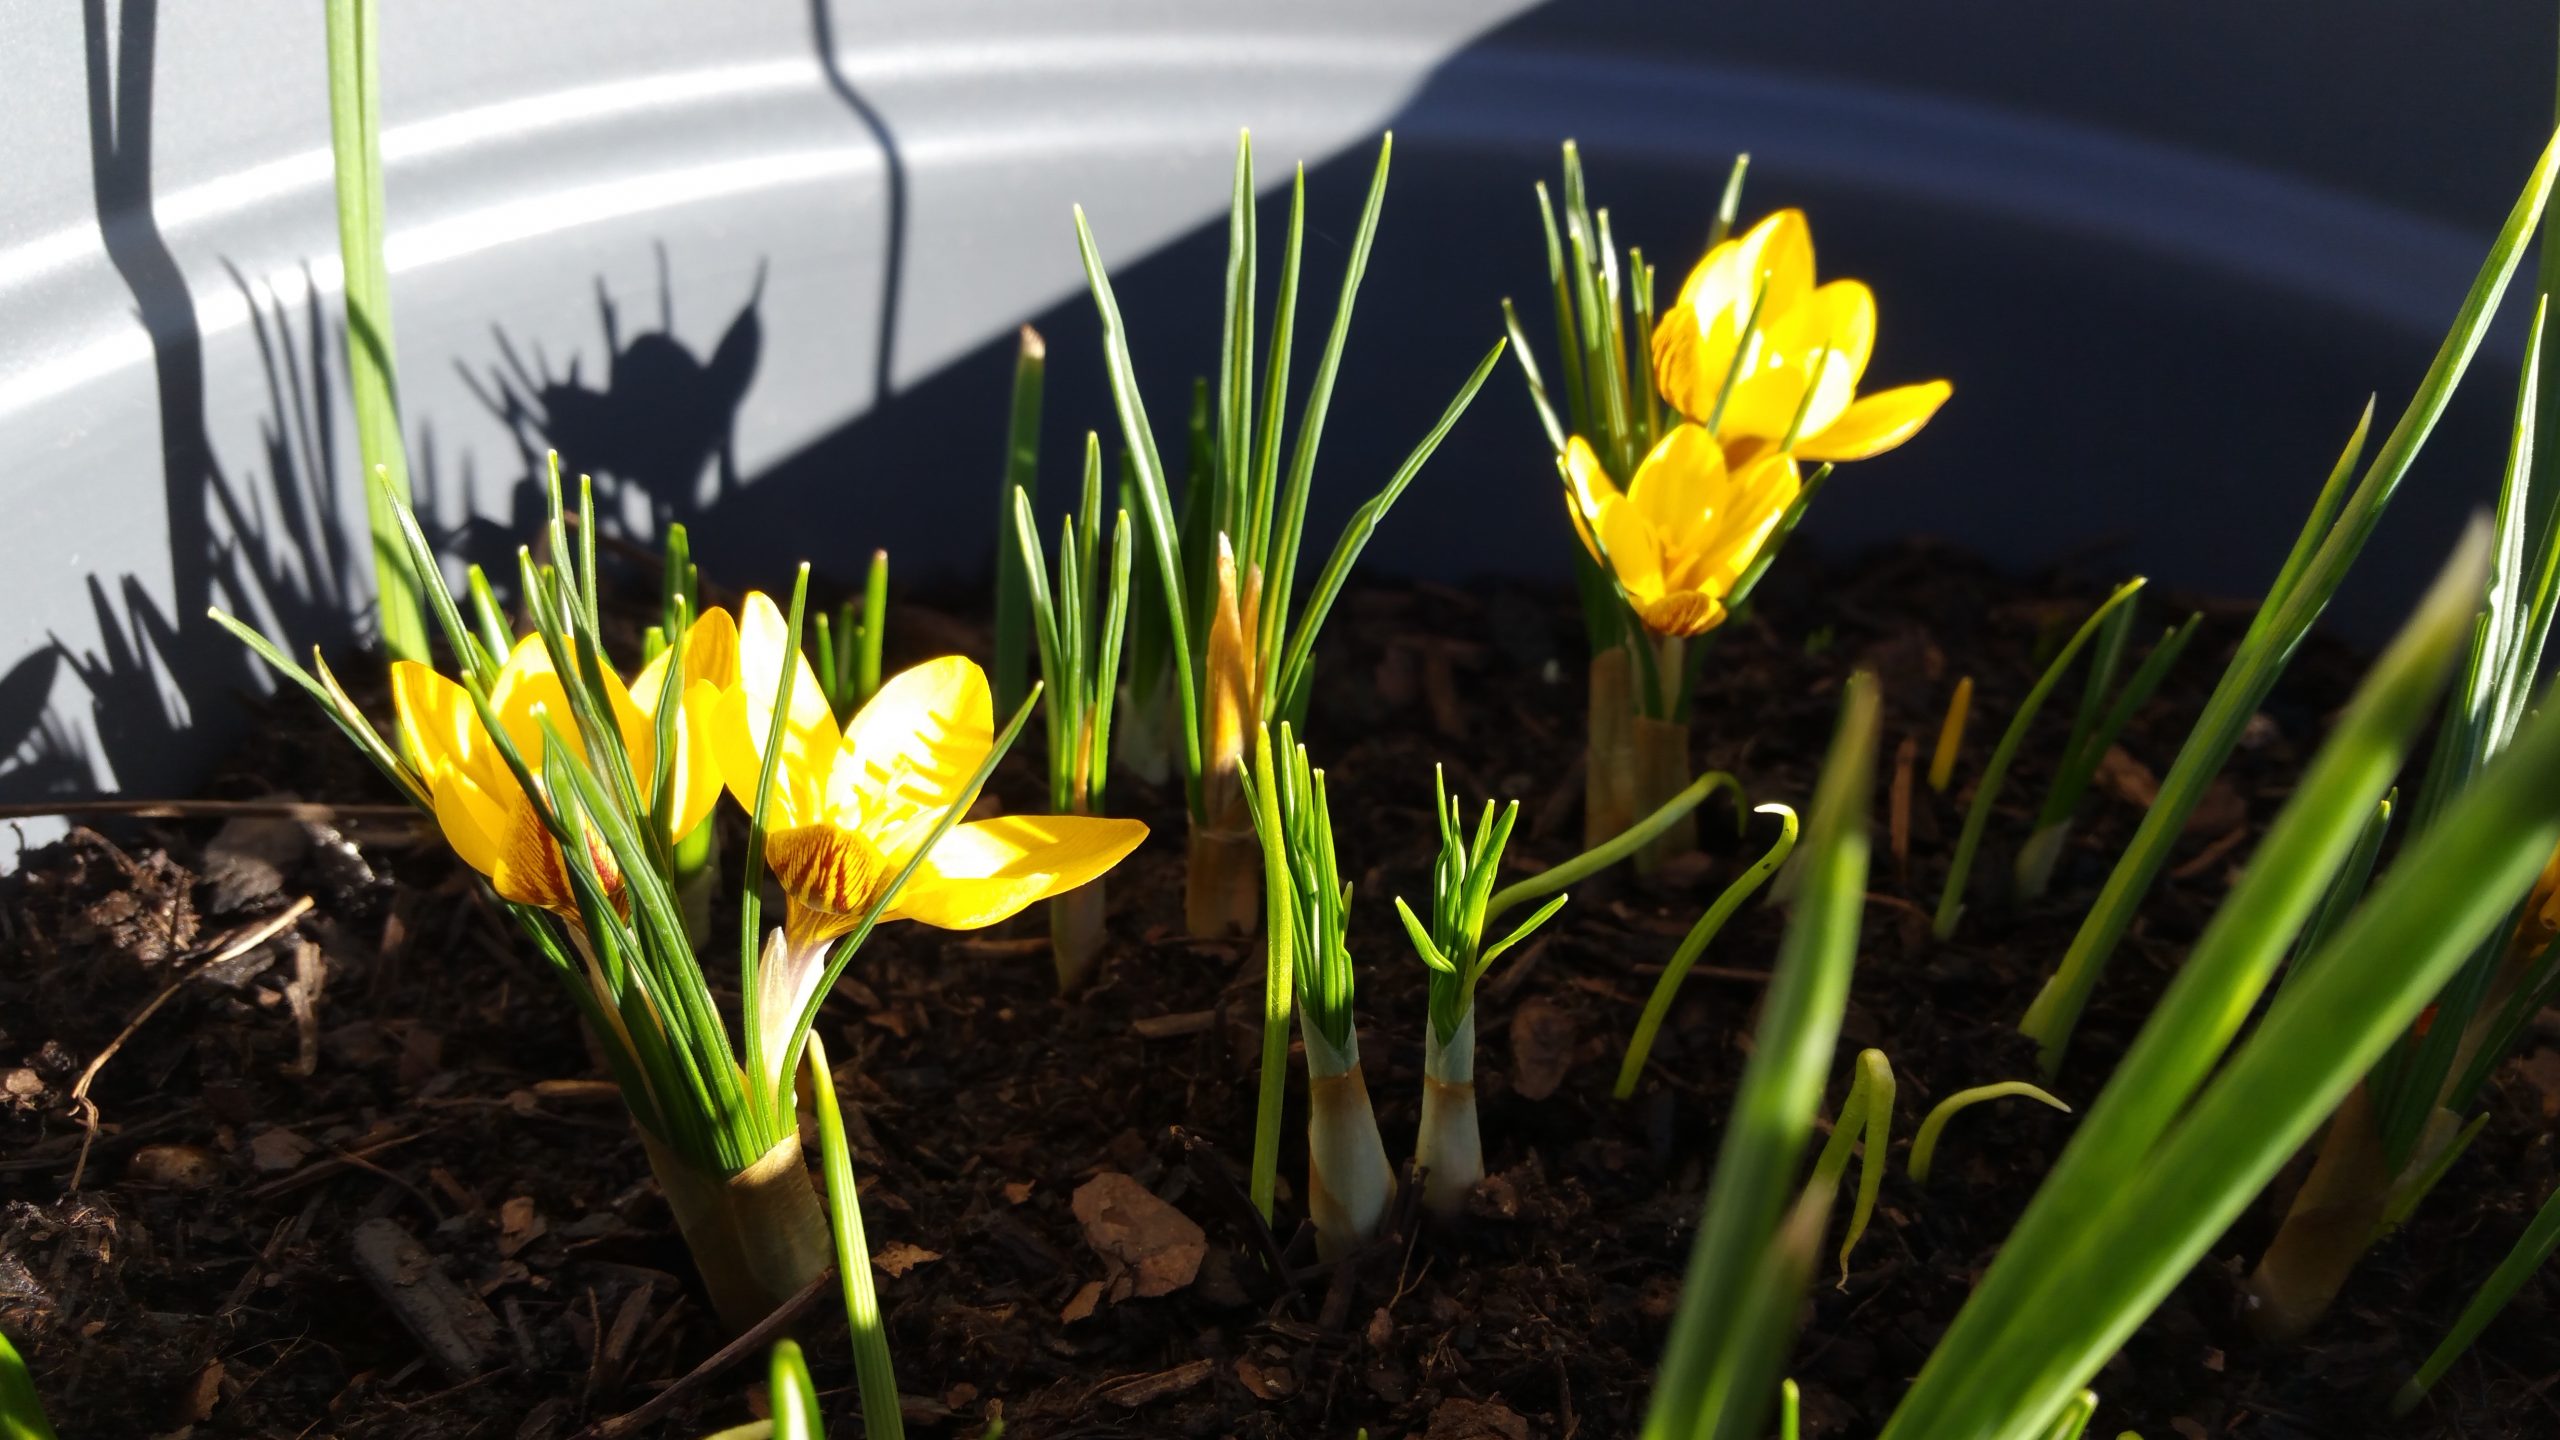
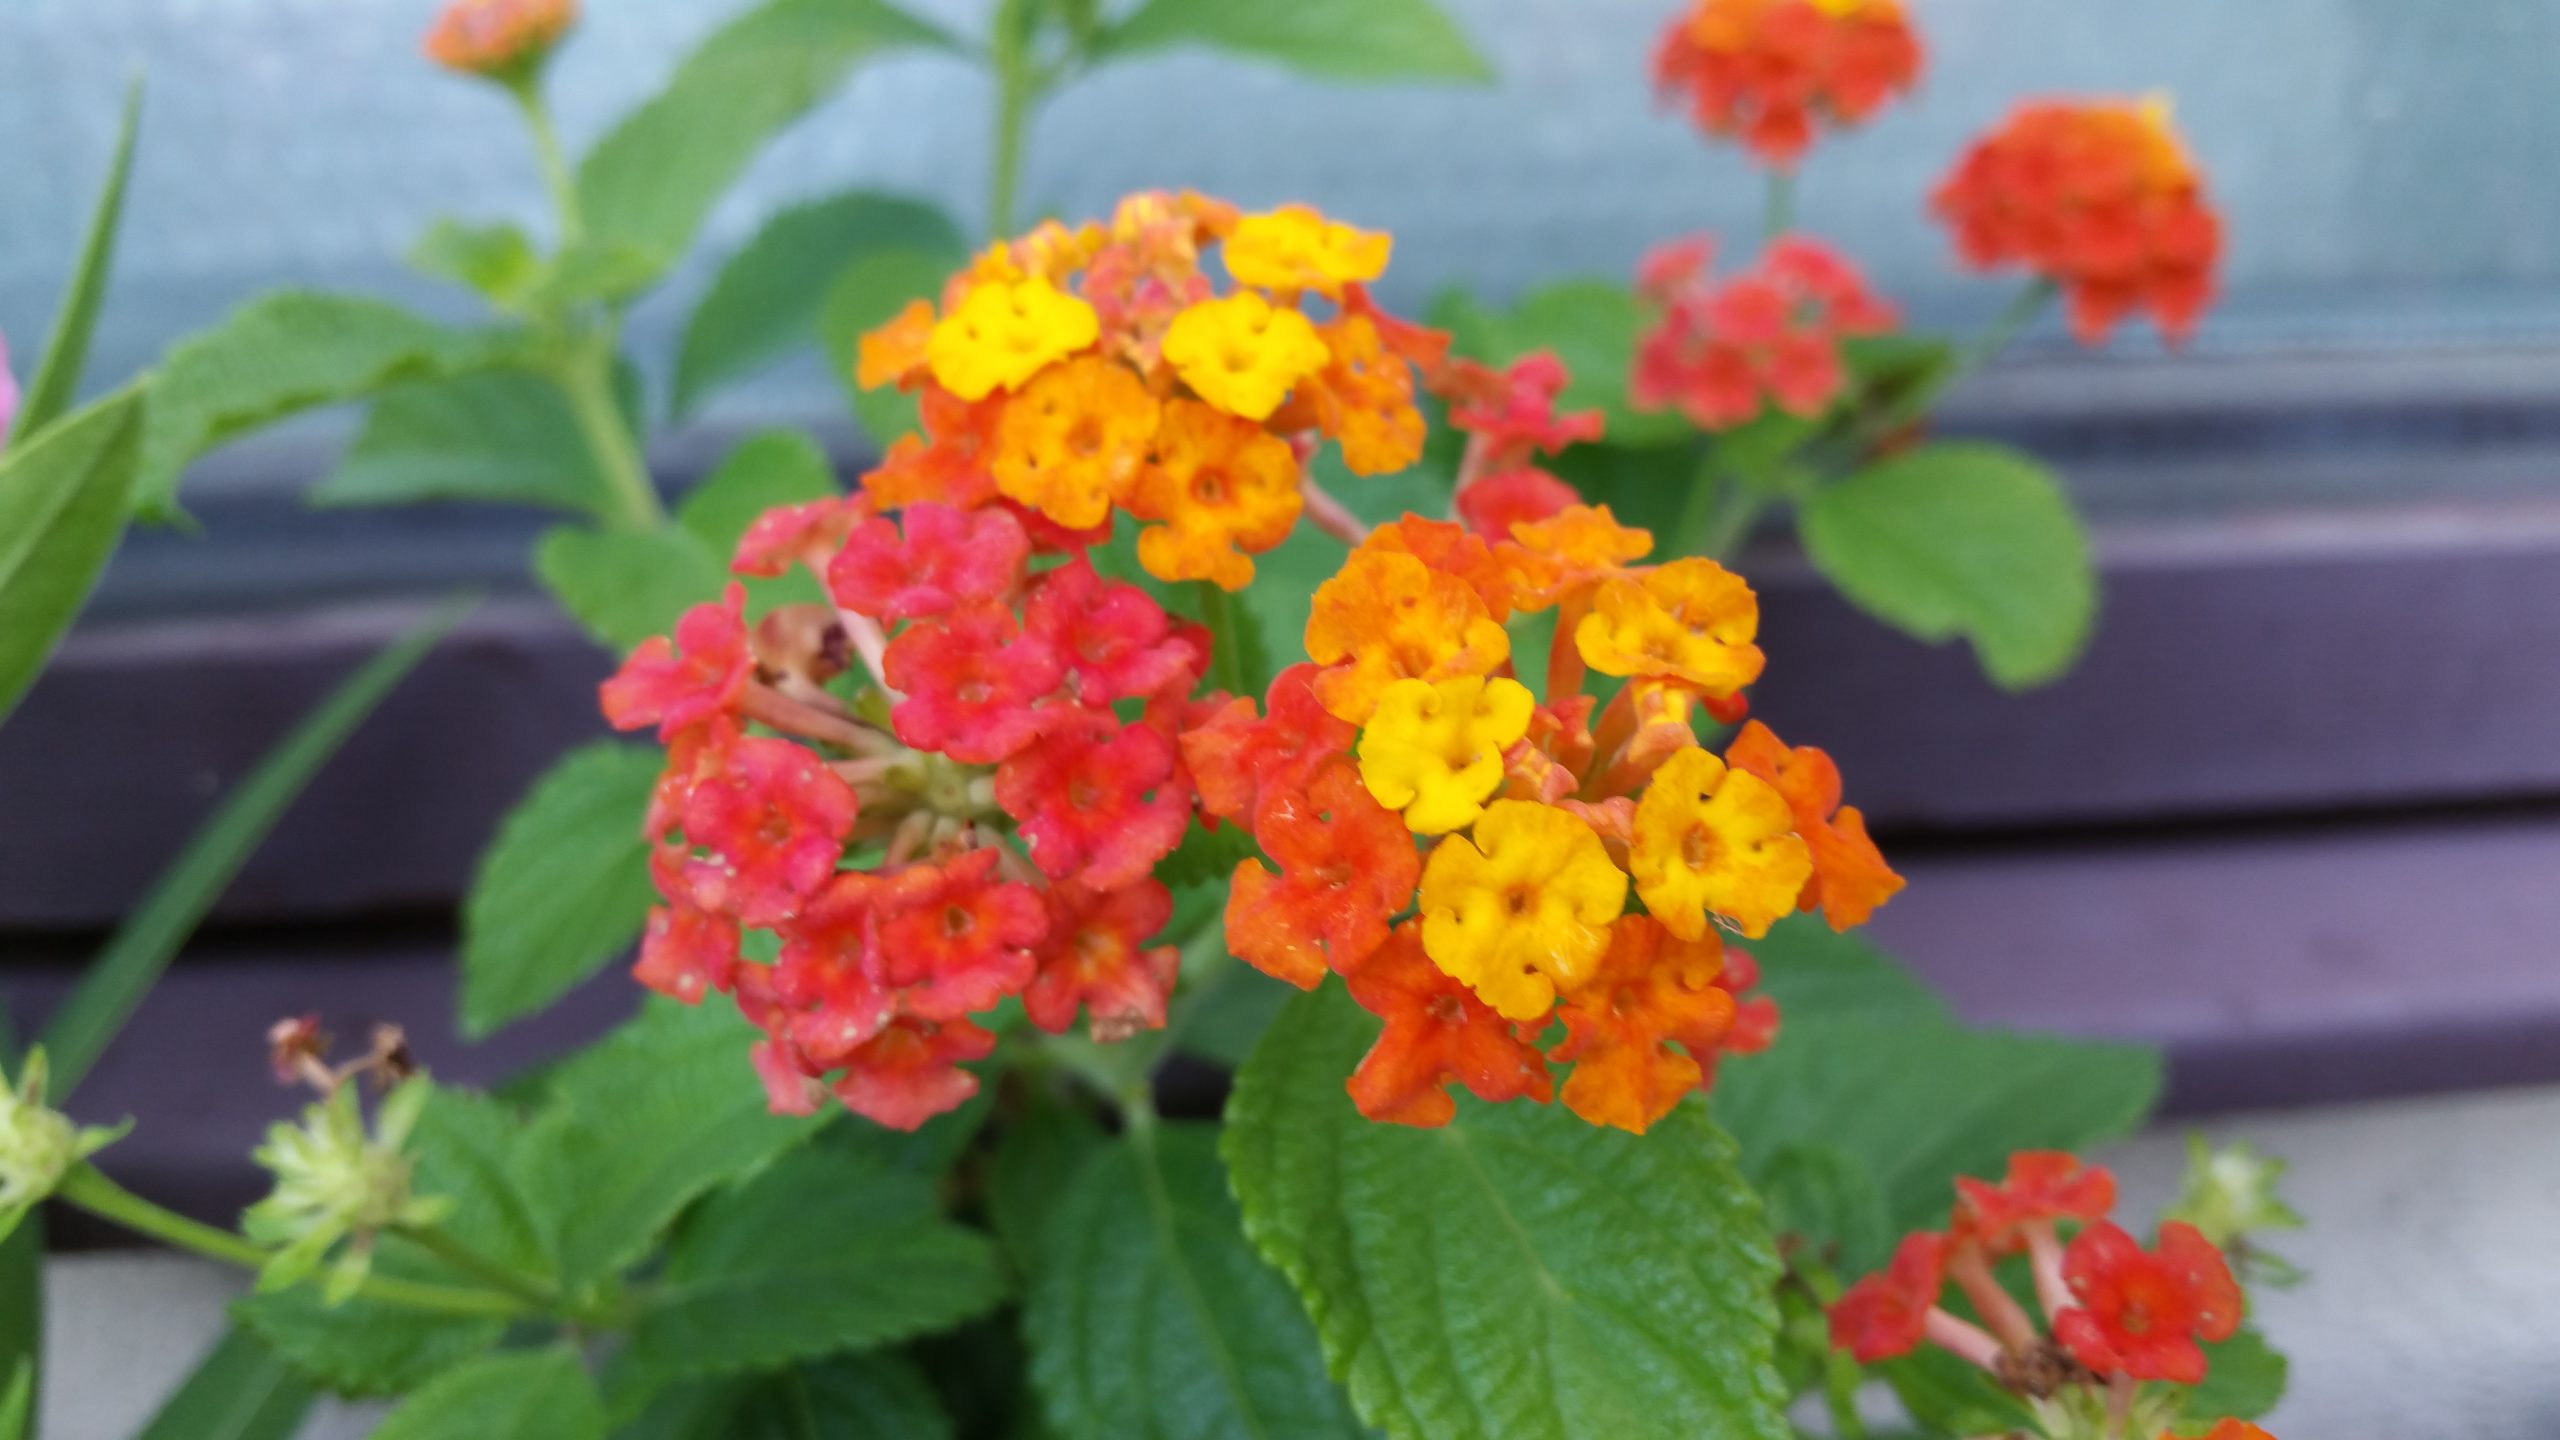
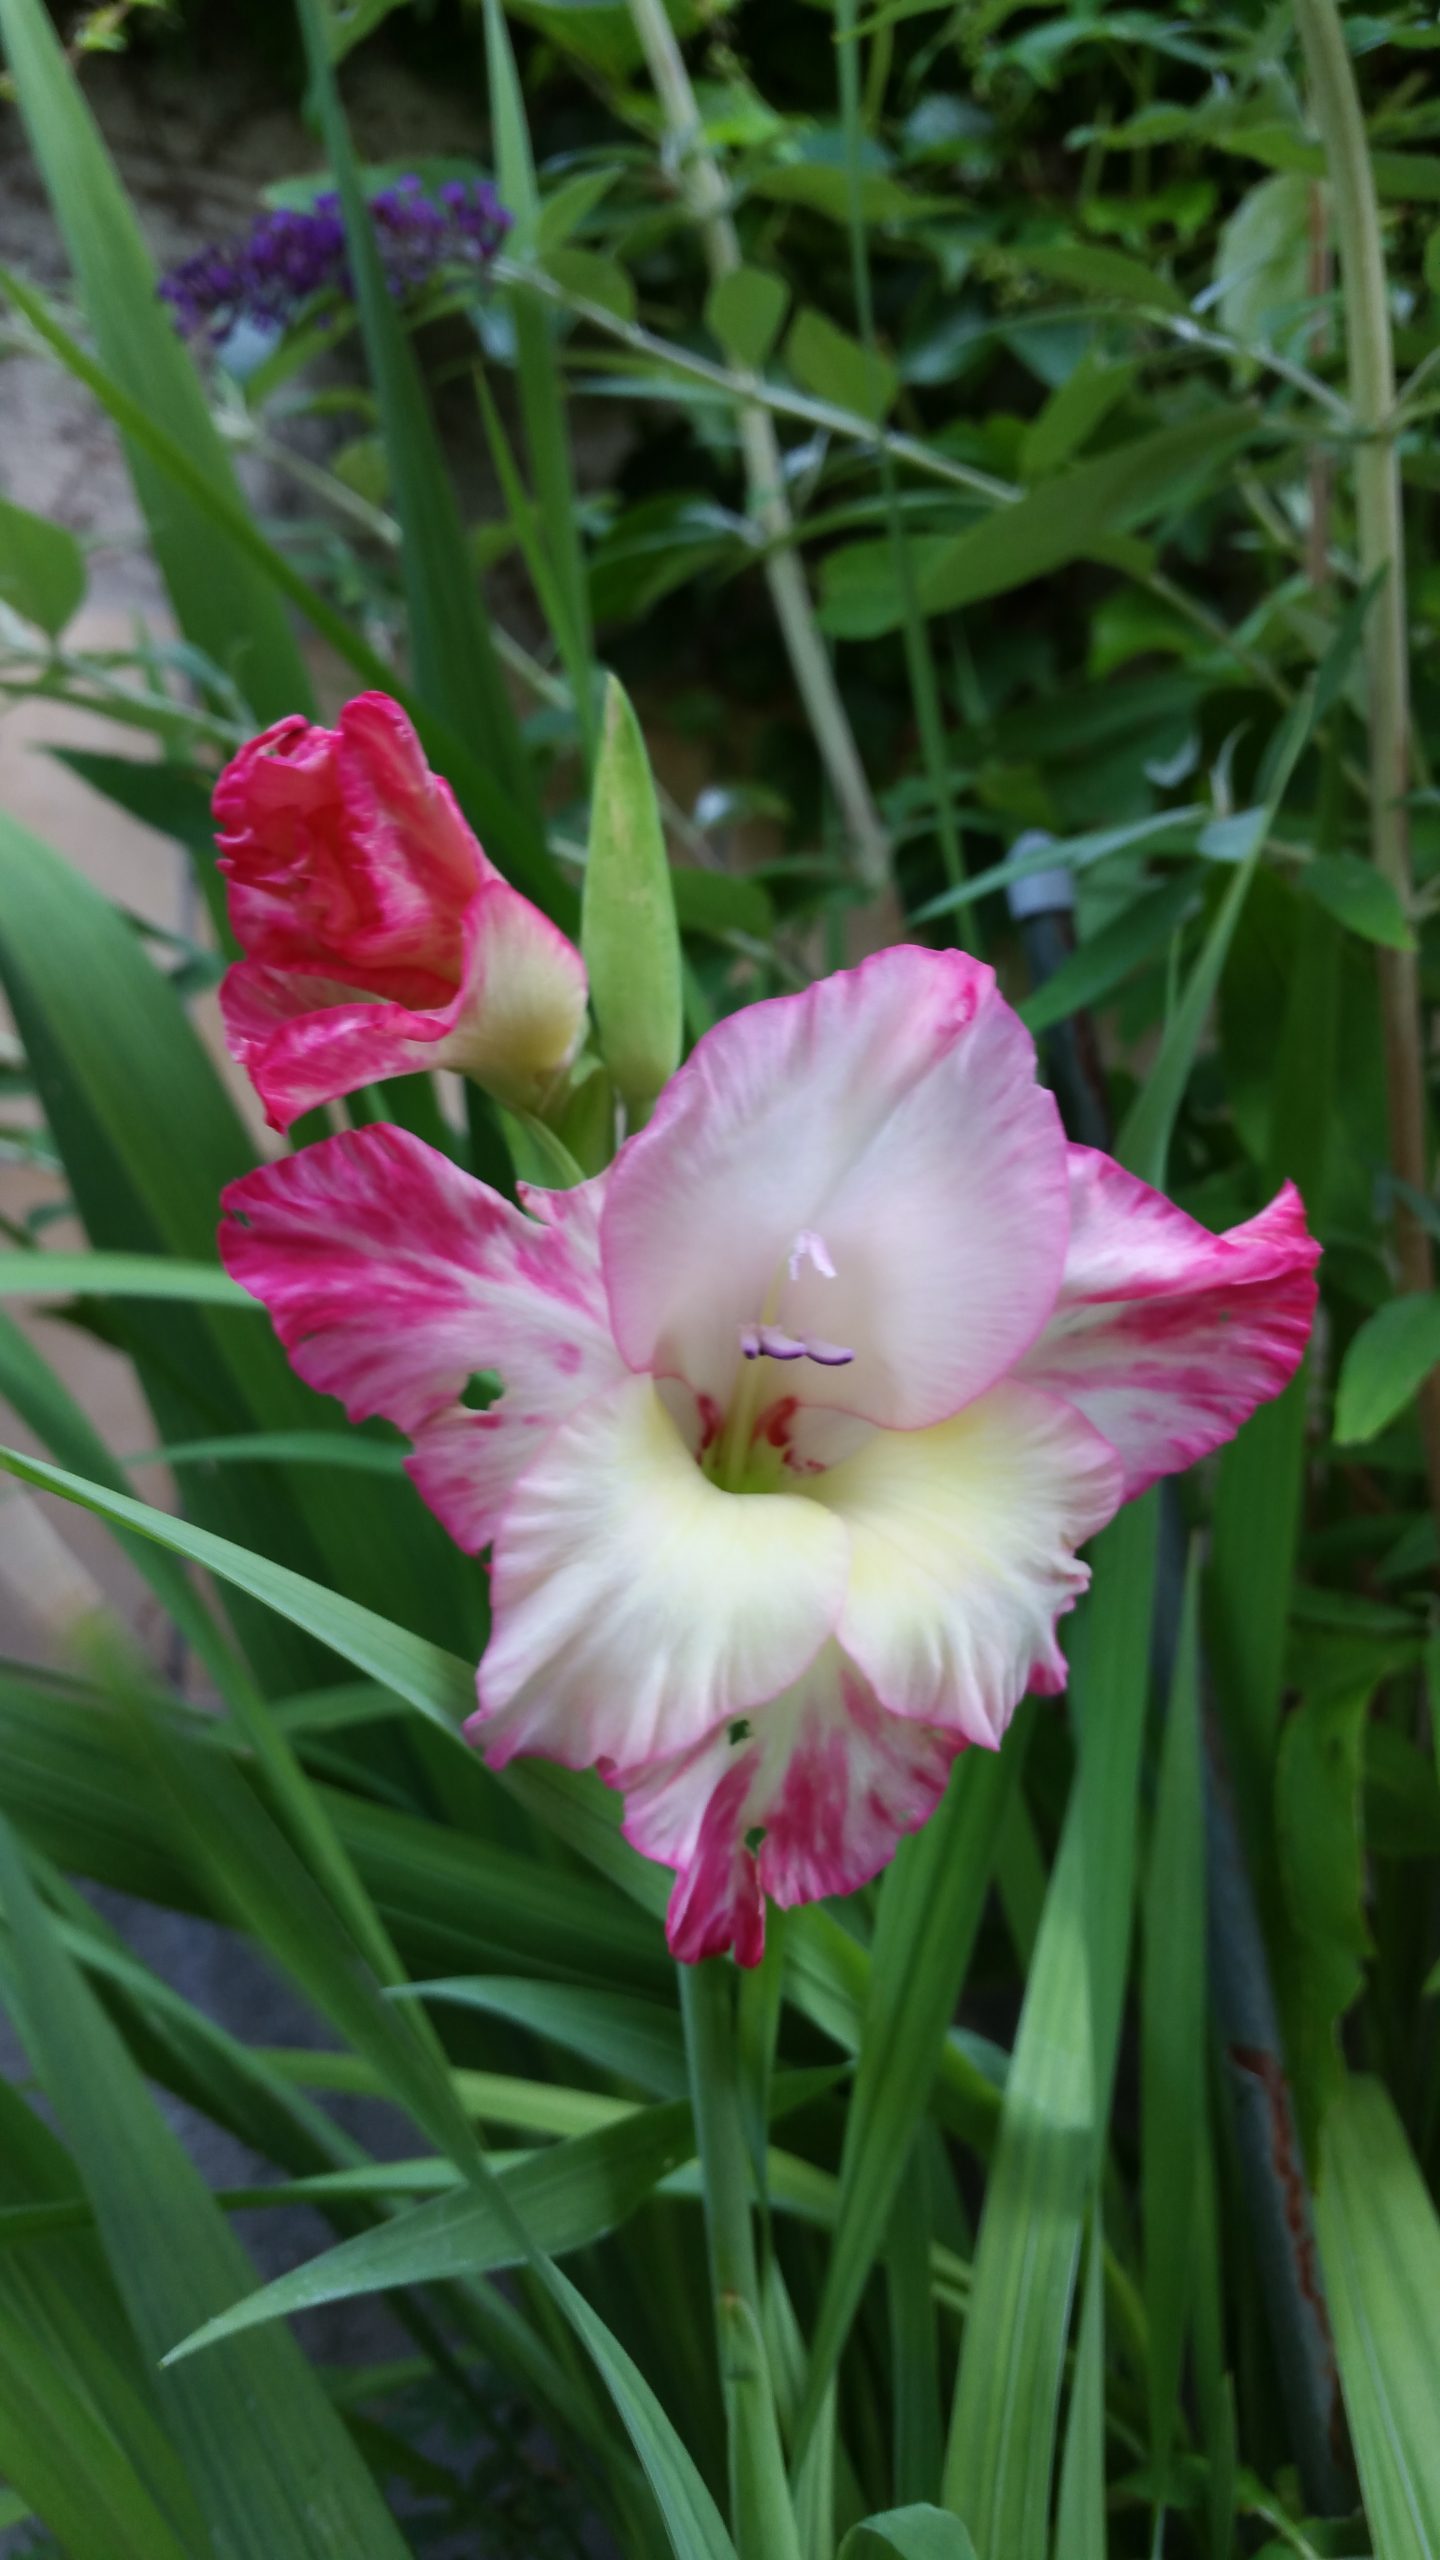
And the first crocuses are now in full bloom.
What the hell is a lasagna pot??
Well, it is a technique to plant various kinds of bulbs of plants into one pot, in layers – that can save a lot of space.
They bloom at different times.
So when the first plants have finished blooming, the next group starts to take over and so on.

From bottom to top above the potsherds: tulips – daffodils – crocuses.
After finding the right pot – it should be high enough to hold the different layers and also be big enough for all the bulbs you plan to put in – you start with some potsherds over the hole or holes at the bottom. This helps on one side to prevent to much soil to fall through the holes and on the other side that too much water can flow off.
Then put in a real good layer of soil.
Now come the bulbs that have the latest blooming time.
In my case it were tulips which are supposed to bloom somewhere in May or June.
Then you pack another layer of soil on it.
Now you arrange some more bulbs – this time with a blooming time that comes before the tulips – in my case narcisses.
They should bloom somewhere from March to April.
Keep in mind that it helps to put these bulbs a little shifted and not exactly on top of the ones below. In that way the saplings can grow more easily to the top.
Then again comes a layer of soil.
And on the top you put the bulbs with the earliest blooming time – here I used the crocuses with a predicted bloom in March.
Of course you can also make 4 layers, but I thought I try 3 for the first time and see if it works 😉
Here I want to show you the development so far……
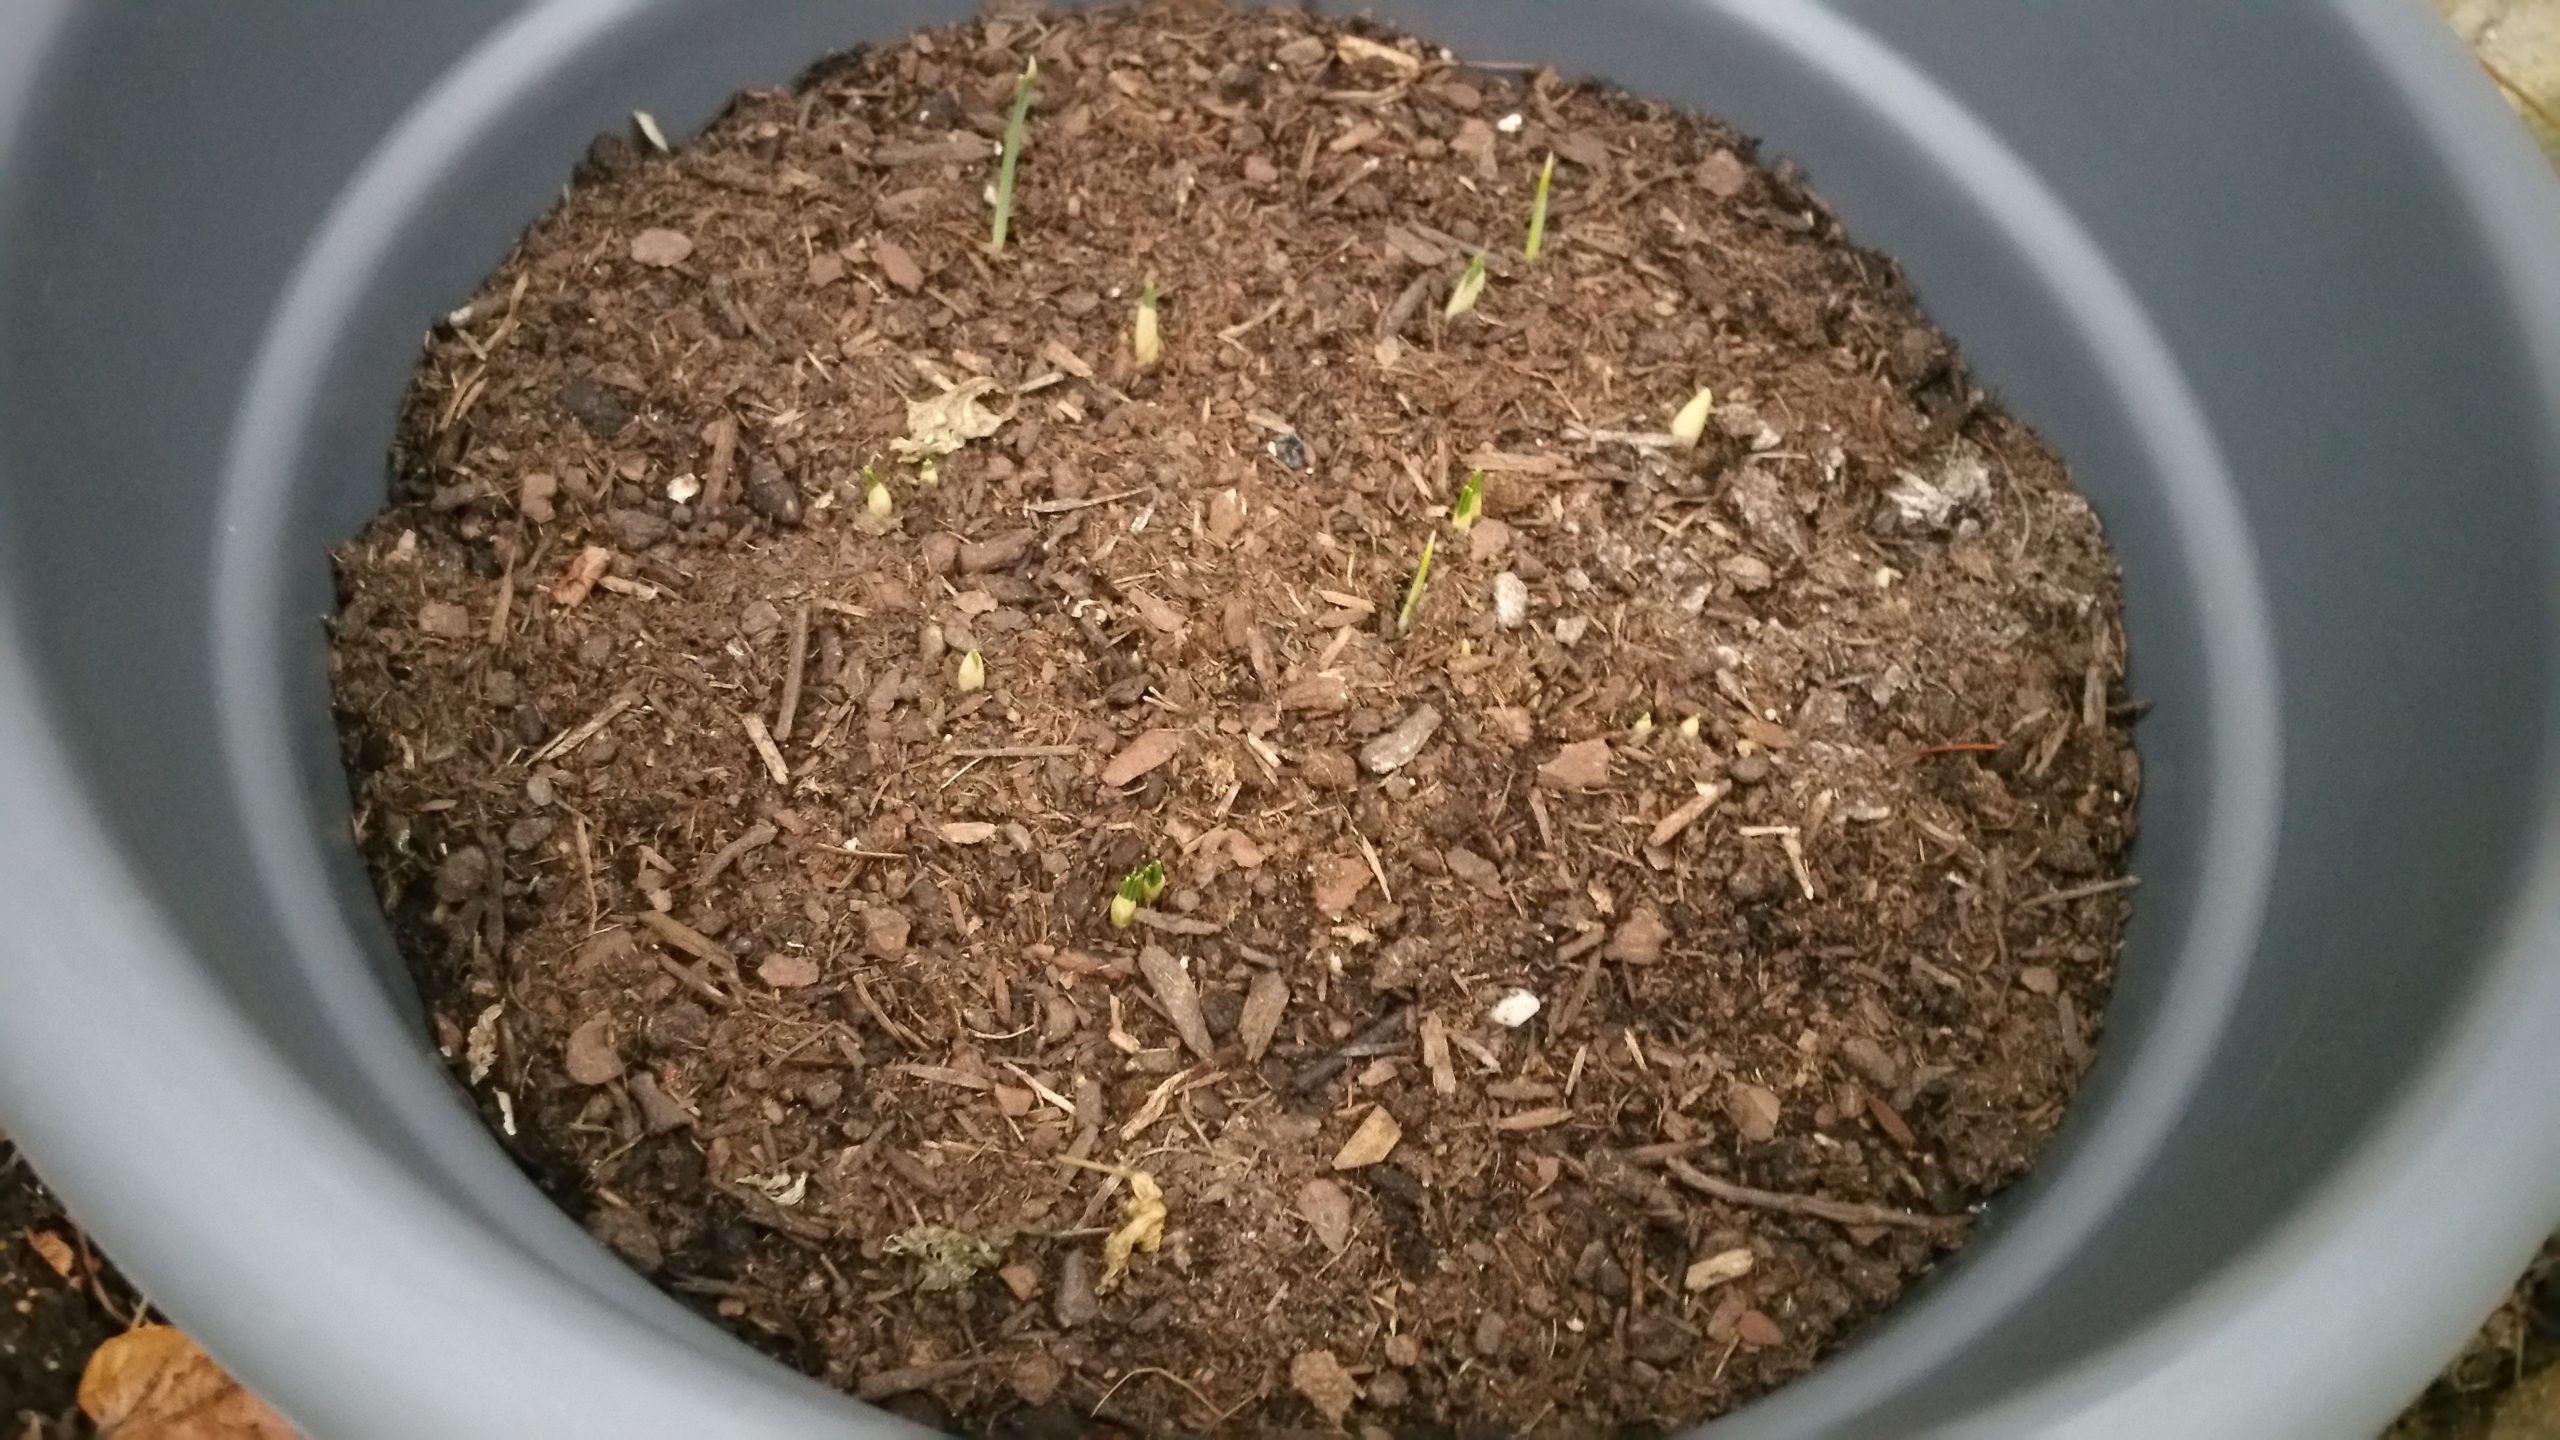

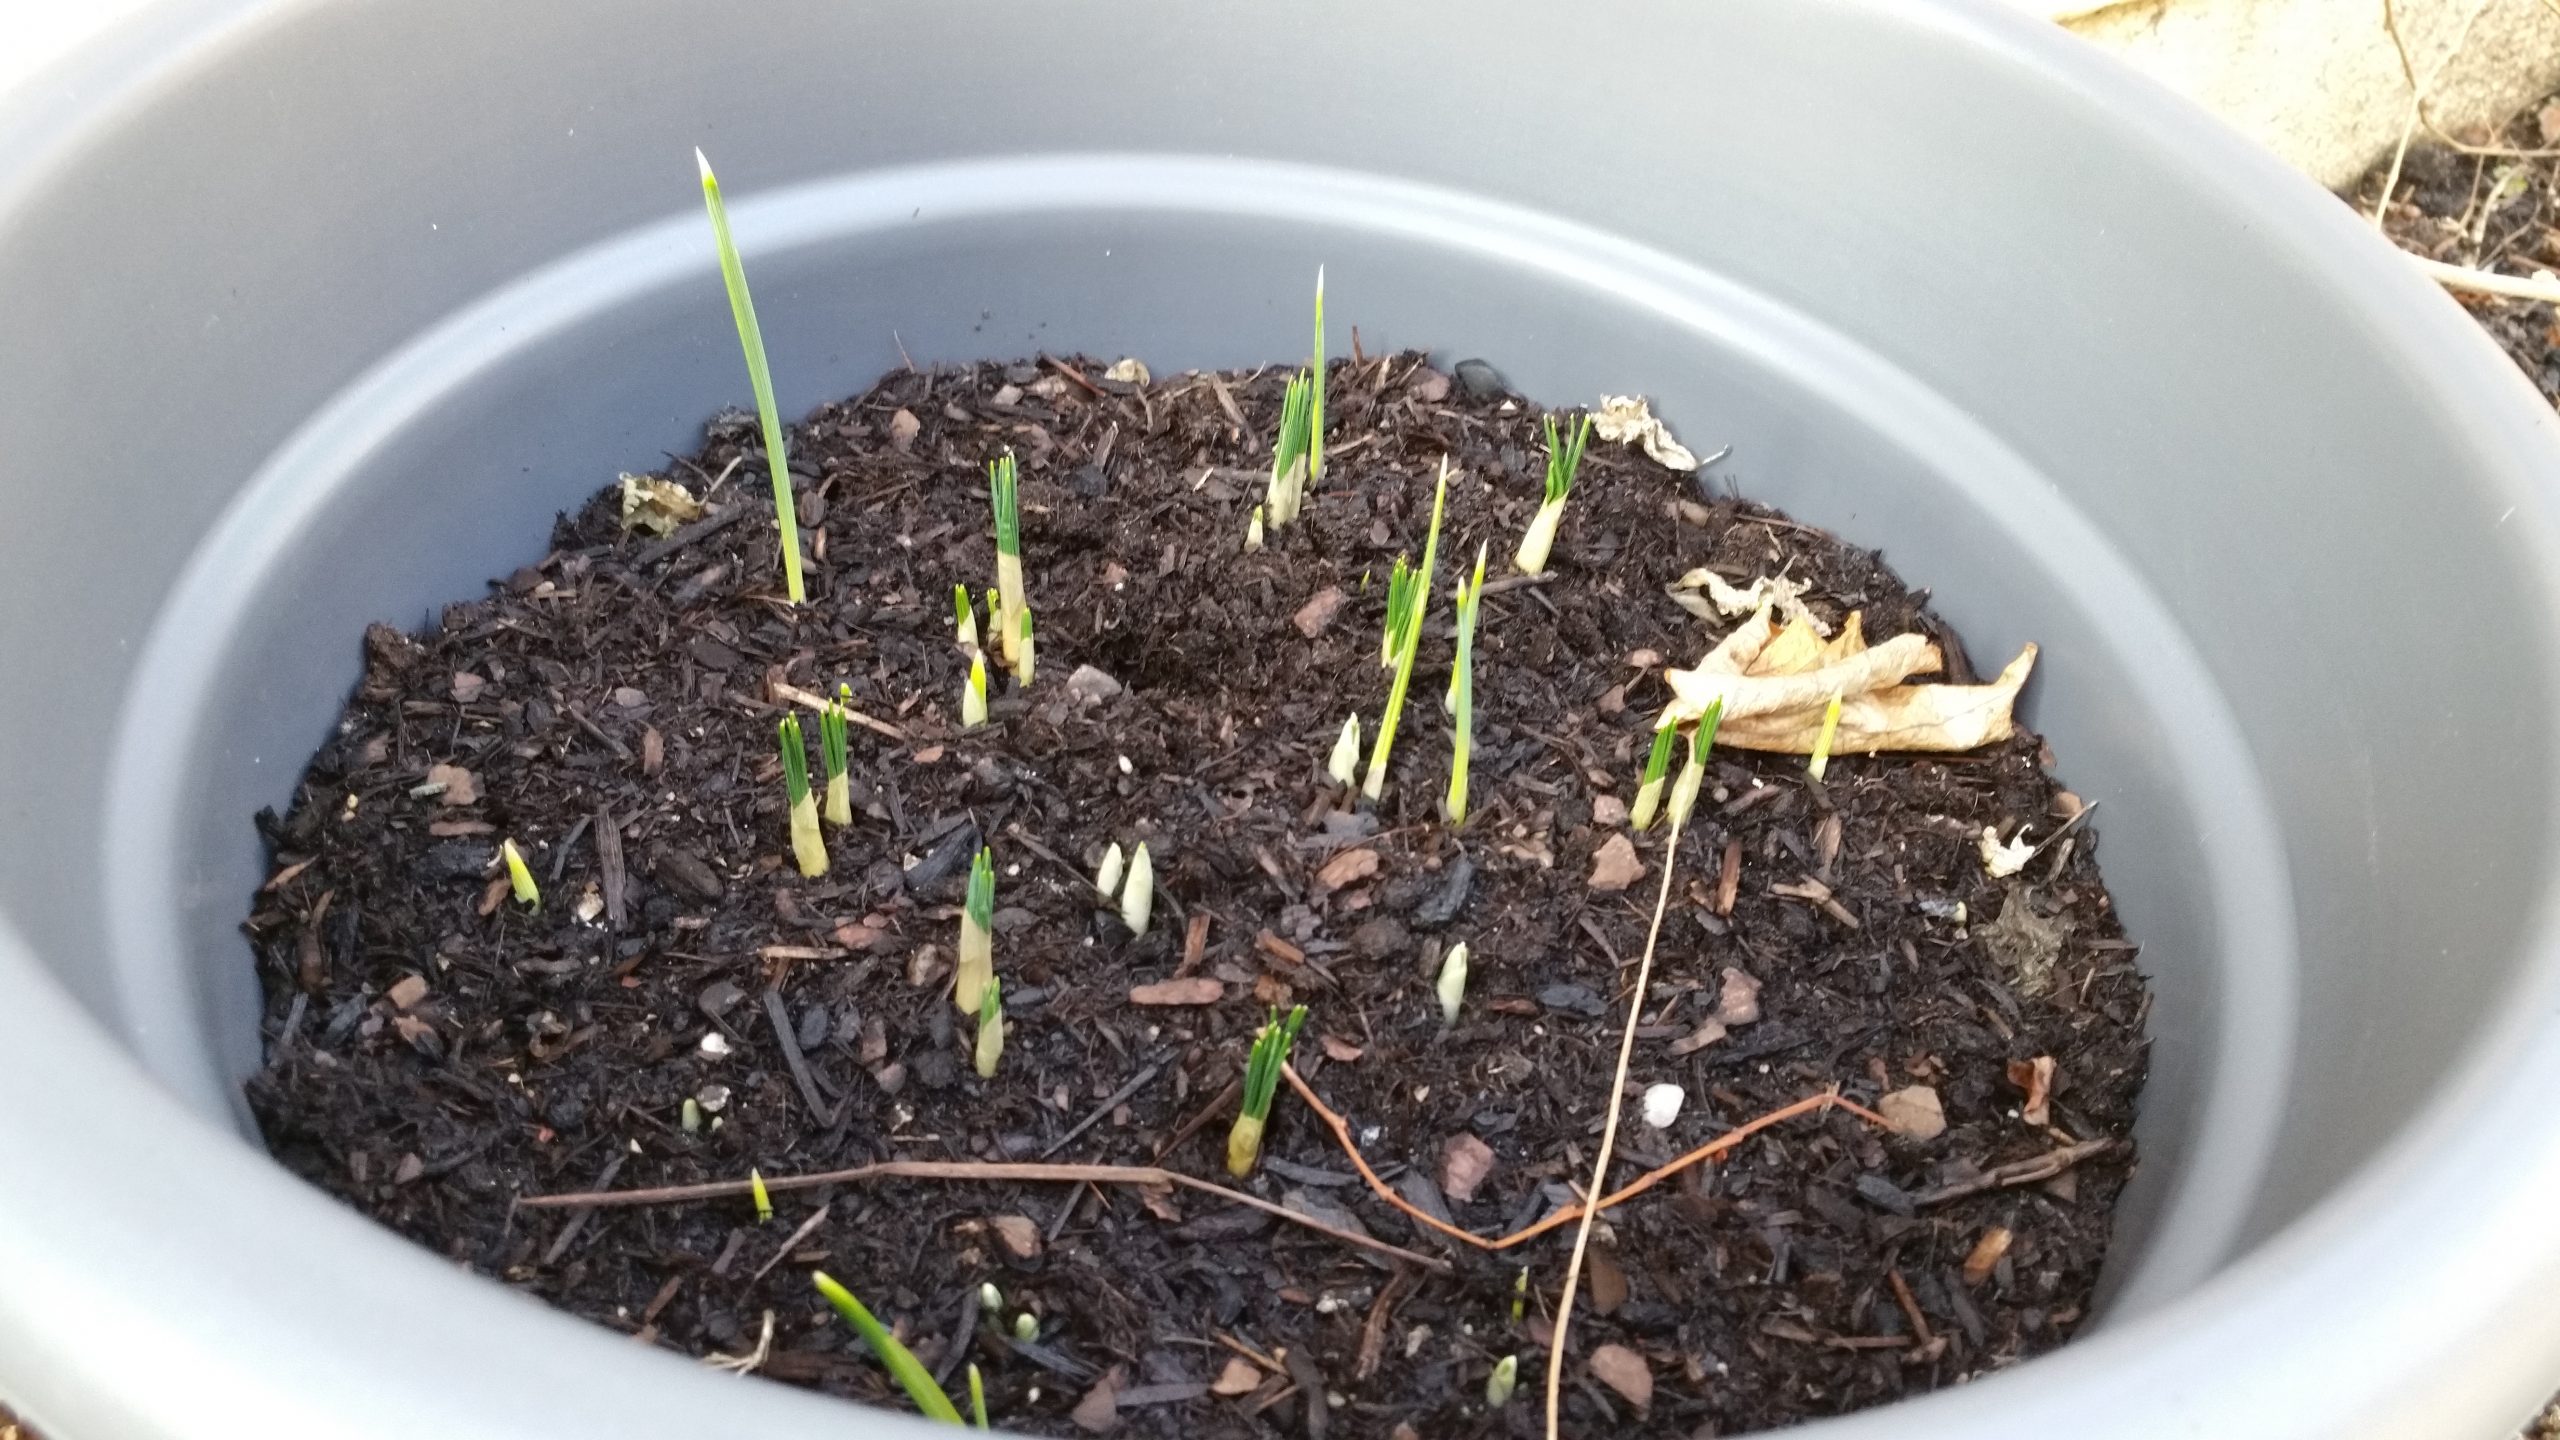

I hope that all the other bulbs will be blooming also ……
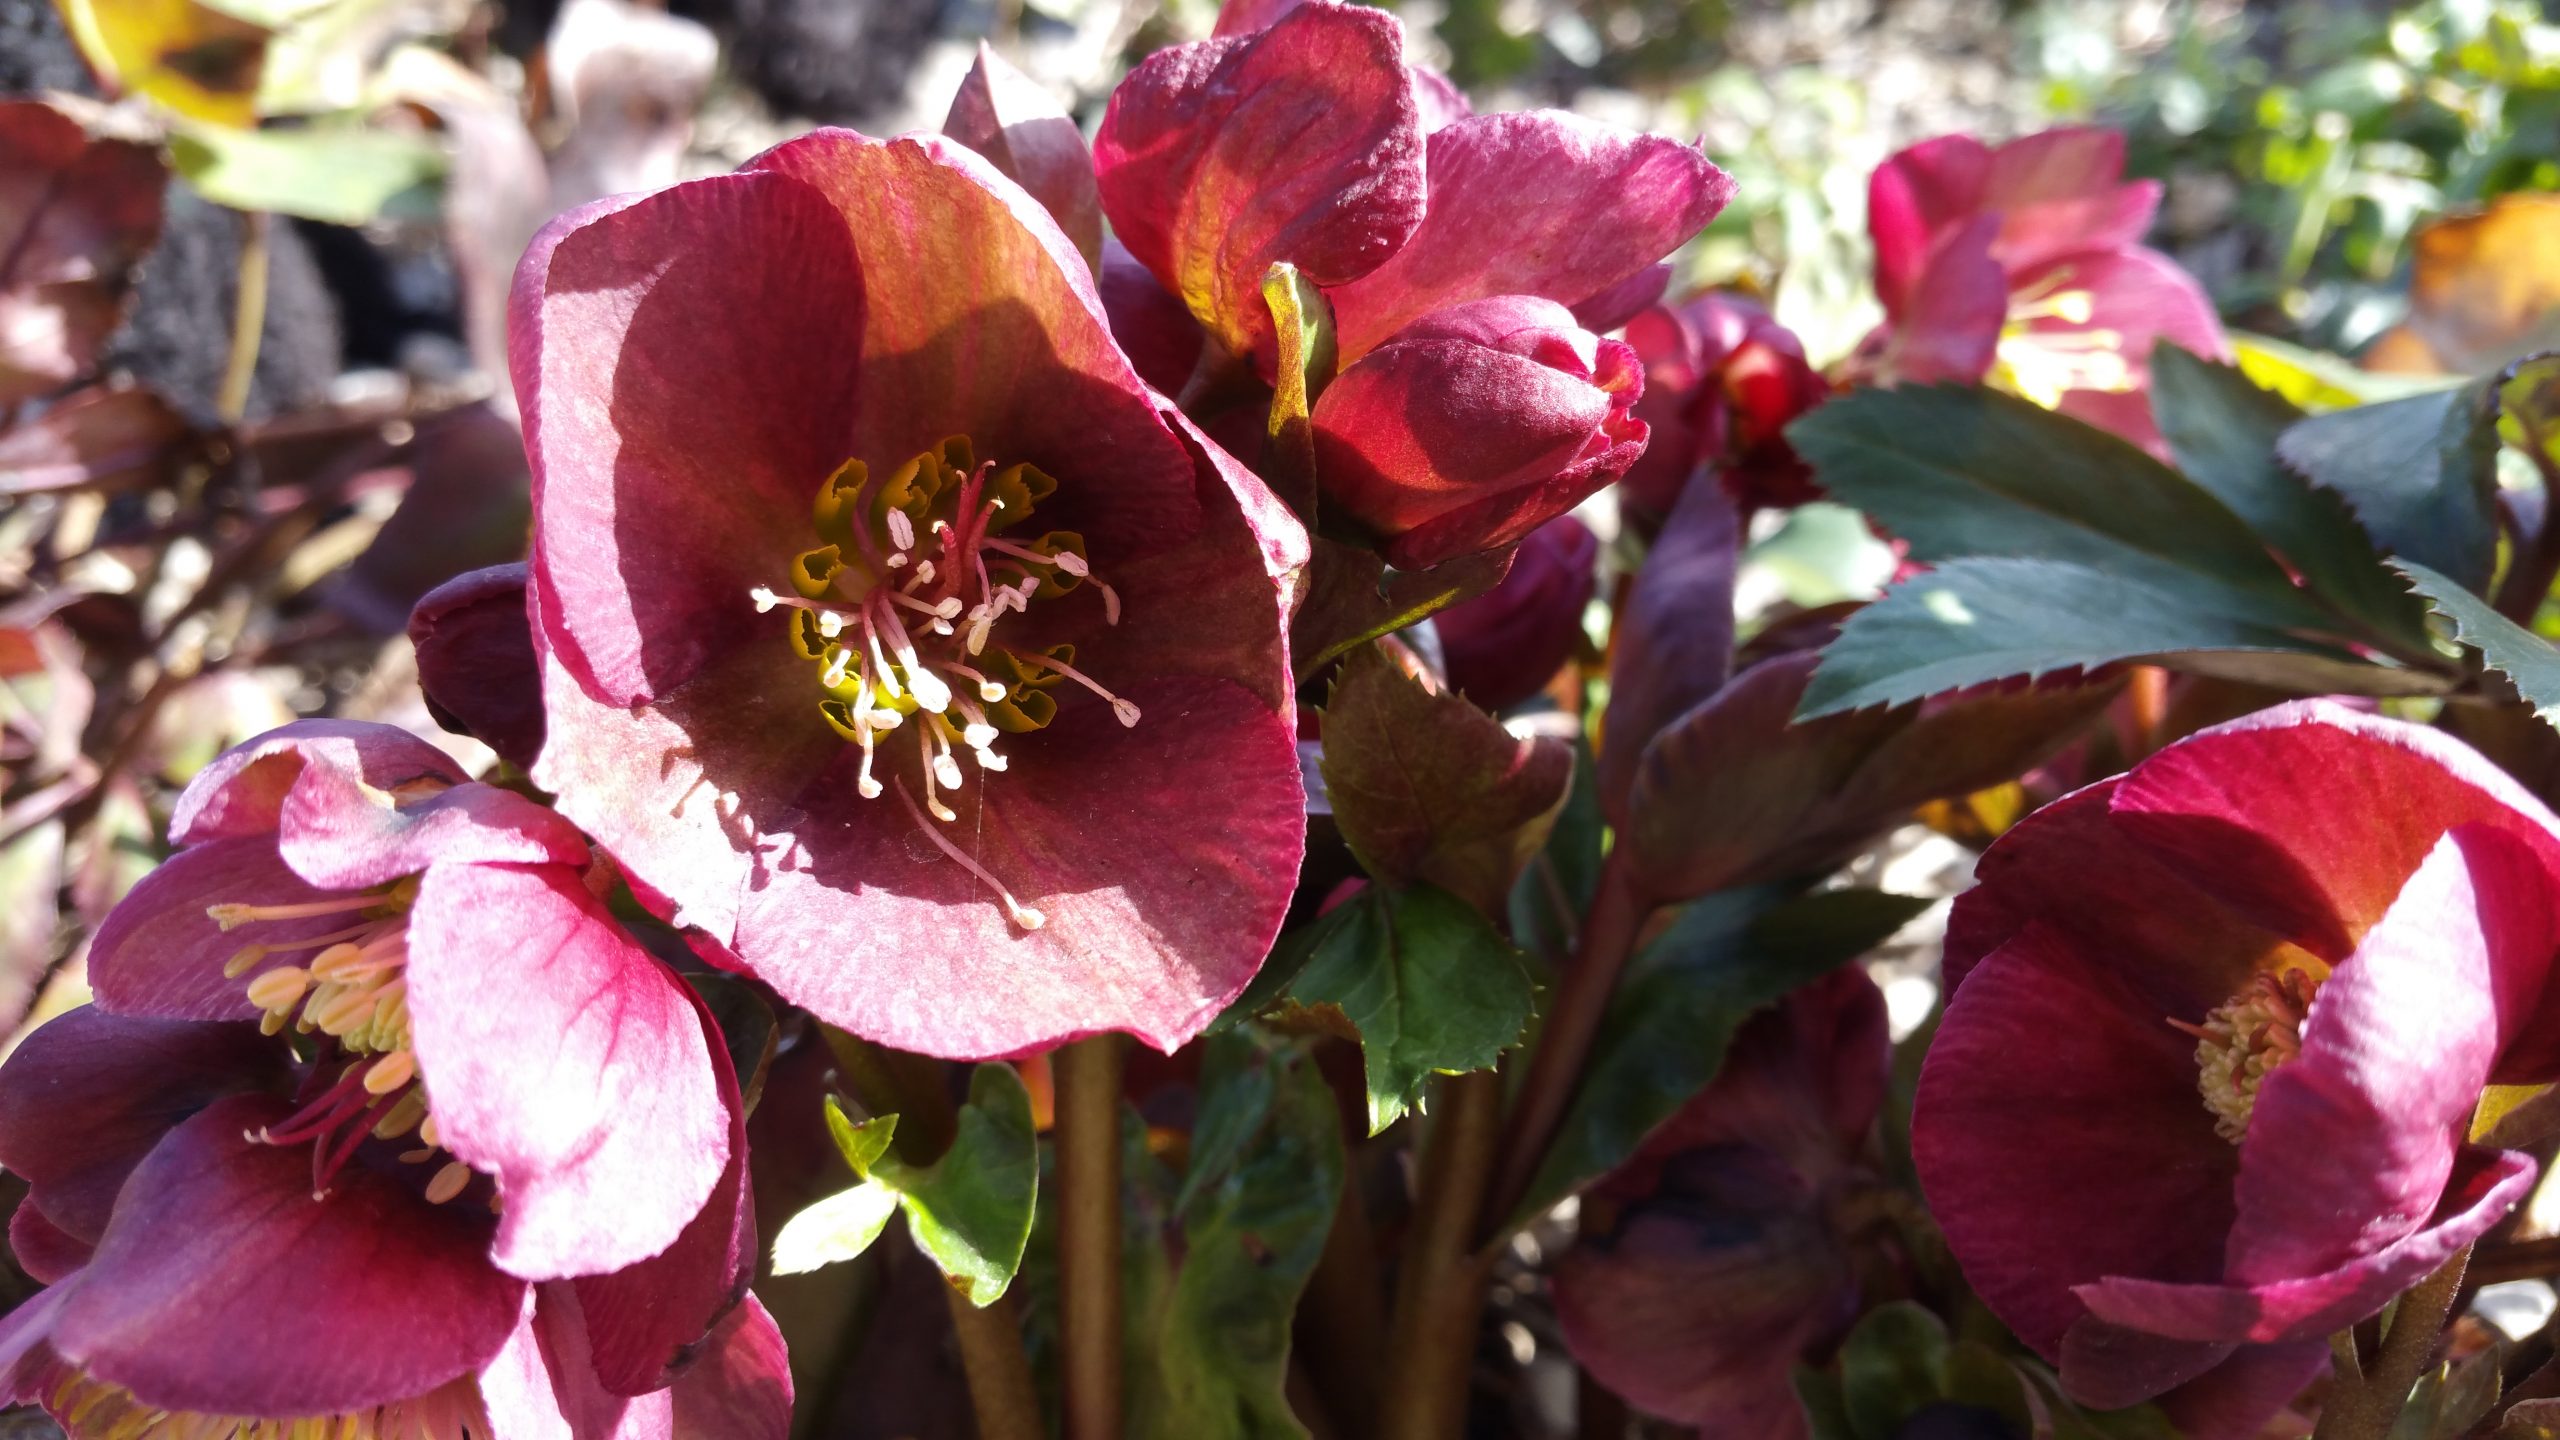
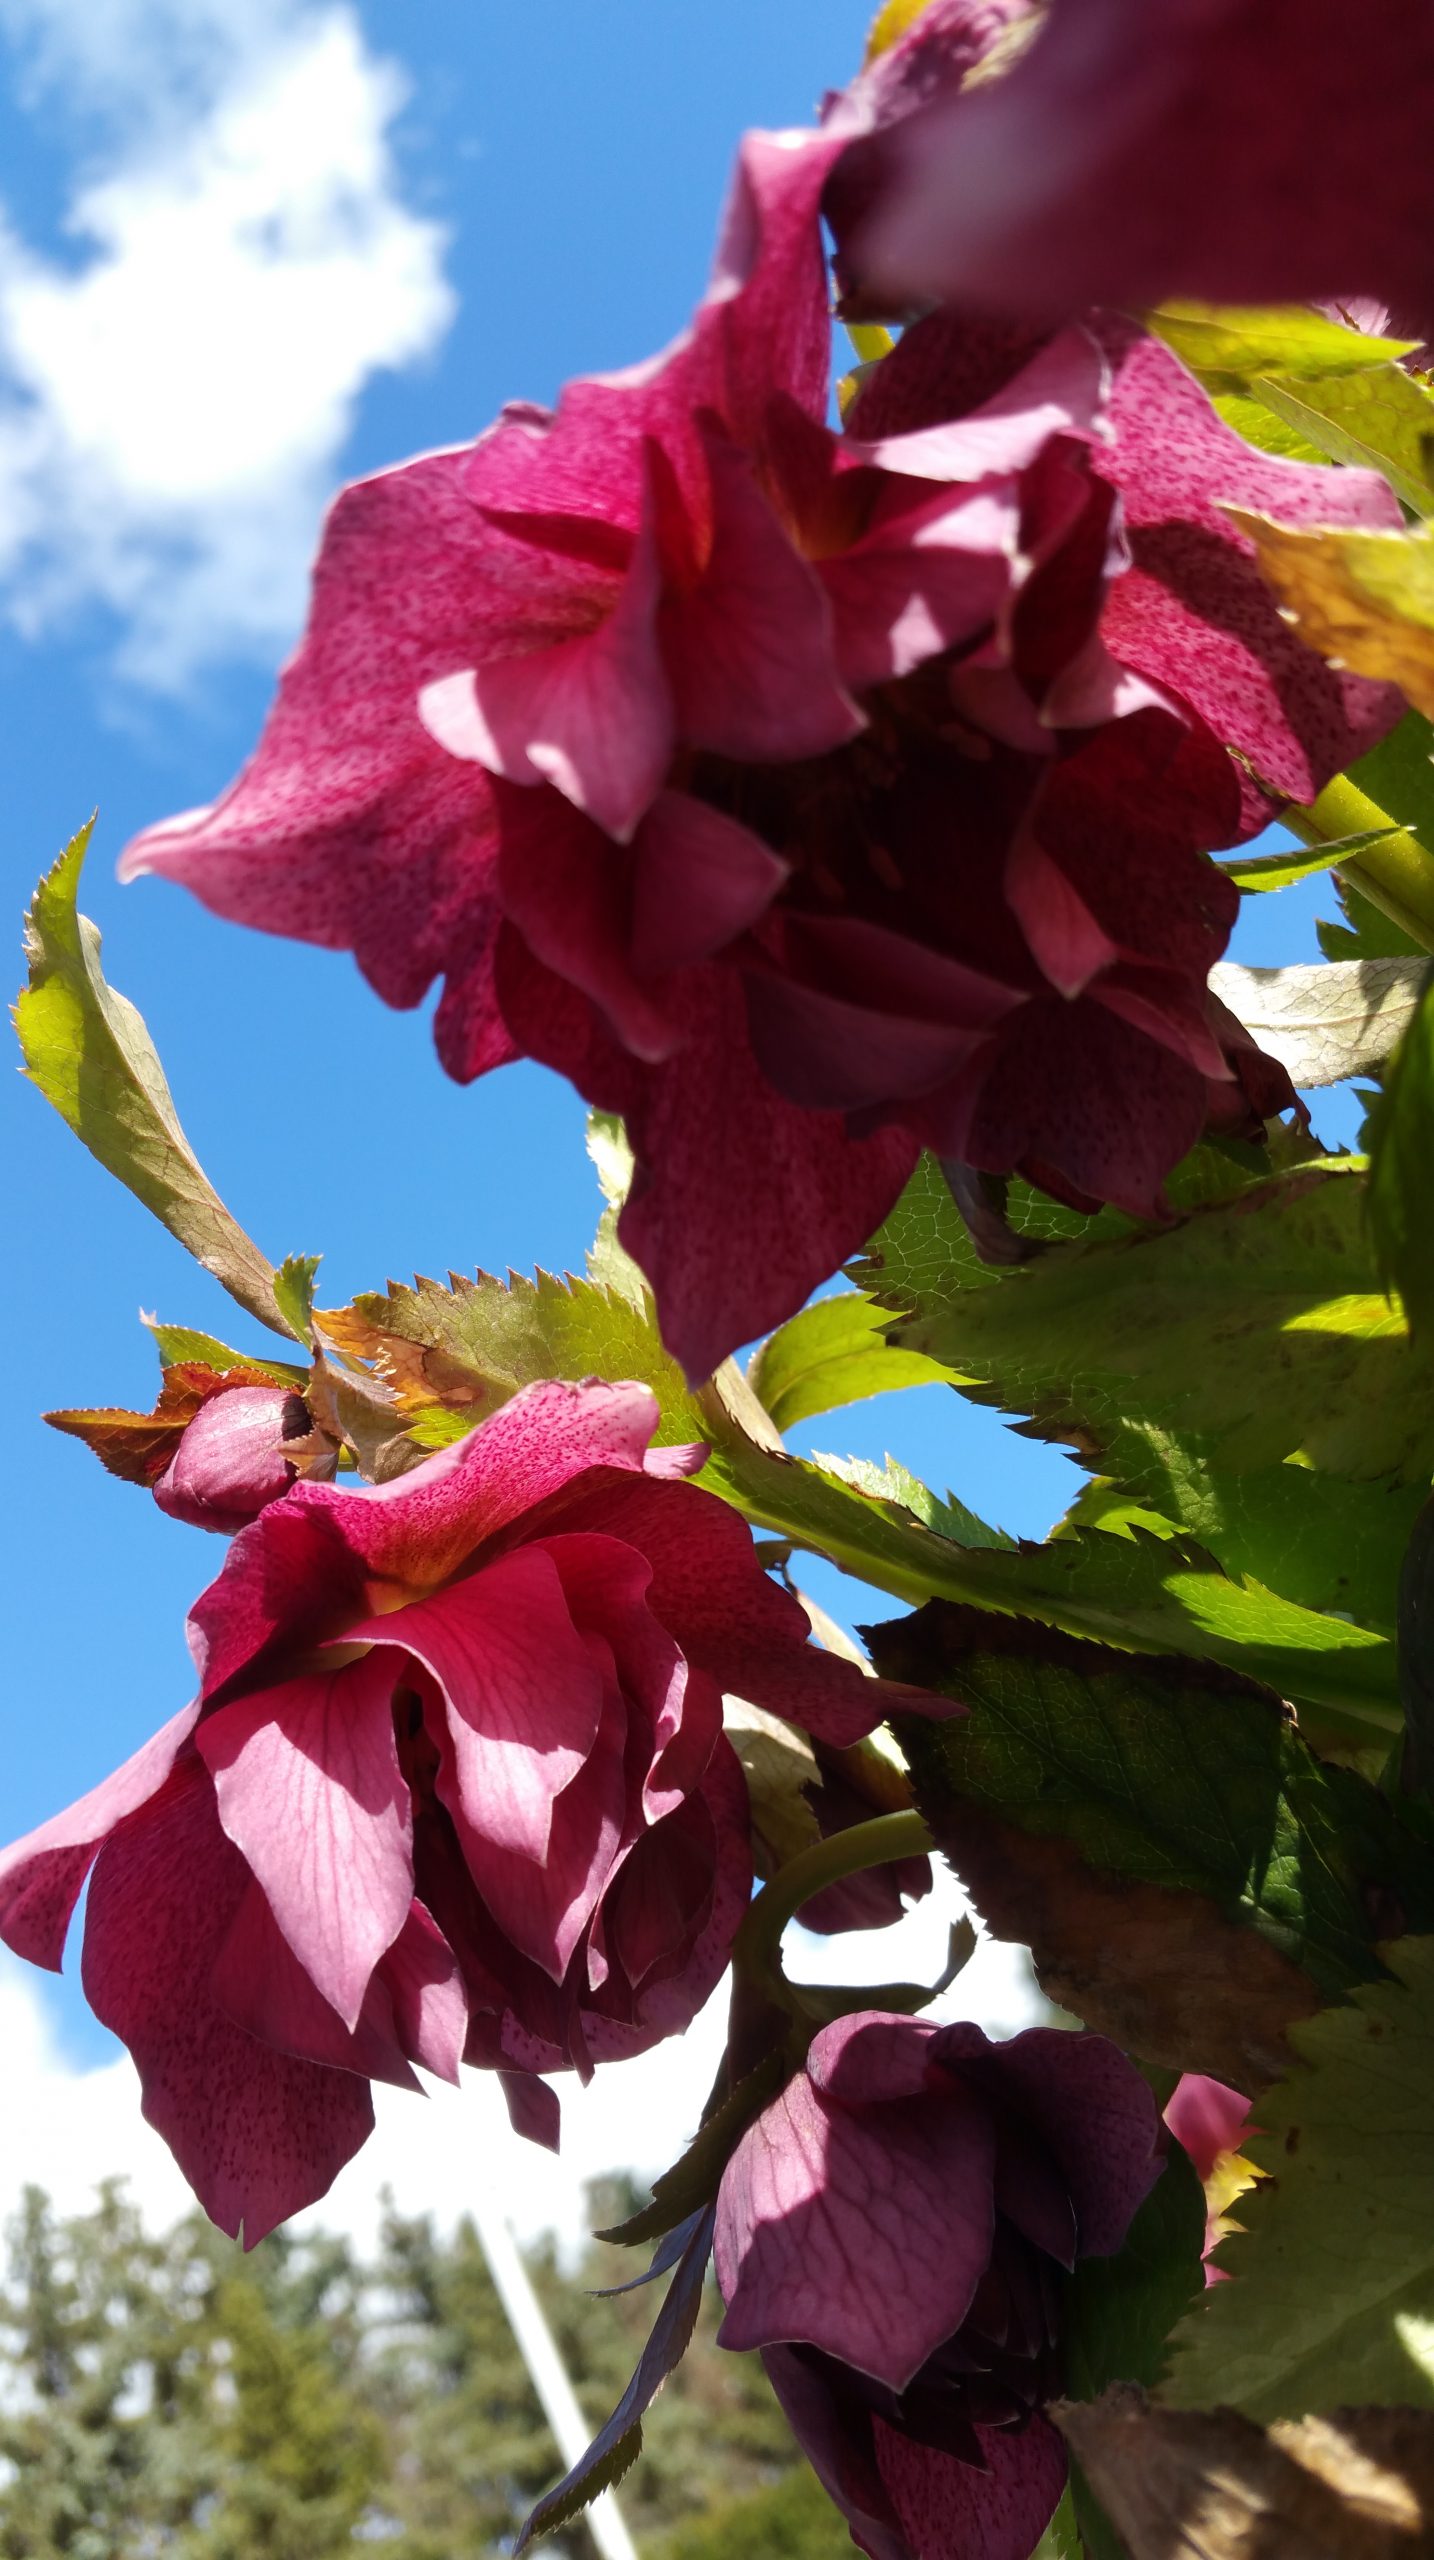
But not only the lasagna pot is blooming, also our black hellebores ……


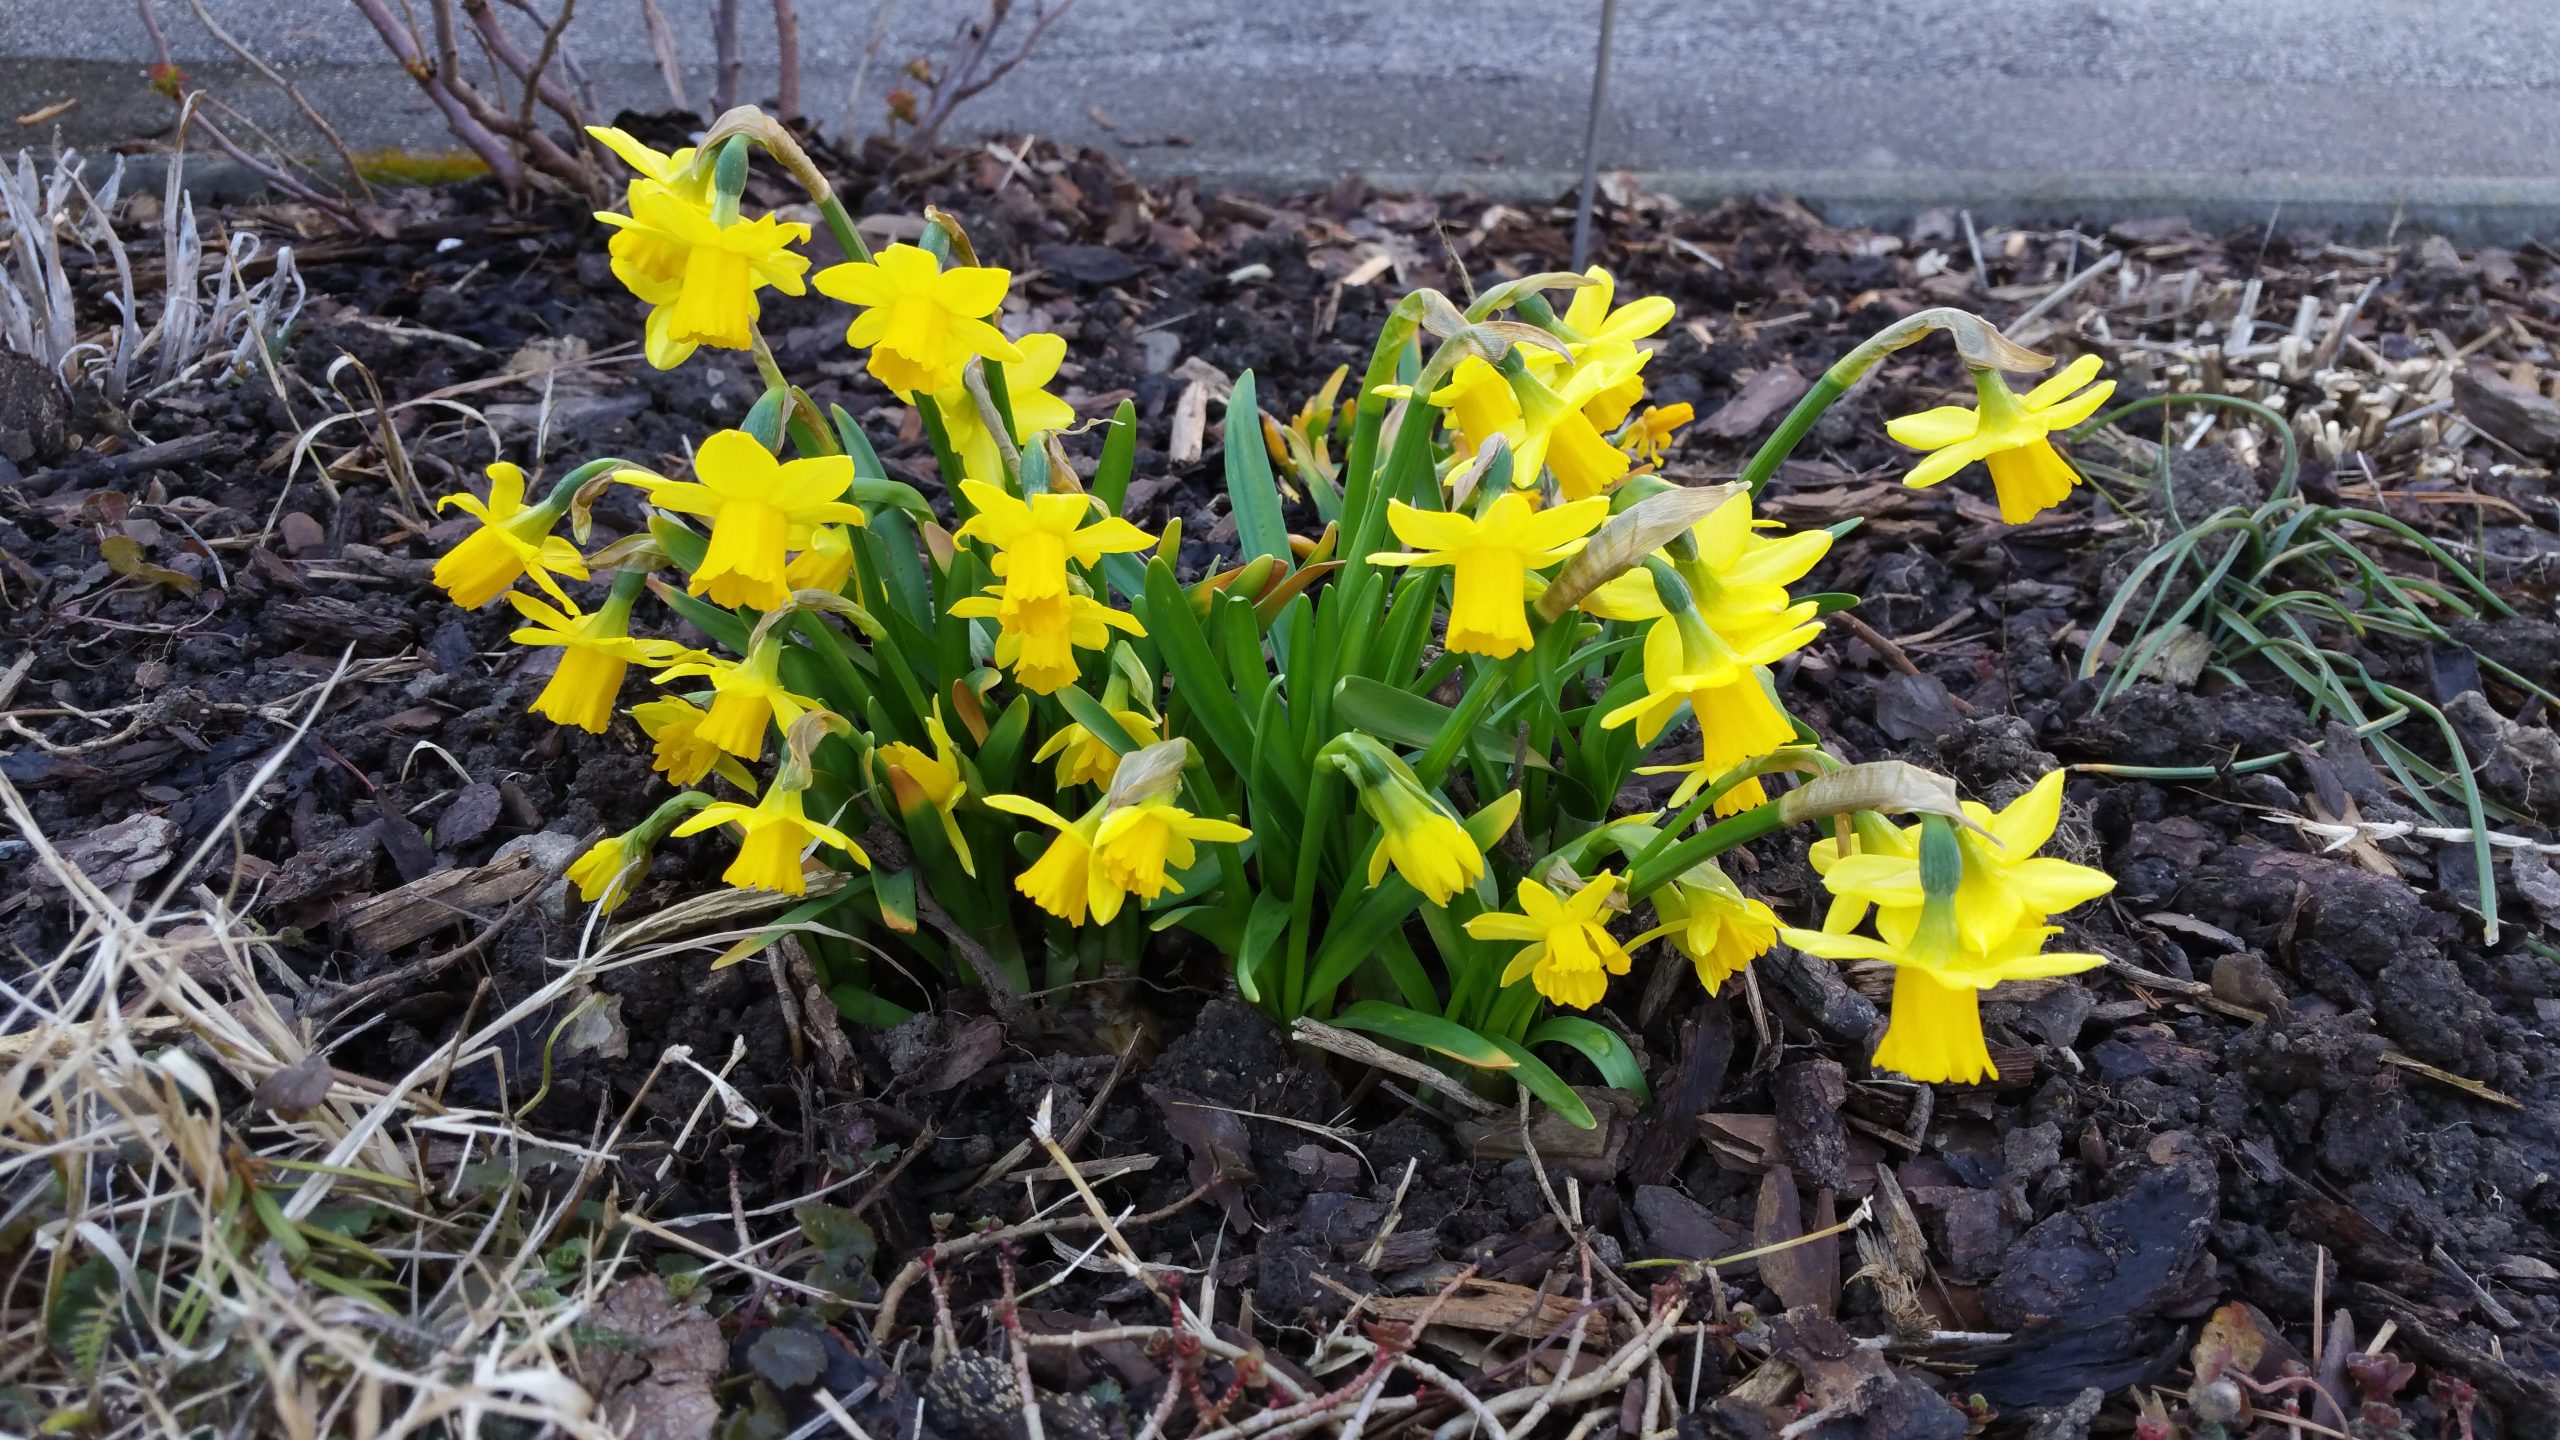
…… and the daffodils (those are newcomers that we bought in February) ……

…… some more tiny crocuses we planted a few years ago ……


…… and some hyacinths – also newcomers.
They are waiting to be planted into a flower bed.


These crocuses – also sitting in a pot – need some more time, but you can see the green tips already lurking 🙂
And a few days before I also found the first blossoms of the lungwort.
Aren’t those tiny blue and pink spots beautiful in the new developing green???
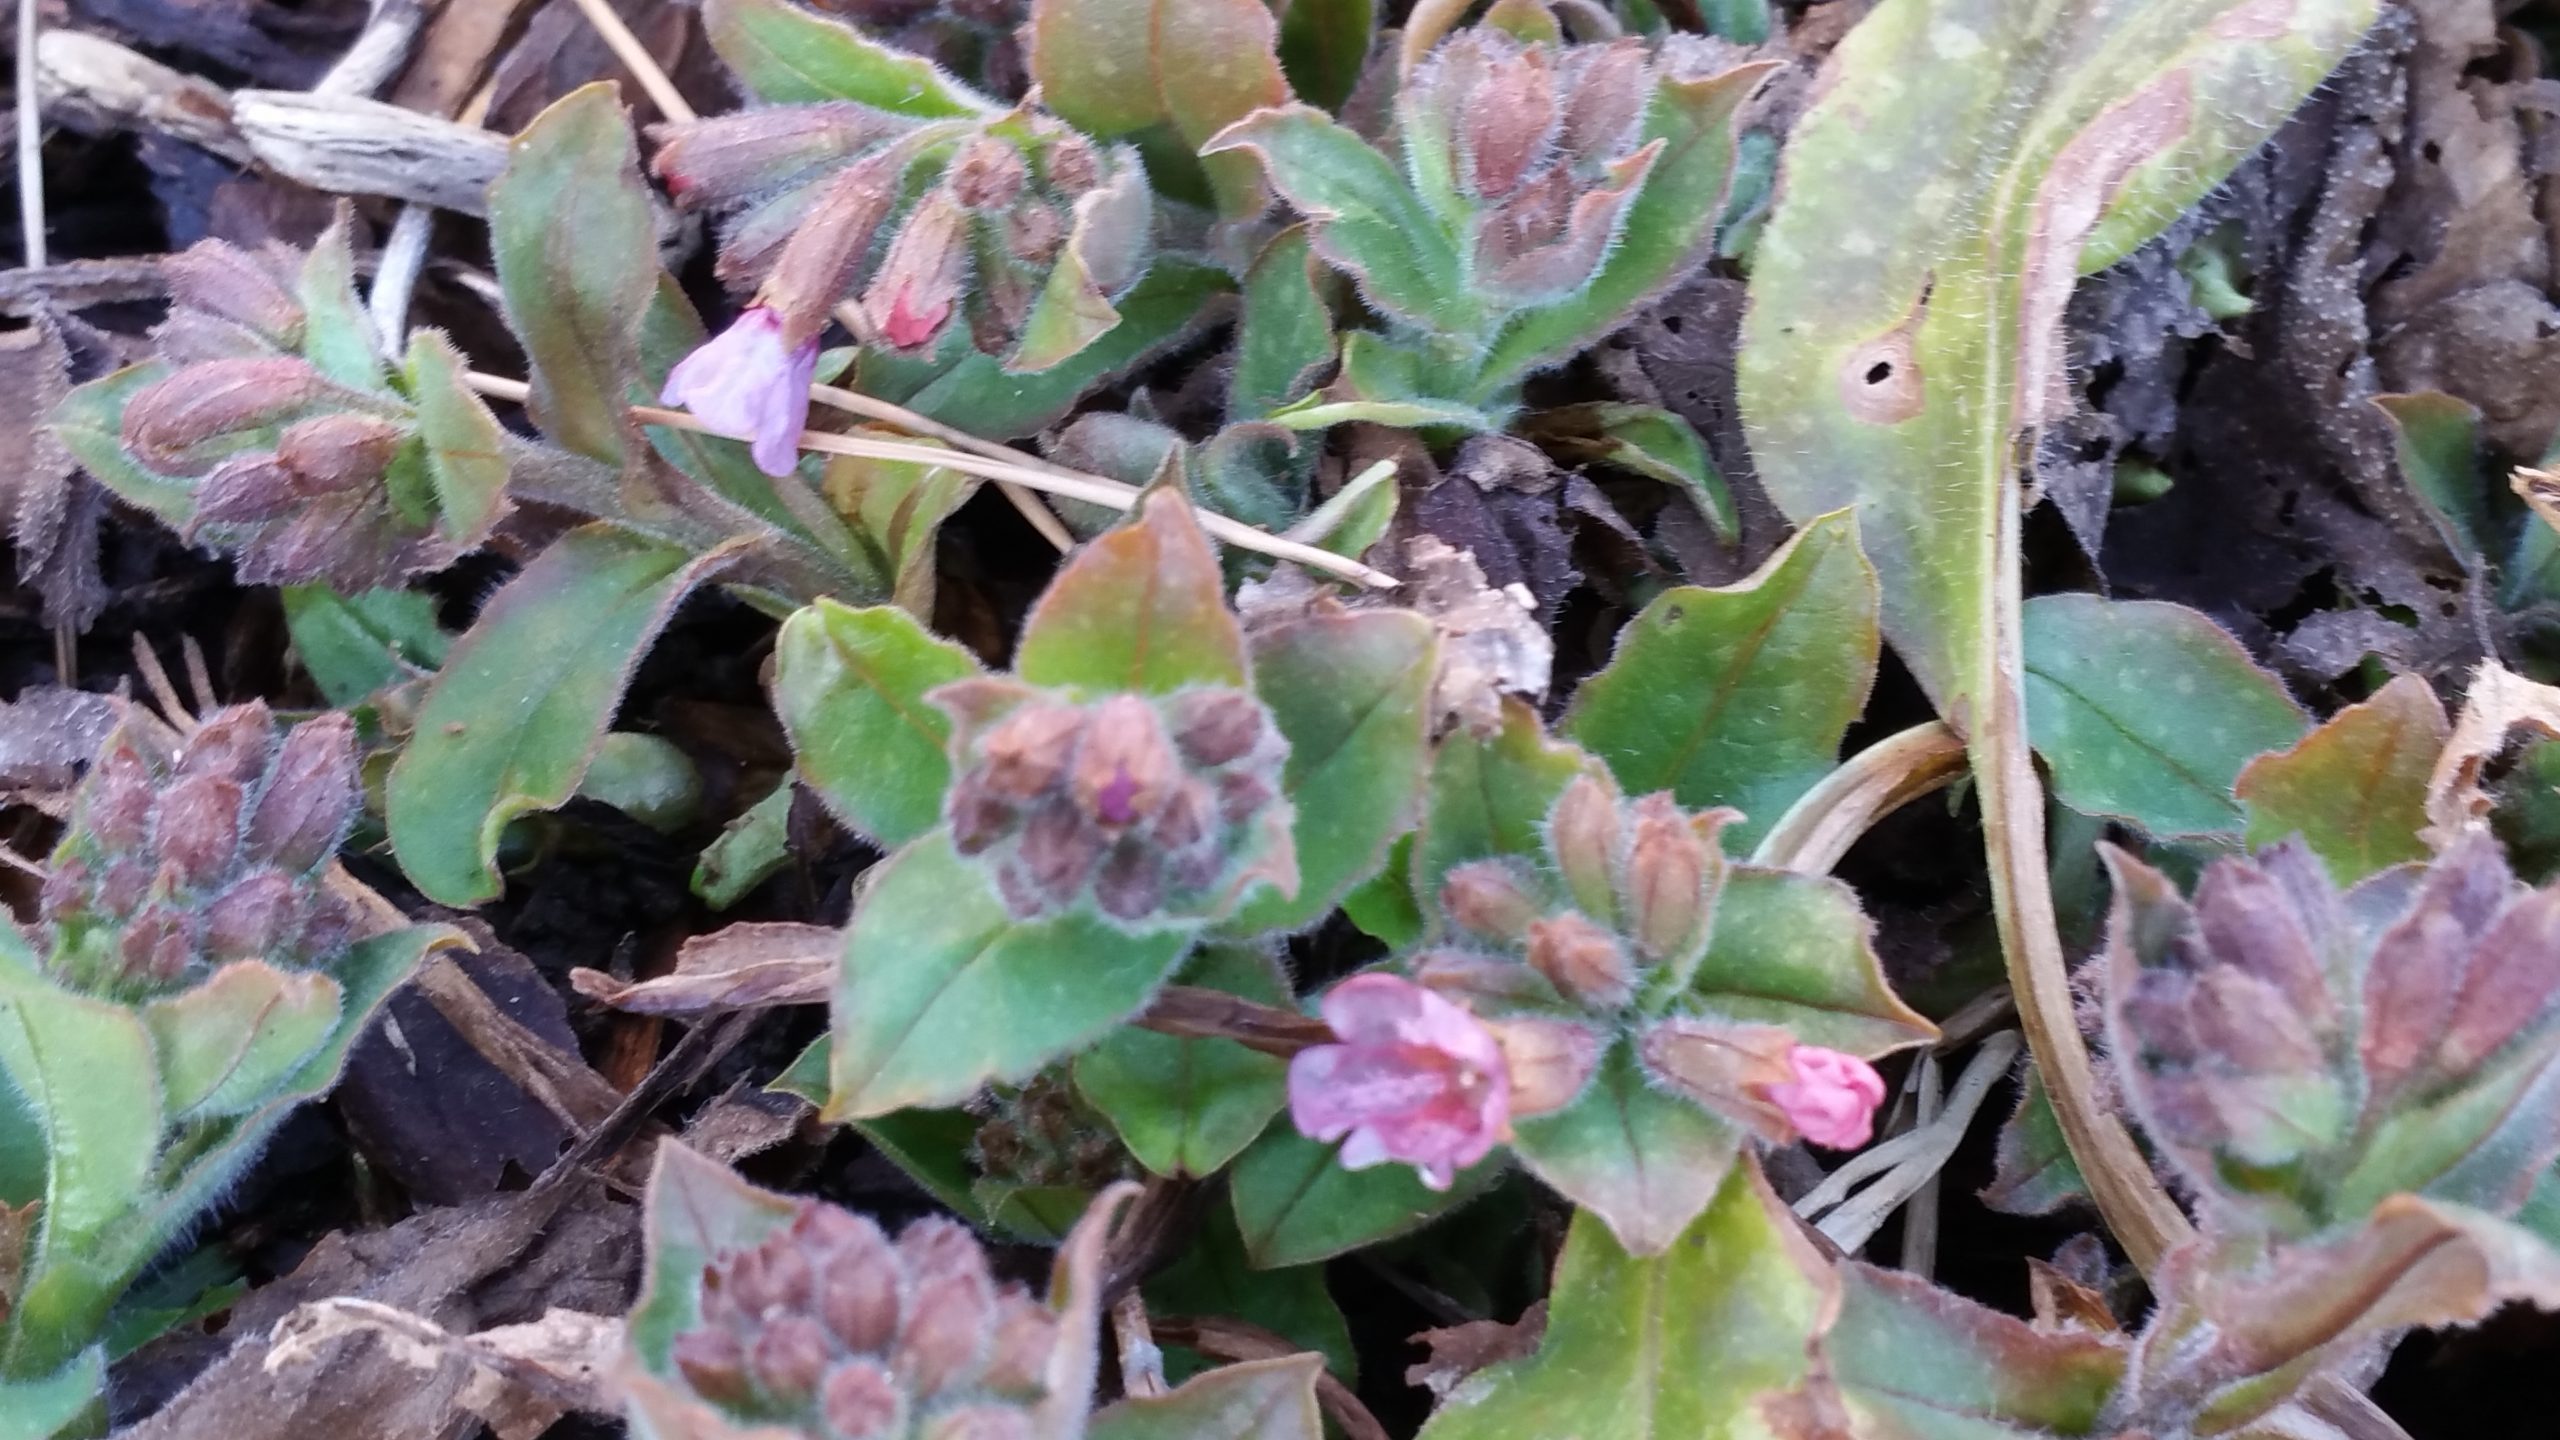
Nature is simply amazing!!
Stay safe!

If you read the article “Who am I” you might have noticed that my first contact with beads and beadwork was through “Native American Beadwork”.
For more information – also tutorials on the different stitches – check out my other website: www.native-american-beadwork.net
I learned a lot so far but always try something new.
Last year I beaded my first baseballcap.
Native American beaded caps or hats have been around for many decades. It is not sure where they originated. But they are very popular.
Also more and more Native Americans add beaded stripes to their highschool graduation caps to show pride for their heritage.
So first of all you need a baseball cap and a design.
Then lay out your desired beads. Here I used seedbeads size 11/0.

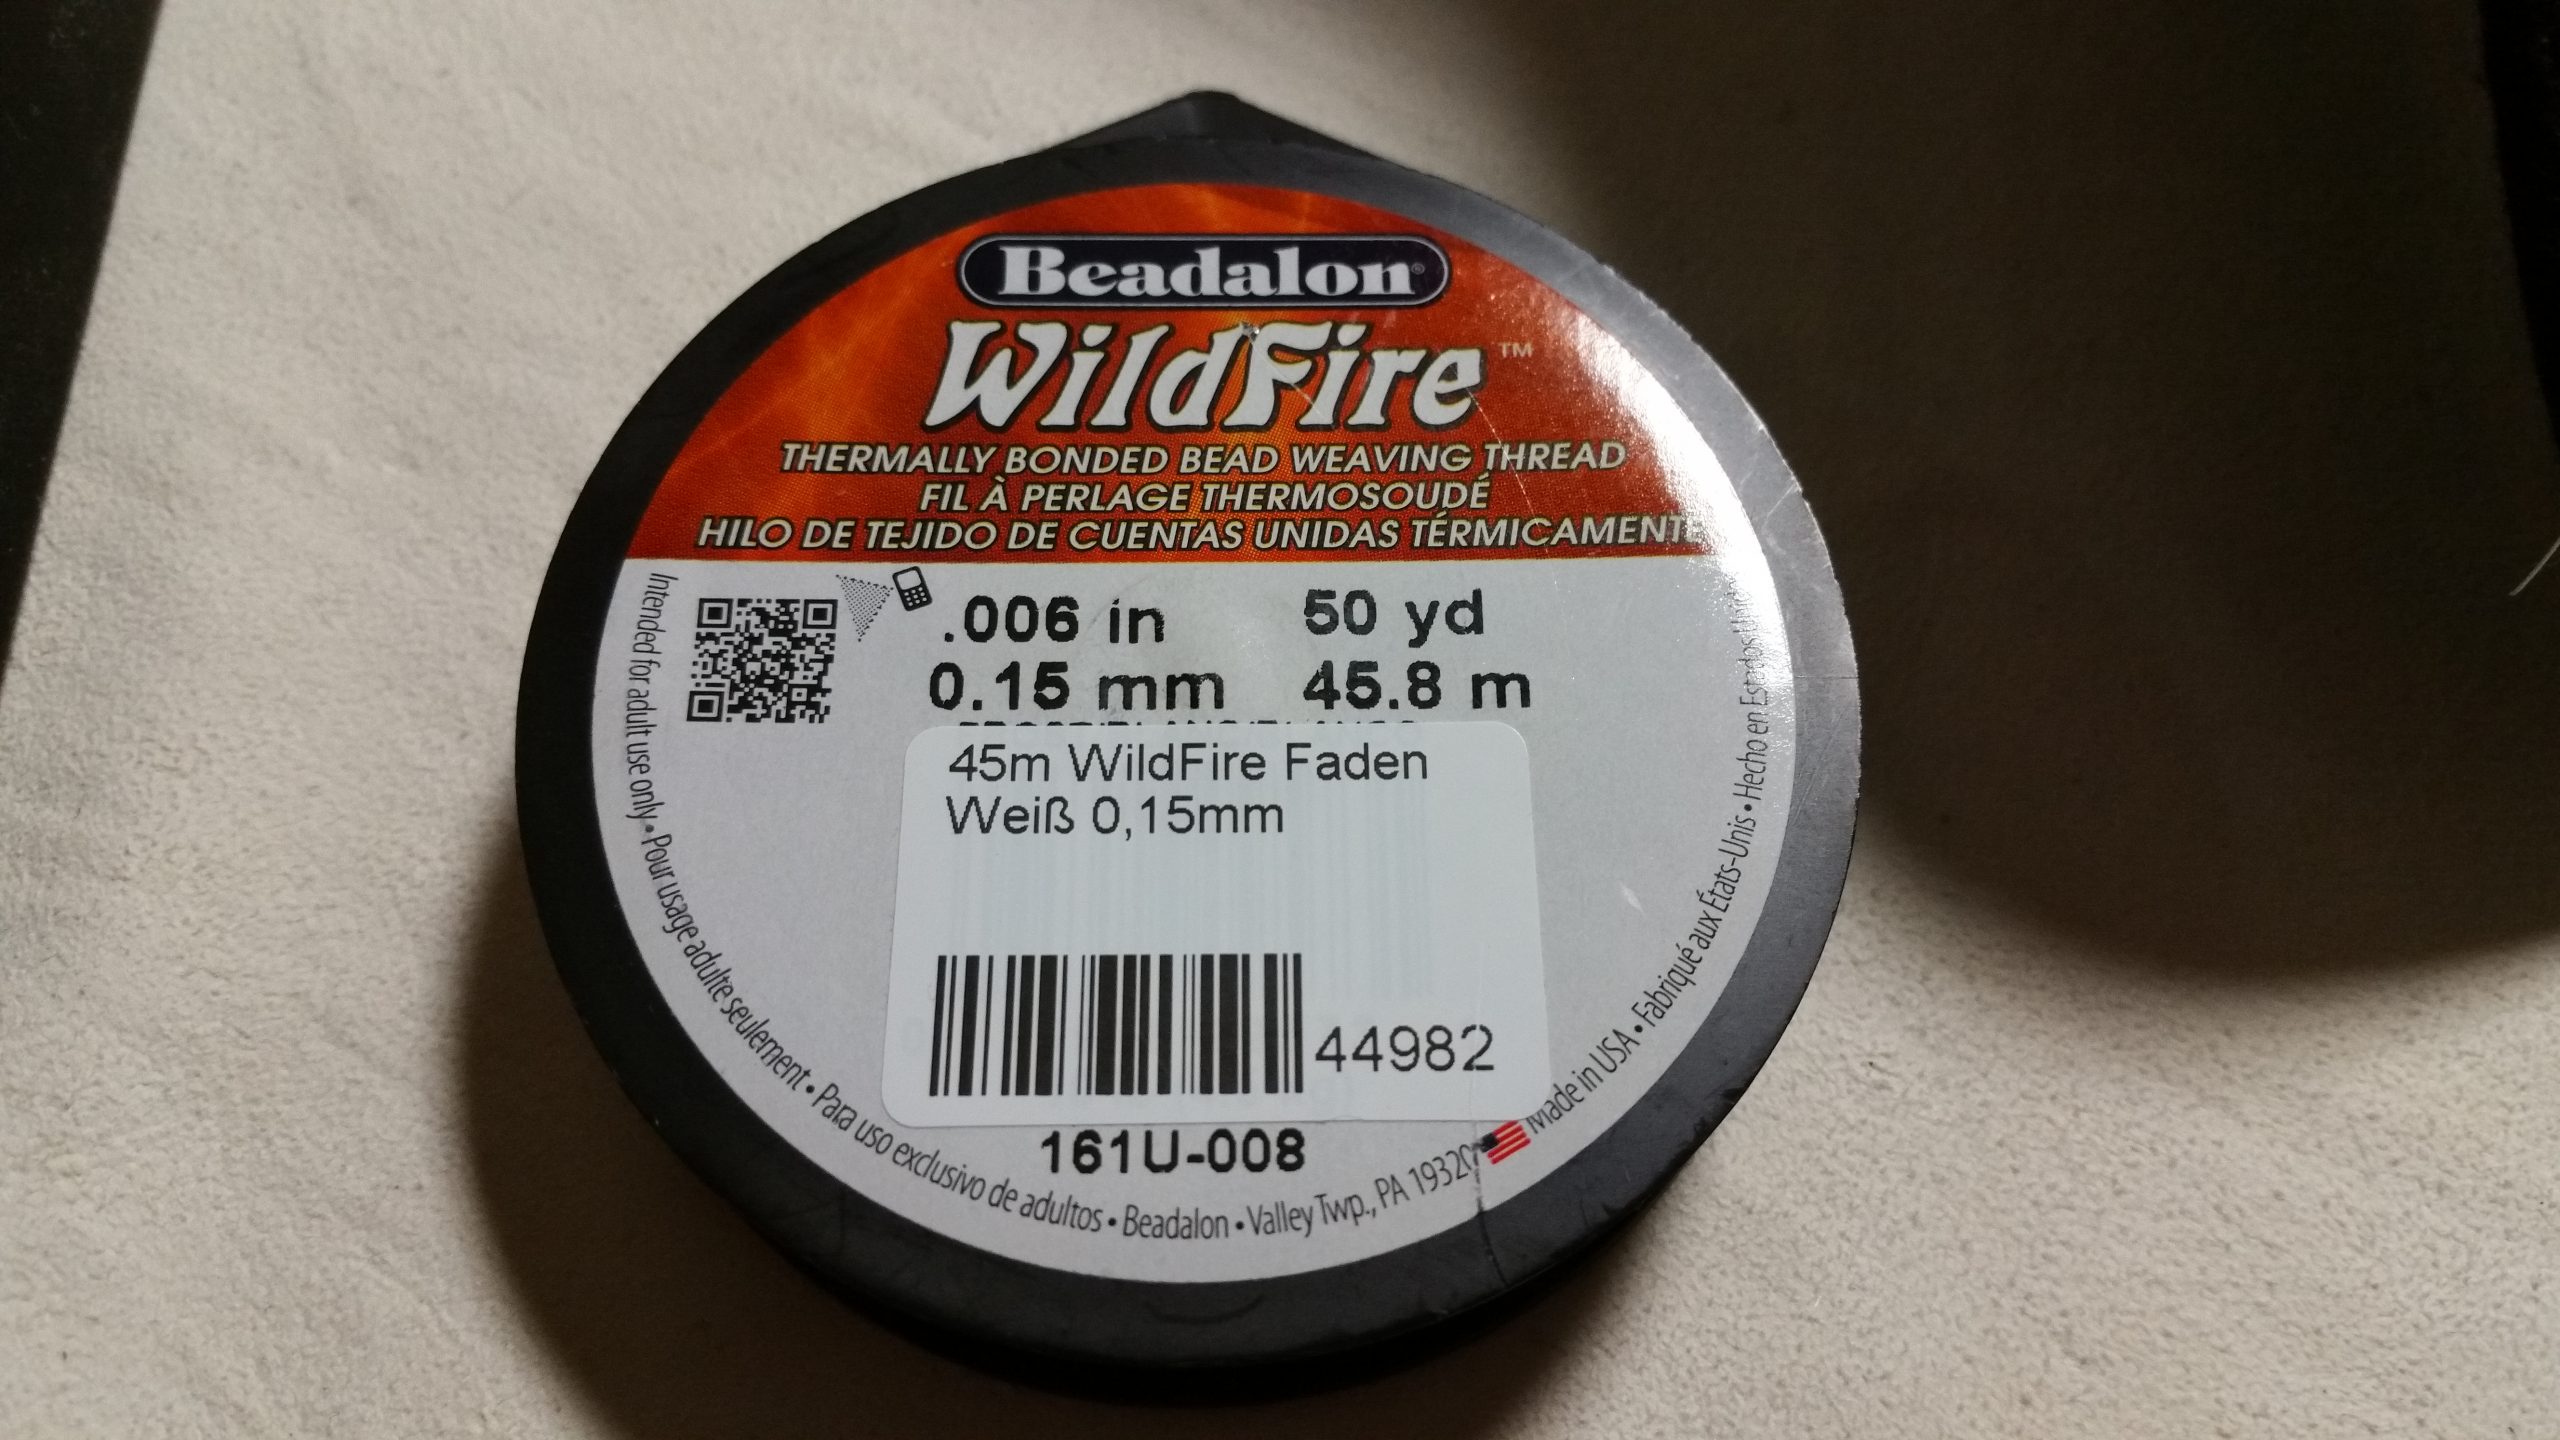
For this project I used Wildfire thread for the first time, unfortunately I only had a white one.
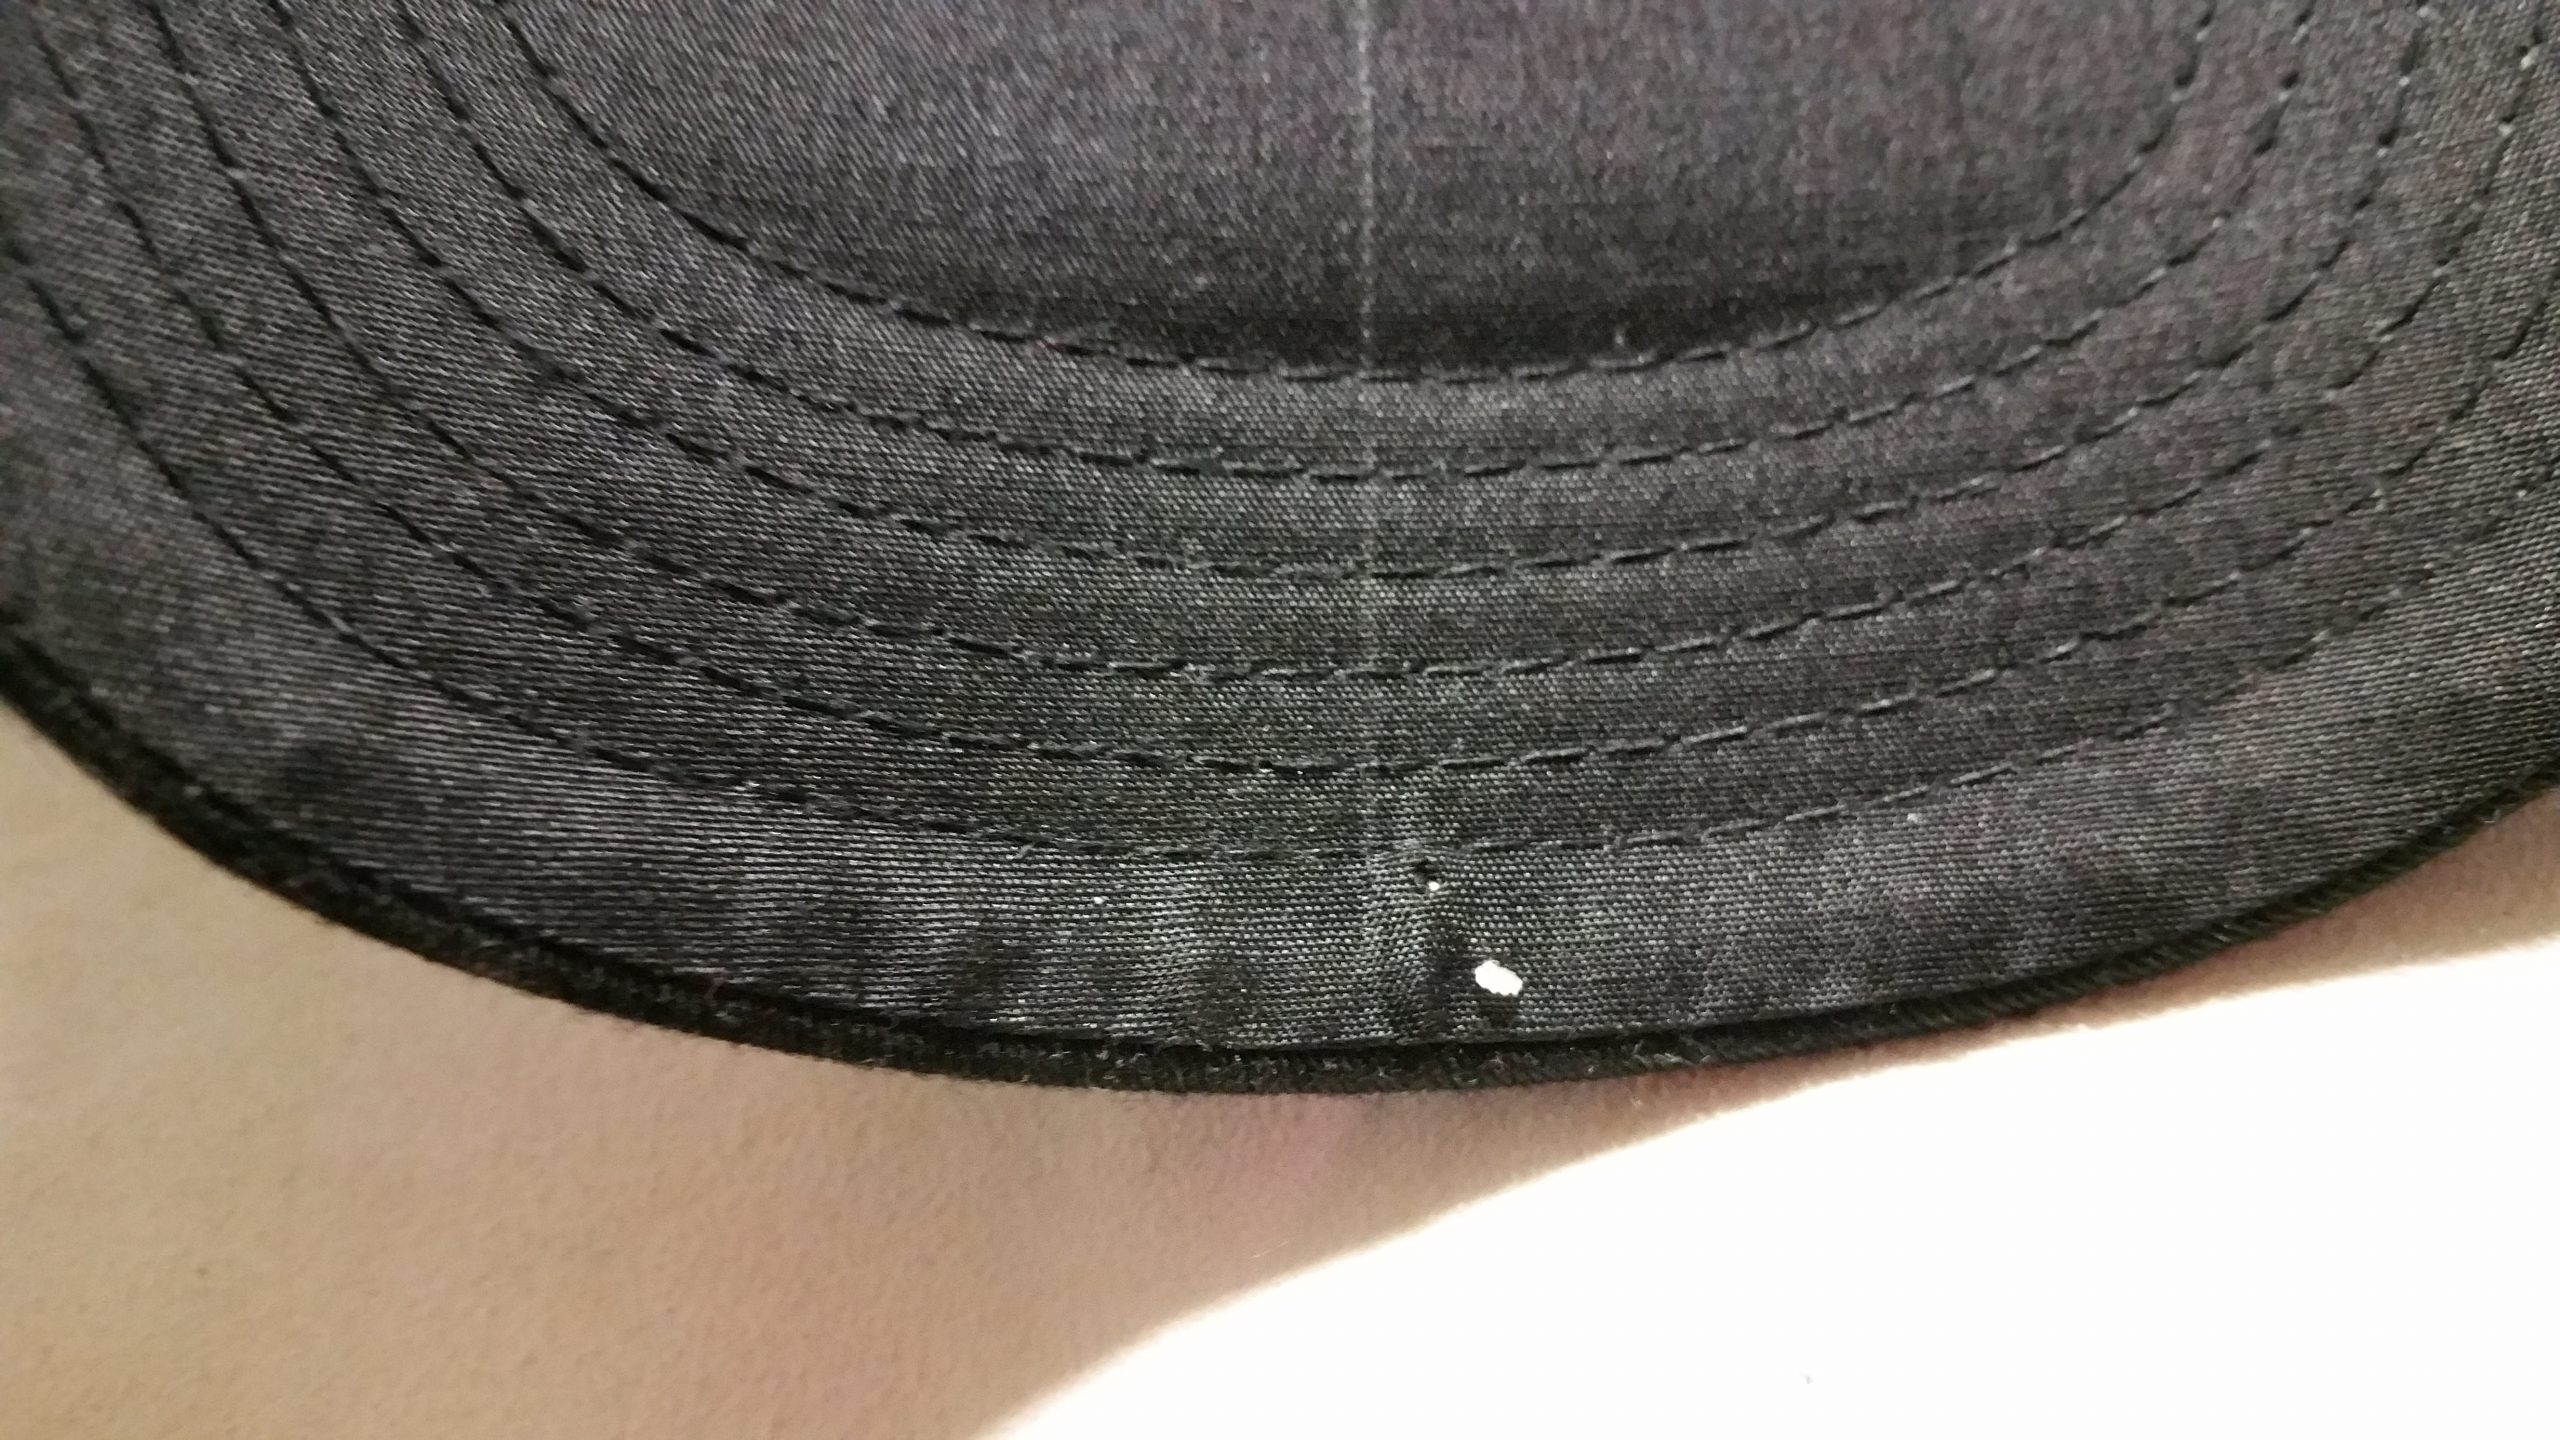
Next to needle, thread, thread conditioner and a lighter you will also need an awl. The visor has a plastic shield inside for stability.
With the beading needle you can’t punch through the shield so you need to prepunch the holes first with the awl.

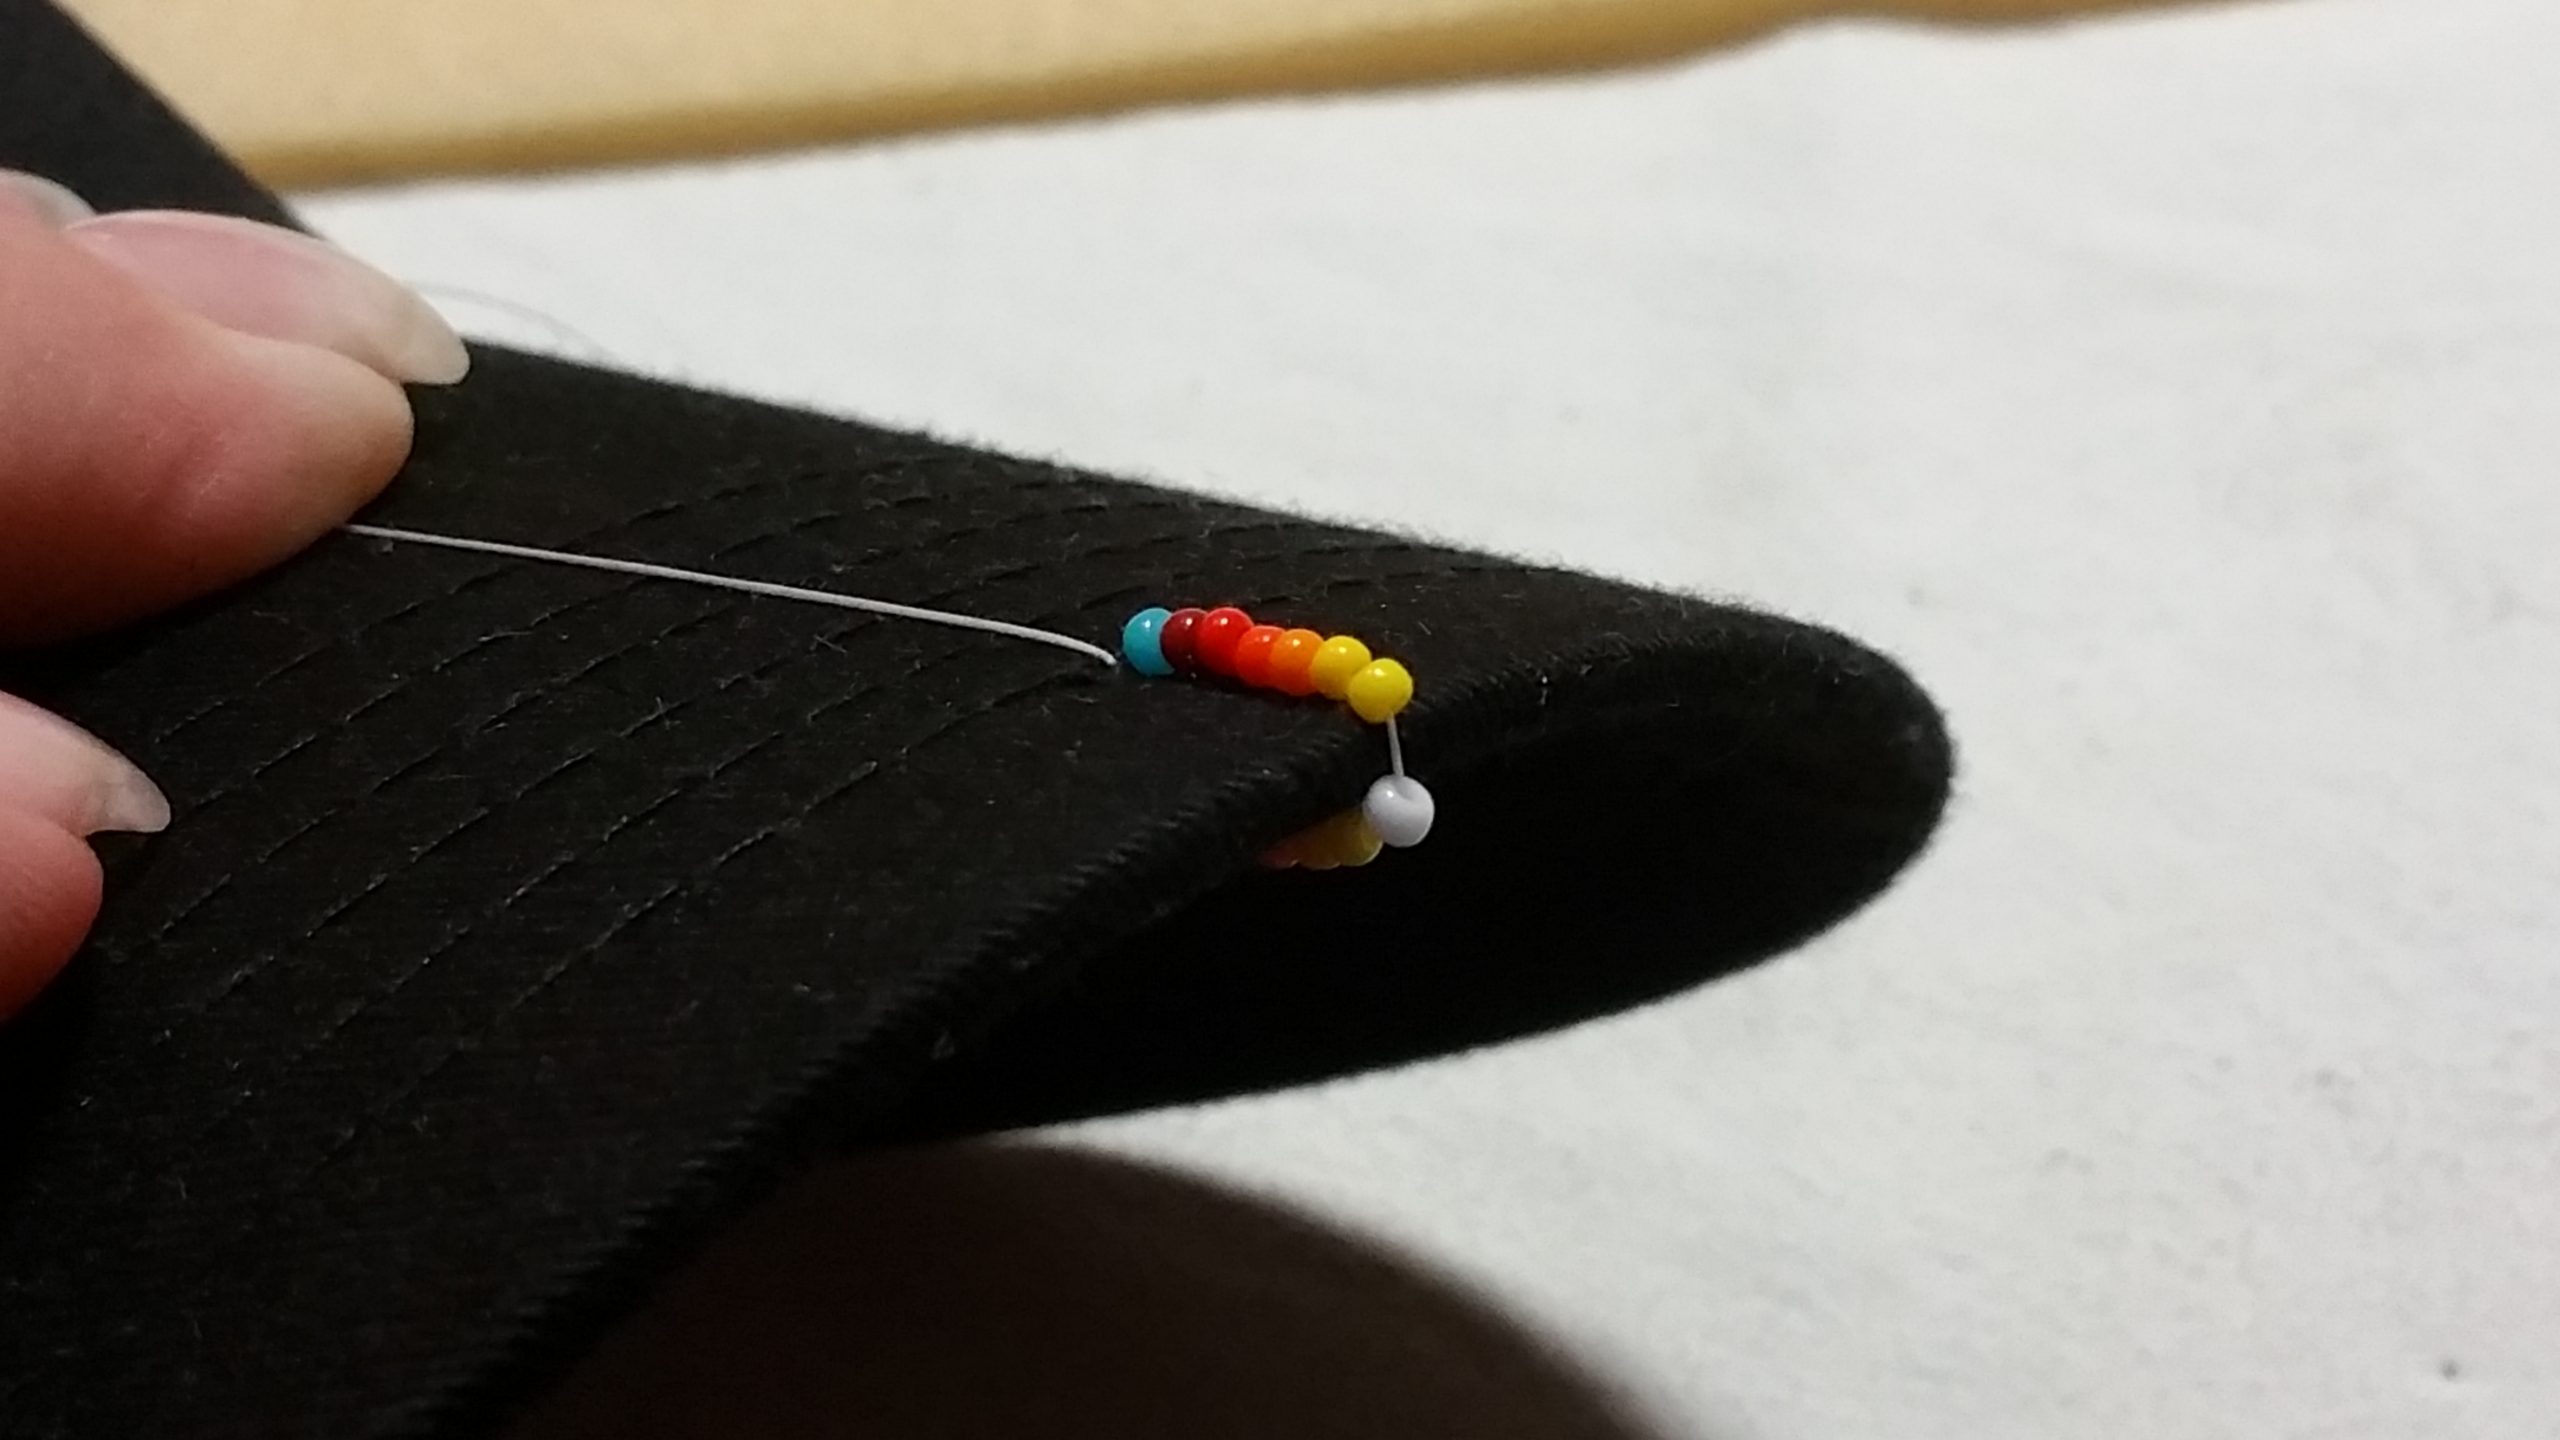
When you start beading always start in the middle and work first to one side and then to the other.
In that way the design will be perfectly aligned.
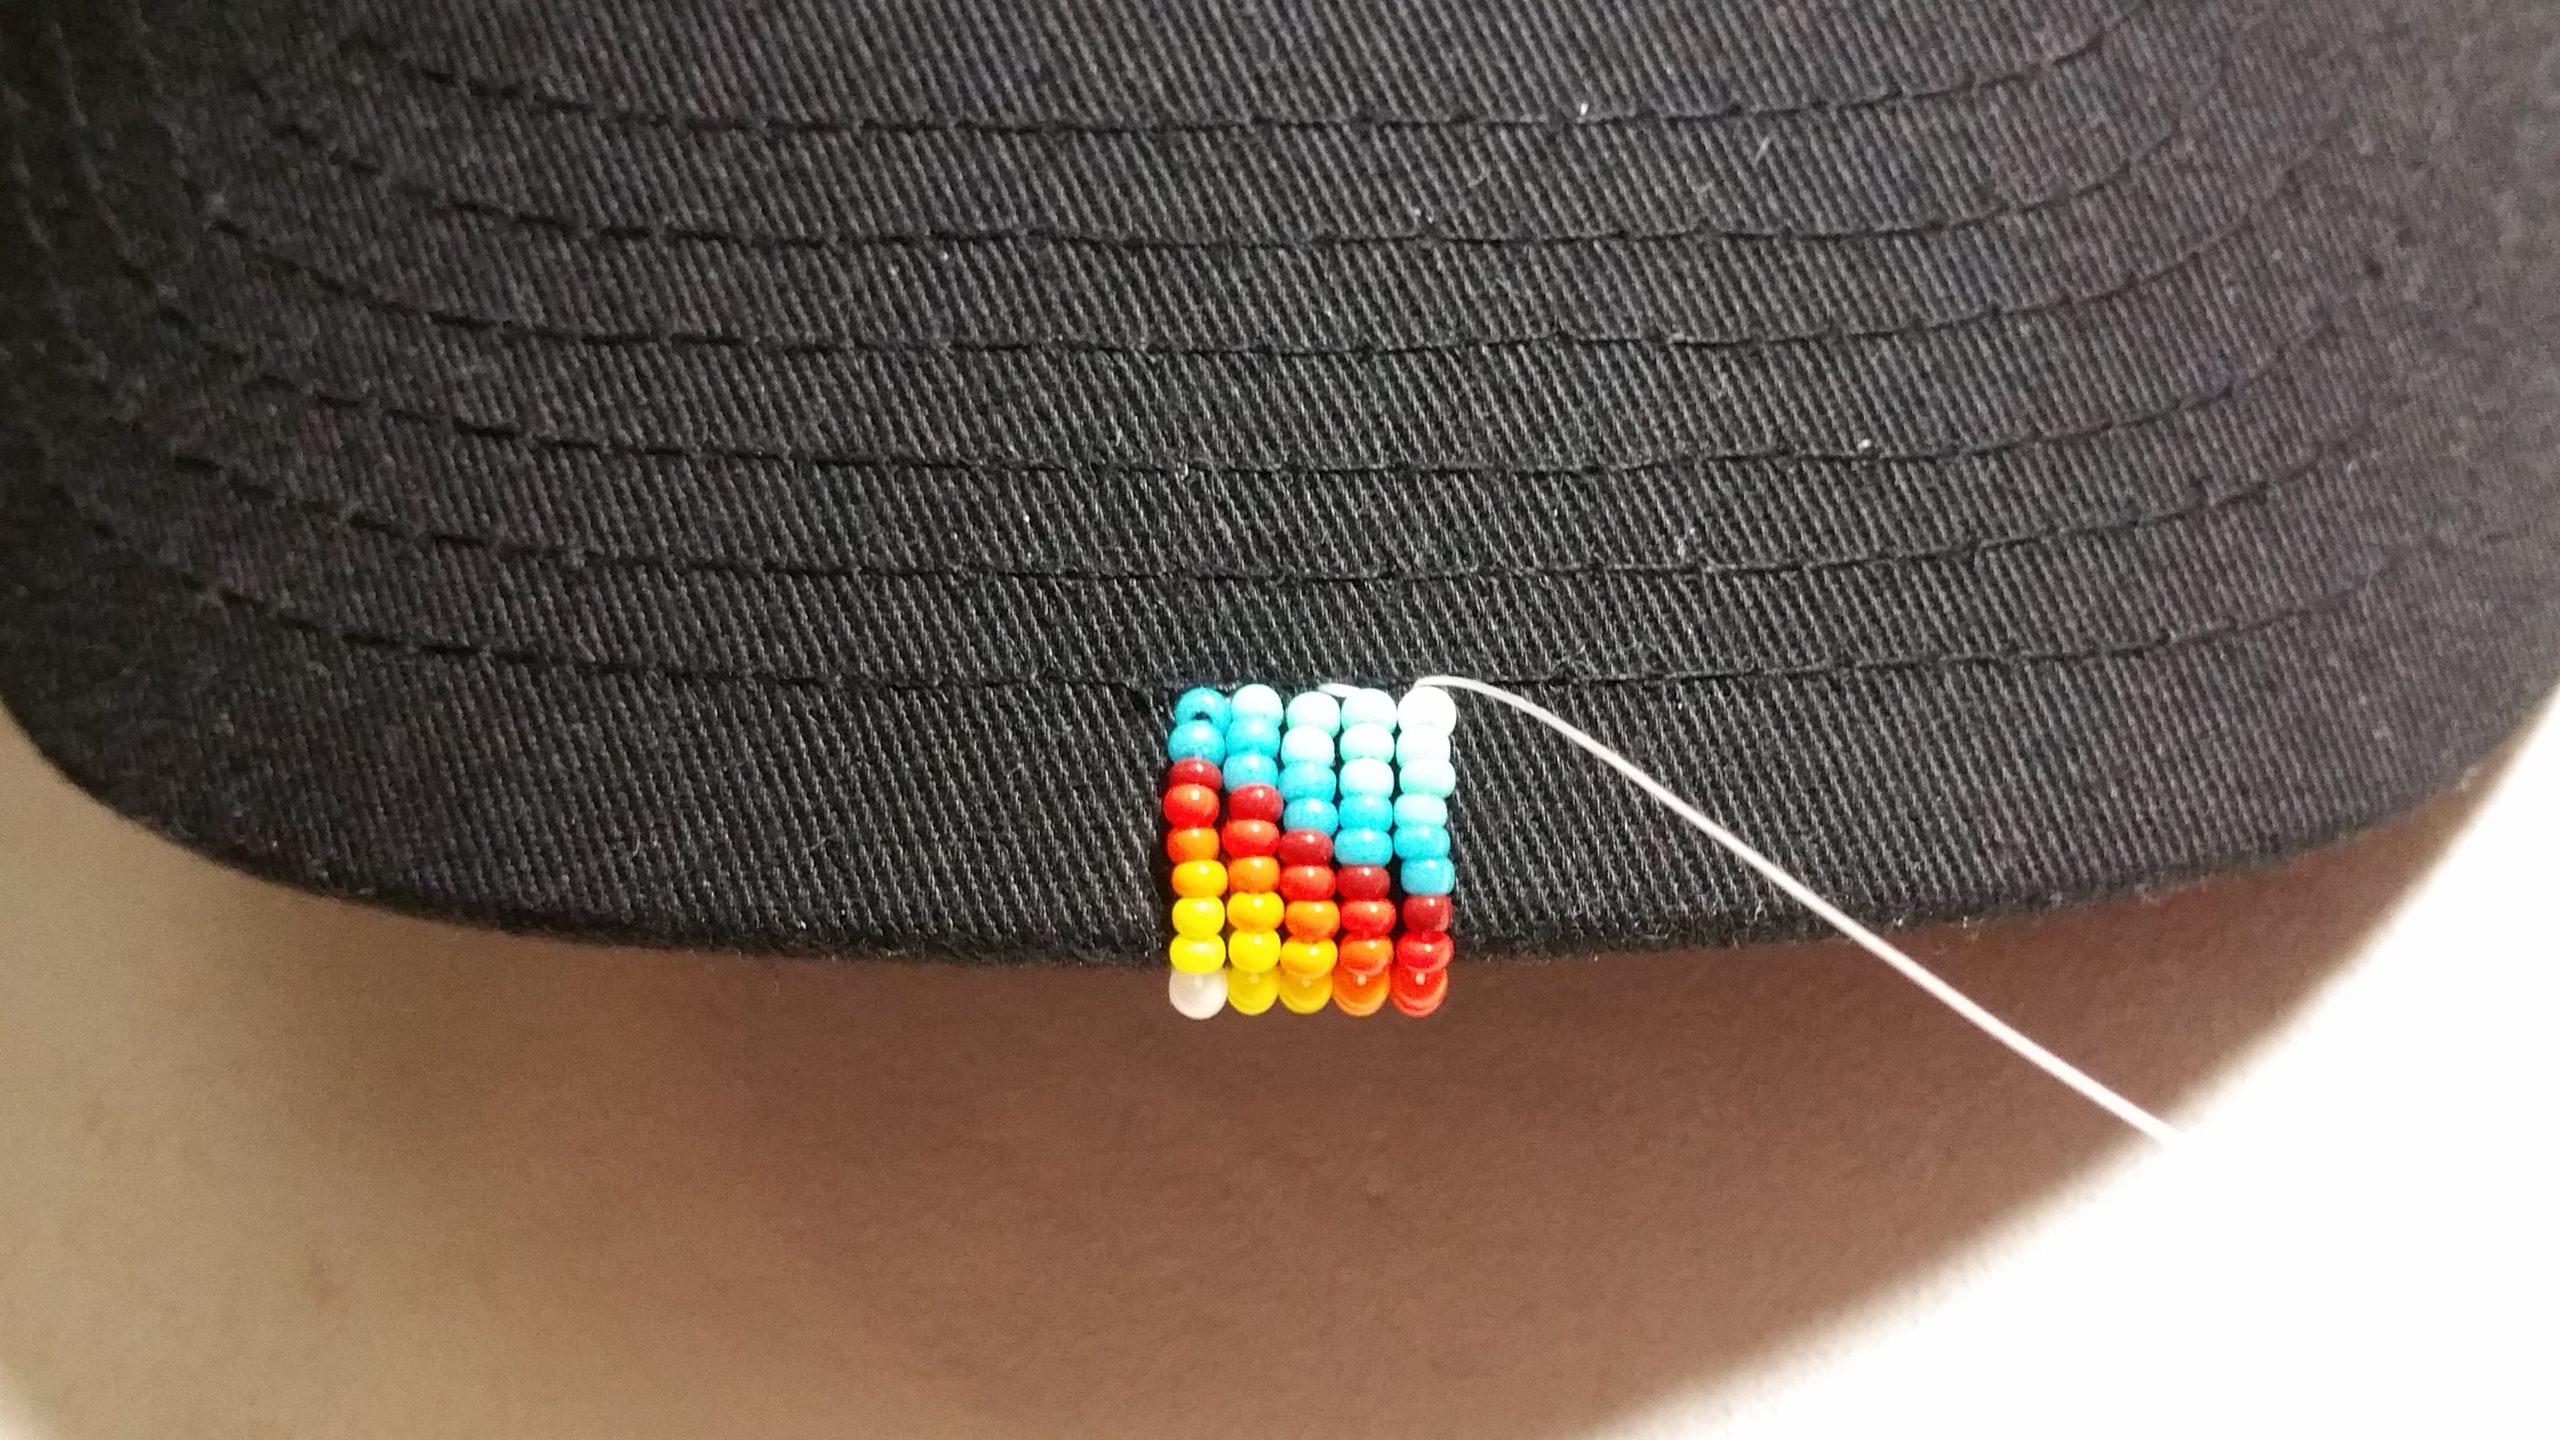
Now you need to determine the number of beads for your stitch. Since the stitch goes around the rim you also need to count the beads on the bottom.
It can also be possible that you might need to adjust your design a bit with the exact number of beads.
And from now on there are always the same steps:
– punch the hole
– lead the needle through the hole from the underside up
– pick up the beads
– lead the needle back up through the same hole from the underside
– now I lead the needle back to the underside through the hole of the previous stitch
– punch the new hole
– lead the needle through the new hole from the underside up
– pick up the beads
– lead the needle back up through the same hole from the underside up
……
One important thing you have to keep in mind: the distance between the punched holes and therefore the distance between the stitches needs to be the size of the diameter of the beads.
Less will make the stitches pop-up because they lie too narrow next to each other.
Too much distance between the stitches will show too much from the color of the background.
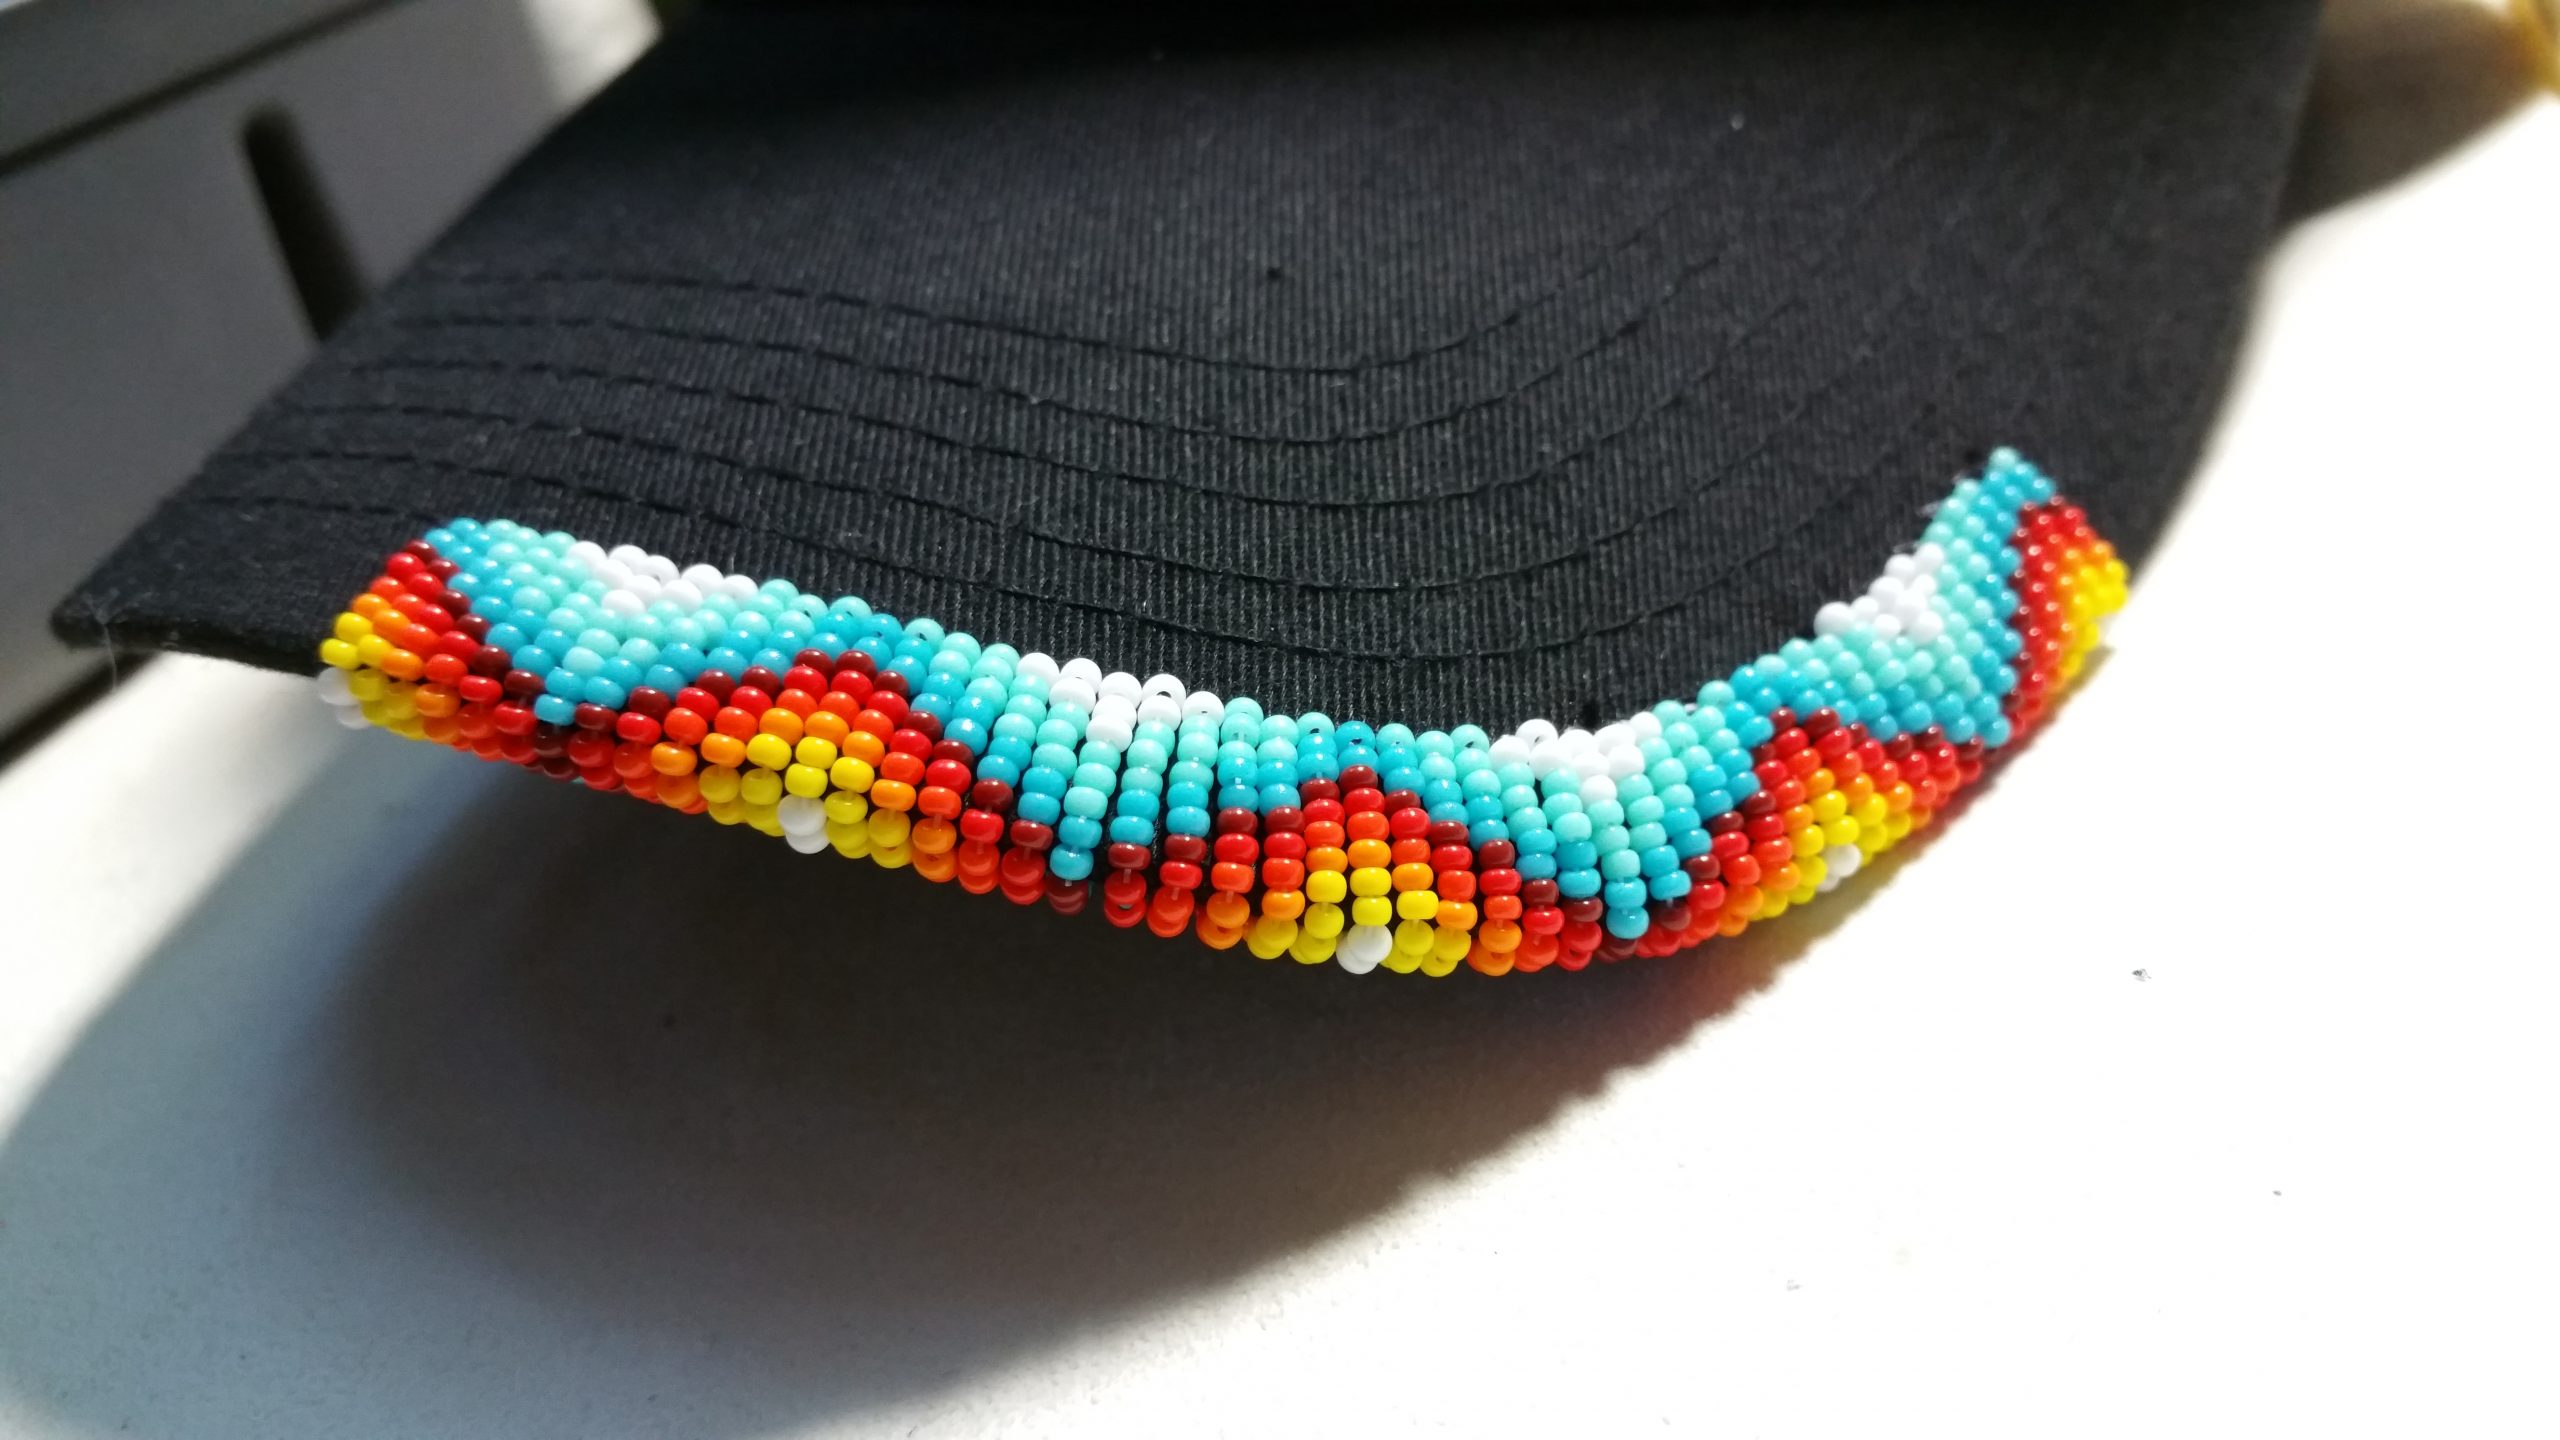
When making the curves it is natural that a bit more of the background will show.
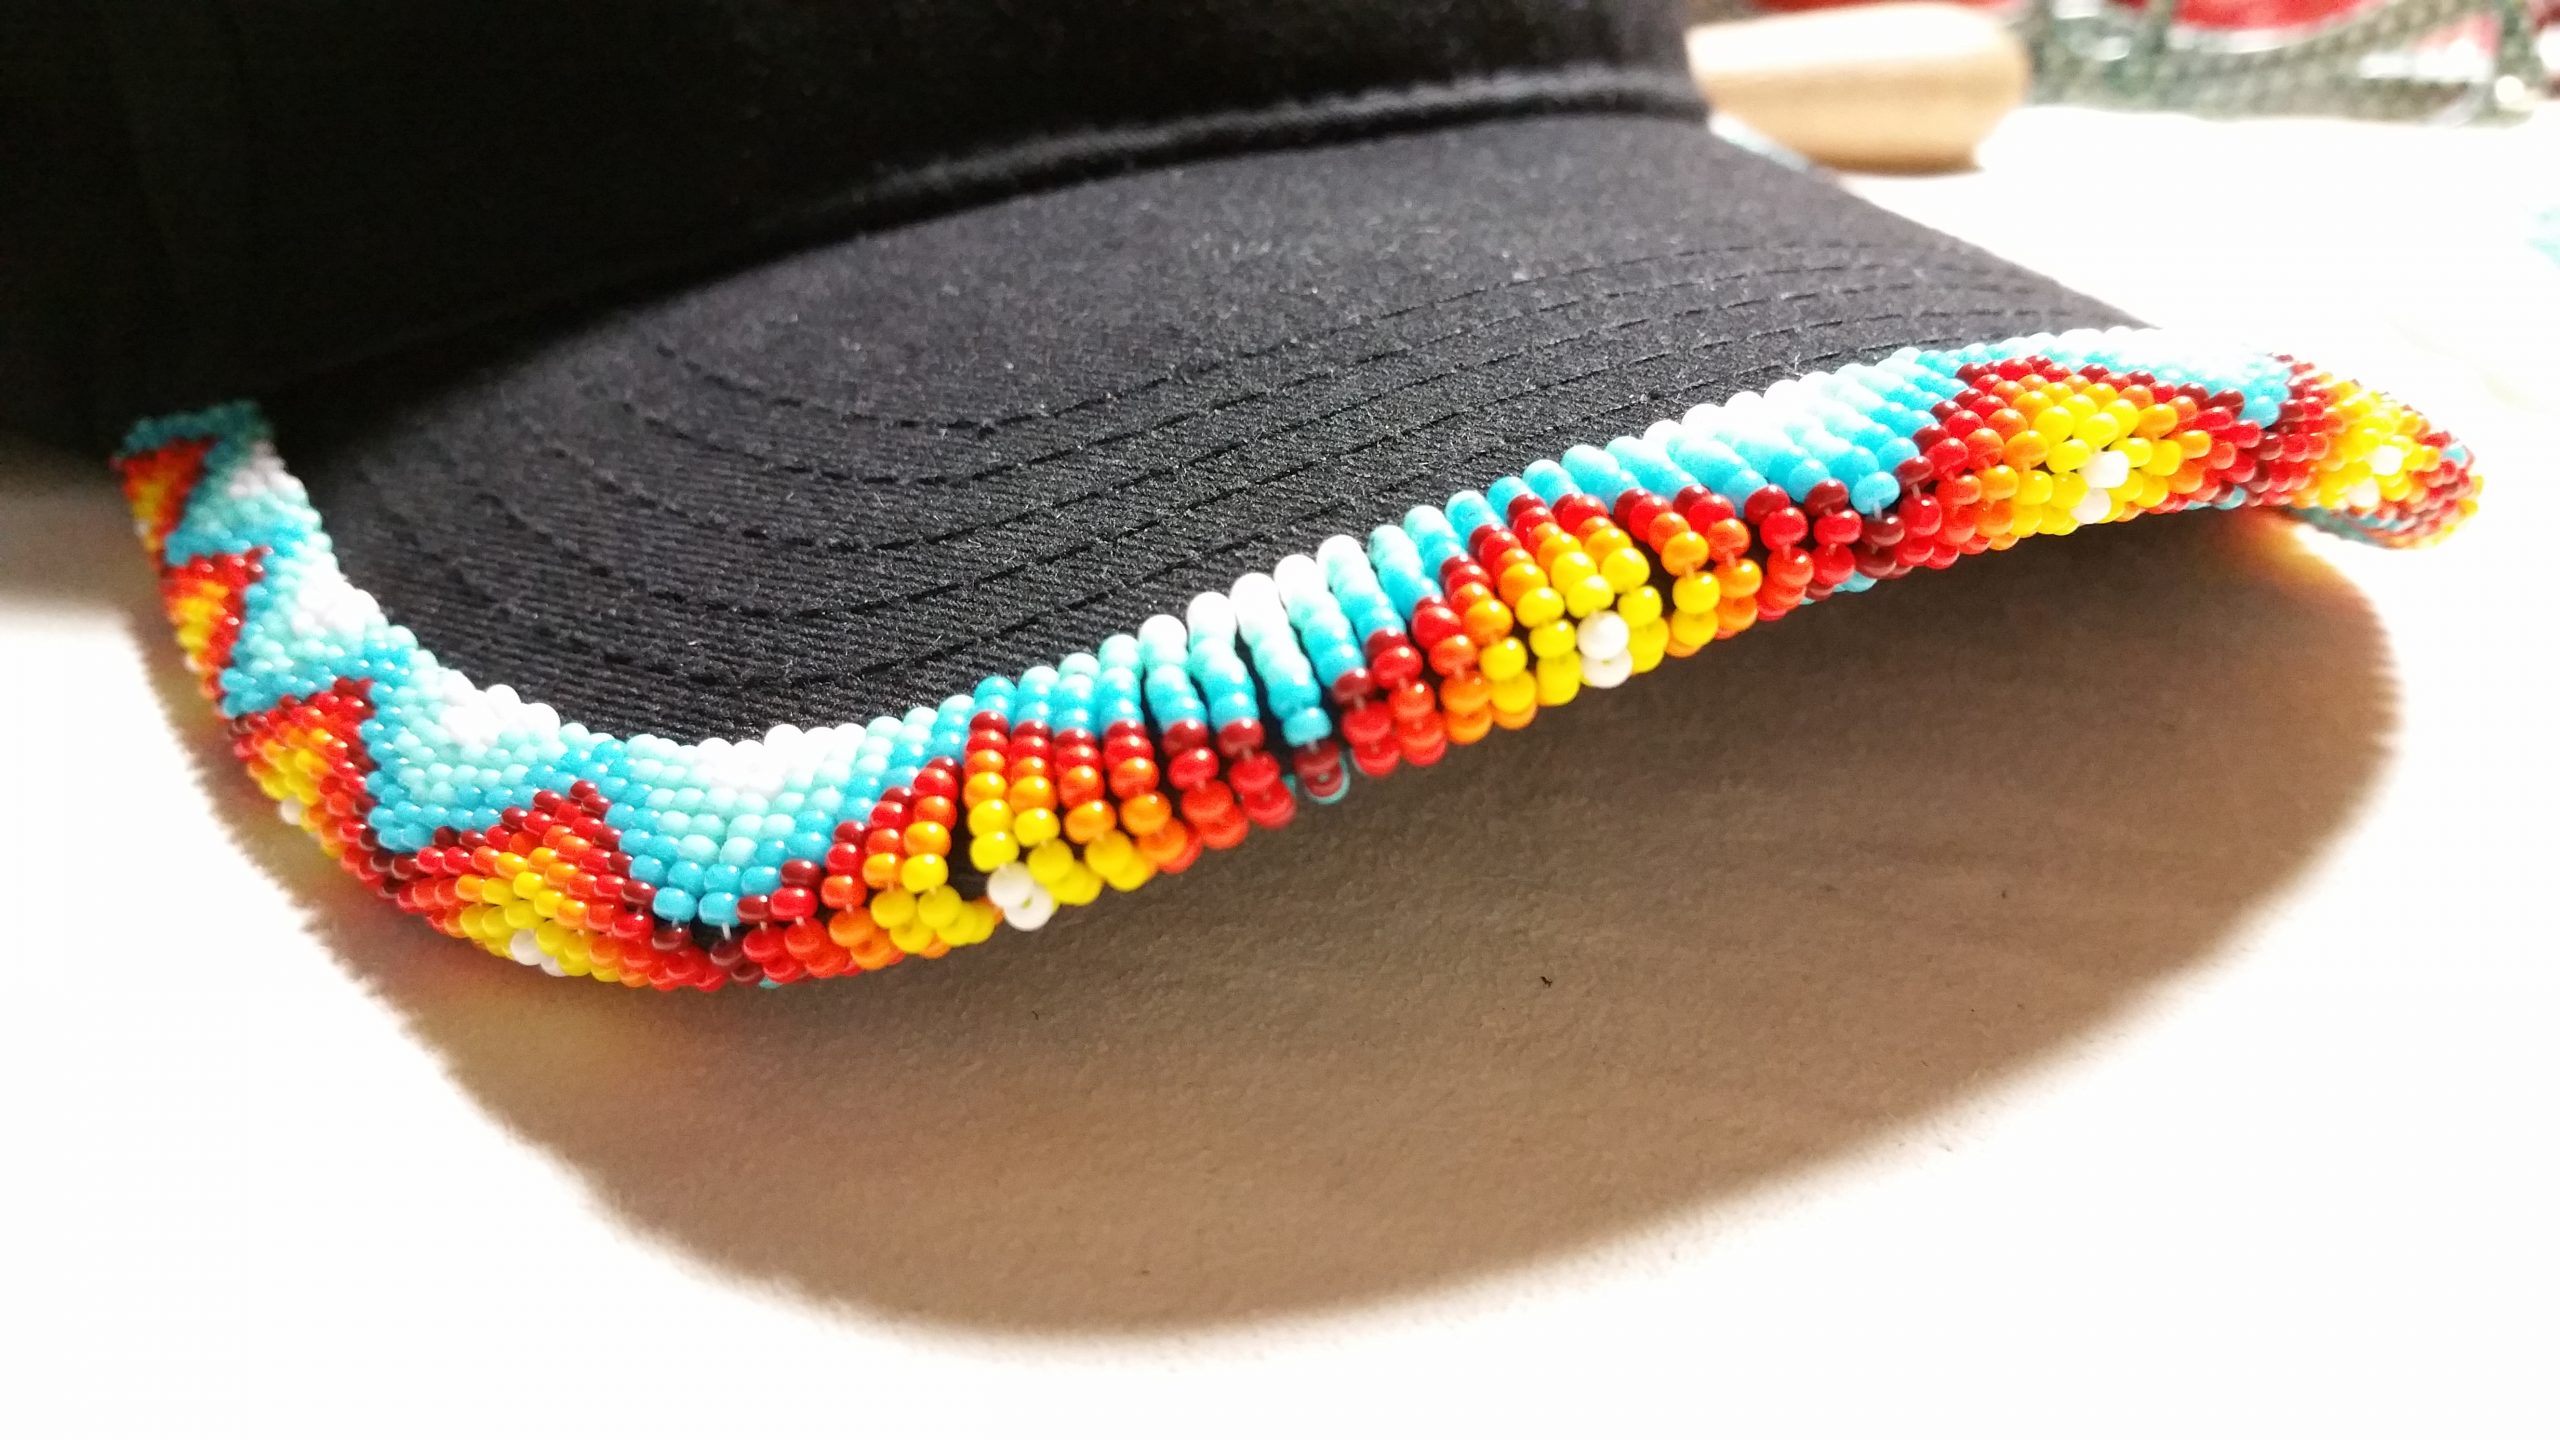
Here you can see the finished rim of the visor.
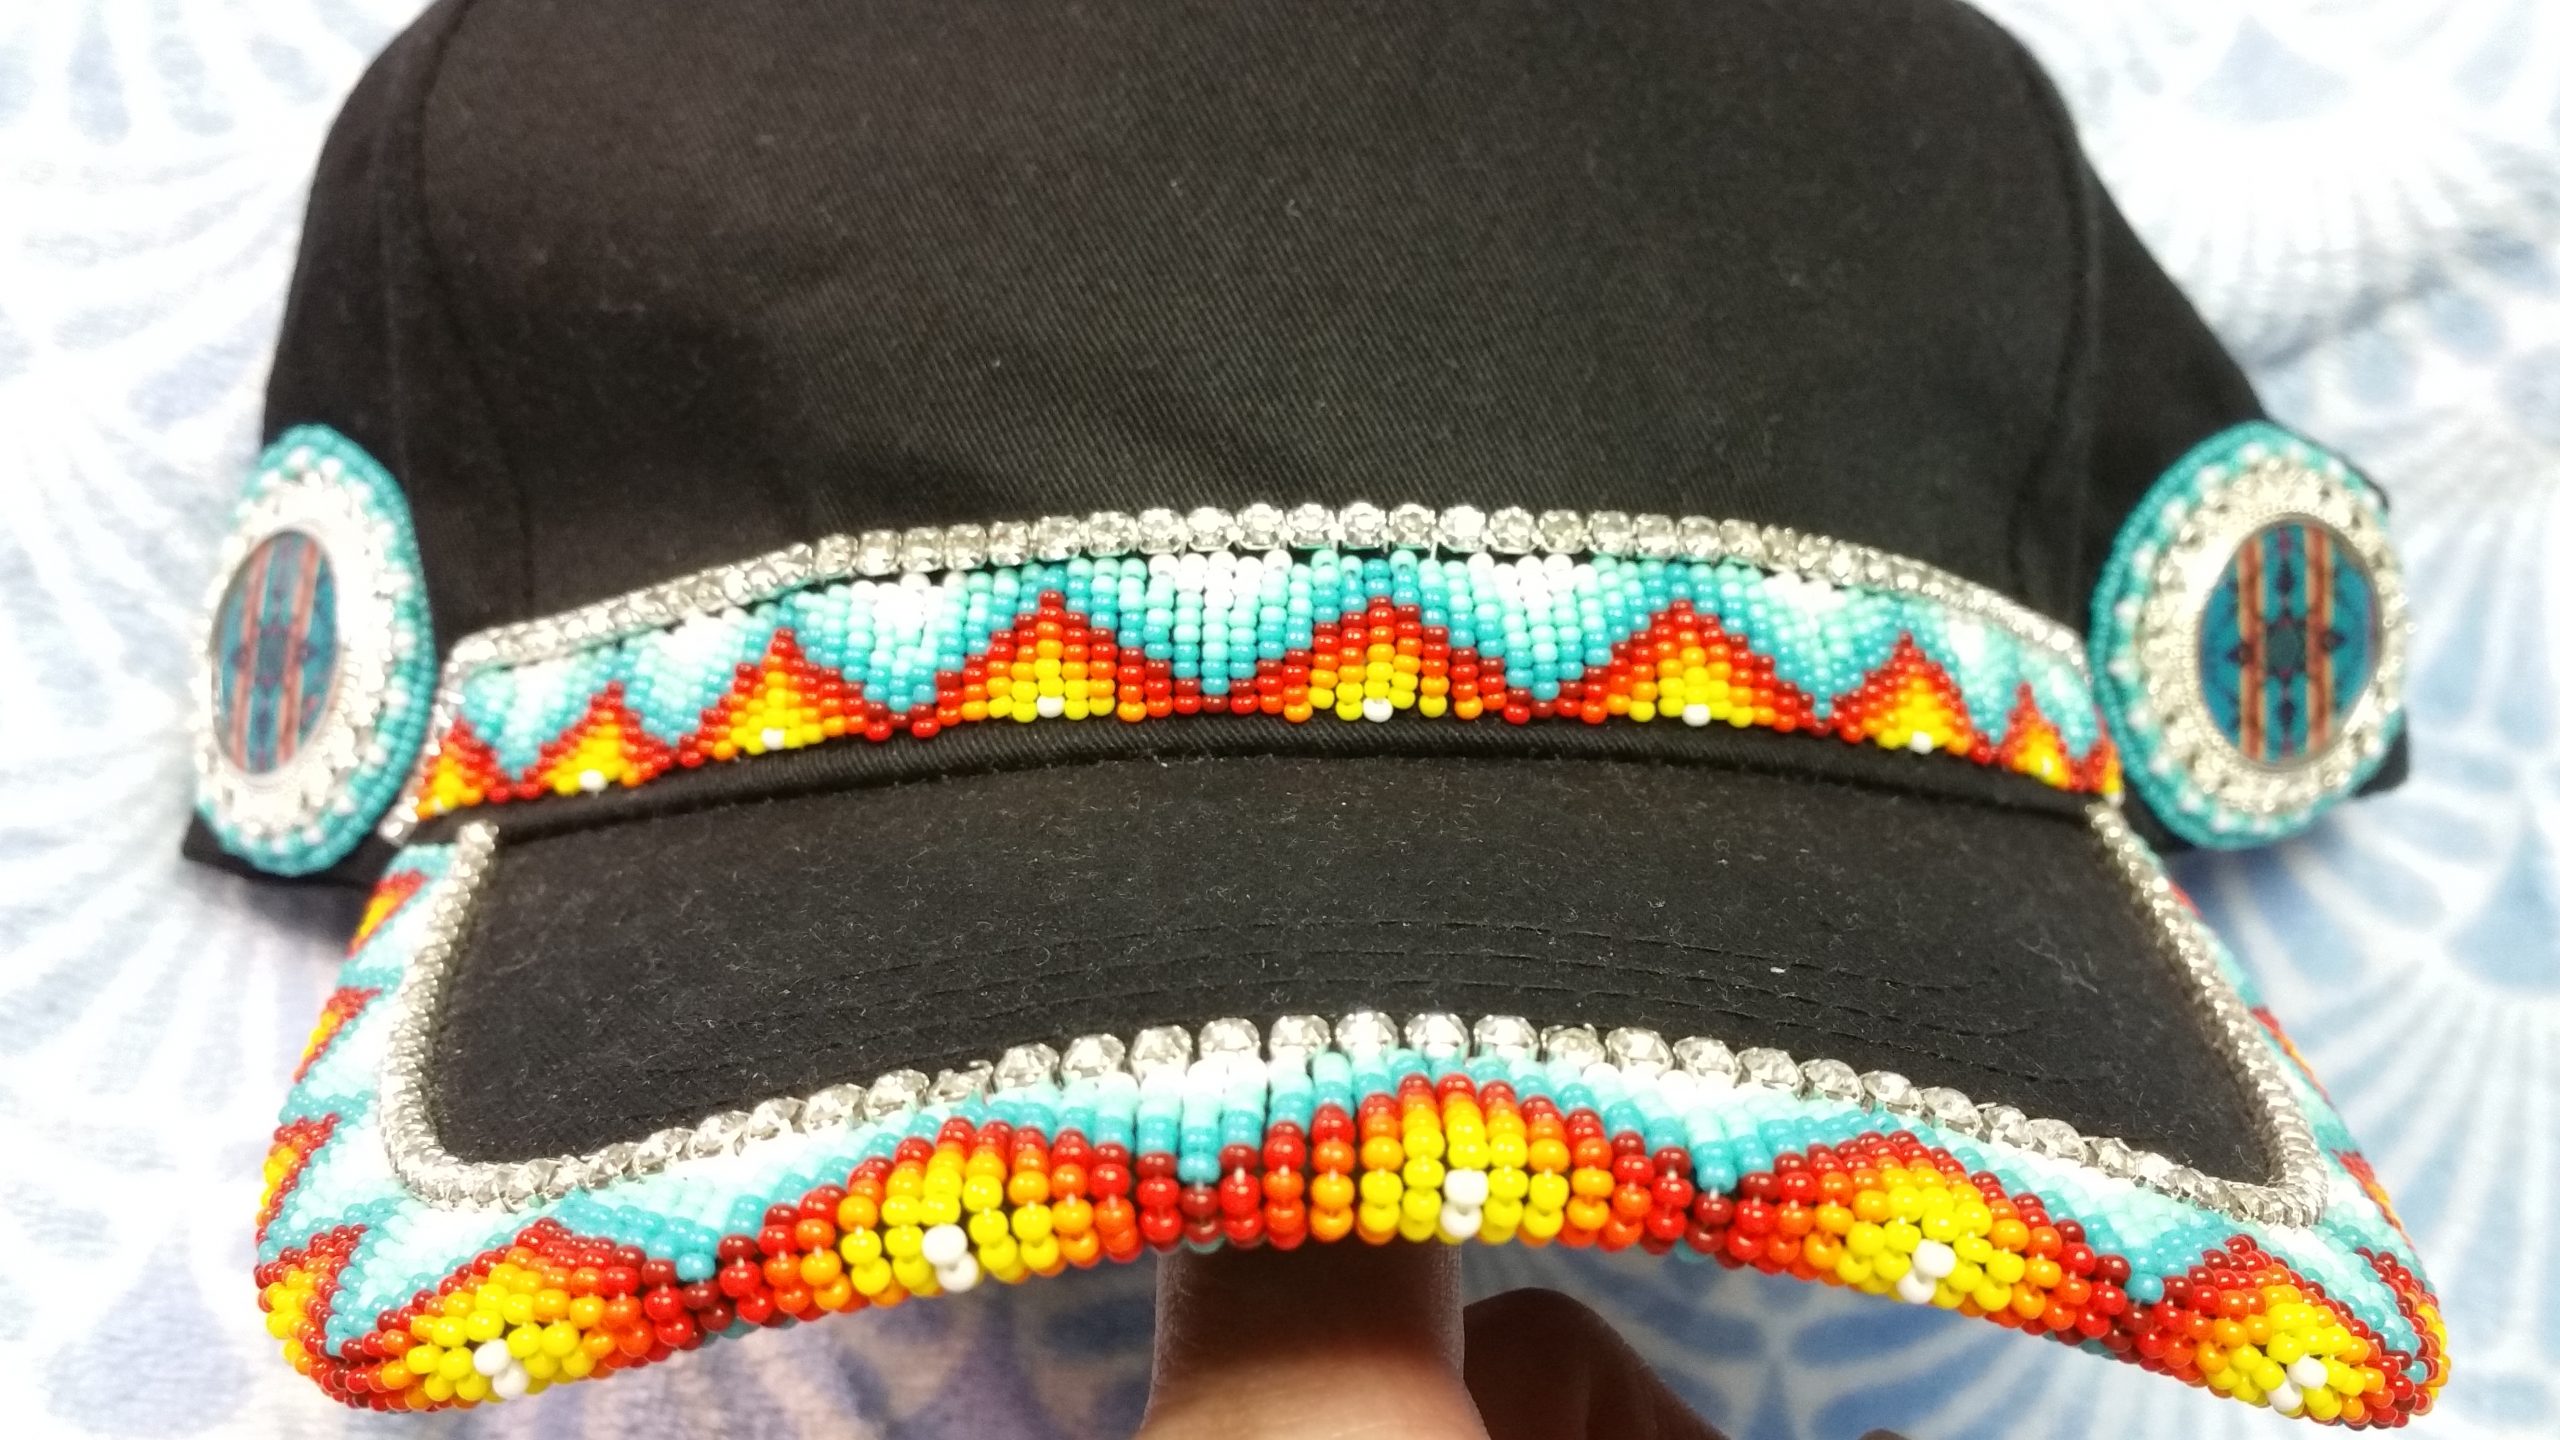
After finishing the rim I decided to make another row of beadwork and also add some rhinestones.
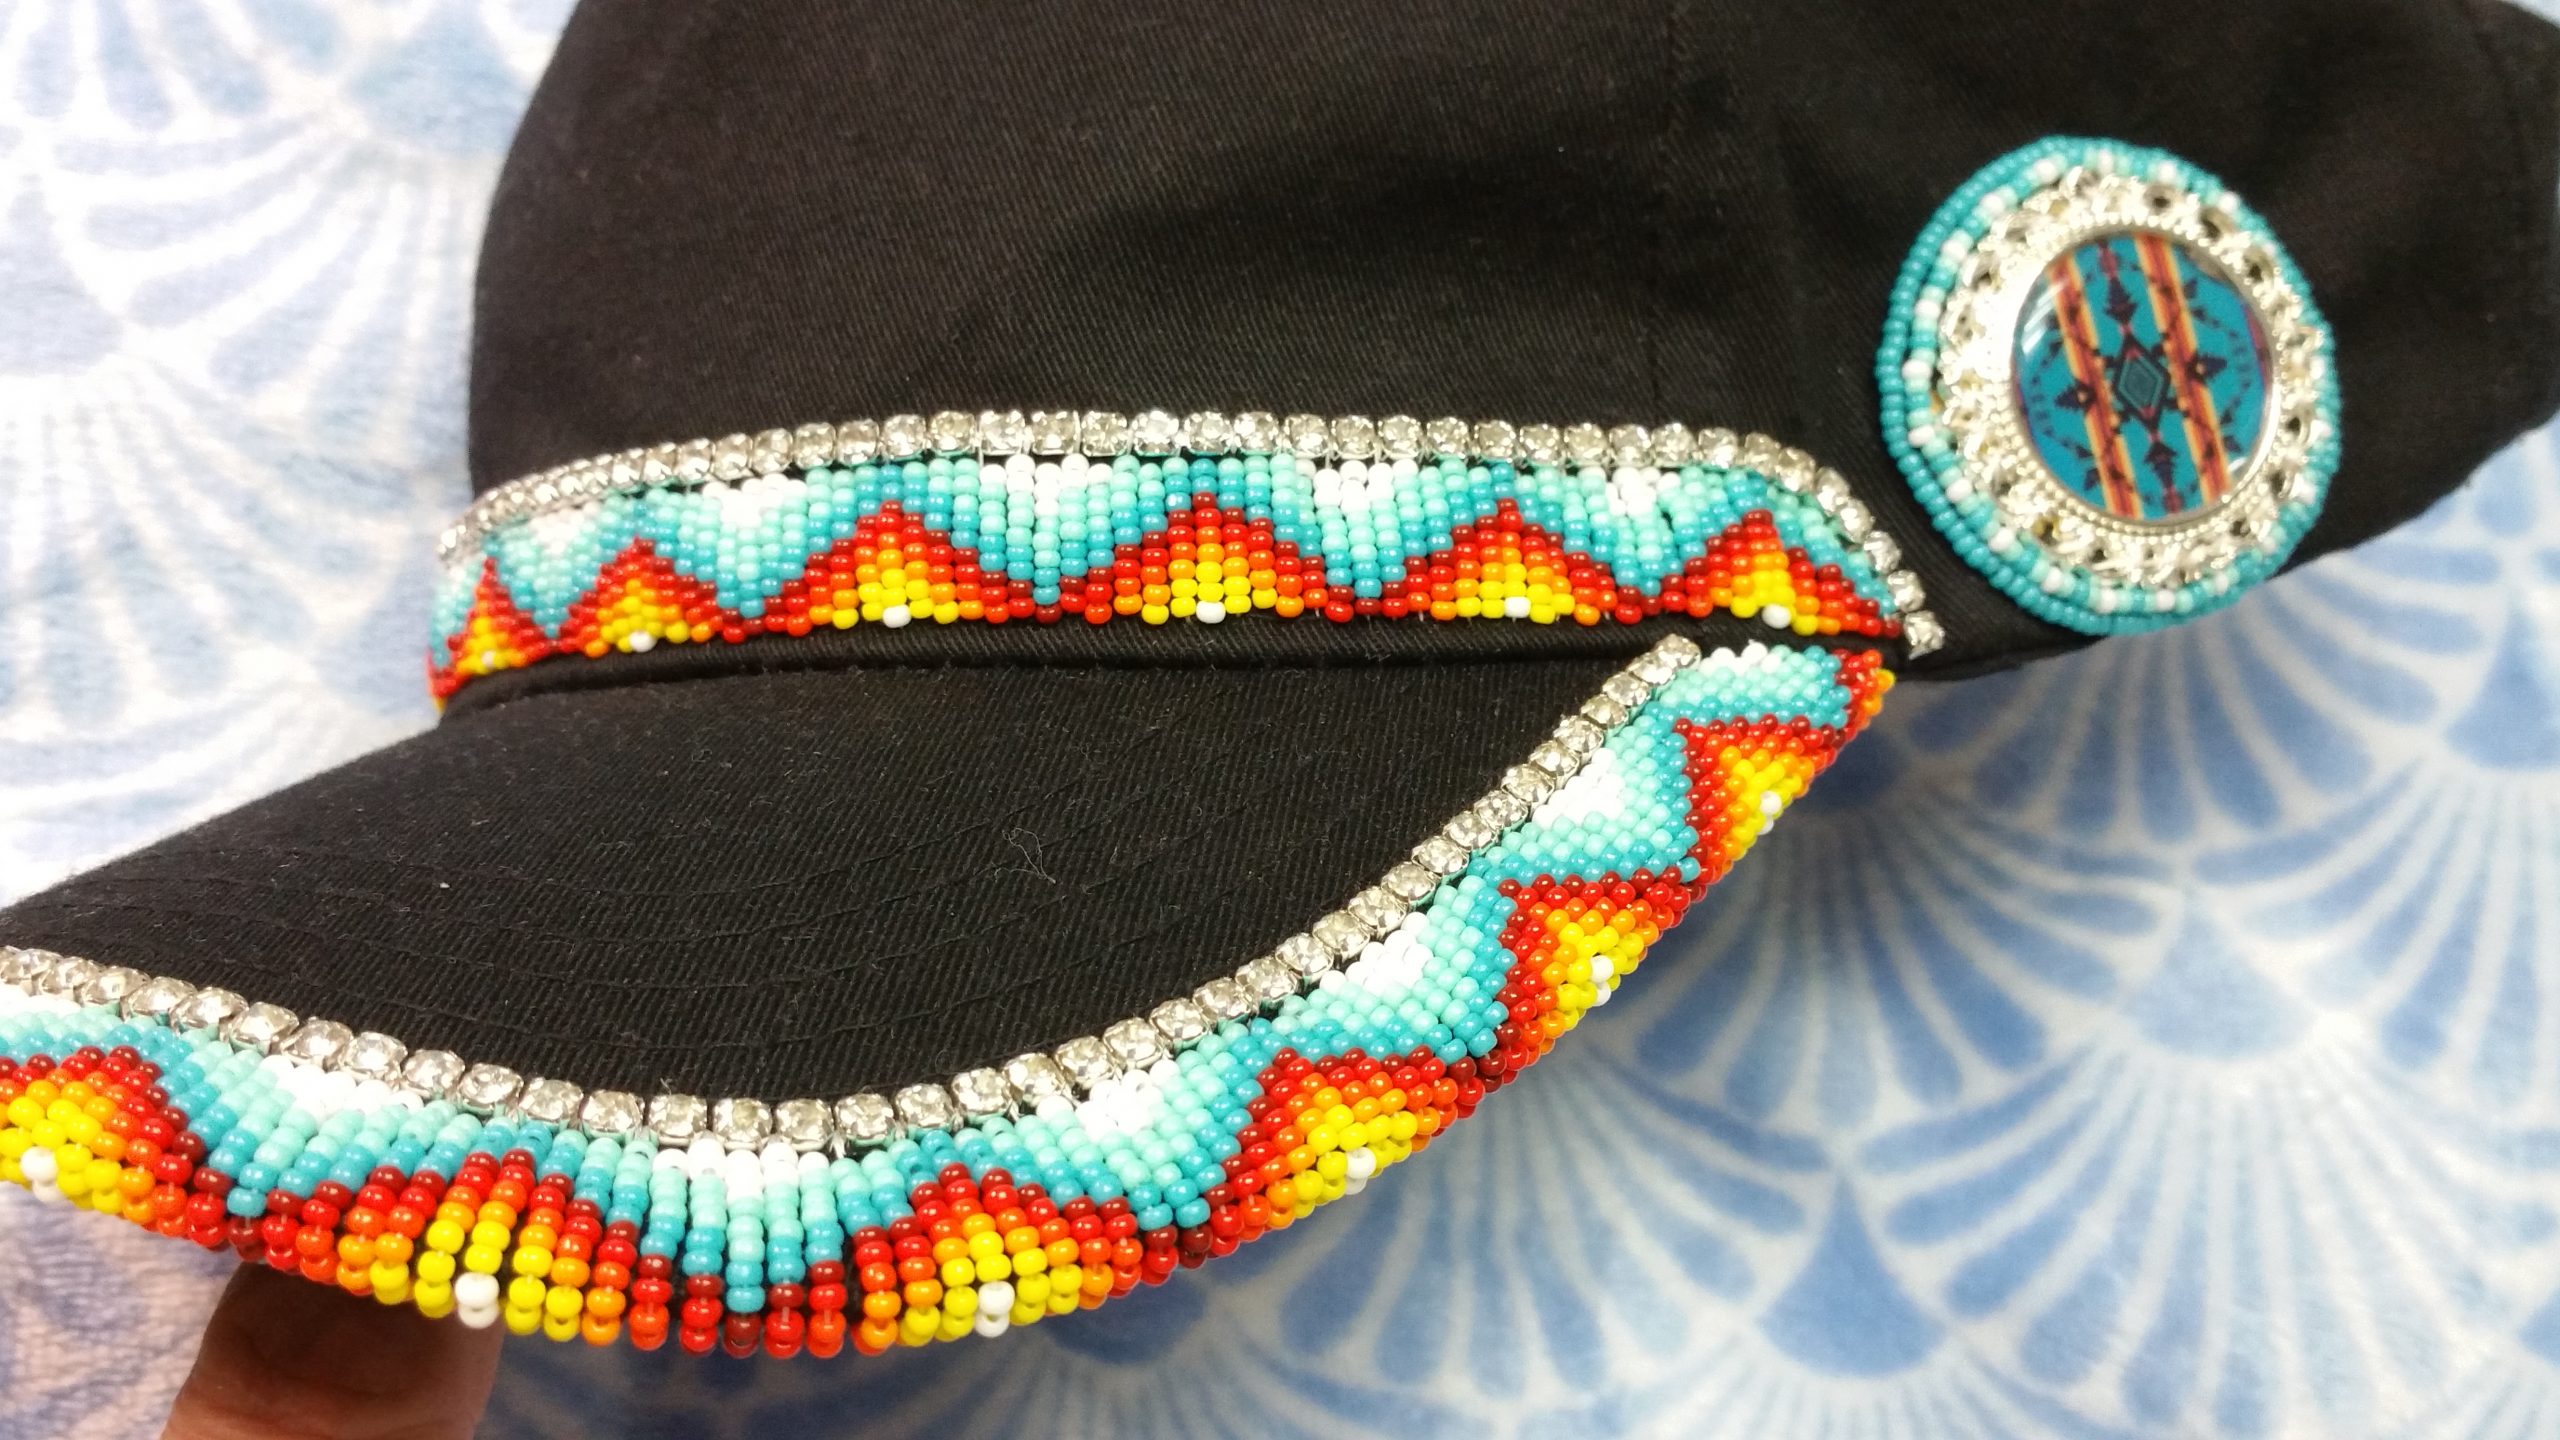
As last part of decoration I took two pendant blanks with a native american design cabochon and added them on the side.
There are many many ways to decorate a baseball cap. It is all up to you, your imagination and your likes or dislikes.
Stay safe!
Alley-Jean

This post is a little off-topic since it has nothing to do with beads or creating jewelry.
But I wanted to share this little colorful project with you anyway 🙂
Rock Painting is something I know from when I was a child.
My mom was a school teacher and also very creative.
She took part in seminars and bought books to get ideas what she could do with her kids.
And most of the time she “used” me as a testing object *lol*.
So one time we started rock painting.
If you think it is easy, you are wrong, well, partially wrong.
The most difficult part is finding the right rock with the right shape and sometimes also size.
The rest is really easy.
Today rock painting is also very popular – again – but a little different. Most rocks are decorated with quotes and flowers, sometimes also landscapes or animals, like little paintings just on another medium.
(if you browse through Pinterest you can find tons of inspiration!!)
In the 1970s it was mostly snakes, fishes and so on, whatever fitted the shape of the stone.
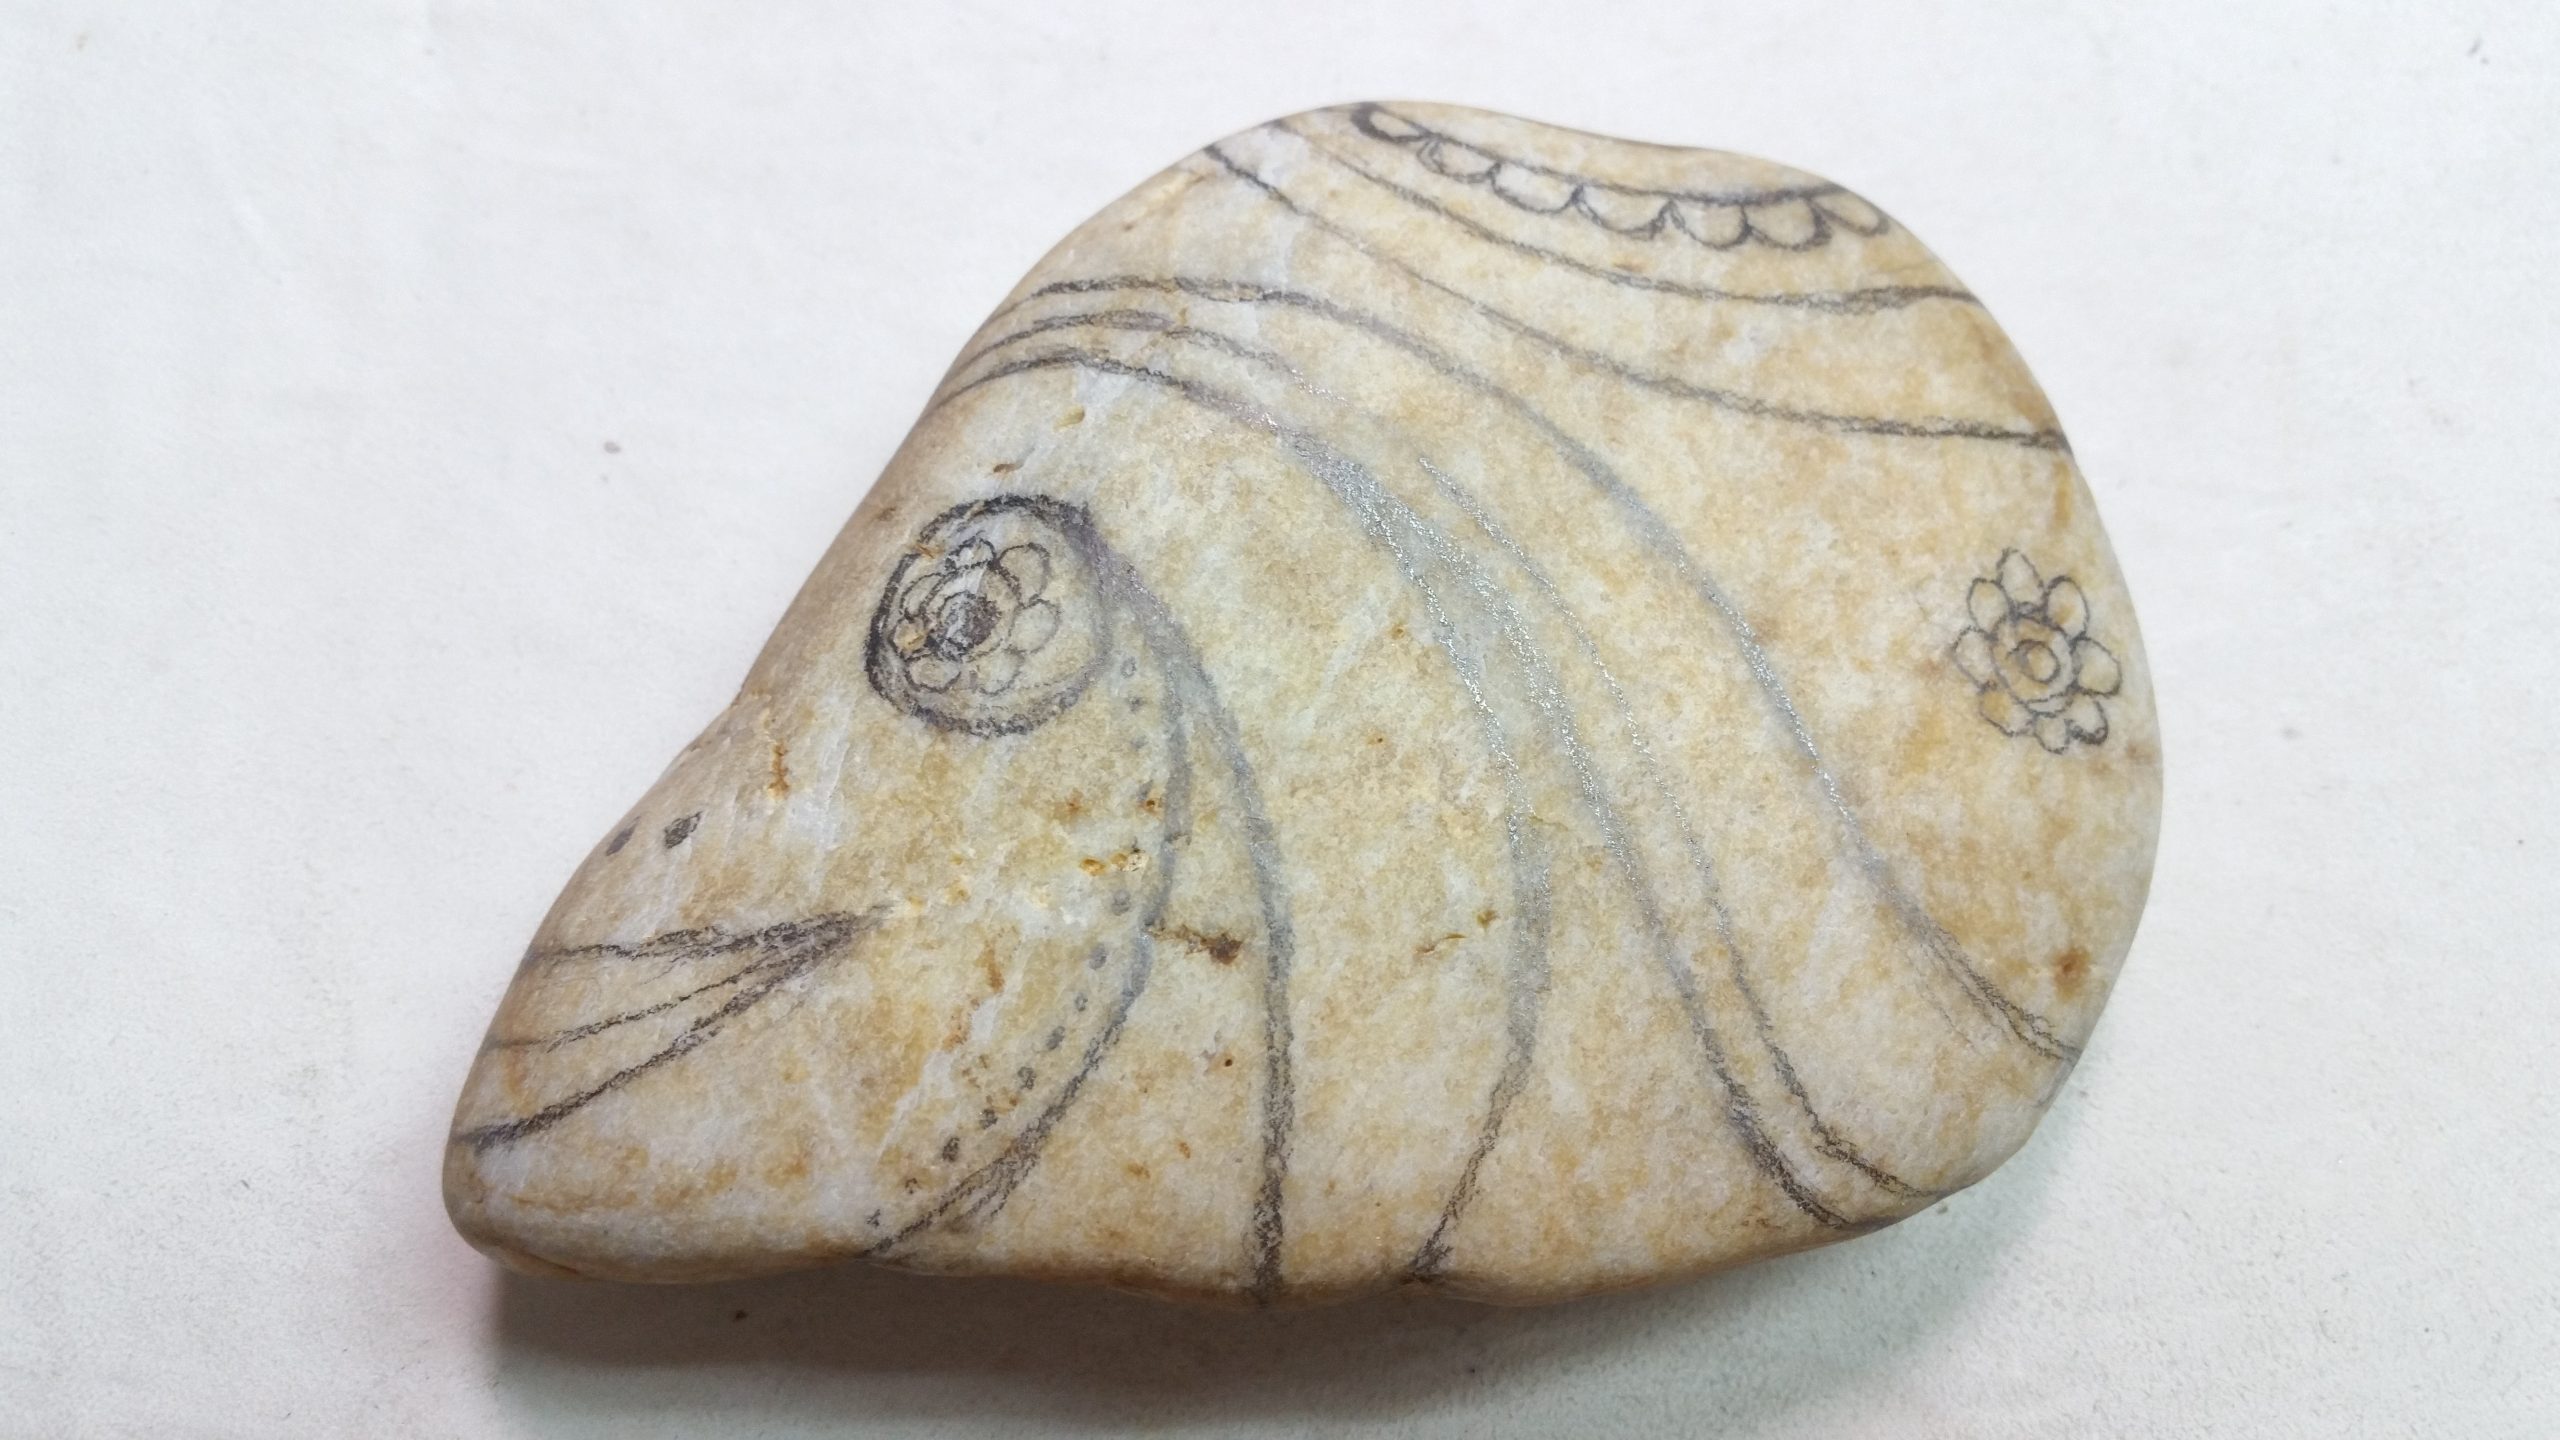
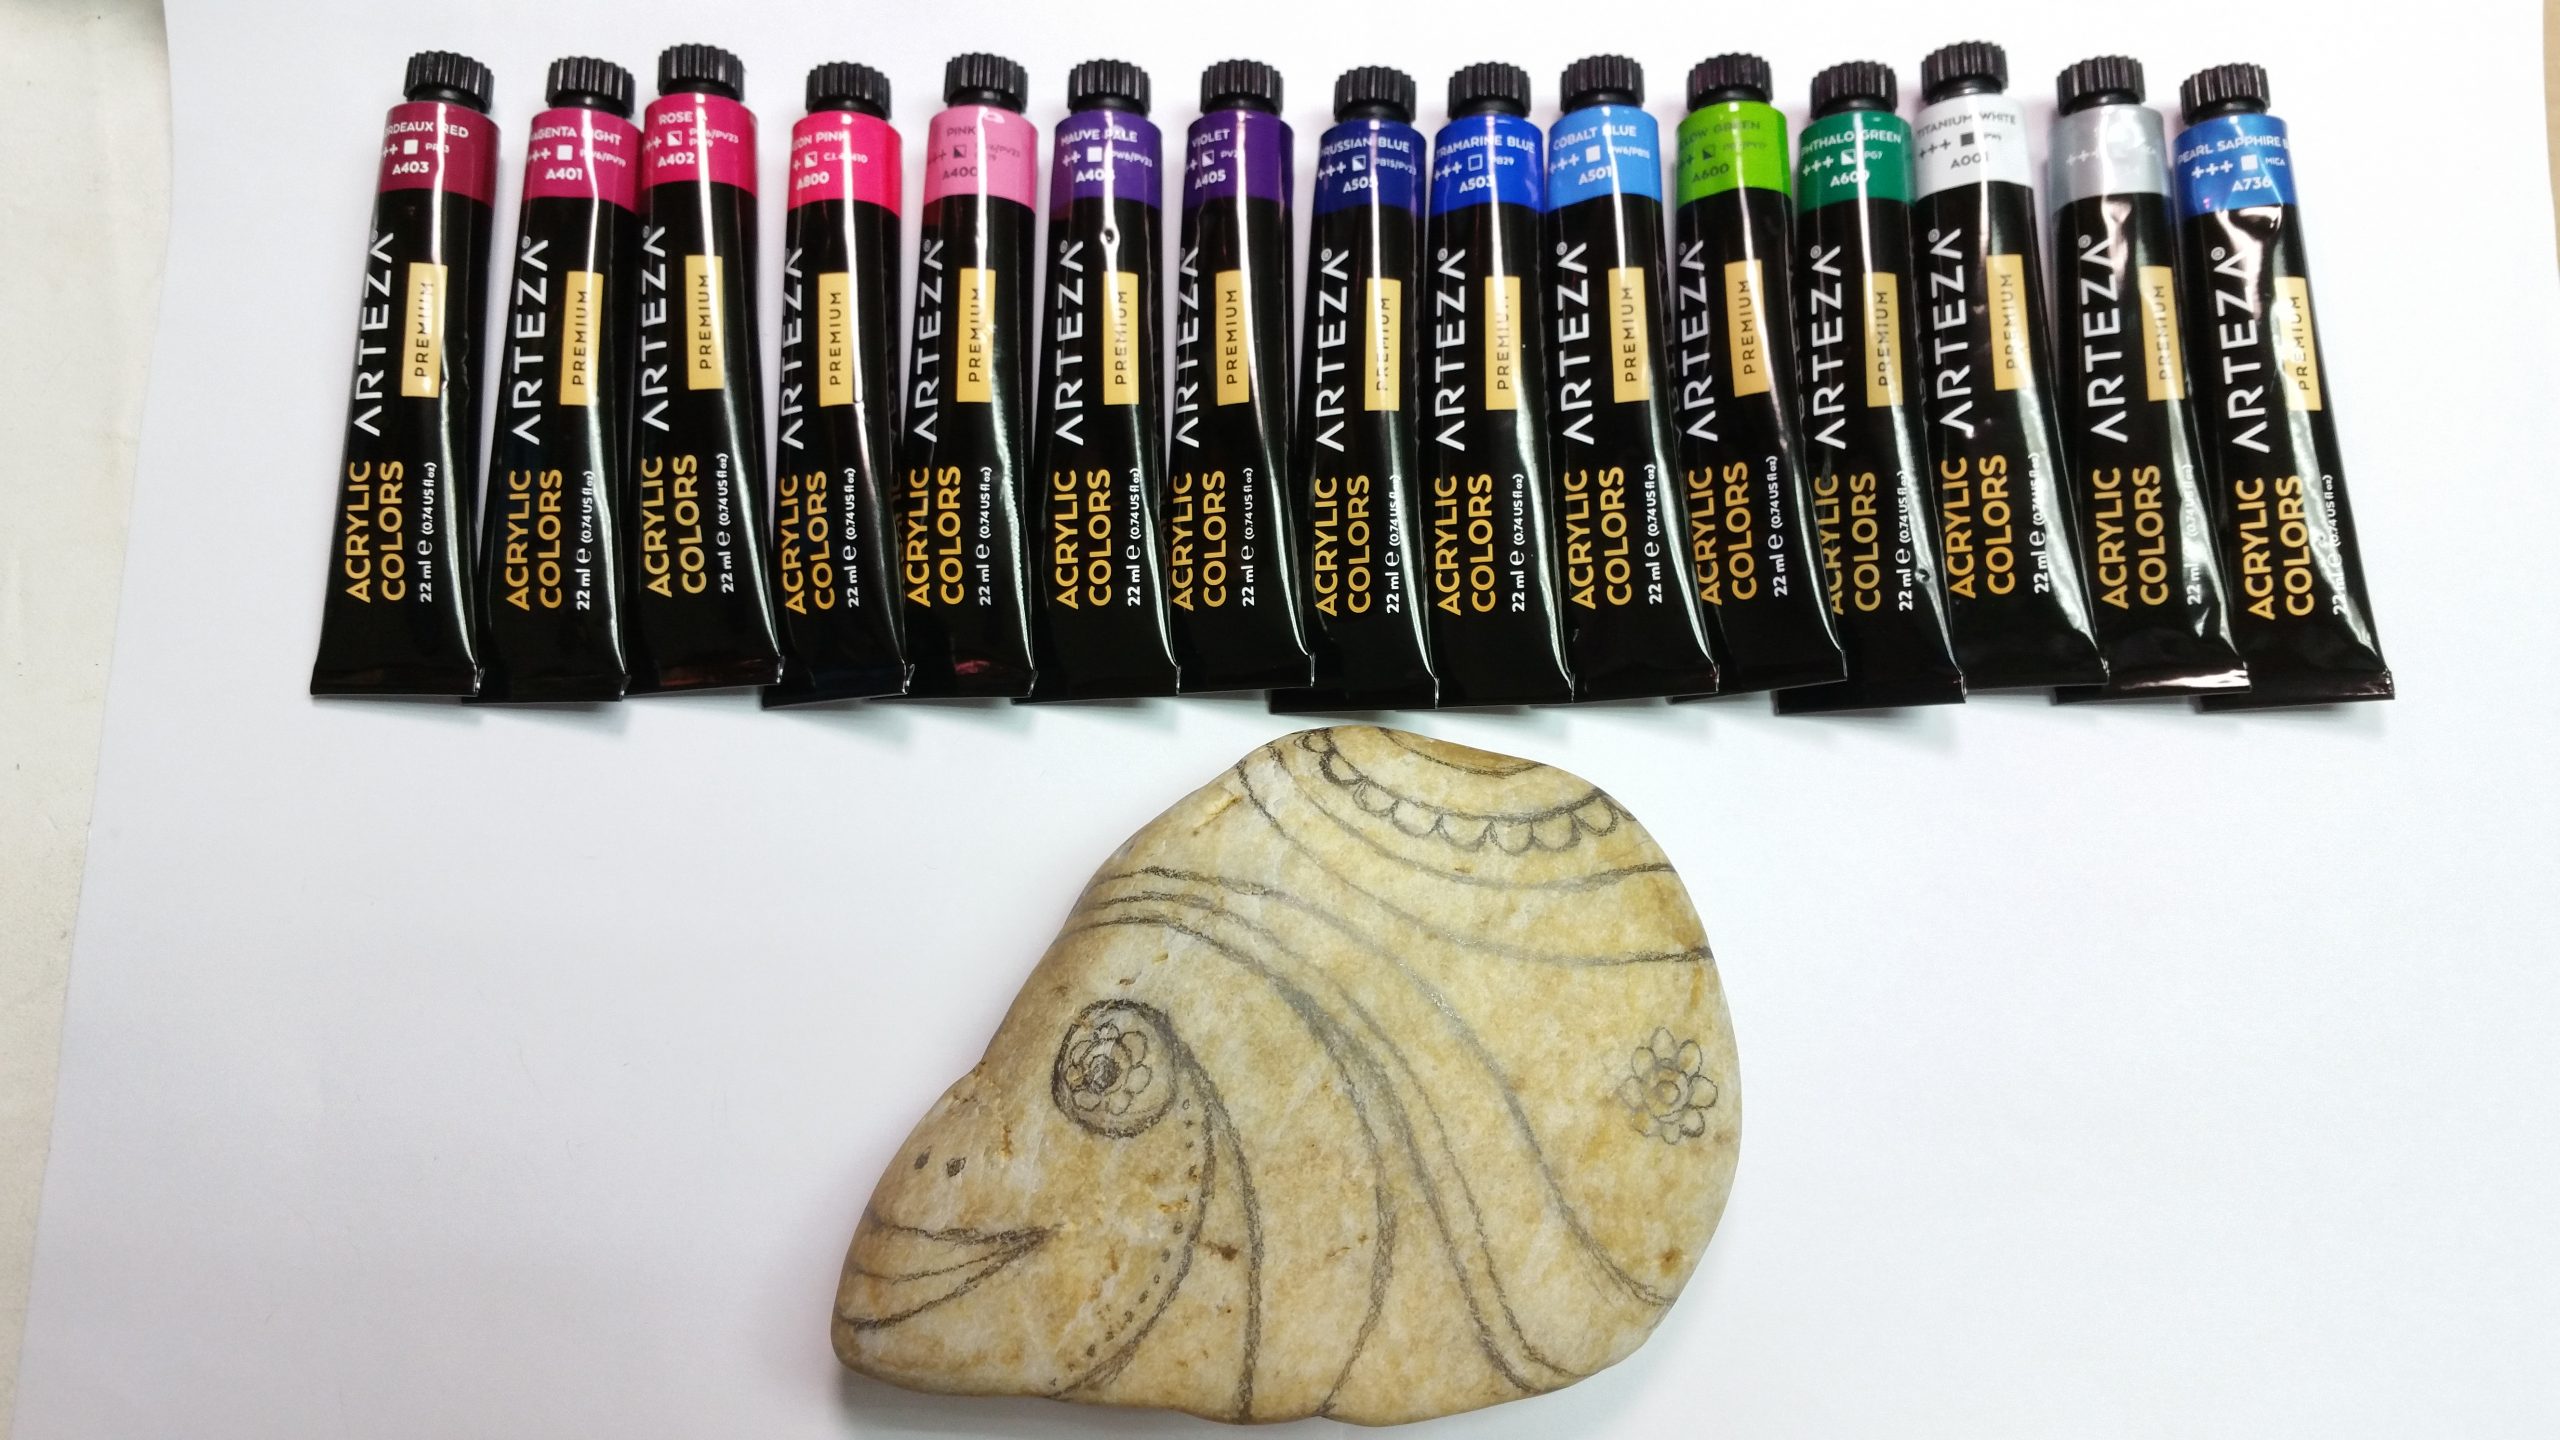
So when I found this rock I knew I had to paint it, because of this interesting shape.
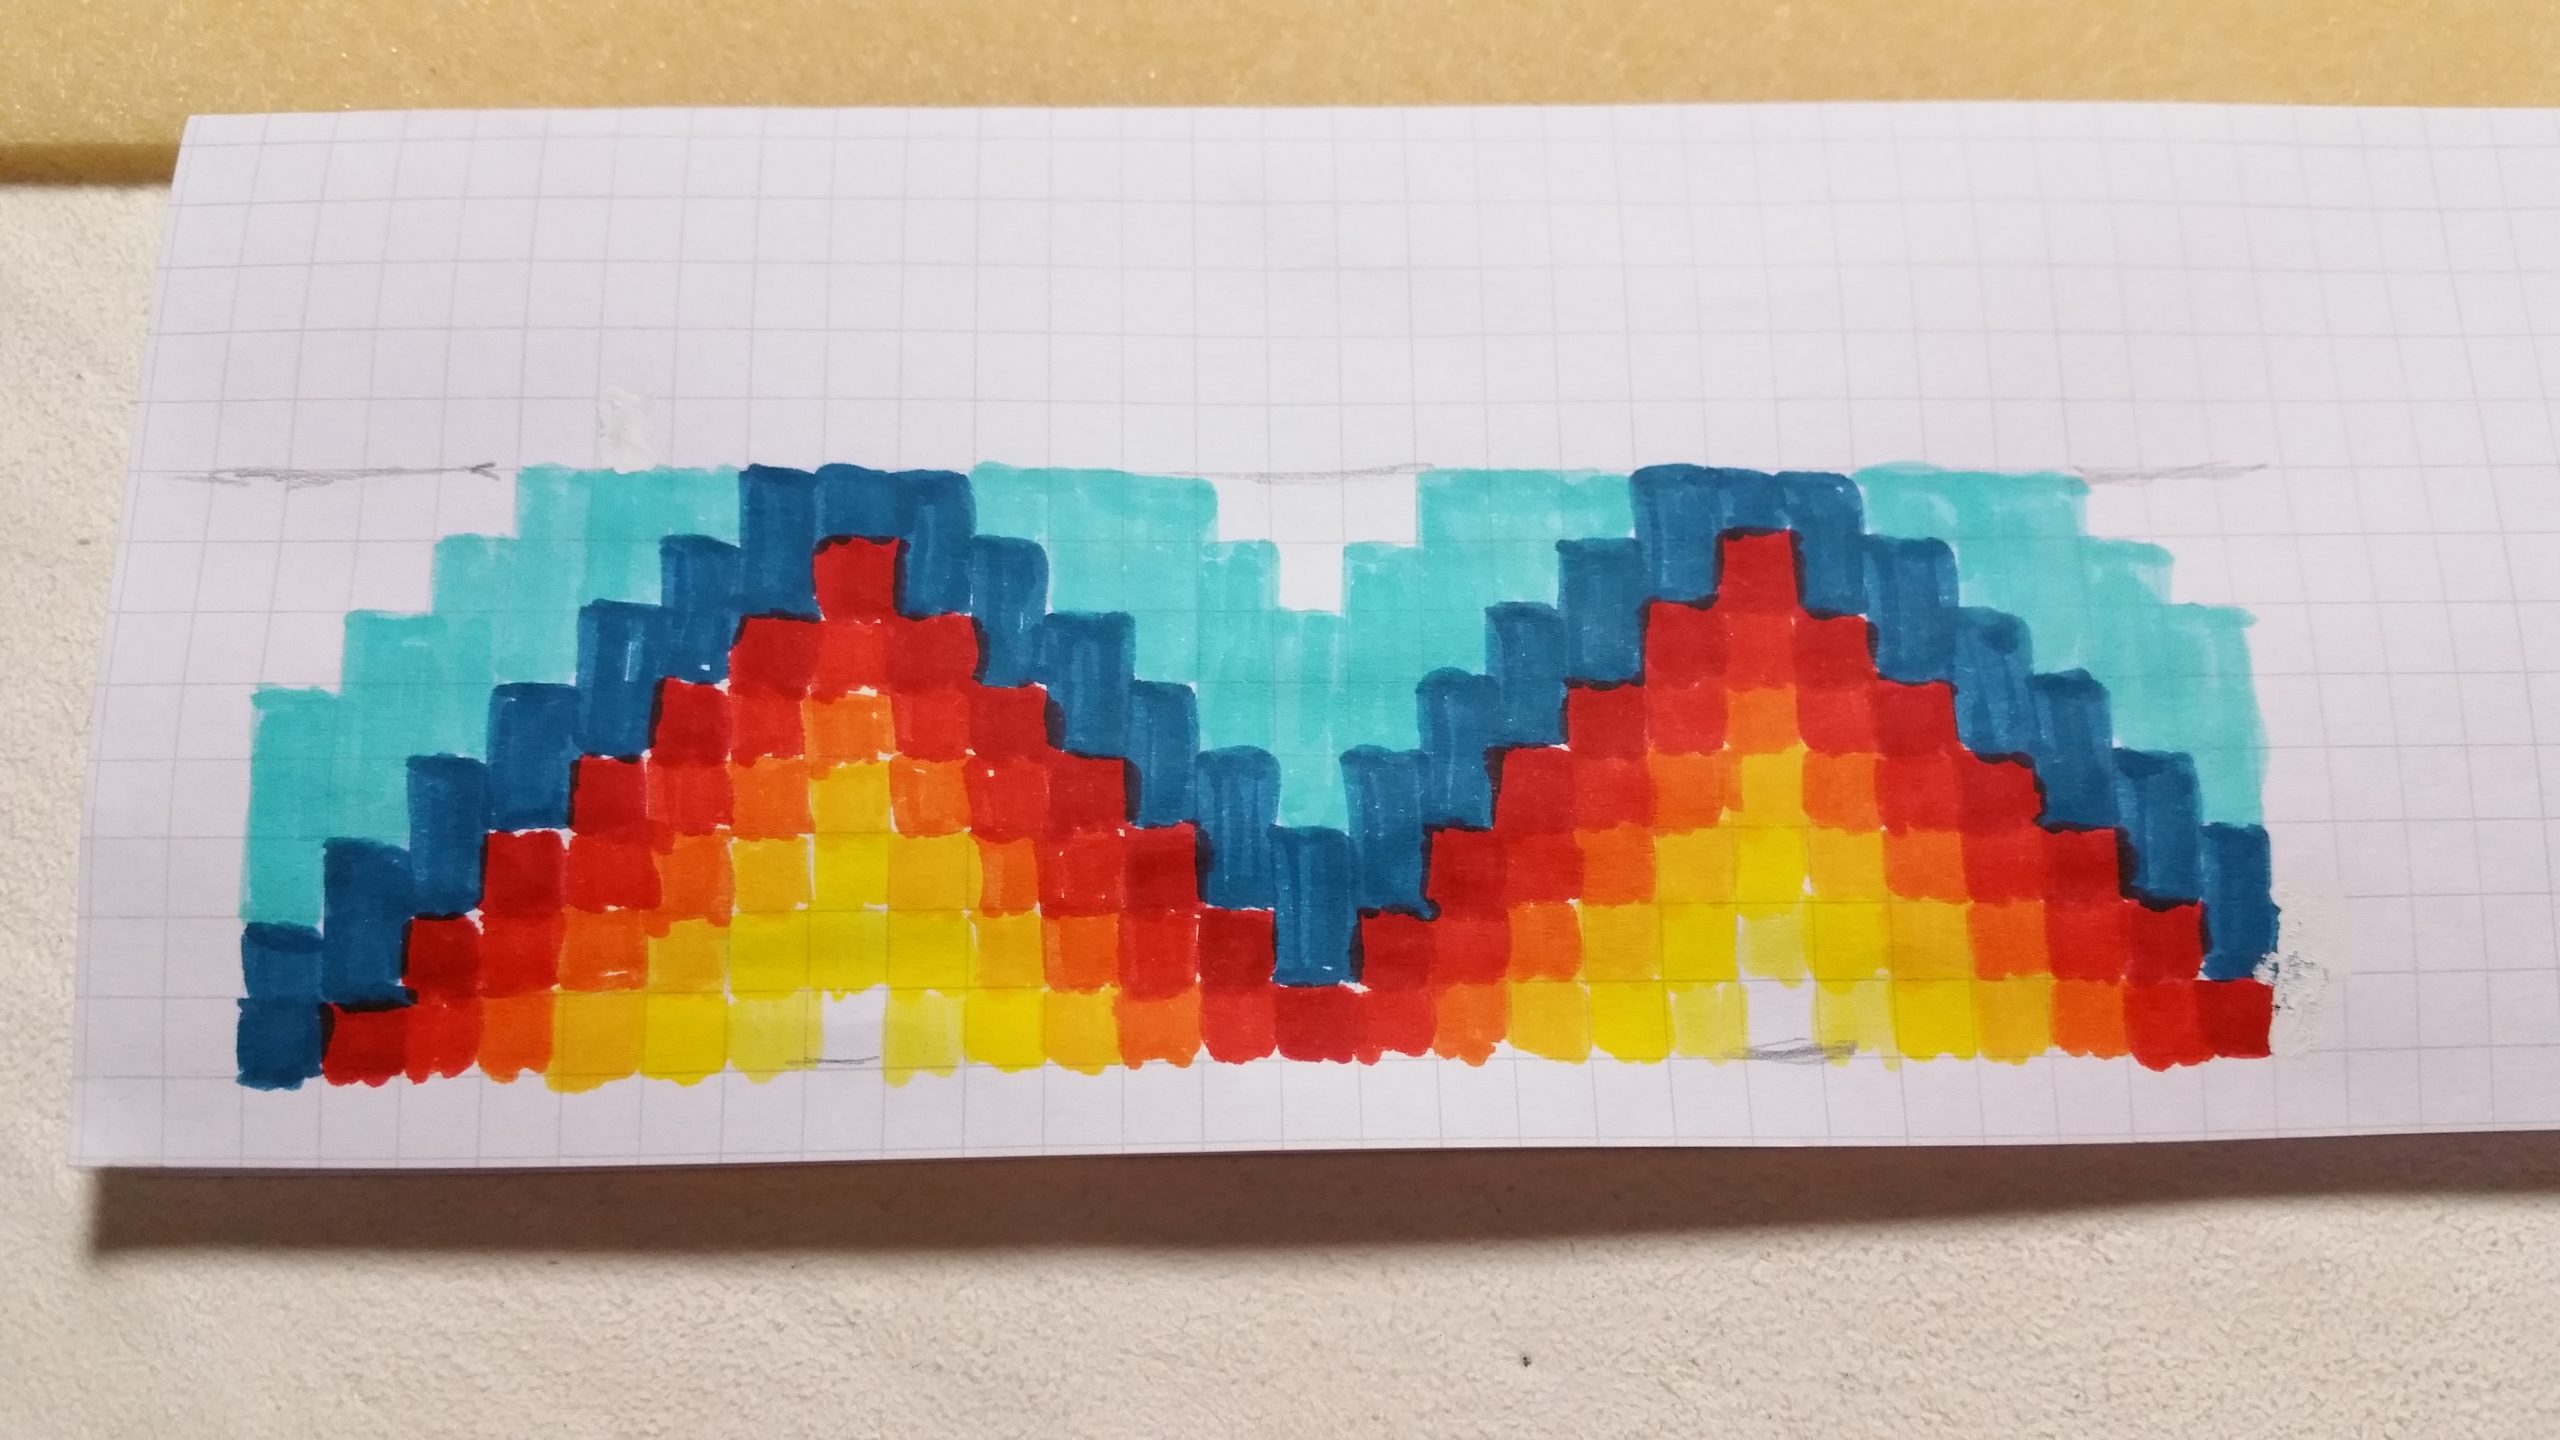
This was the pic from the booklet I had in mind ……

…… and this was how I transferred it:
The next thing to think about … colors.
Since I had in mind to lay the finished stone in the garden into one of our flower-beds or under a tree I wanted some flashy colors that stand out against the green.
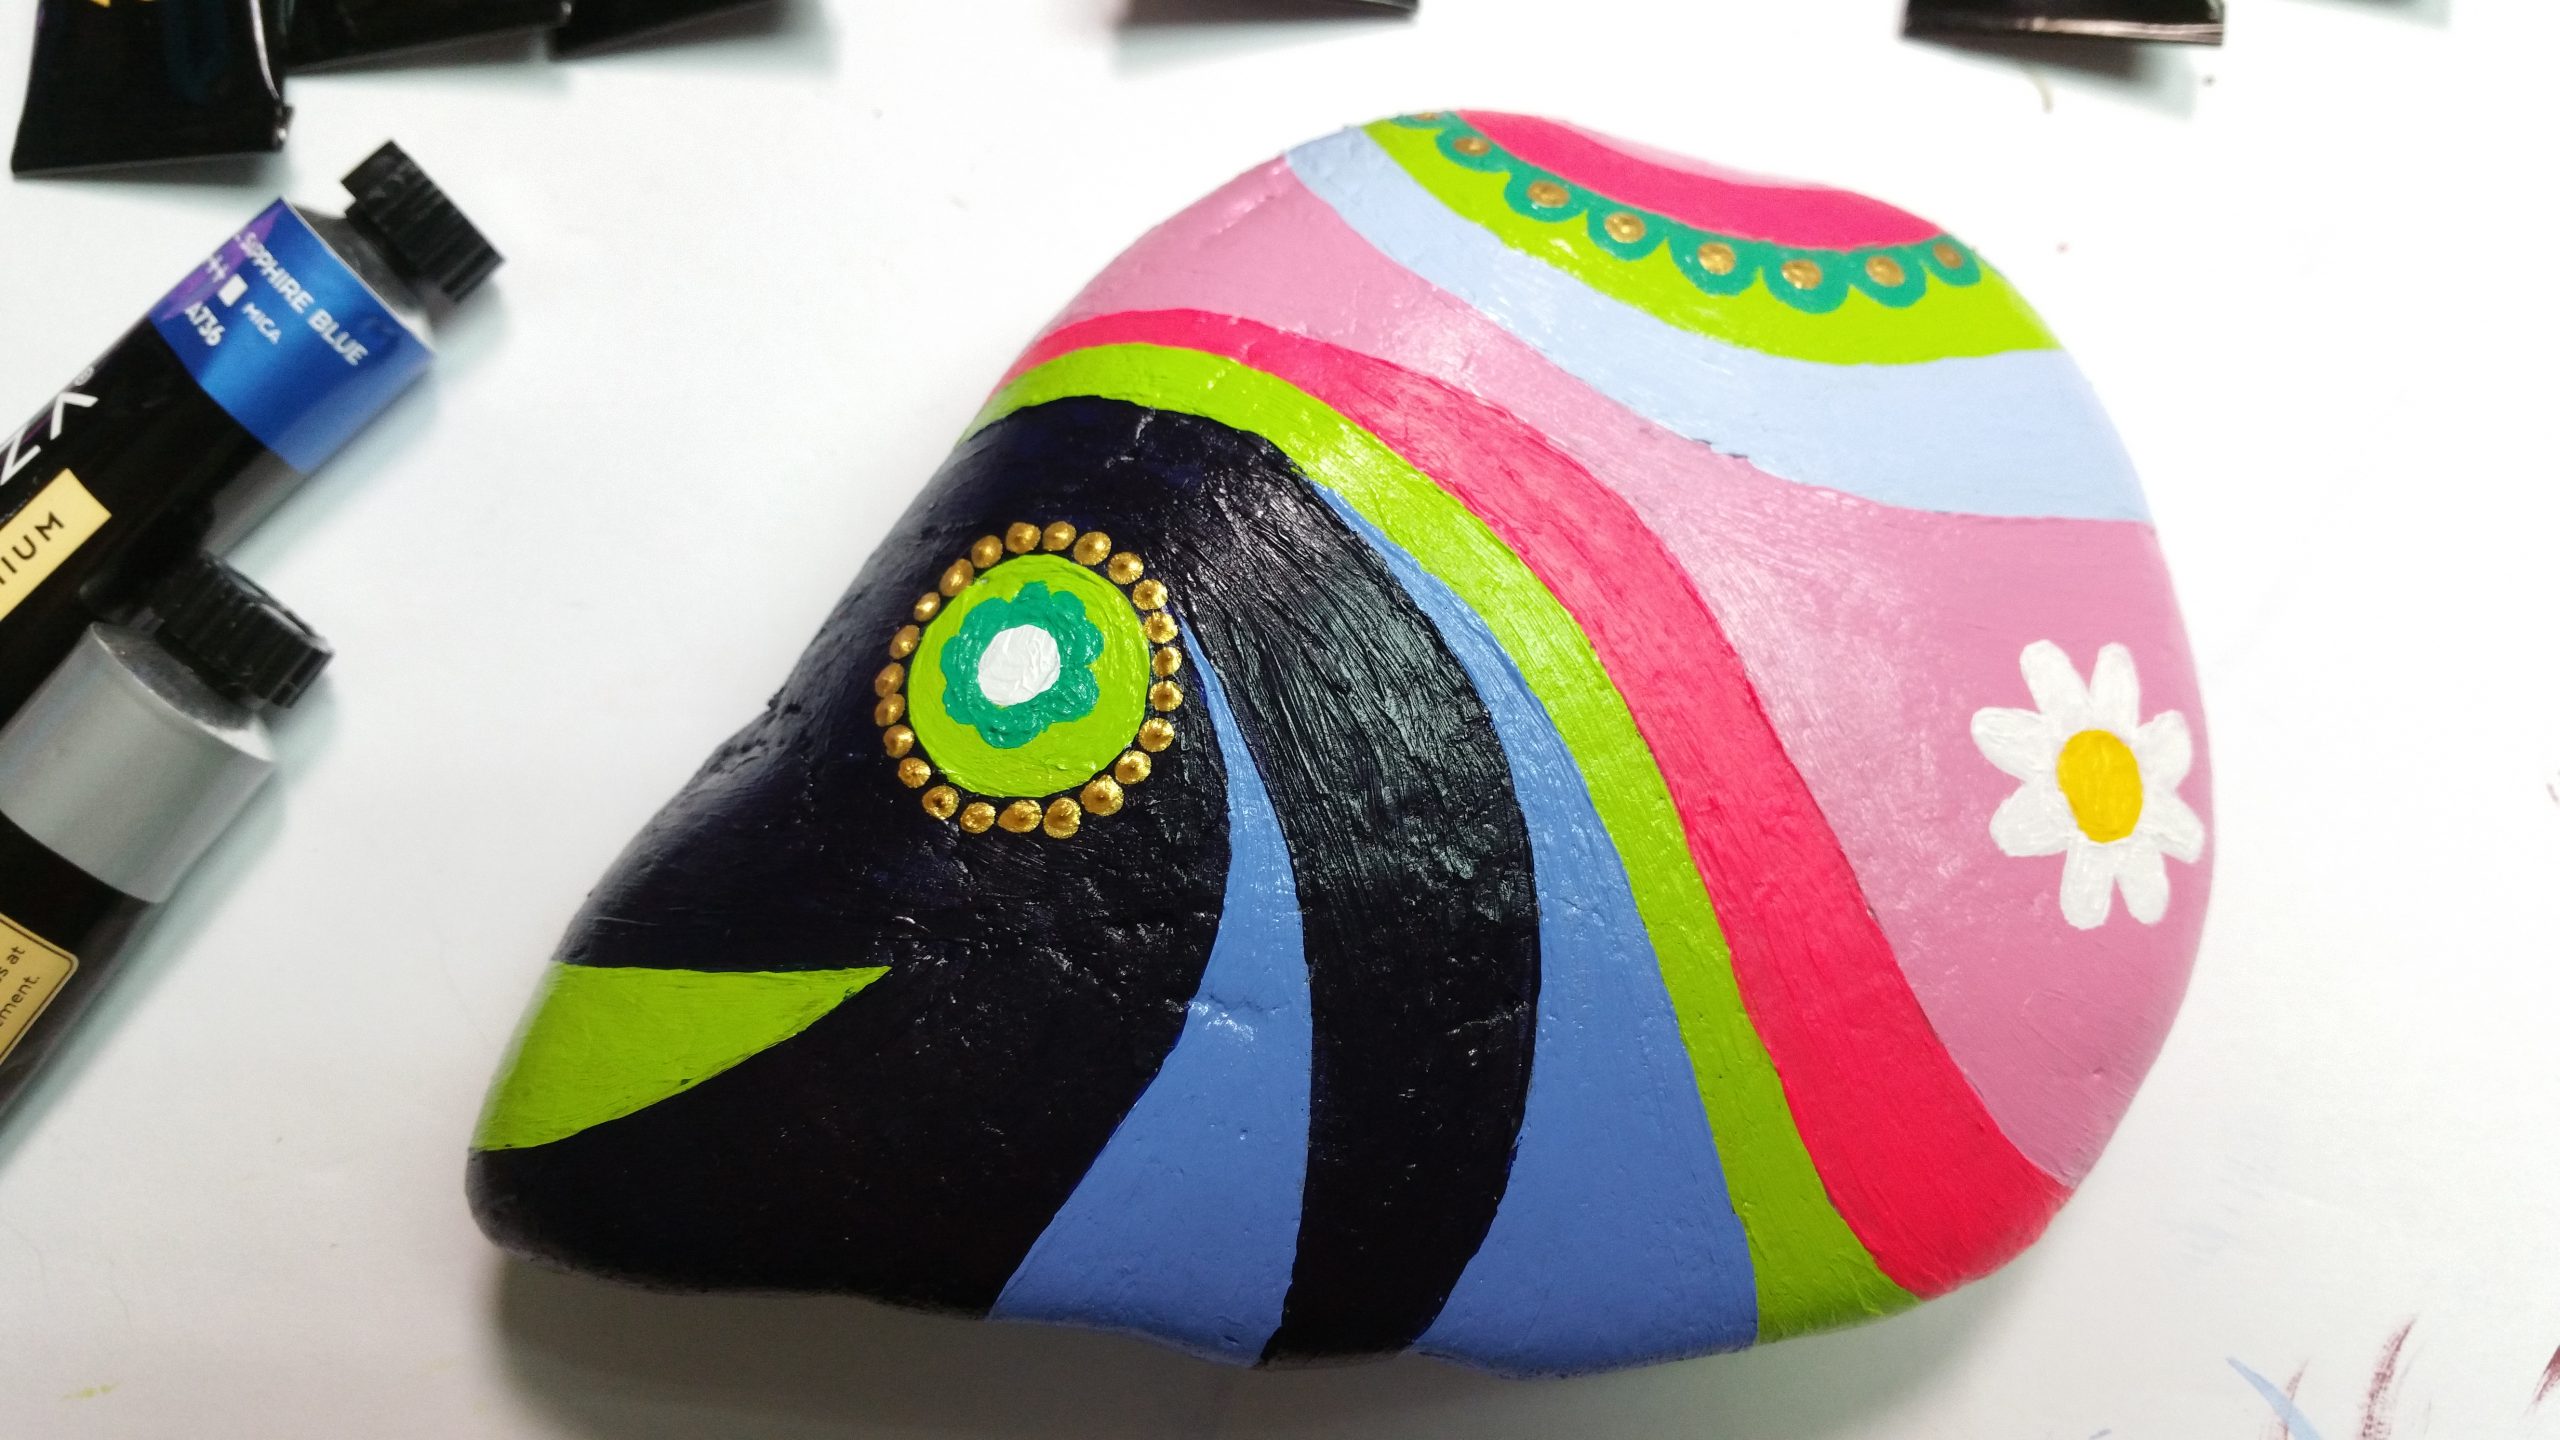
And this is what the stone looked like after the first painting part.

Only now I noticed that the colors need at least 2 layers of paint to cover the stone completely.
And the light green was to dark for me and also darker than on the outside of the tube.
So I started mixing it with white….

Way better. That was the color I had in mind….
Also the blue needed a little white in it.
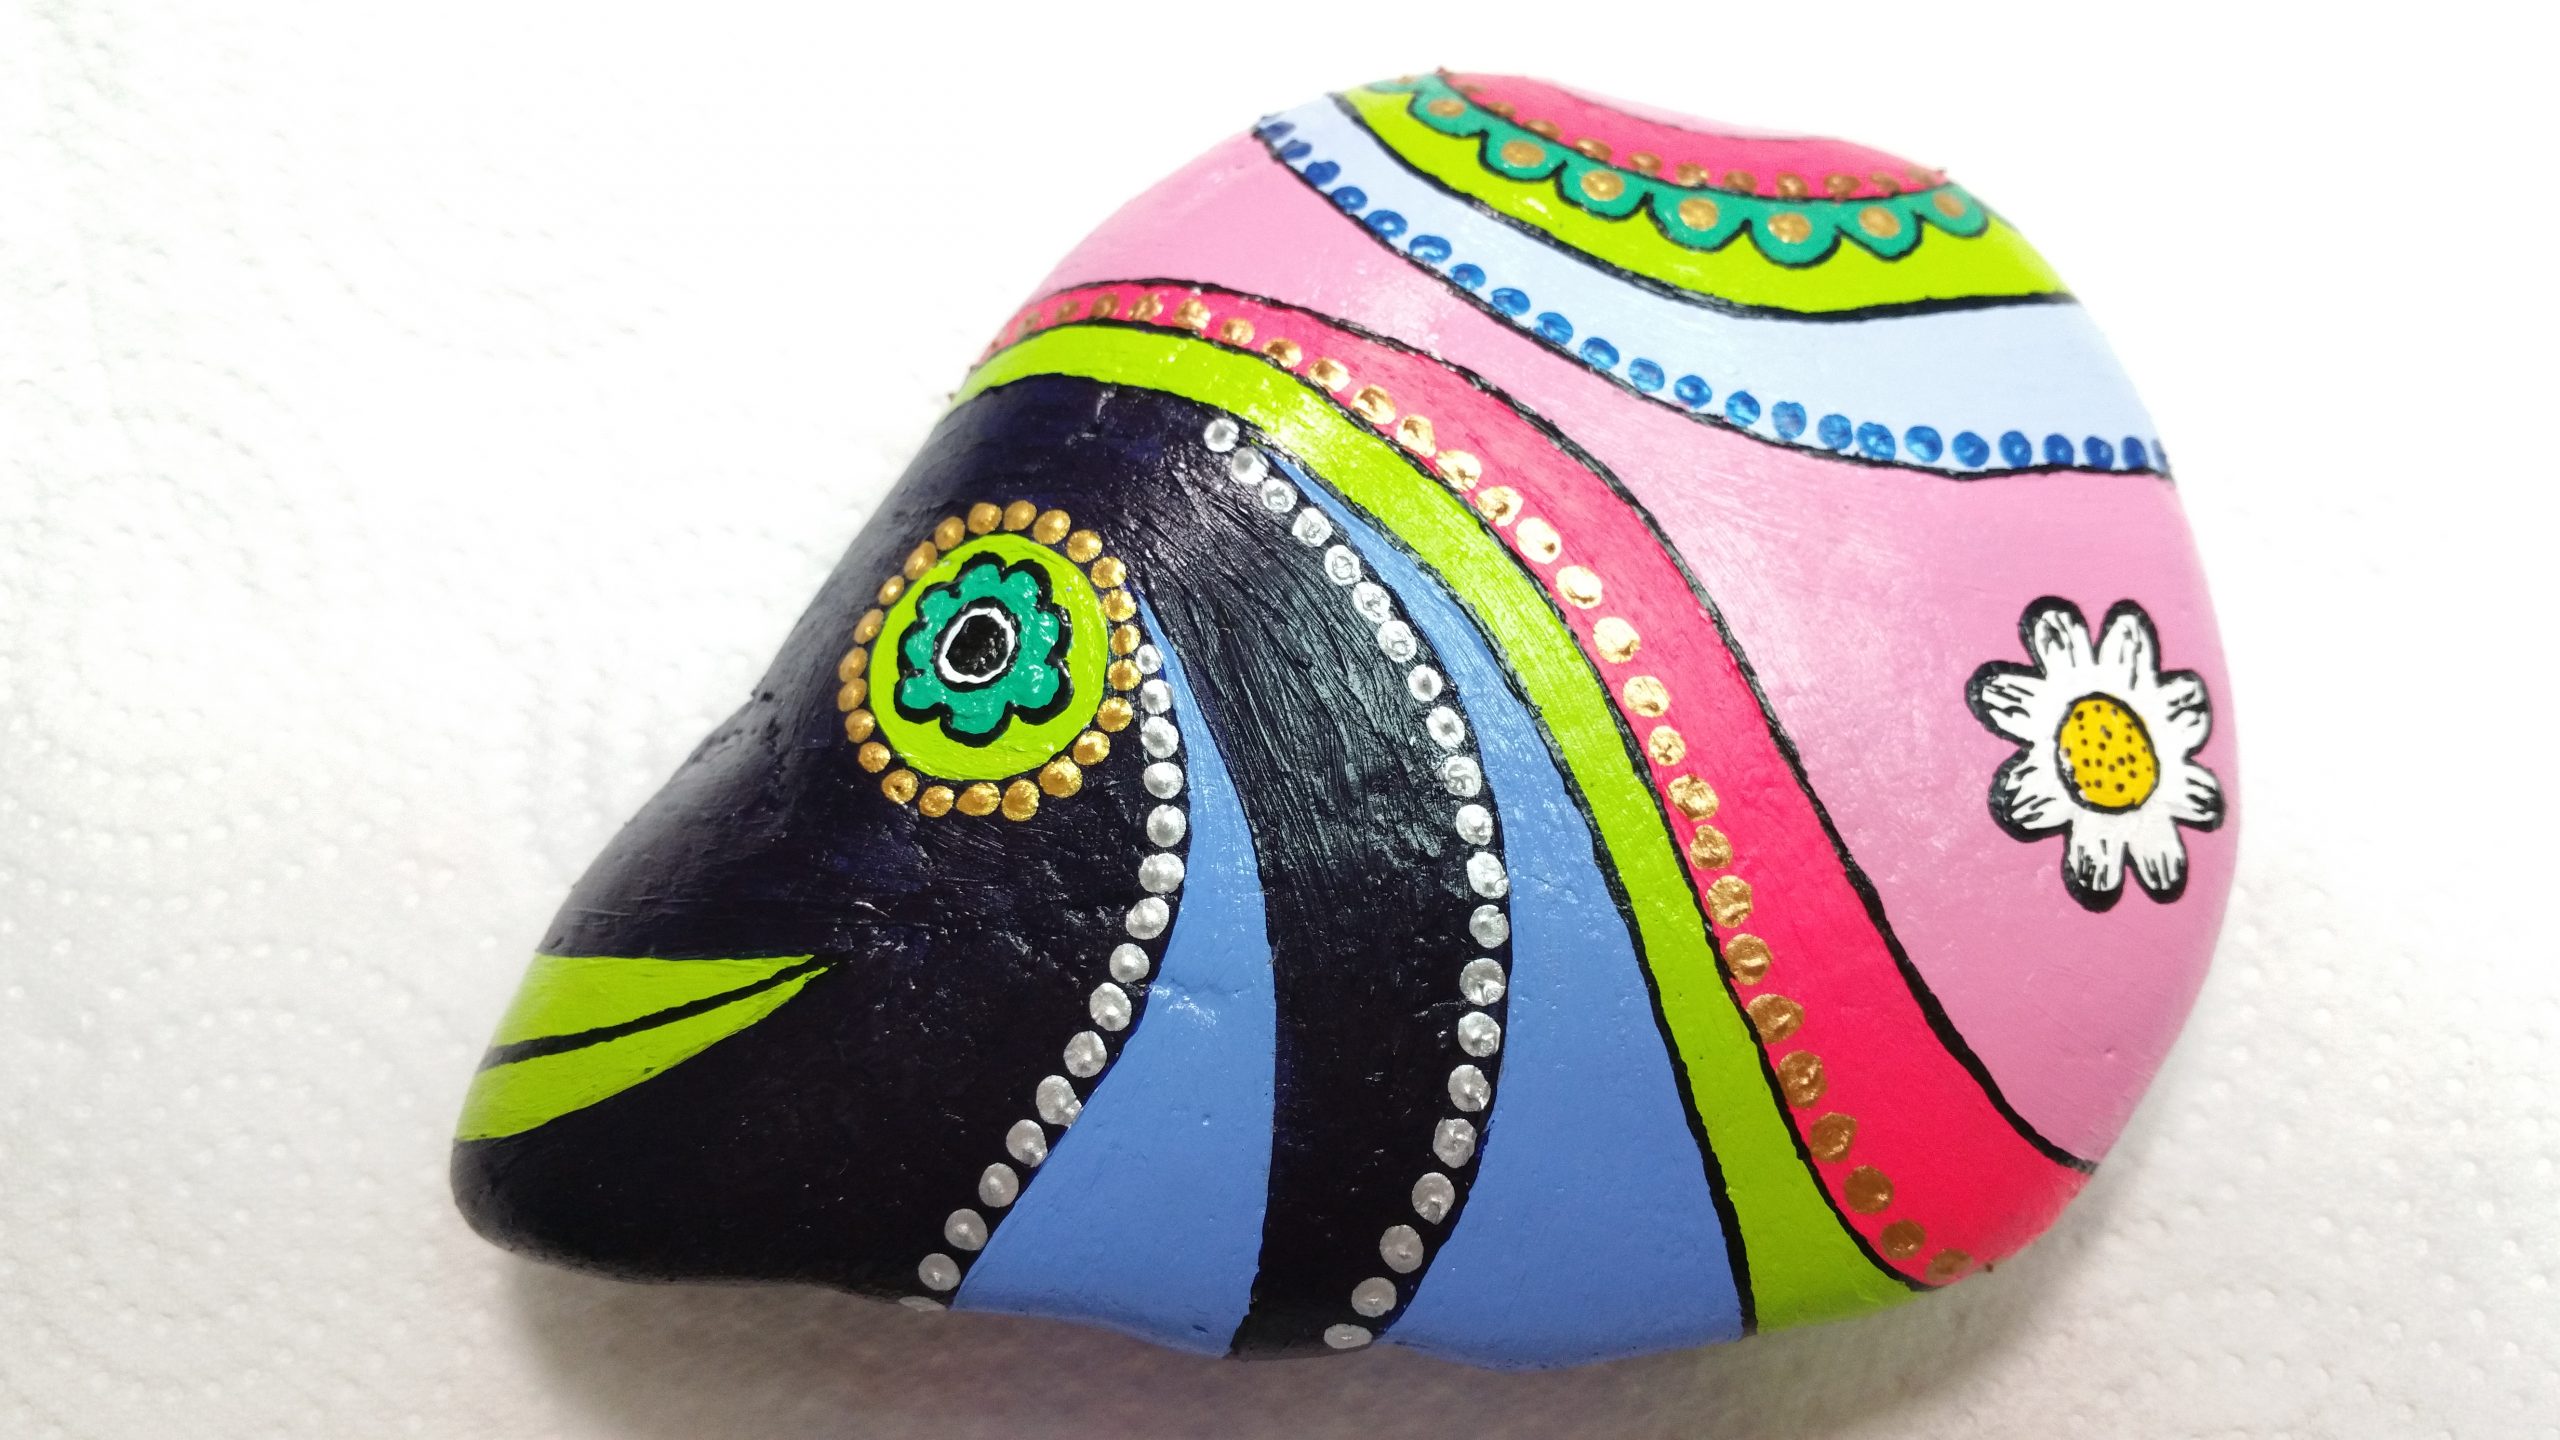
After the colors I started with silver and golden dots to highlight certain areas.

One thing I didn’t count on was that the metallic dots dried very fast because it was relatively thick and the color didn’t have time to level. So the dots stayed 3-dimensional with a small peak (you can make it out if you open the pic and zoom in).
Now all I needed to do were a few black lines at the color edges and to add some more highlights.
So I took a black acrylic pen and started drawing.
I have to admit that this was the most difficult part.
Why?
Well, the thick acrylic paint dried with brush marks. And to draw a thin line along a field of color with brush marks is not easy. The tip of the pen often gets “misled” and the line becomes crooked.
You can see those little problems in the pic above when you zoom in.
The only positive thing is that when the stone will be lying in the garden it is far away so you don’t see them.
But I guessyou can say ‘Lessons Learned‘.
The next time I will try a differrent approach.
First I will dilute the paint to become a bit thinner – hopefully it dries more evenly with less brush marks.
In addition I will add a layer of translucent varnish to make the surface even more smoother.
Then the lines should be easier to draw.
Did you ever paint rocks?
I would love to see them. Perhaps you can let me in your little secrets 😉
Stay safe!

A good friend of mine asked if I could make her some personalized gothic jewelry.
Since I had some spider charms left from a previous order I searched for all the black and grey beads I had.
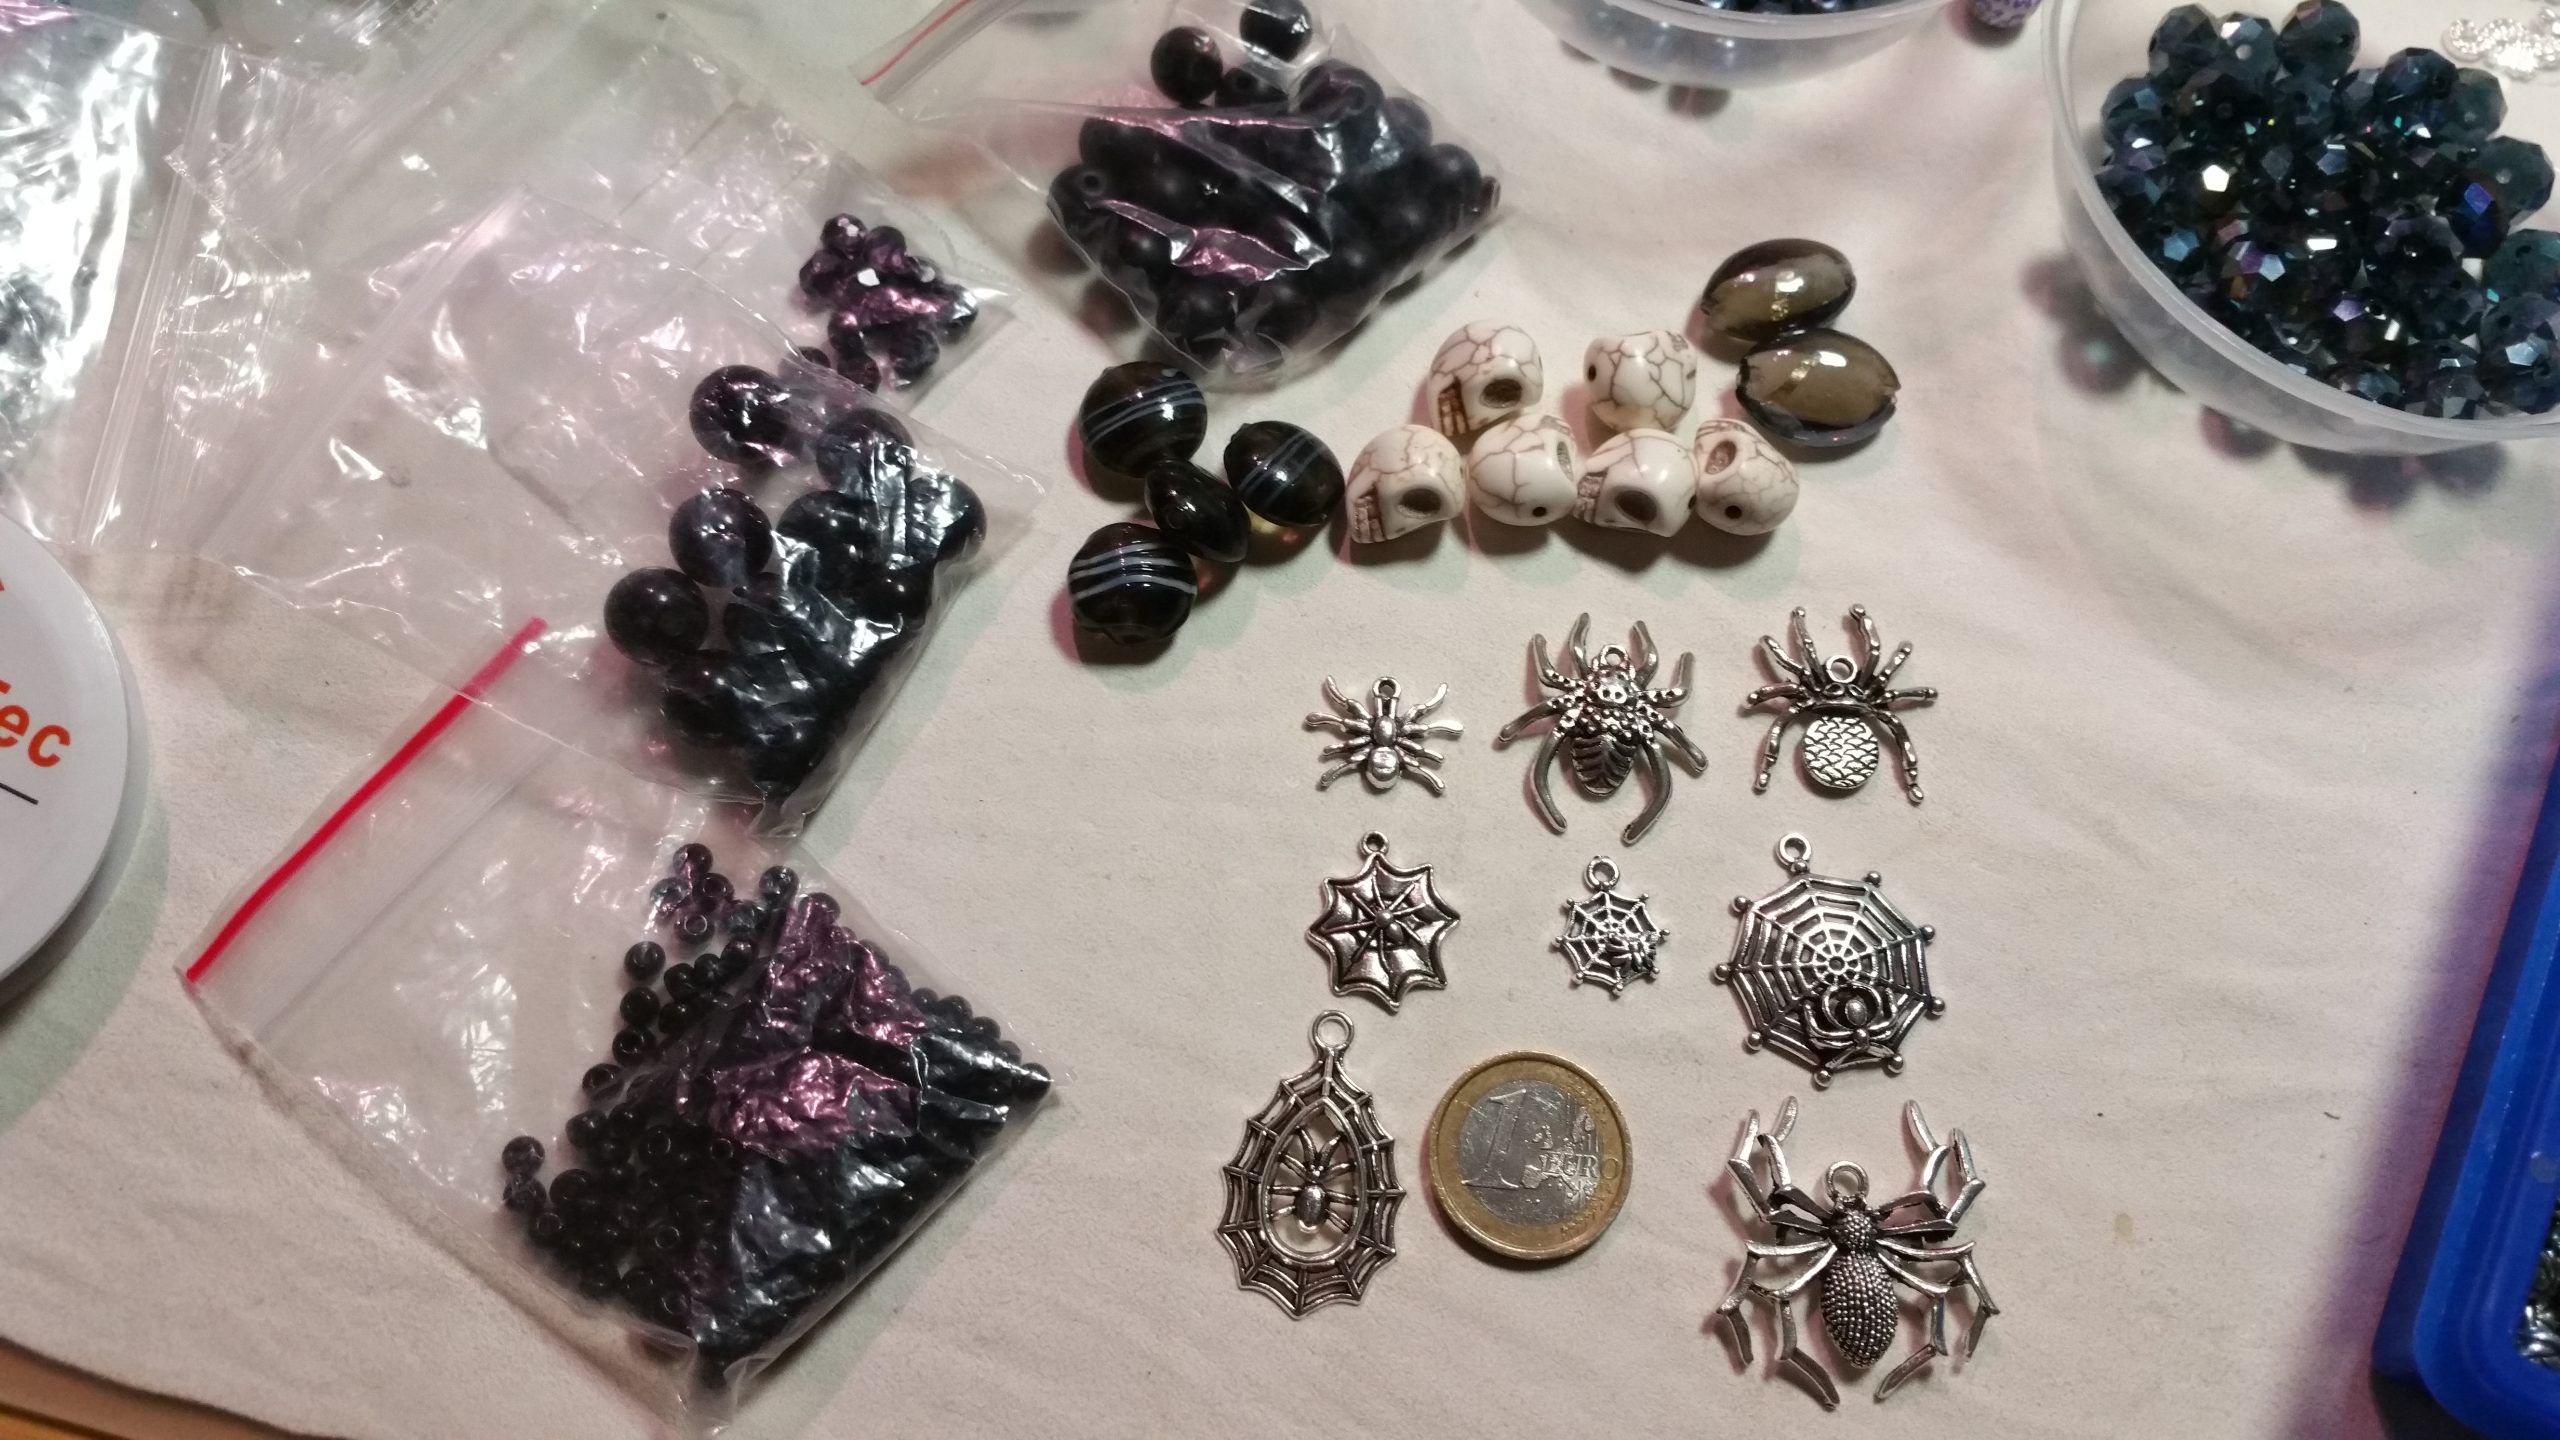
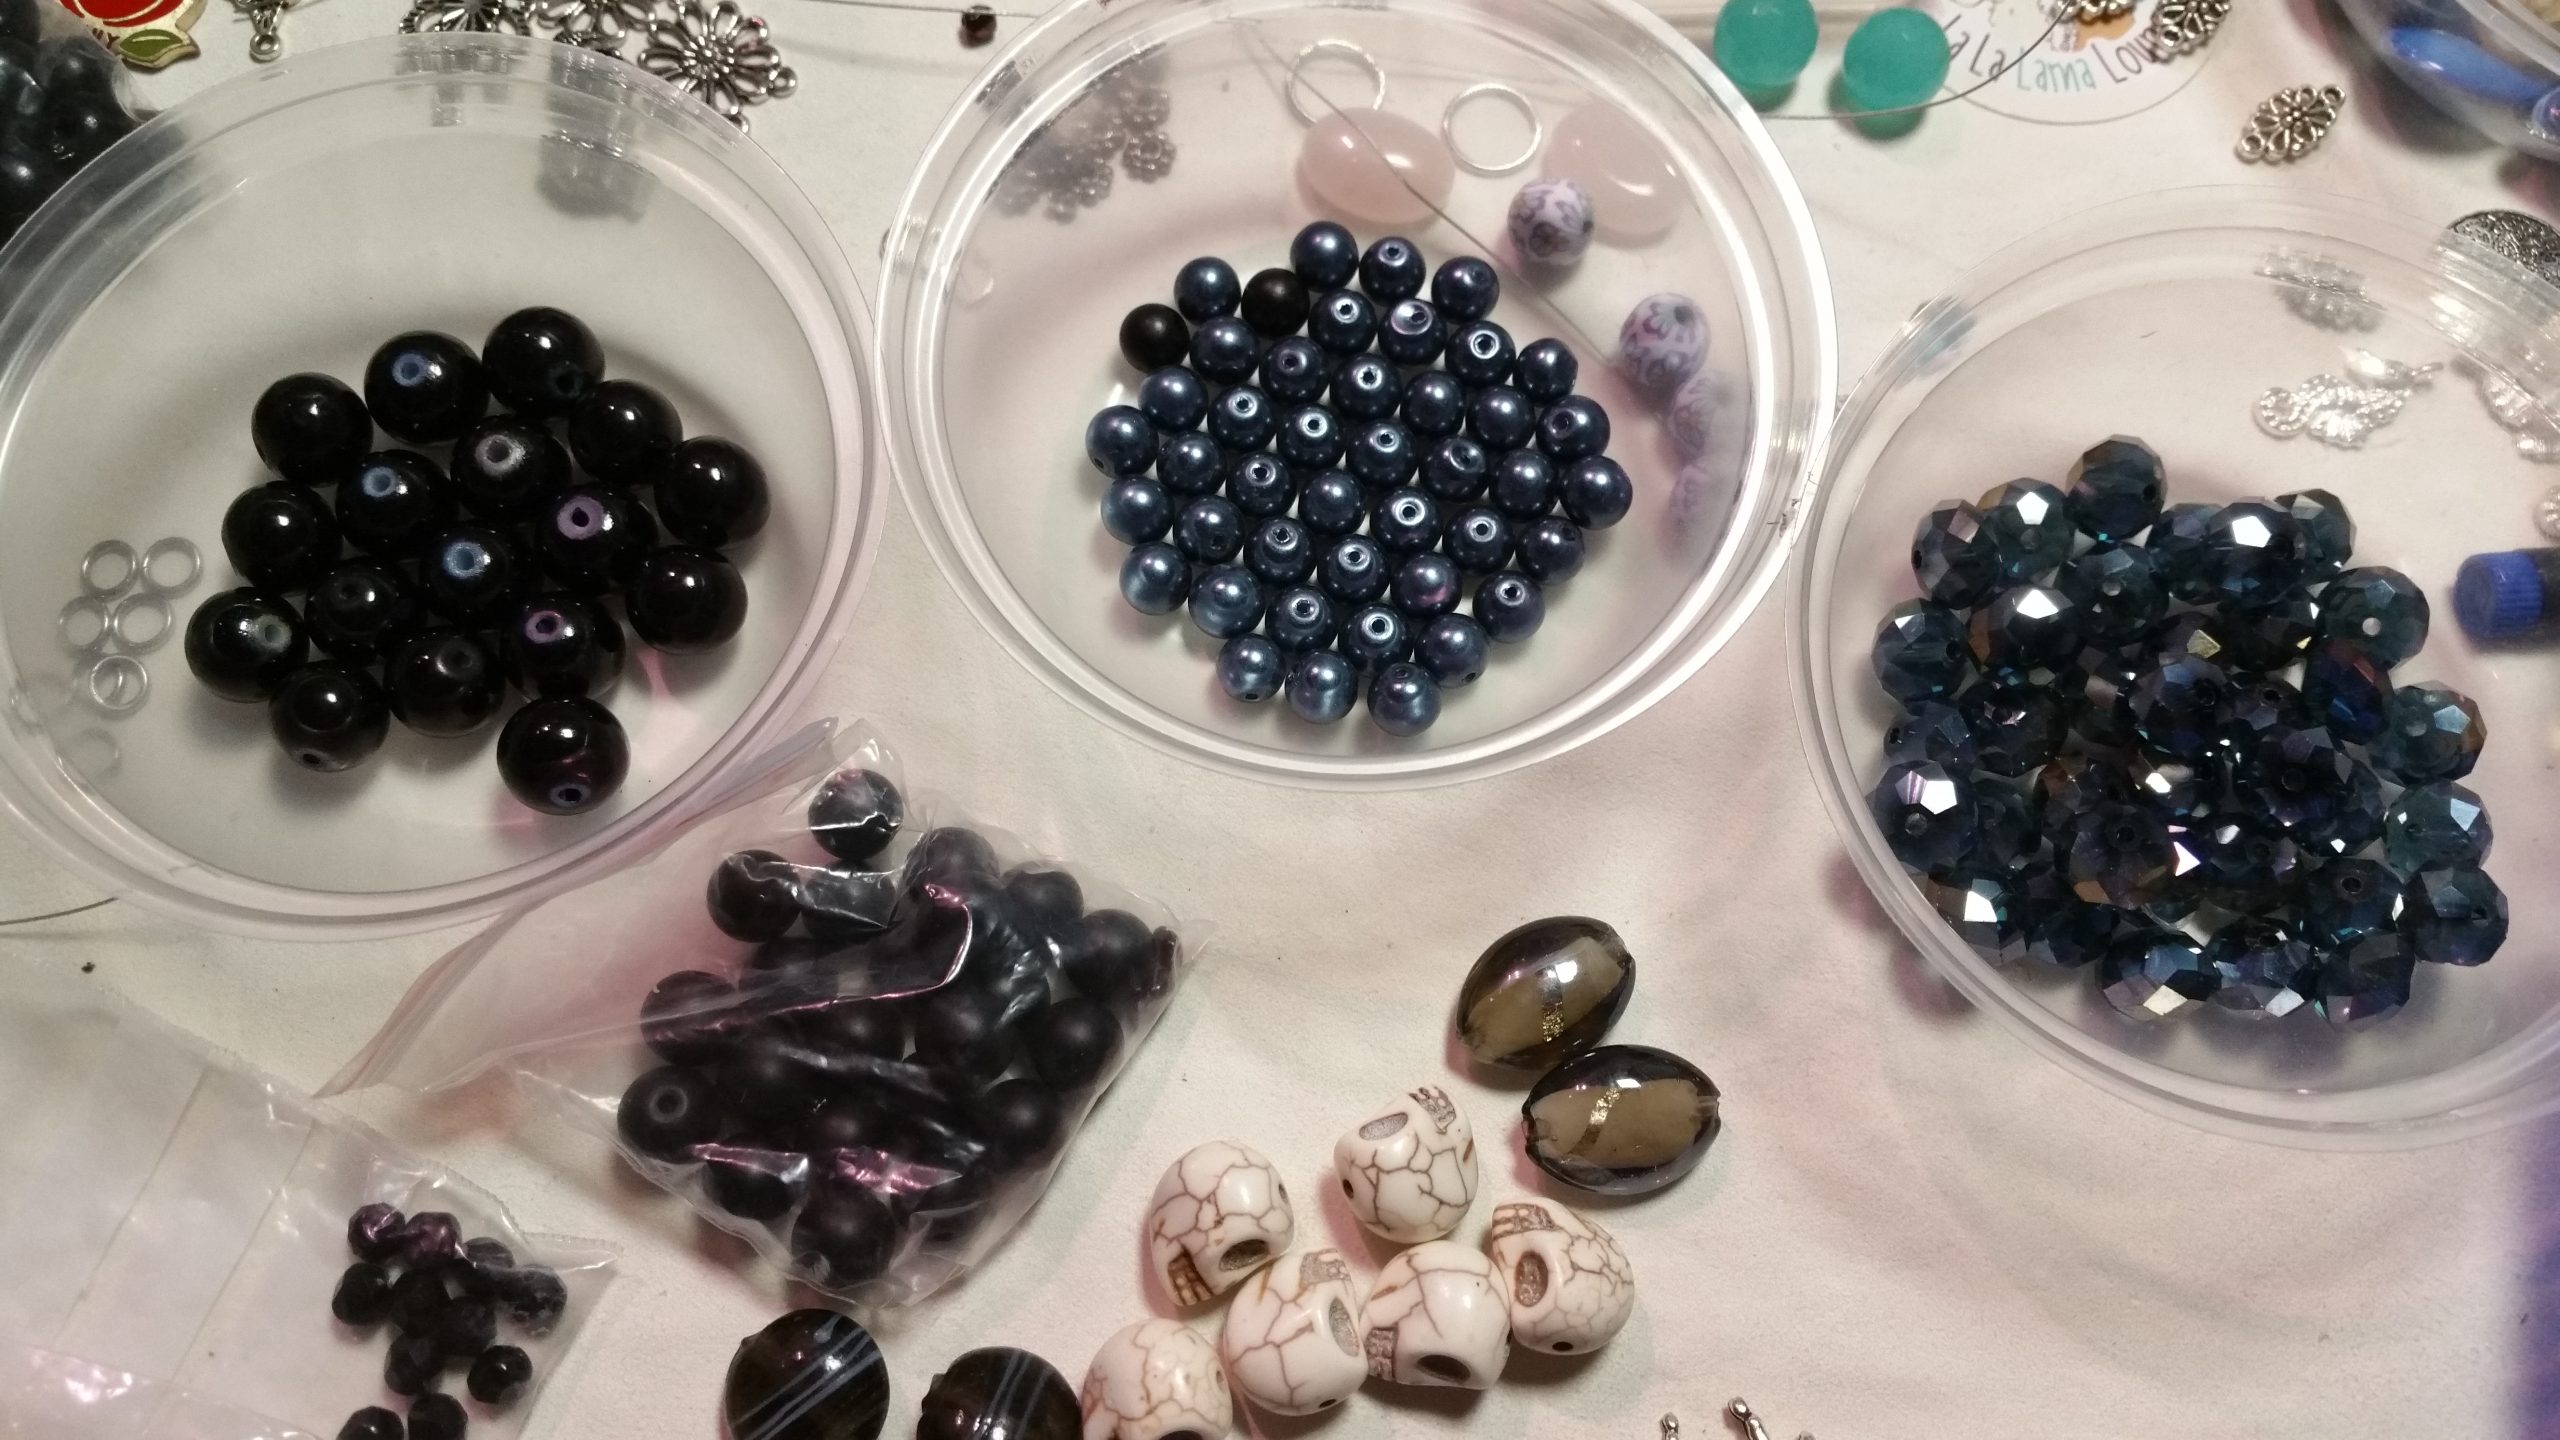
After my friend told me what beads she liked best, I went on designing. She wanted 2 stretch bracelets and an adjustable necklace.
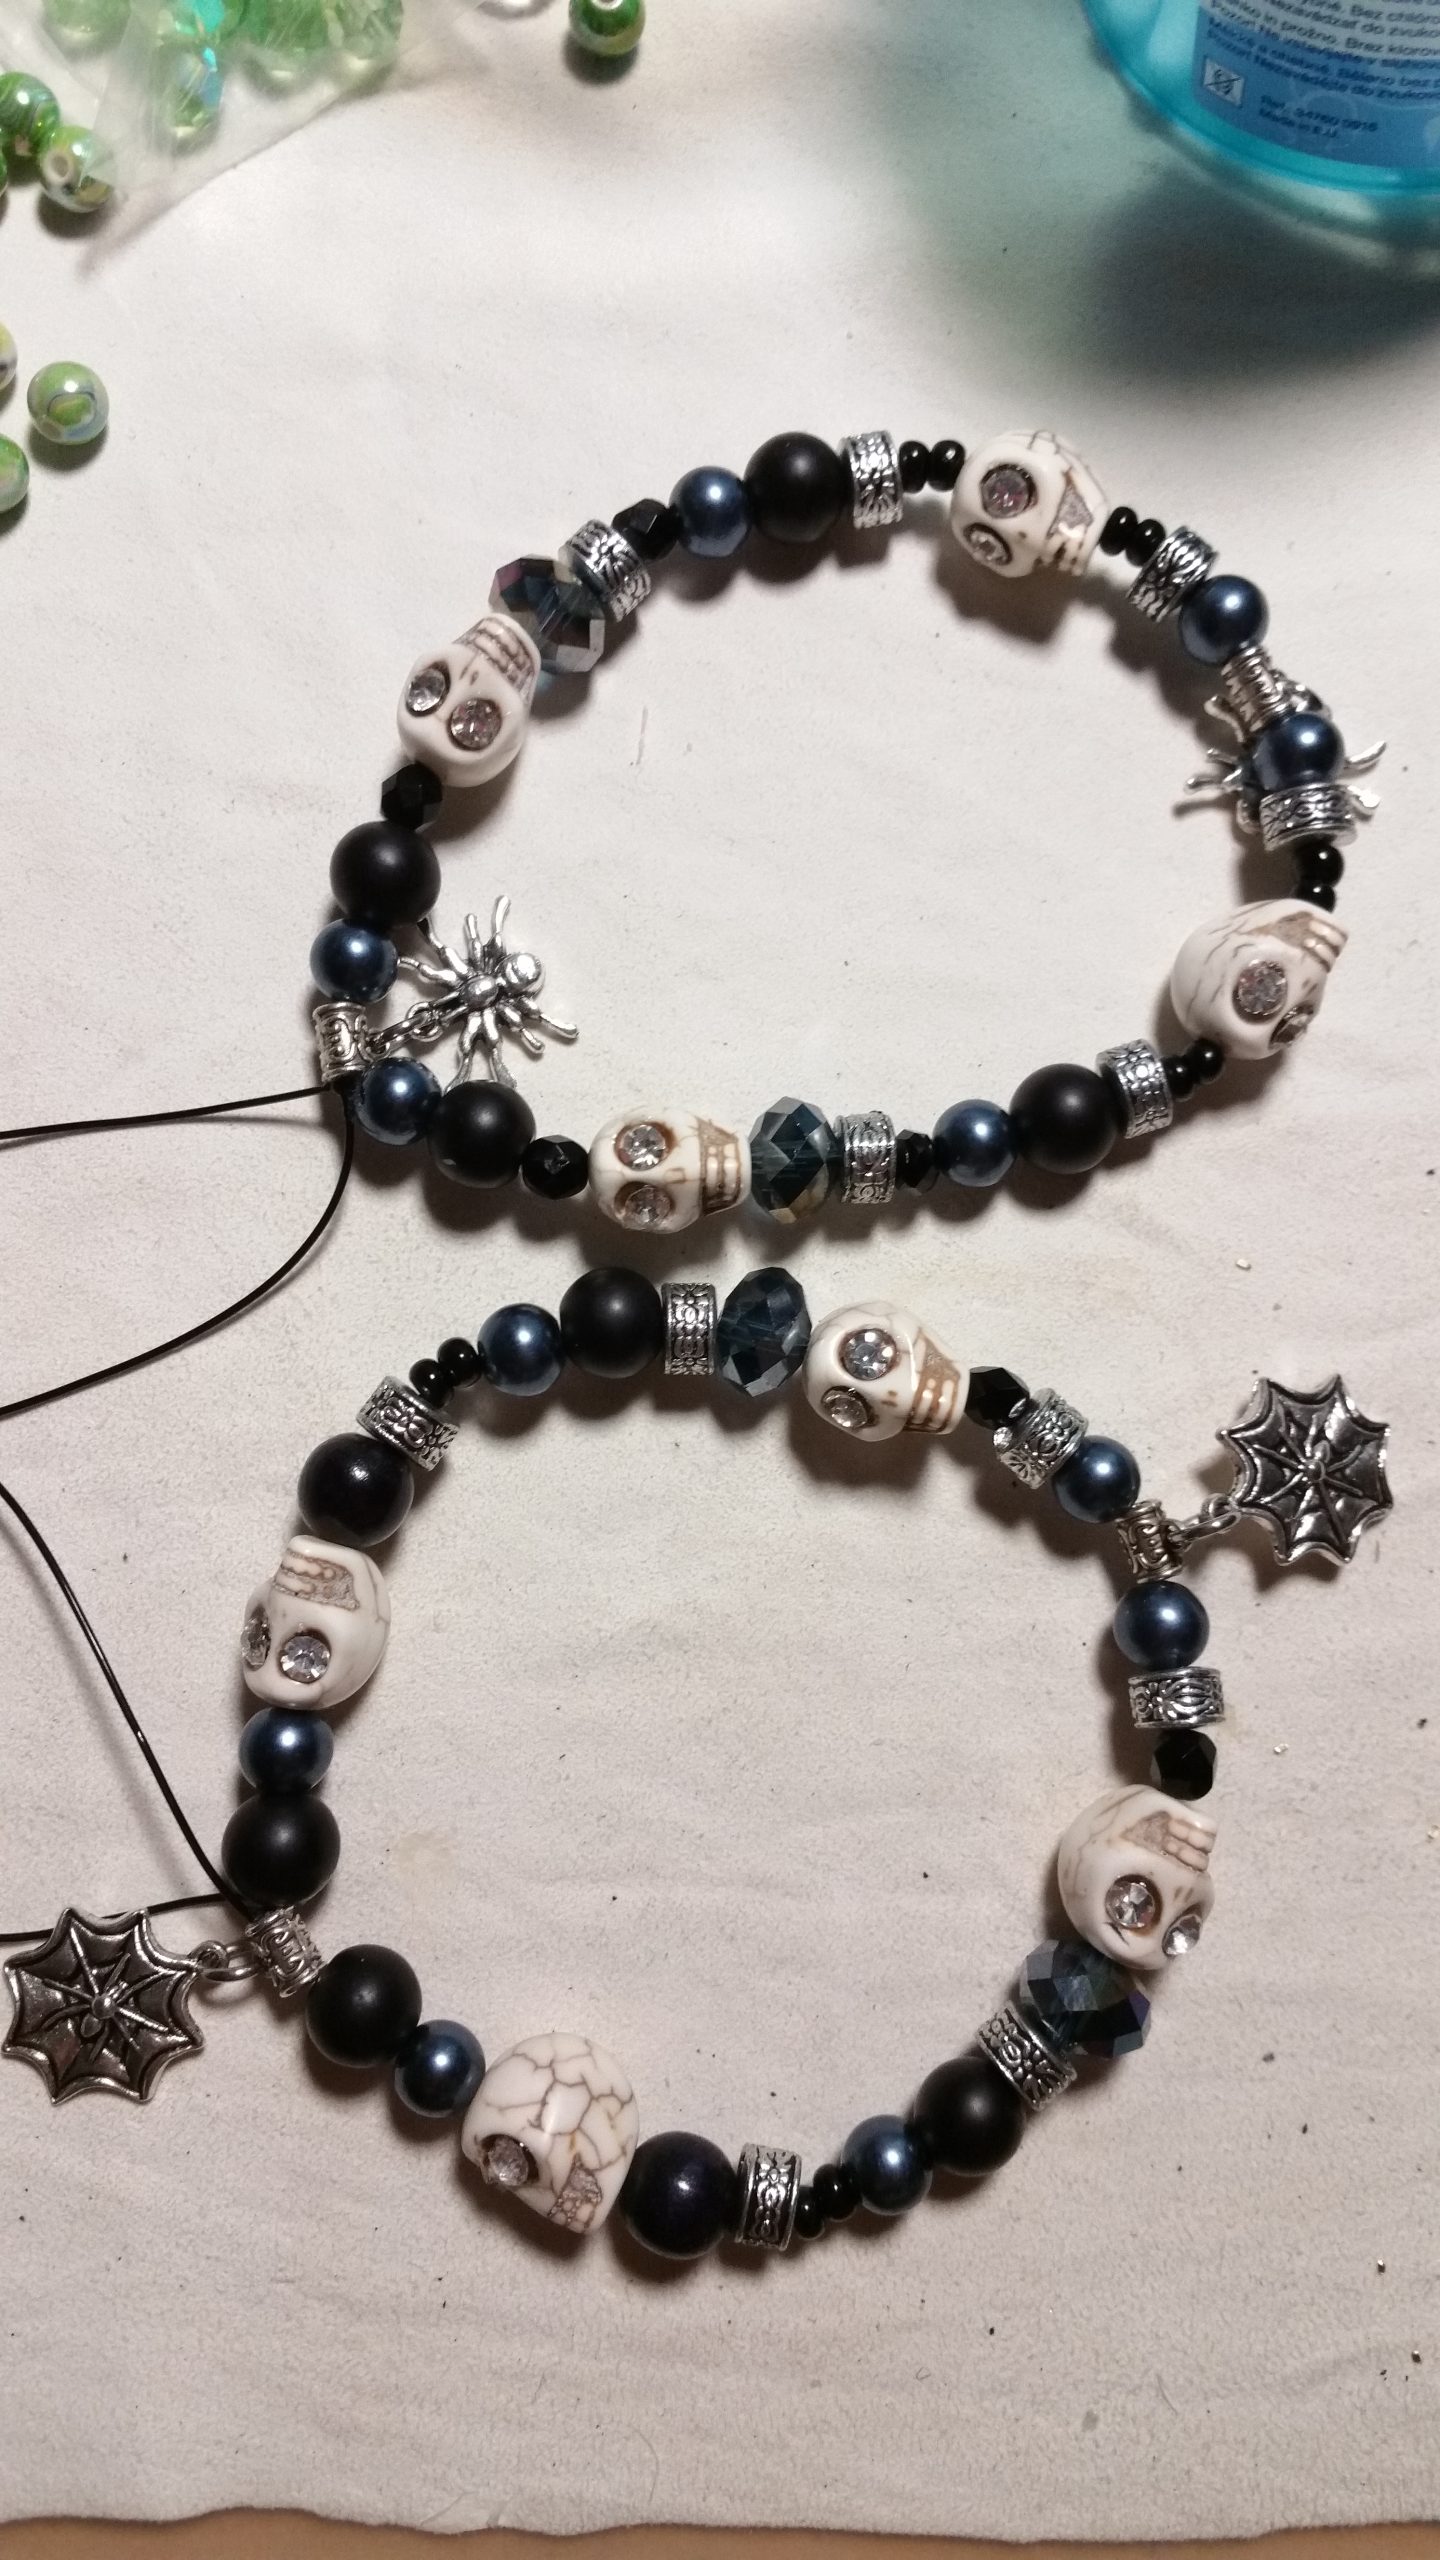
And this is the final look of the jewelry set.


If you are looking for something special made for your wife, girl friend or another special person please don’t hesitate to contact me.
Stay safe in this crazy time of the pandemic!

So much has happened this year.
In the middle of all the chaos with corona, pandemic and lock-downs I tried to do business as usual.
But that was easier said than done.
Although I am lucky and neither my mom nor I did catch the virus (hopefully it stays that way until we get our vaccination next year!!) but I know families and friends who had their impact.
That pesky virus hounts us, not only in our jobs, but also in our private life – our personal freedom.
Suddenly we are not allowed to do certain things anymore or at the least the way we used to.
We all had to adapt and find new ways to communicate, work, meet family members etc.
And the fact that the situation still isn’t over and most likely will last another 9-12 months at least does not make it easier!
I hope you are all safe and have – nontheless – some wonderful days.
The new year should be a better one.
Stay safe! Stay strong!
Happy Holidays and a better new year 2021!!


It has been months again since I wrote my last post.
I have been very busy at work and at home and the whole corona pandemic is slowly taking its toll – since we entered our 2nd hard lockdown yesterday.
All stores except groceries, pet shops, banks, post office and newsstands are closed down.
But I am glad that my family and I have been spared from this disease so far.
I made a bunch of bracelets and dangle earrings lately. You can see them all on my instagram account.
But I thought of sharing some older pieces with beadwork on them today.
They are inspired by the contemporary native american pieces you can find all around social media and the internet.
In a later article (or better series!!) I will show you how it is done.
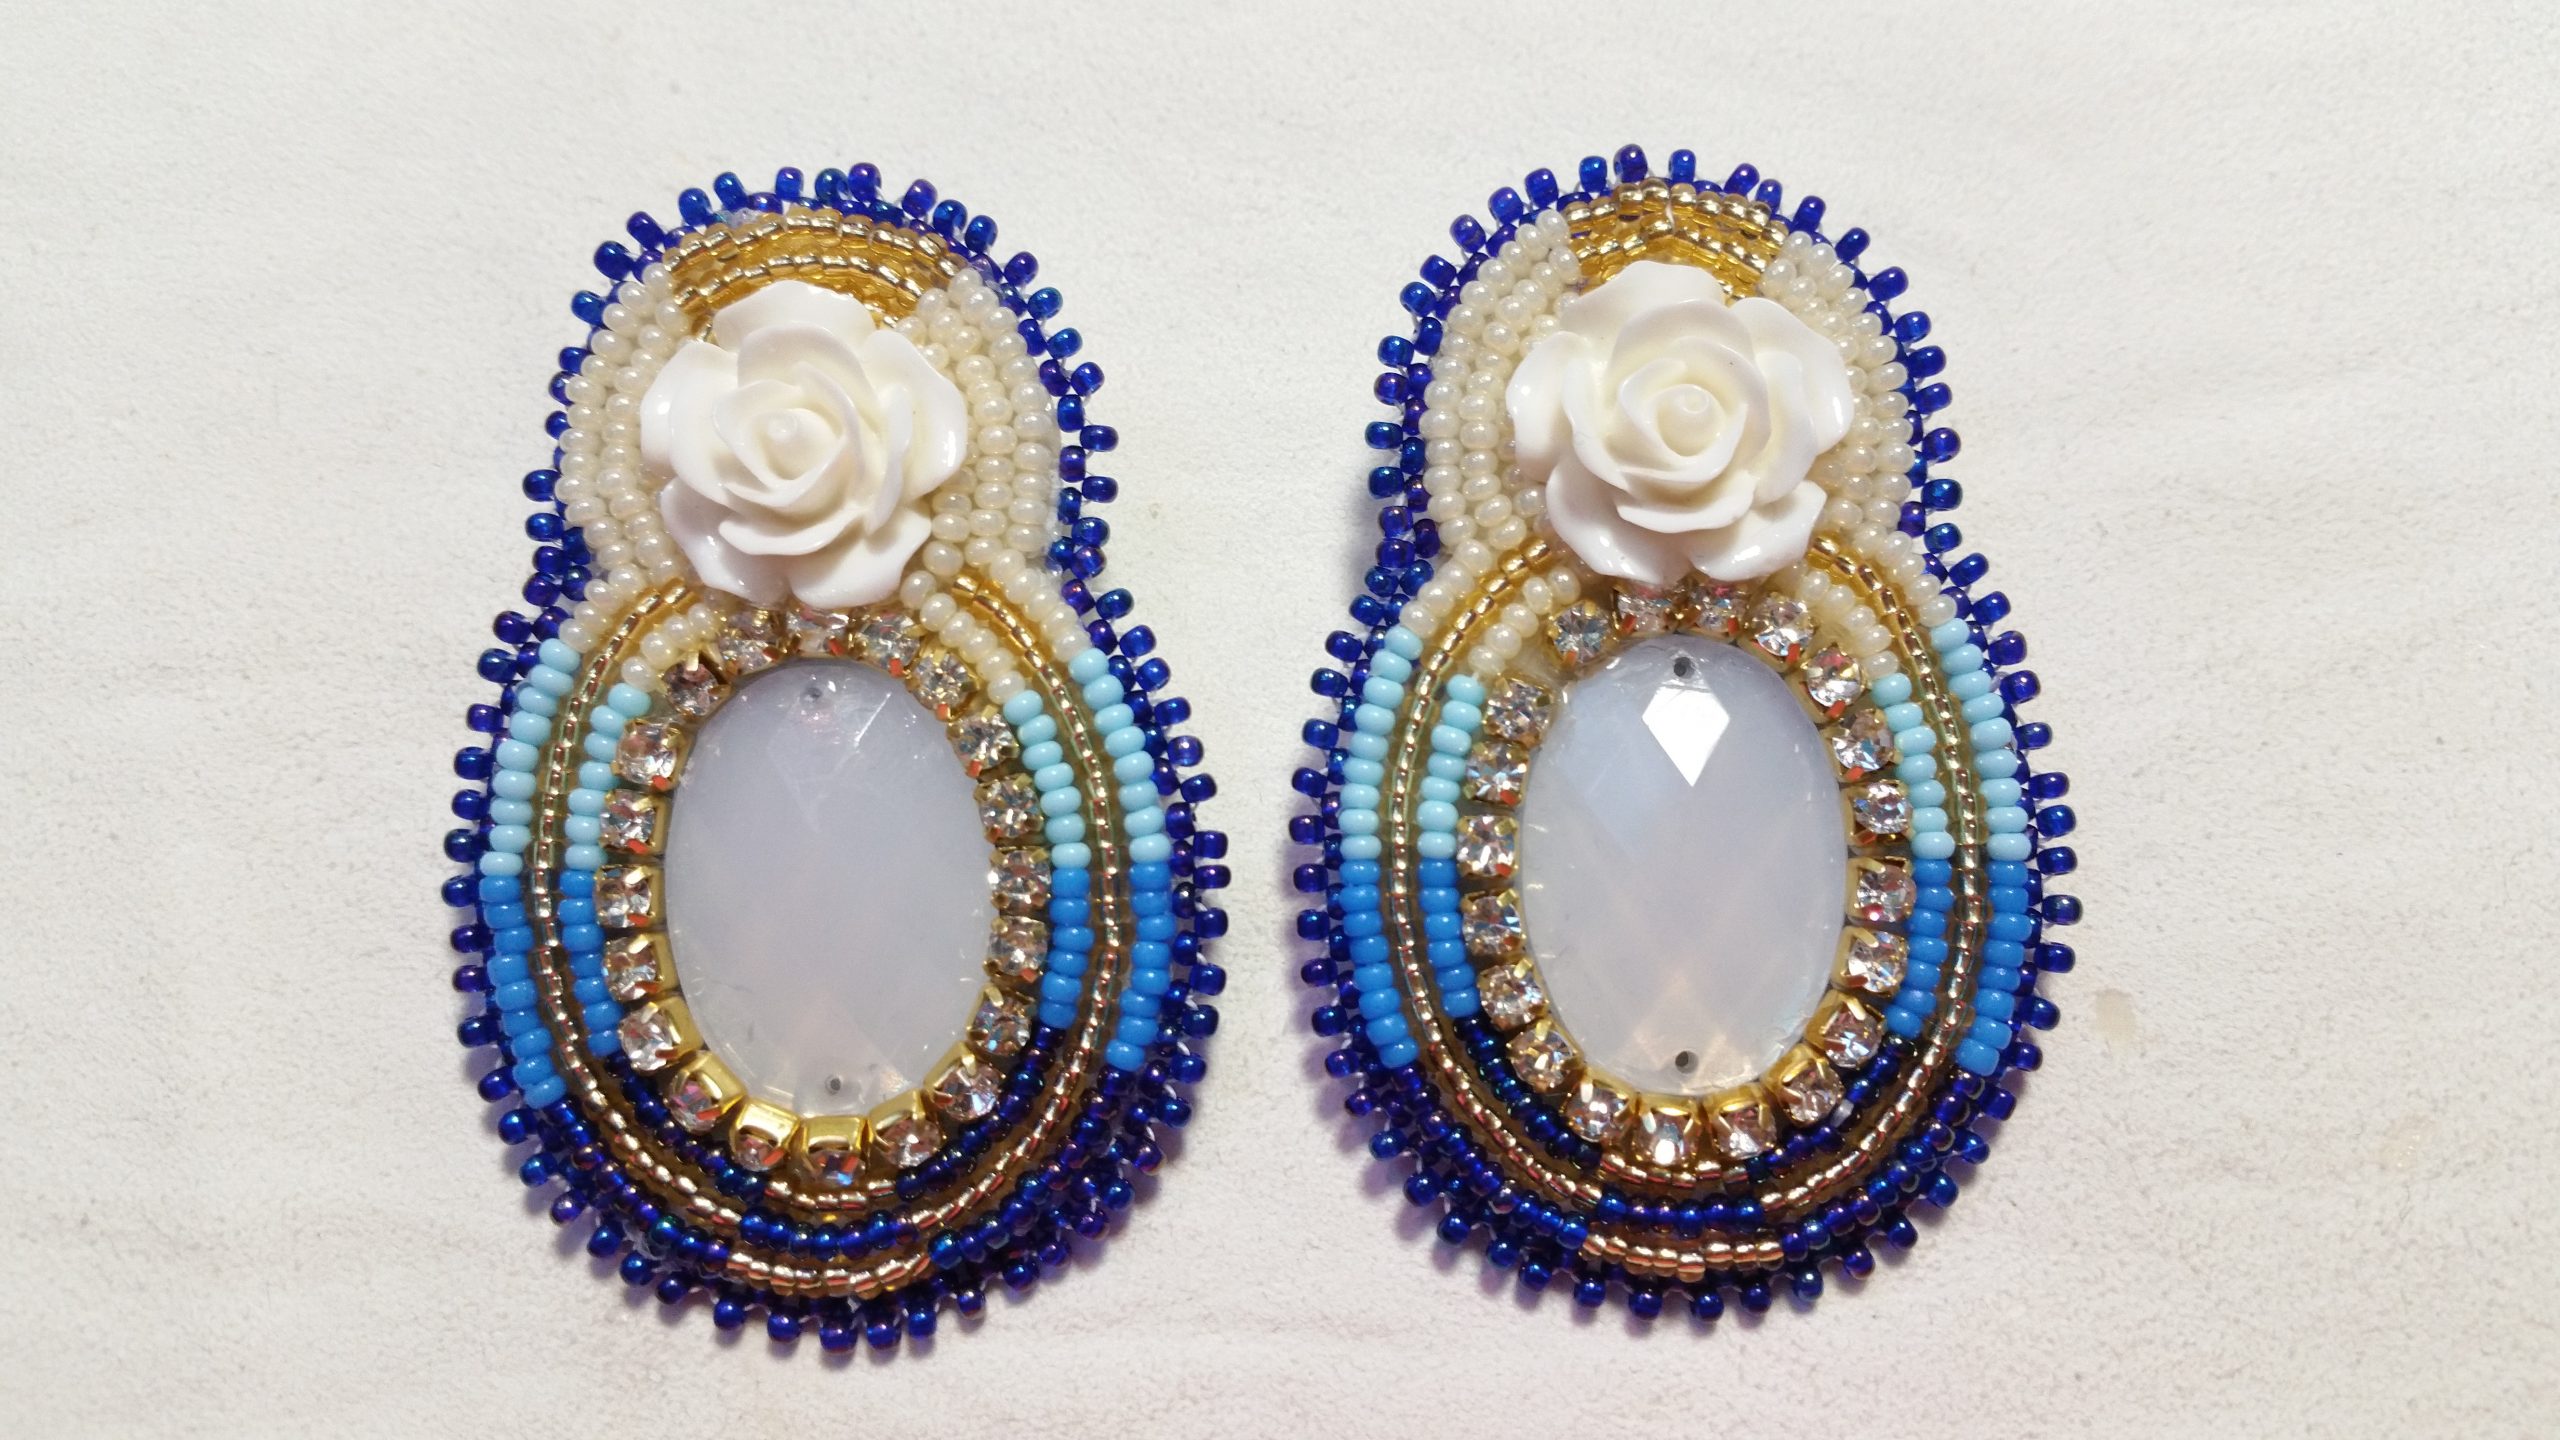
Although they are quite large they are lightweight since the large cabochons in the center and the roses are made of acrylic.
They have so called fingernail posts, which is something like a clip but for pierced ears.
The advantage in this posts is that the earring can be a bit larger but it is not hanging down too much (always depending on the overall size of course).
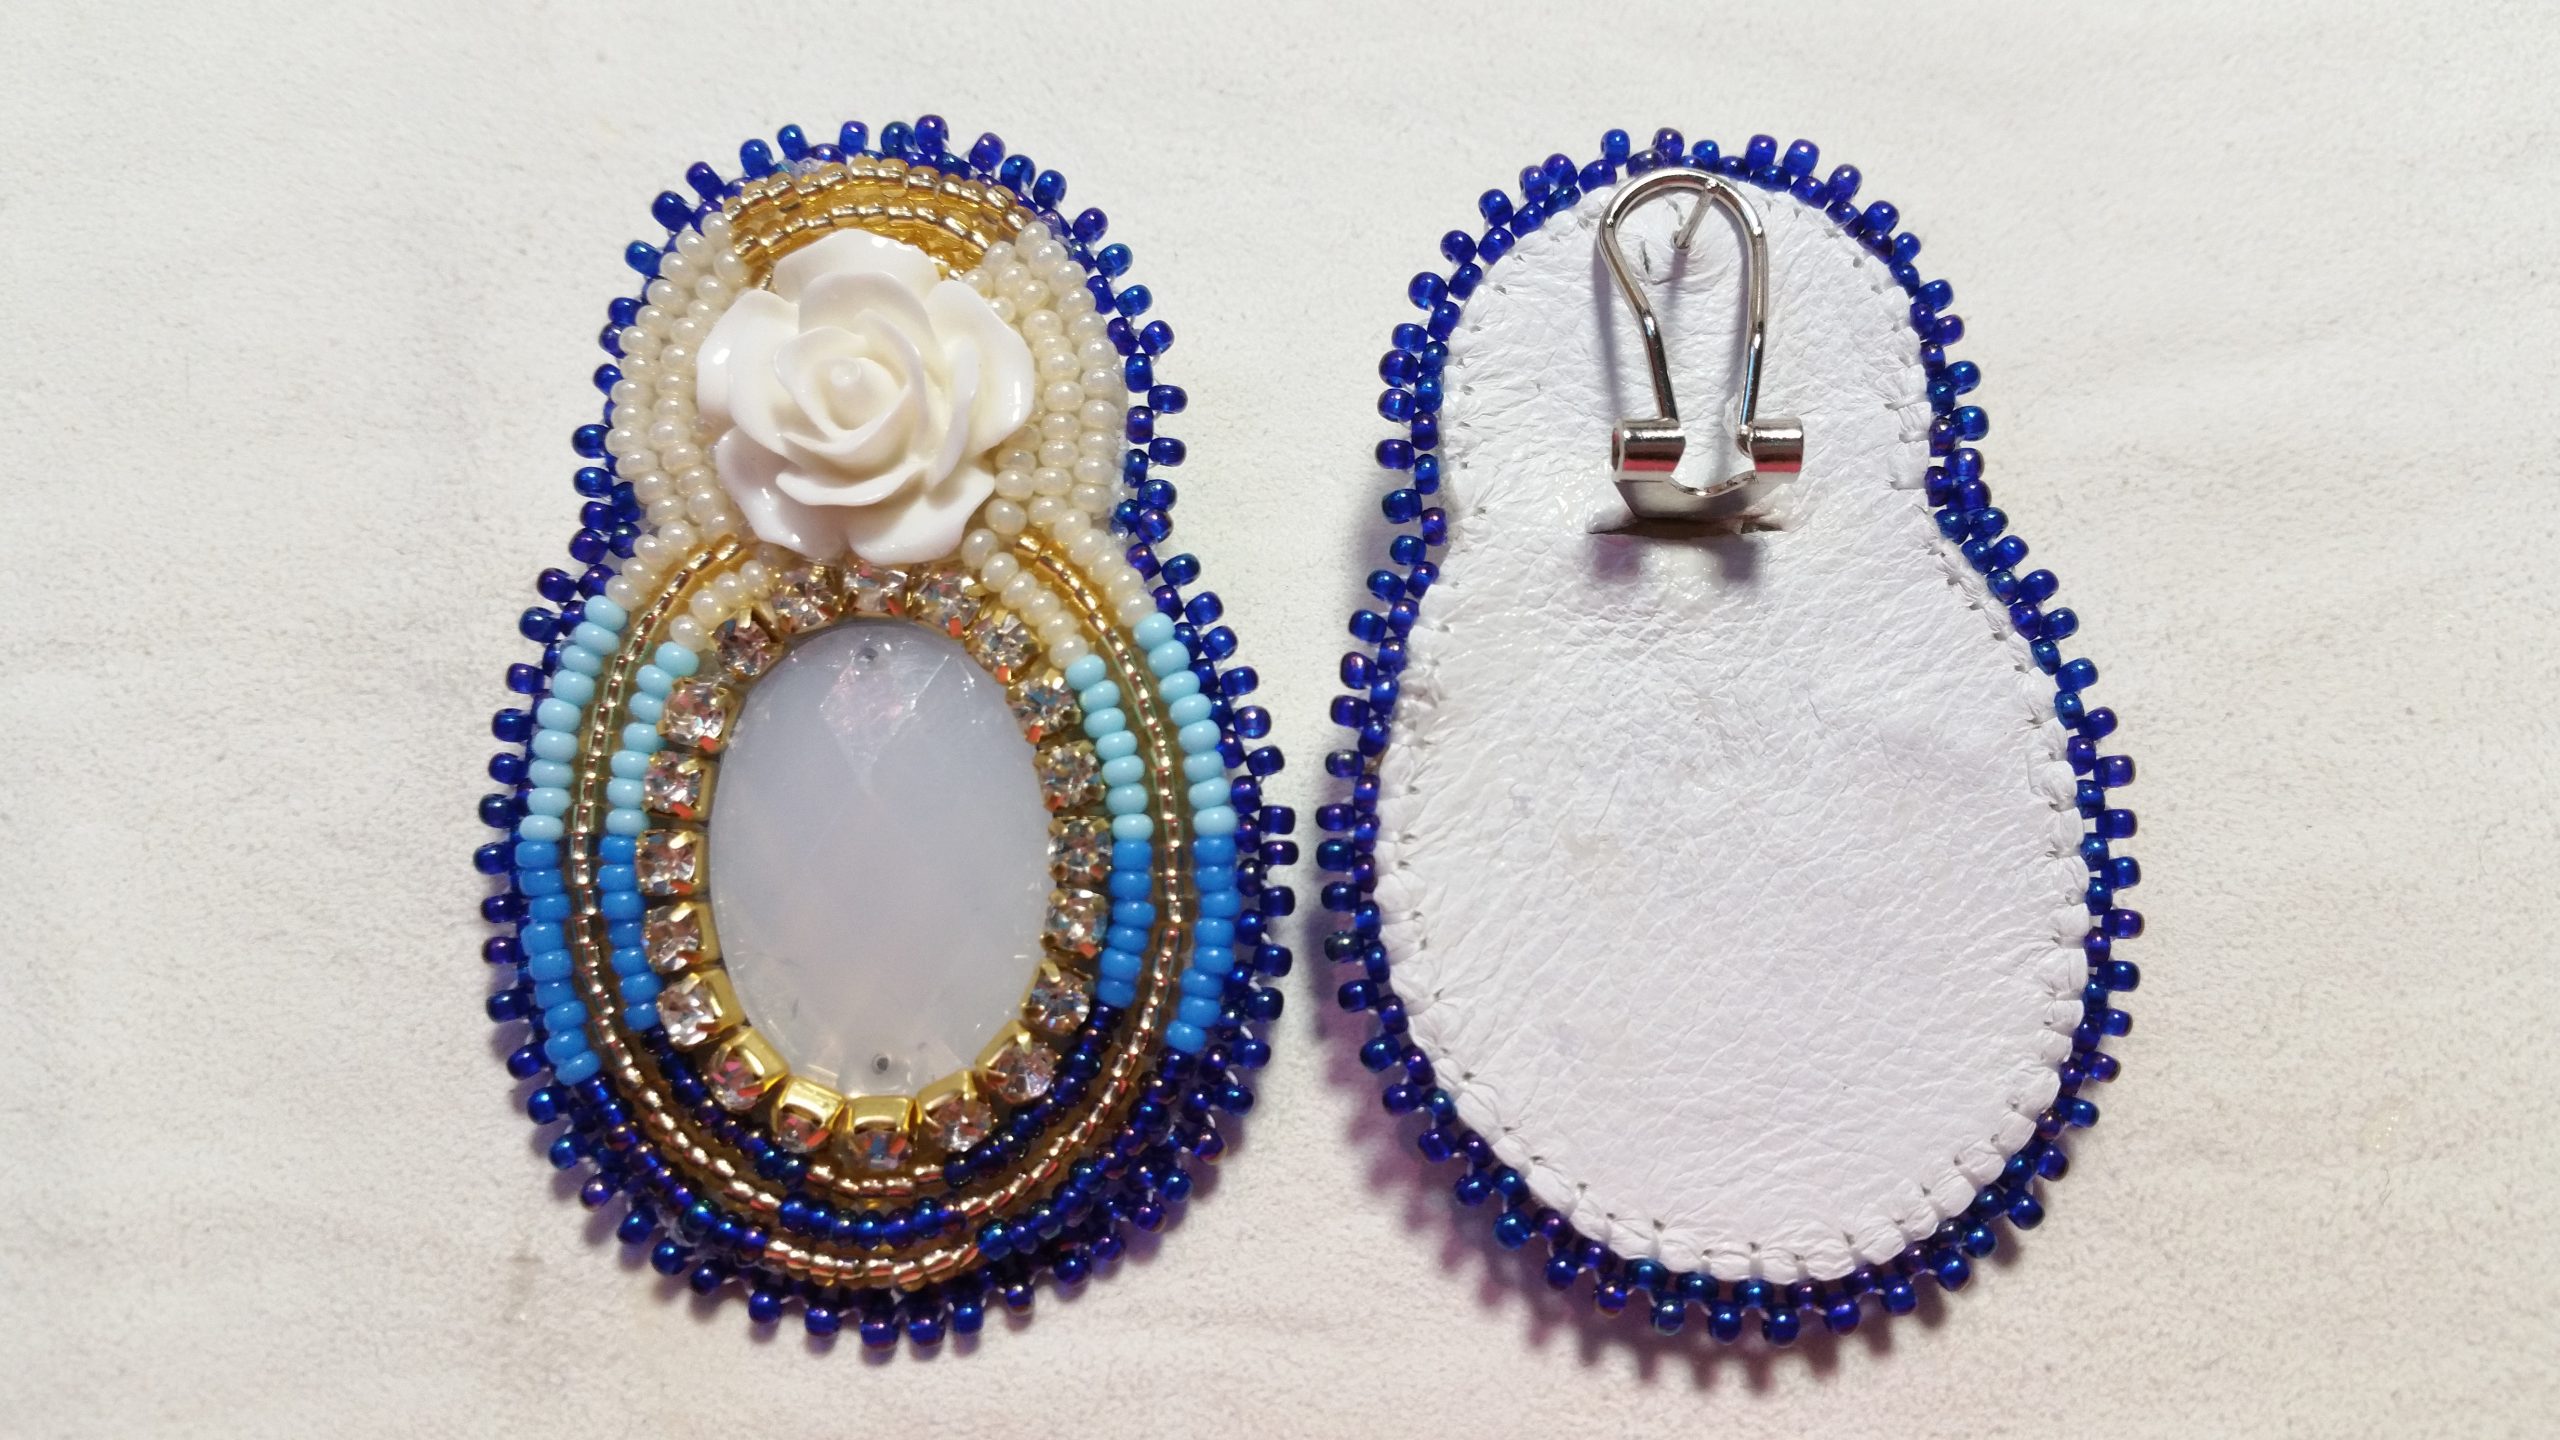

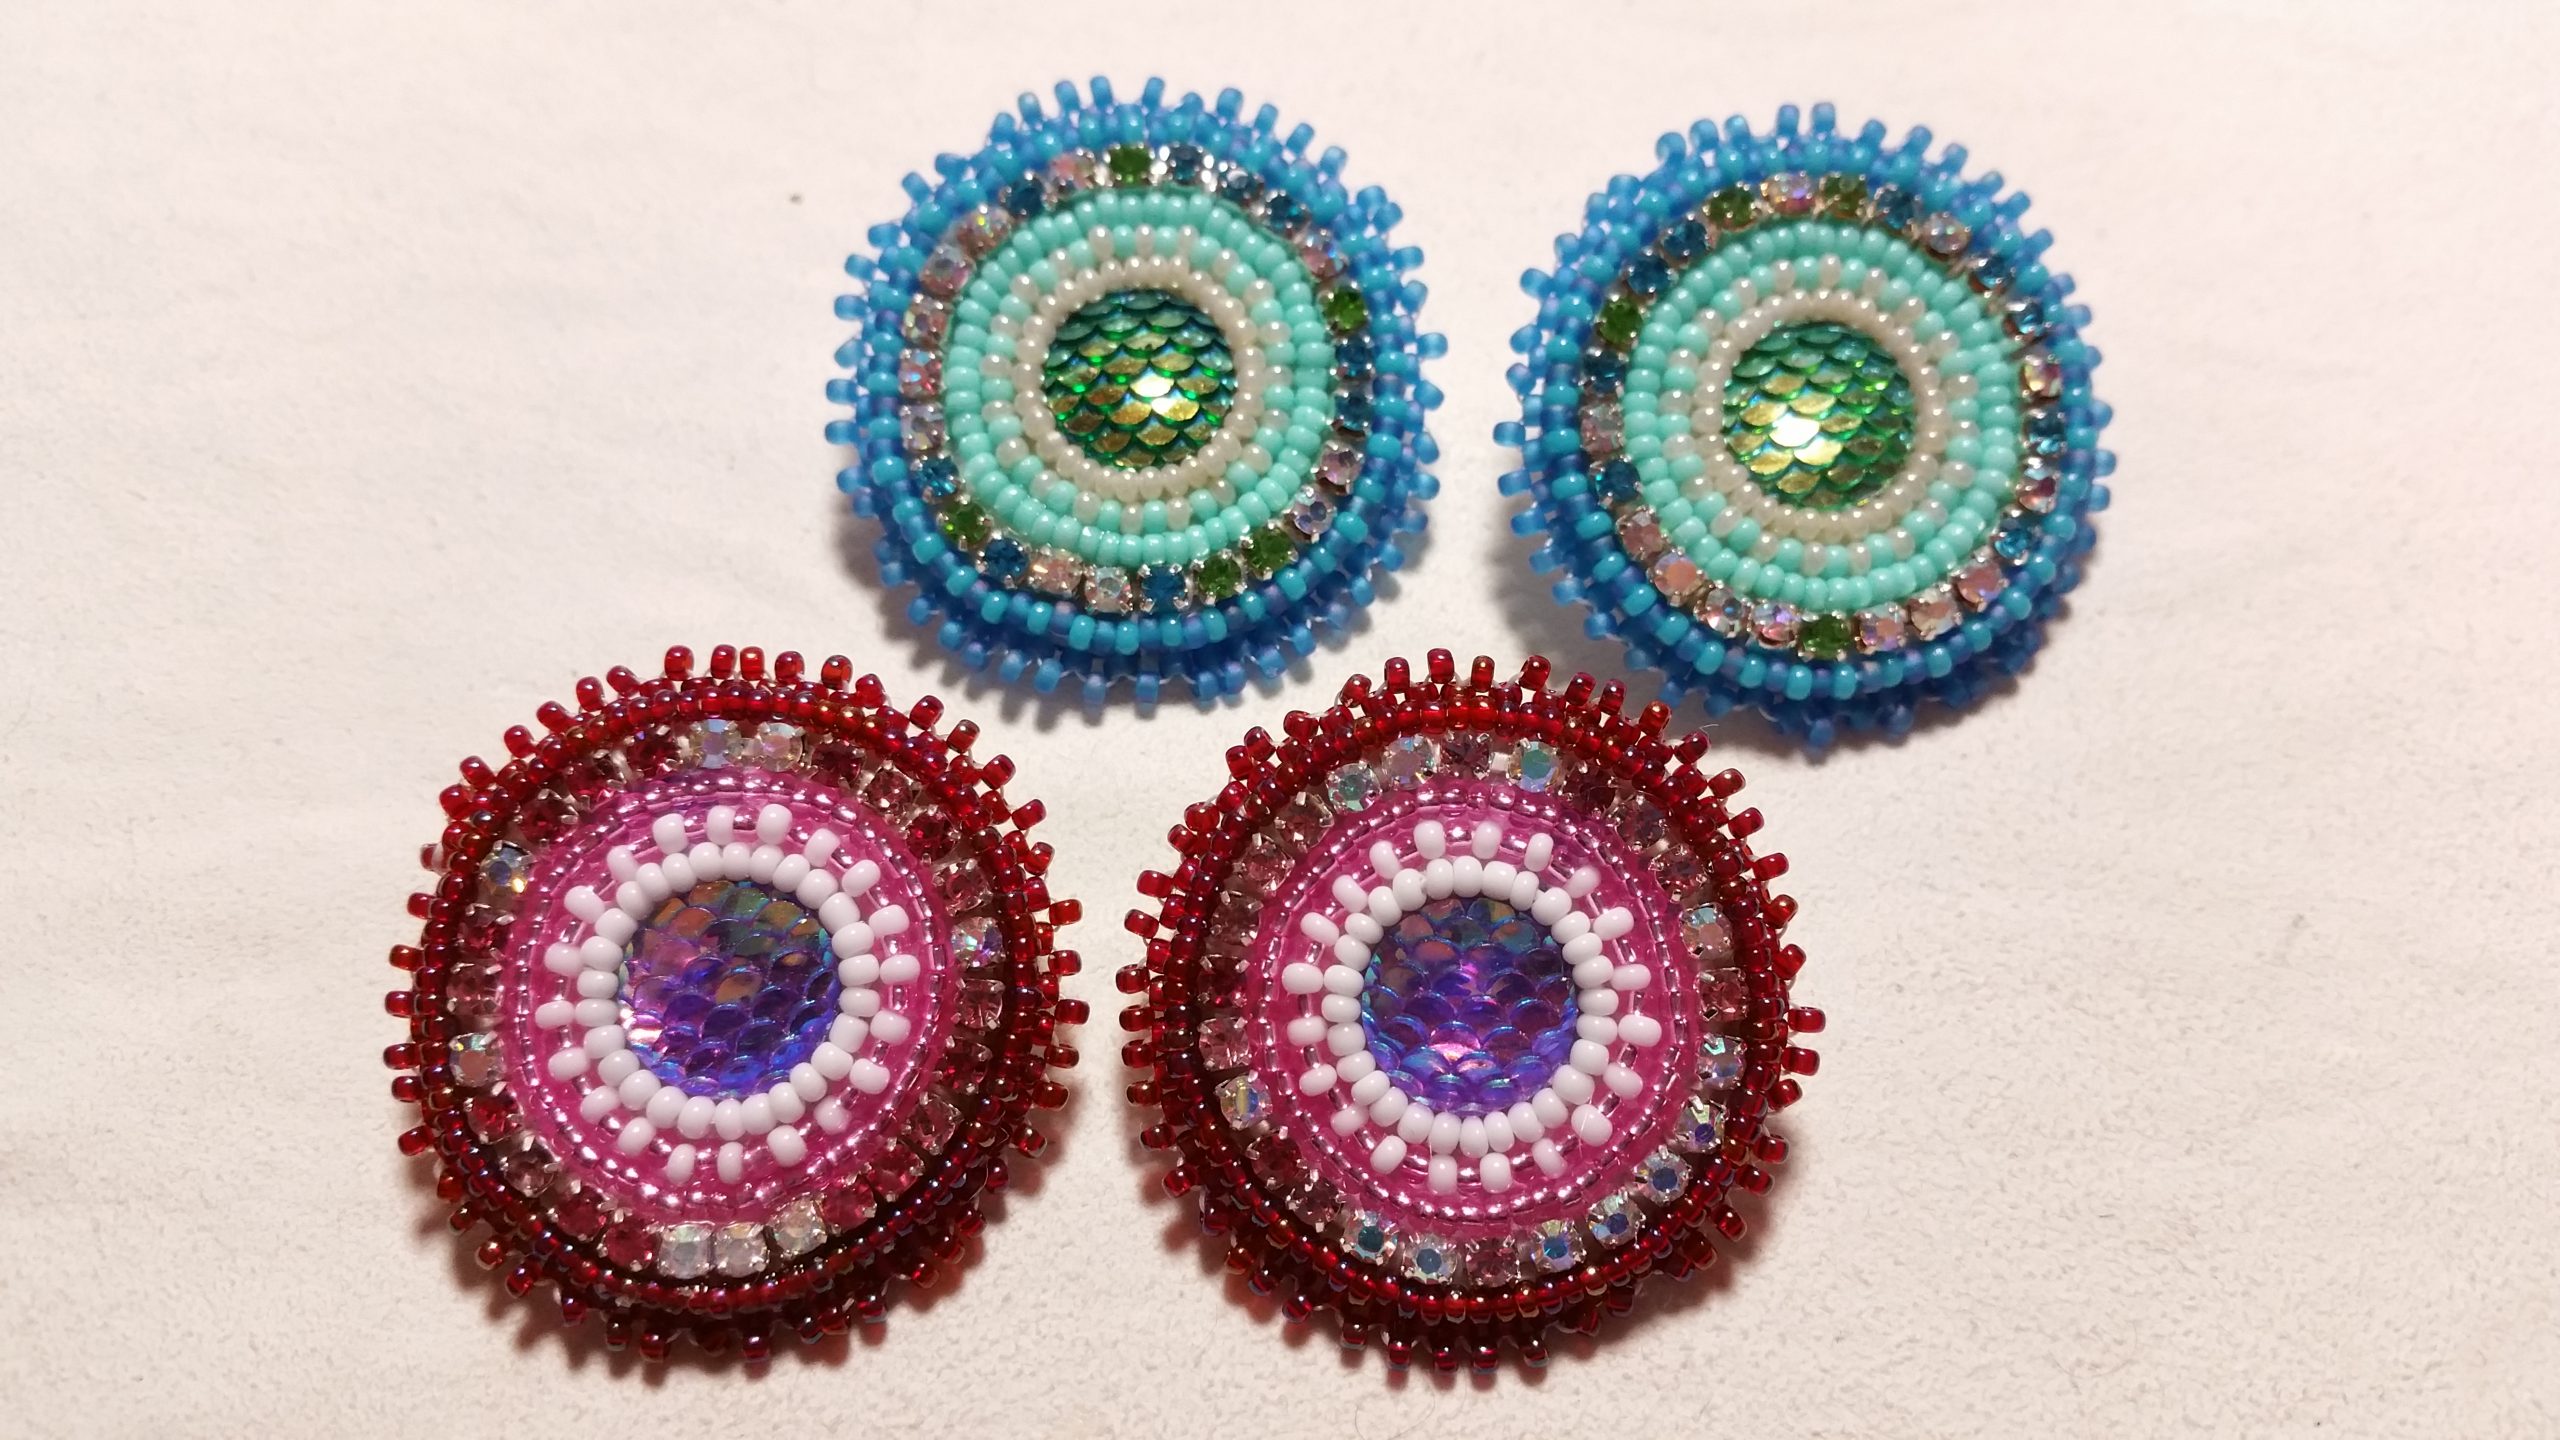
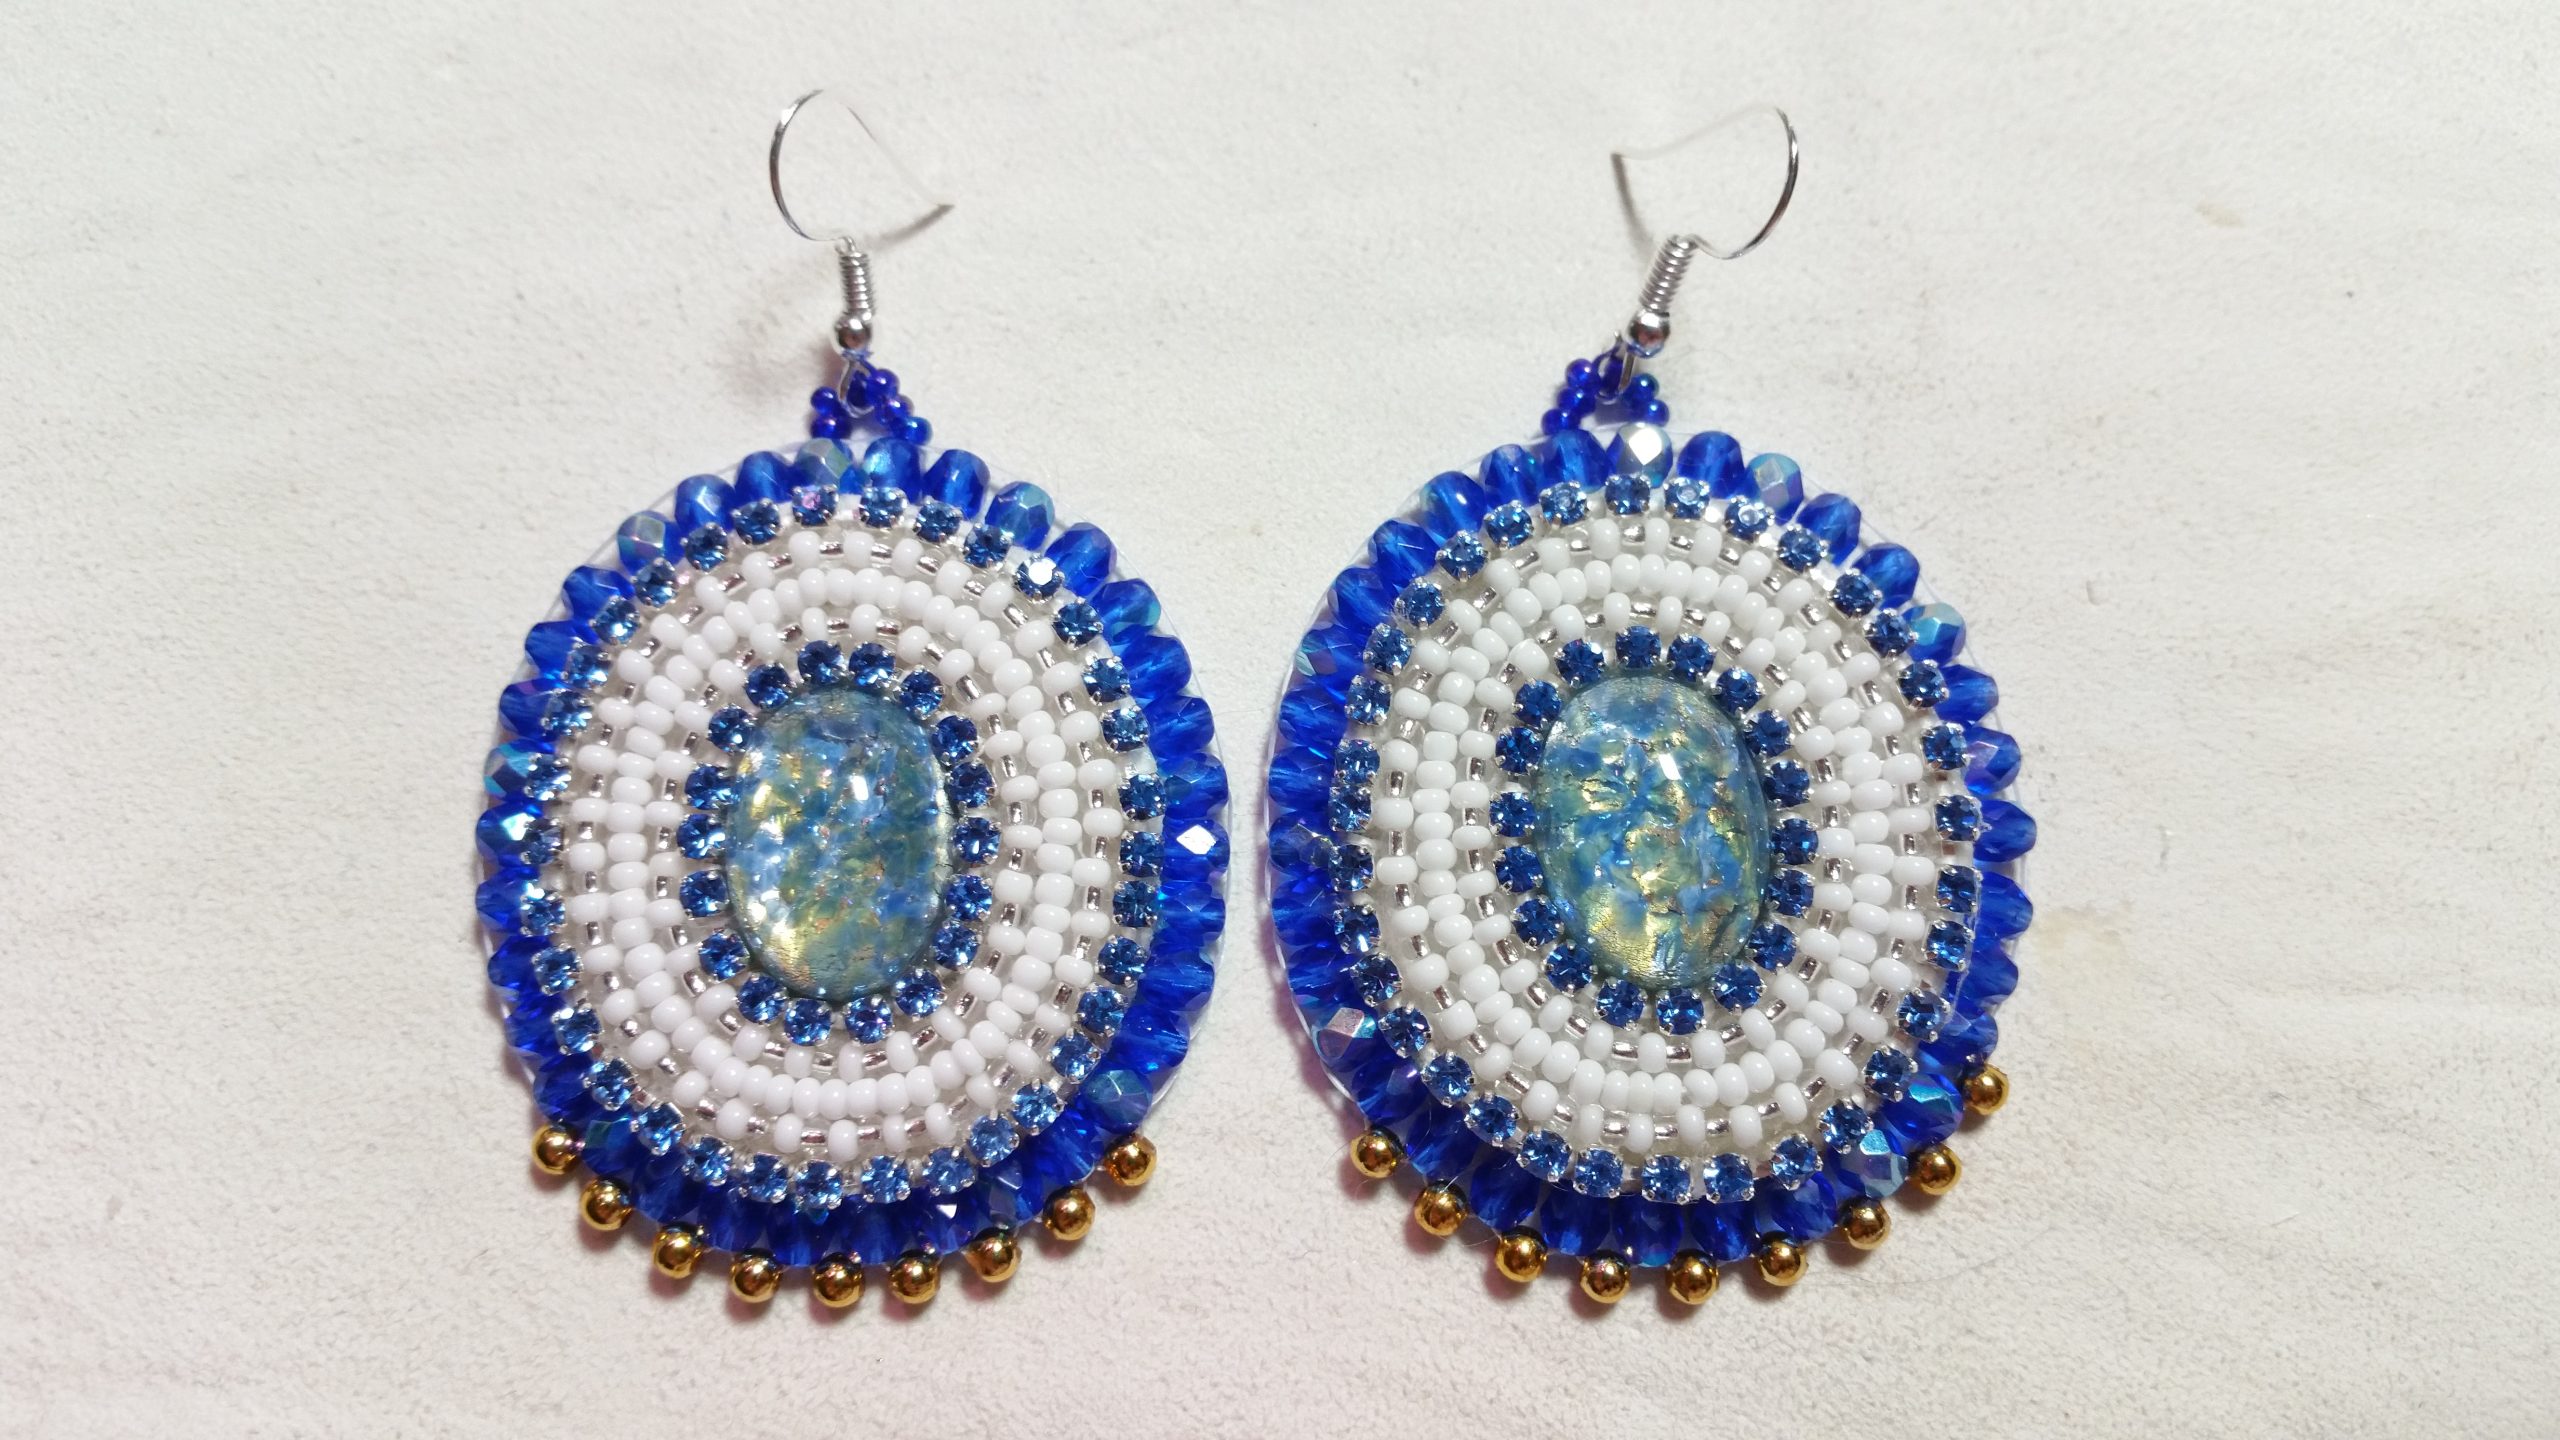
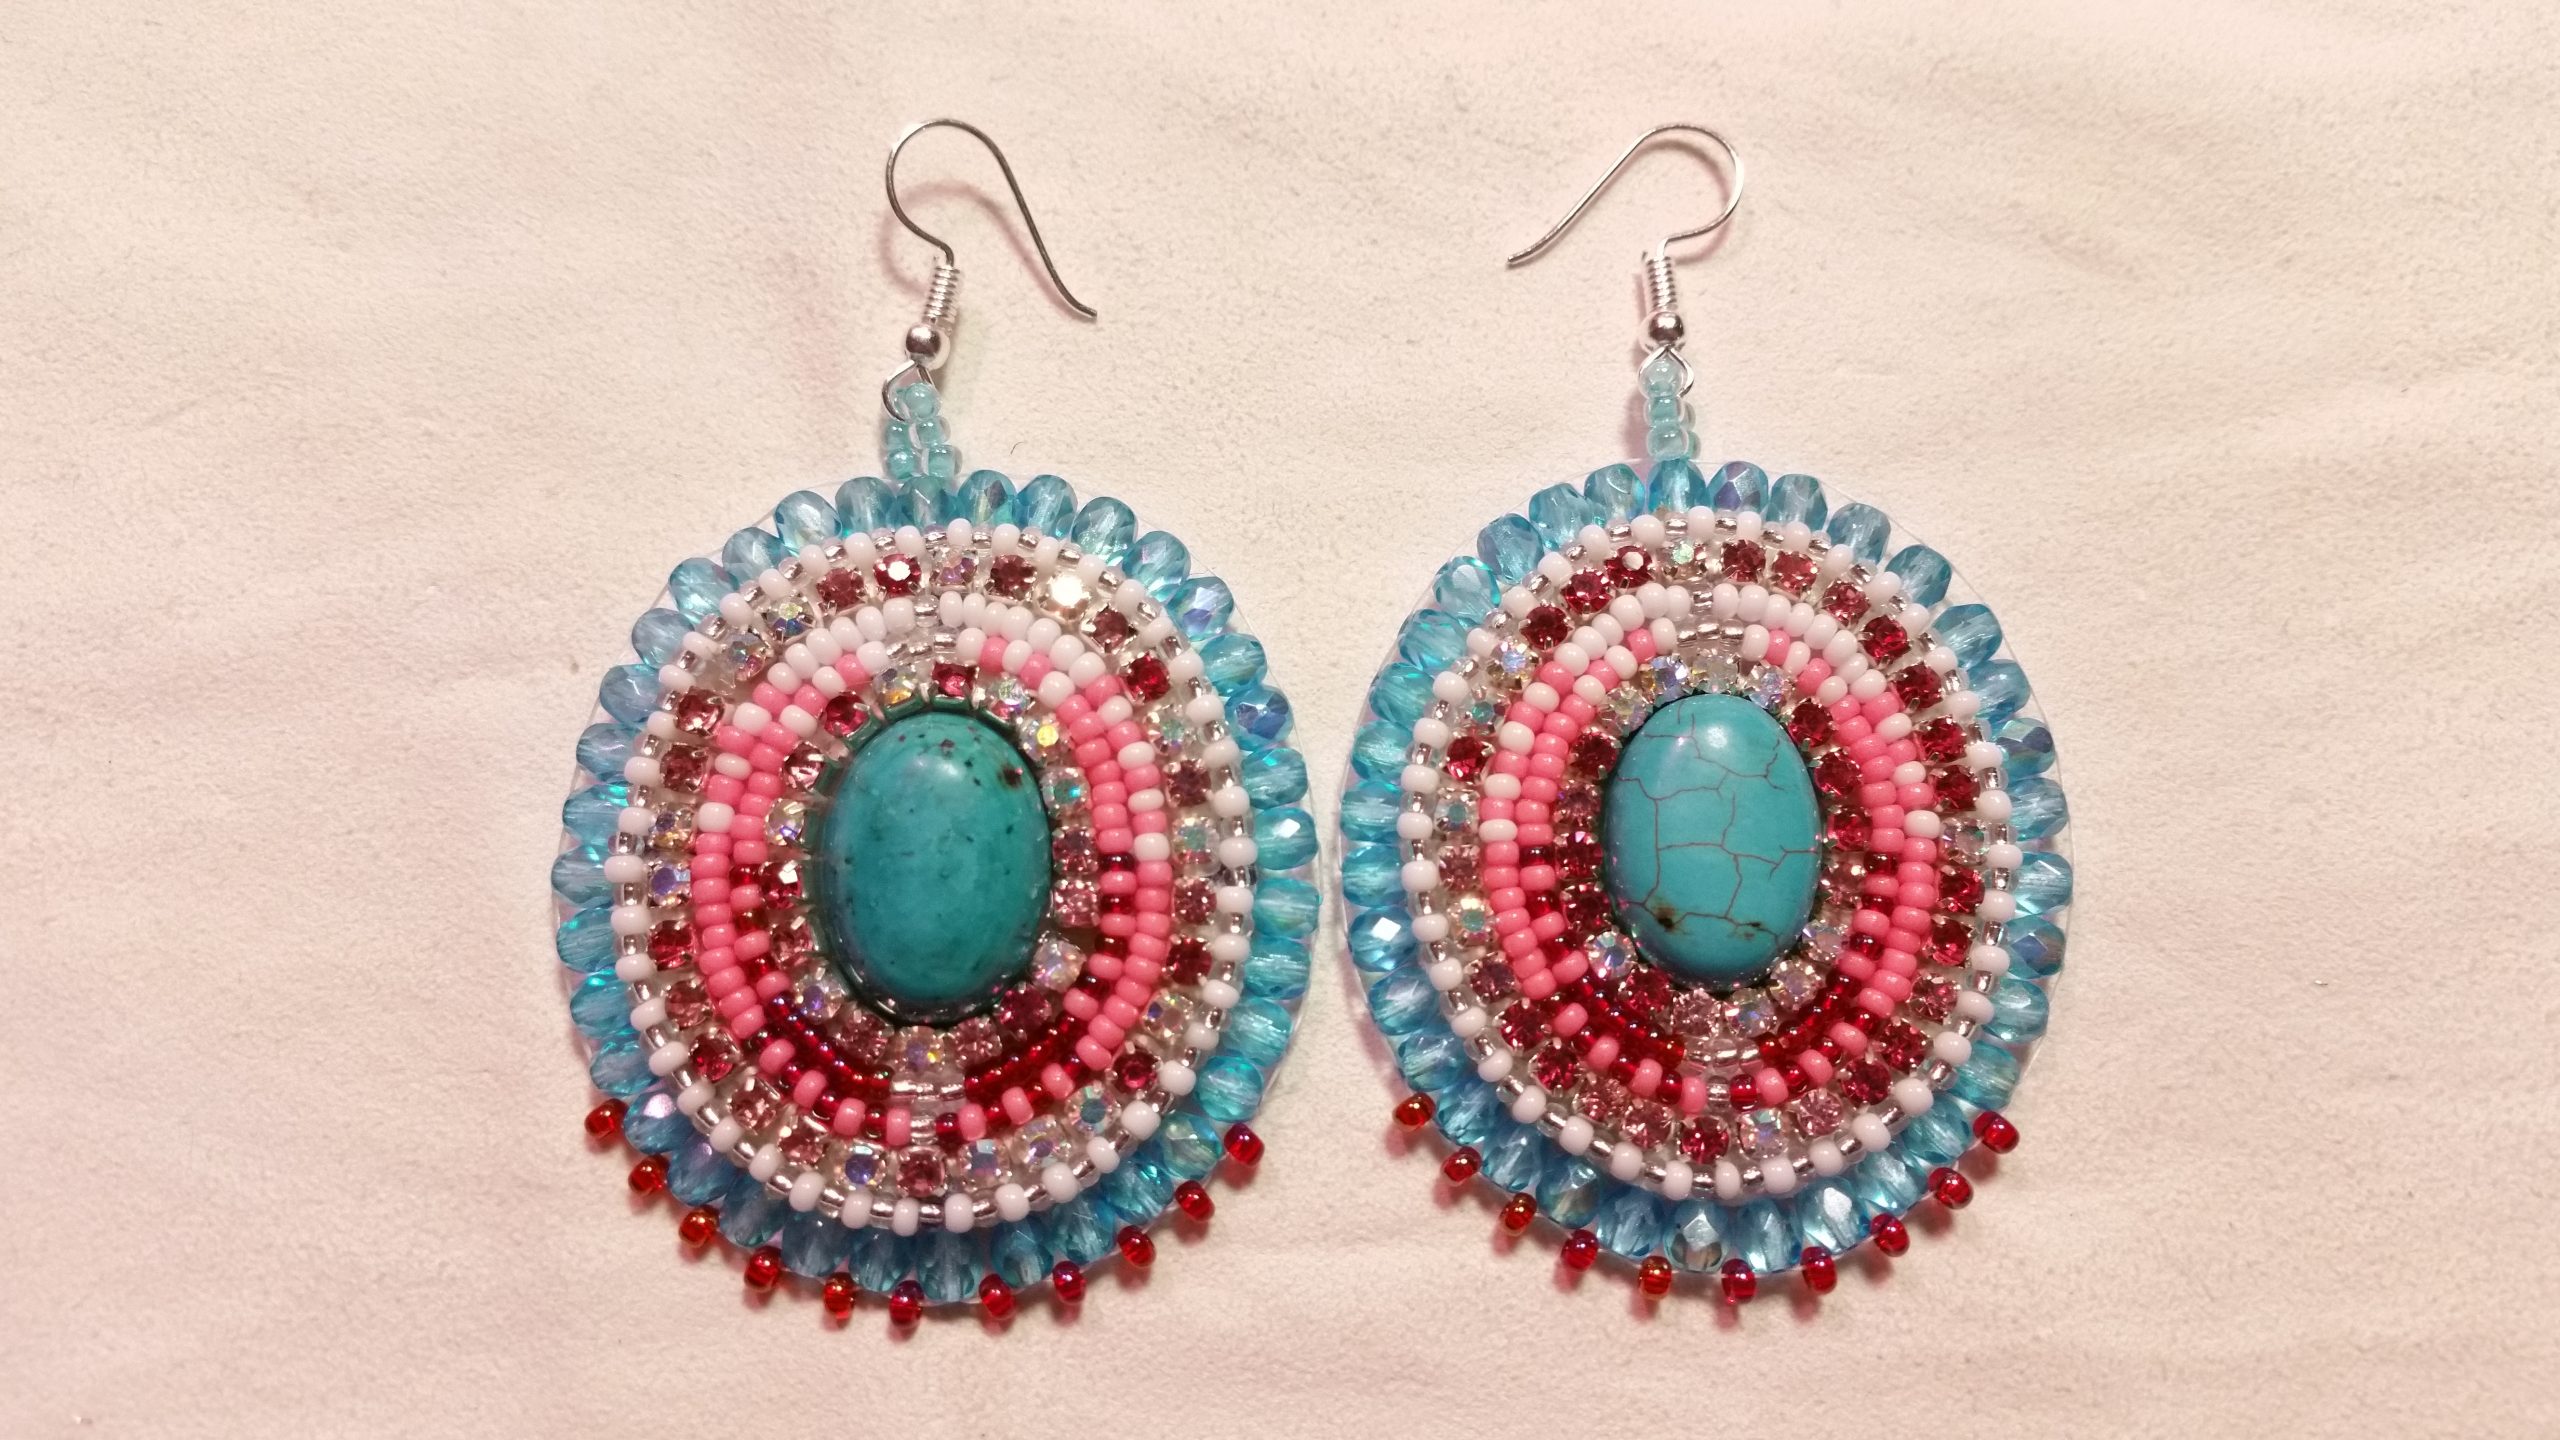
The beads I use are so called seedbeads. They have the size 11/0. The ones I use for beading the edges can be larger (10/0 or 9/0) or small firepolished beads – mostly 3 or 4 mm.
And I love to combine everything with rhinestones.
You know, everyone needs a little bling 😉
Stay safe!!

A lot has happened in the last six months.
Stress at my job – not sooo new but more than usual – and we had (or better still have) the corona crisis which left me energyless and idealess.
A few weeks ago I had surgery and now am recuperating.
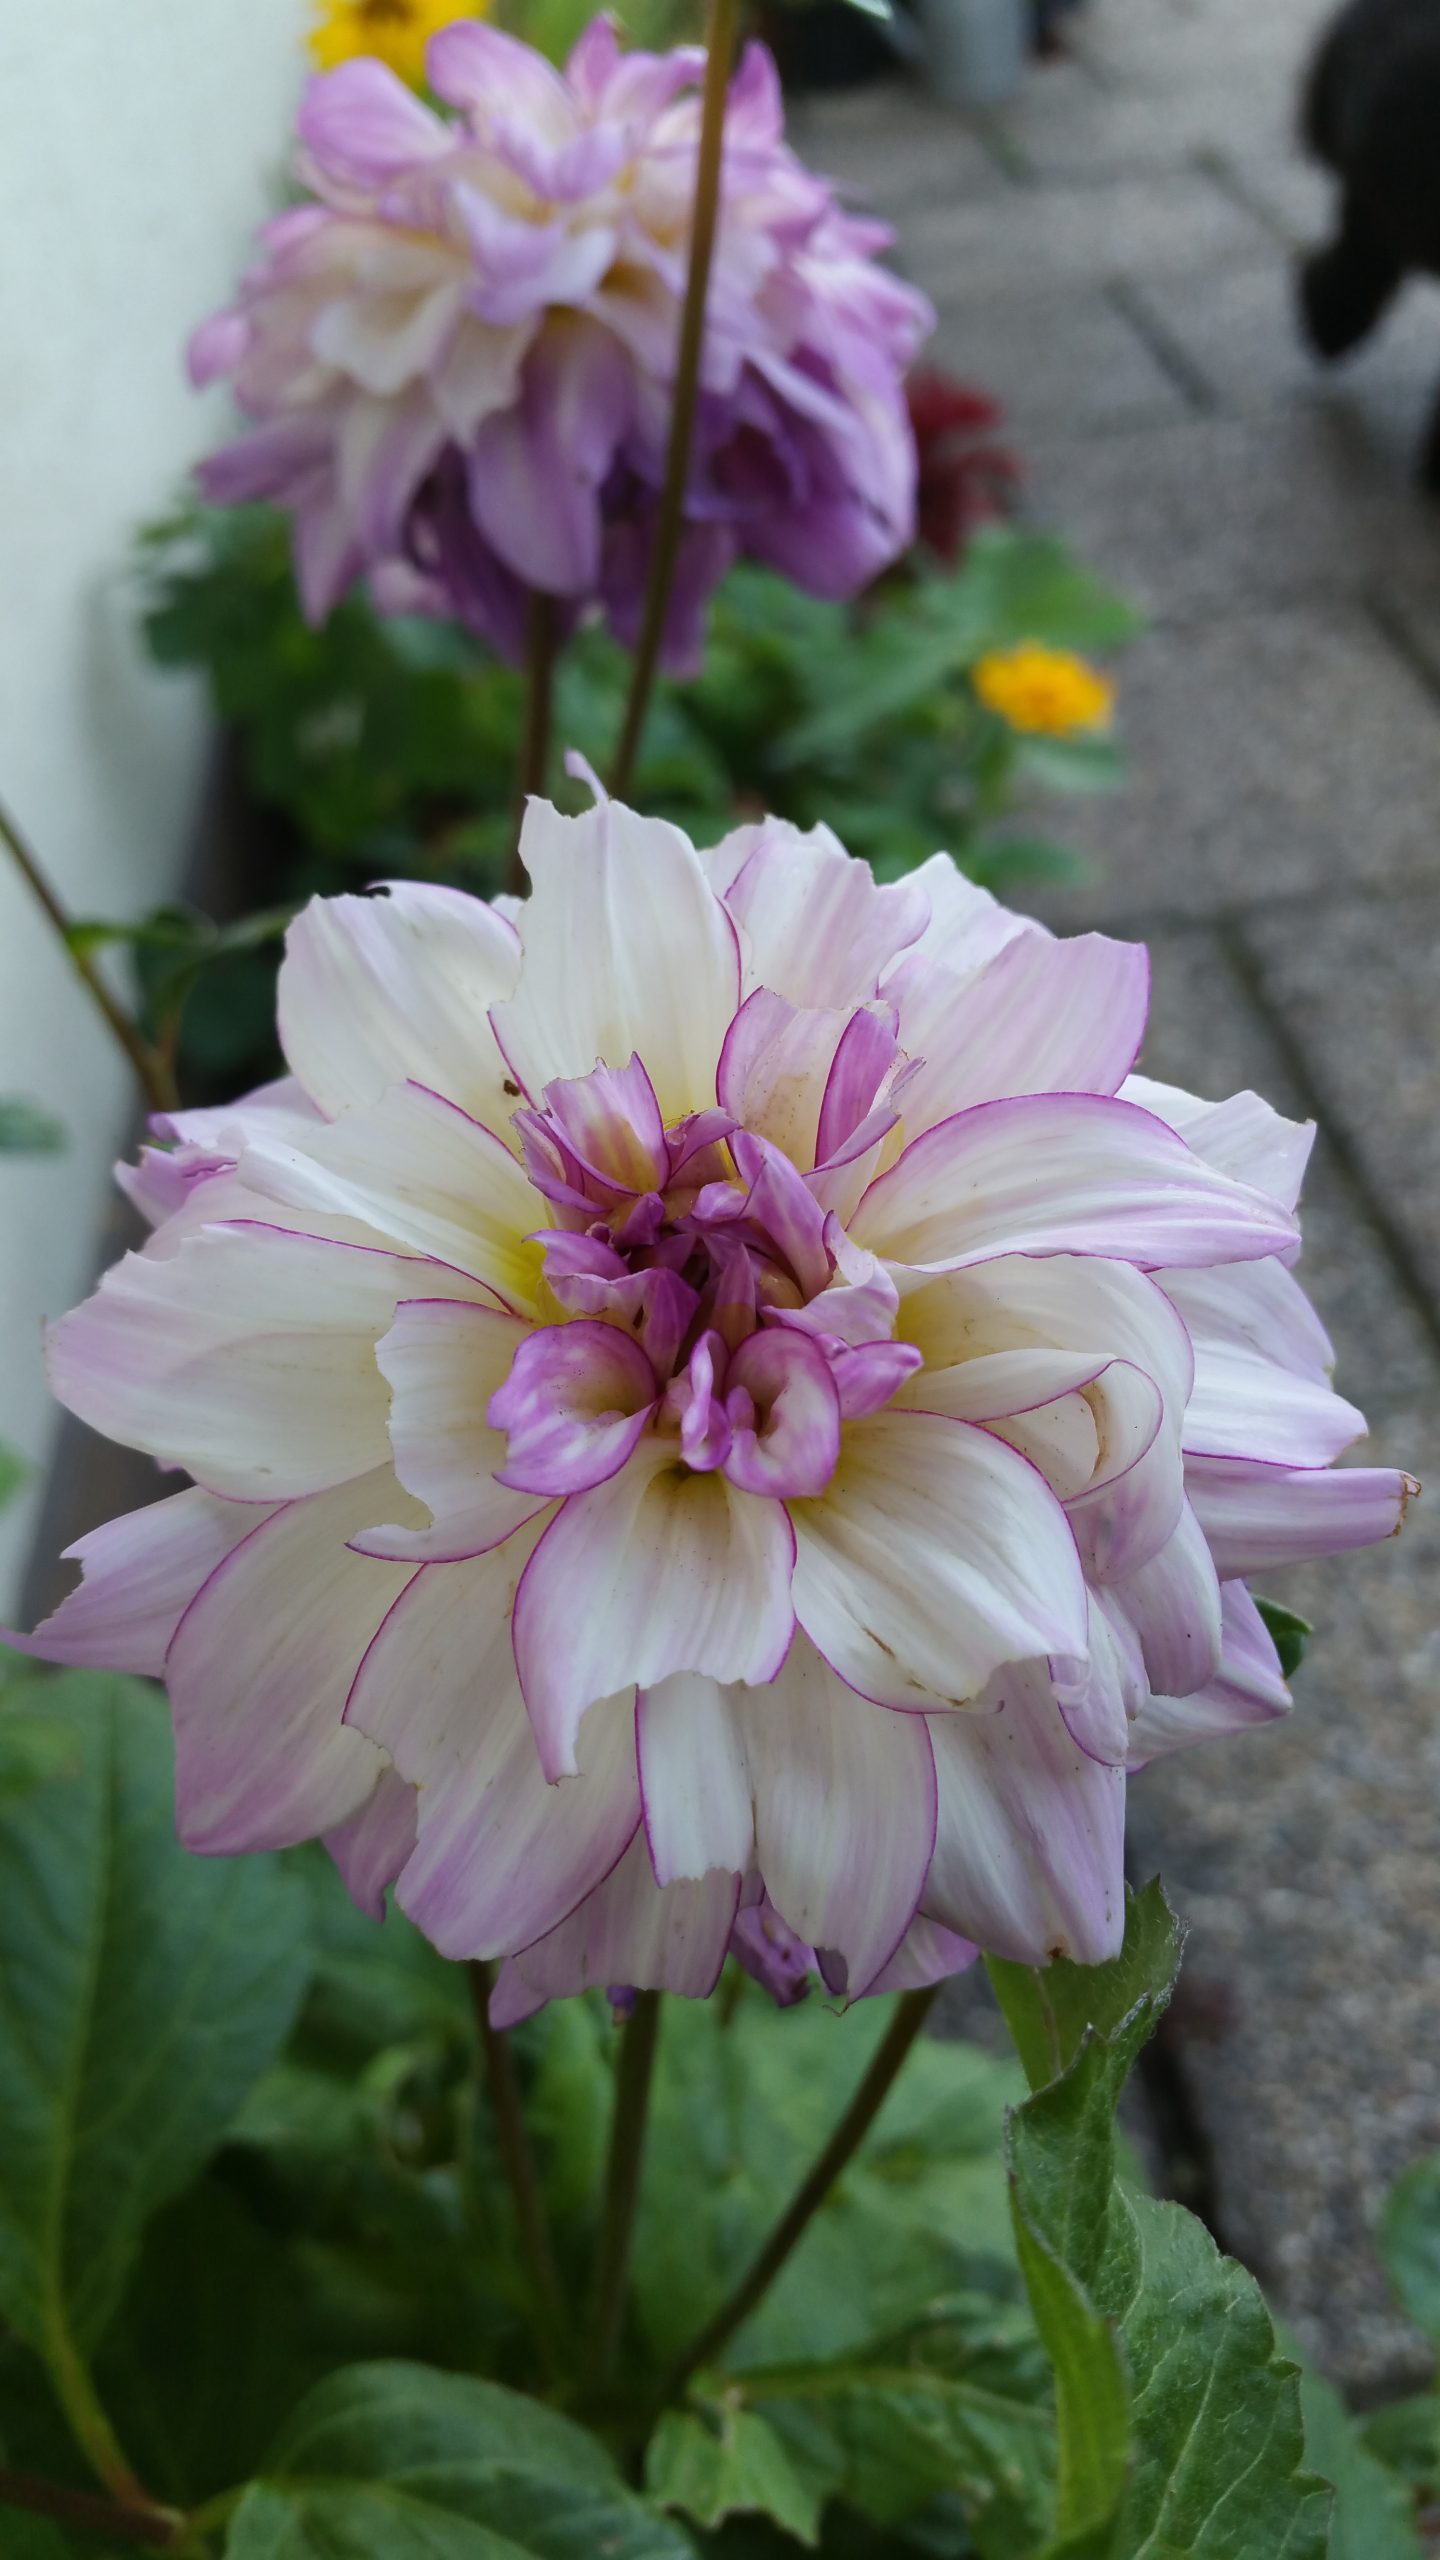
Still trying to find the energy to get some beadwork or other jewelry work done I literally stopped and smelled the roses …….
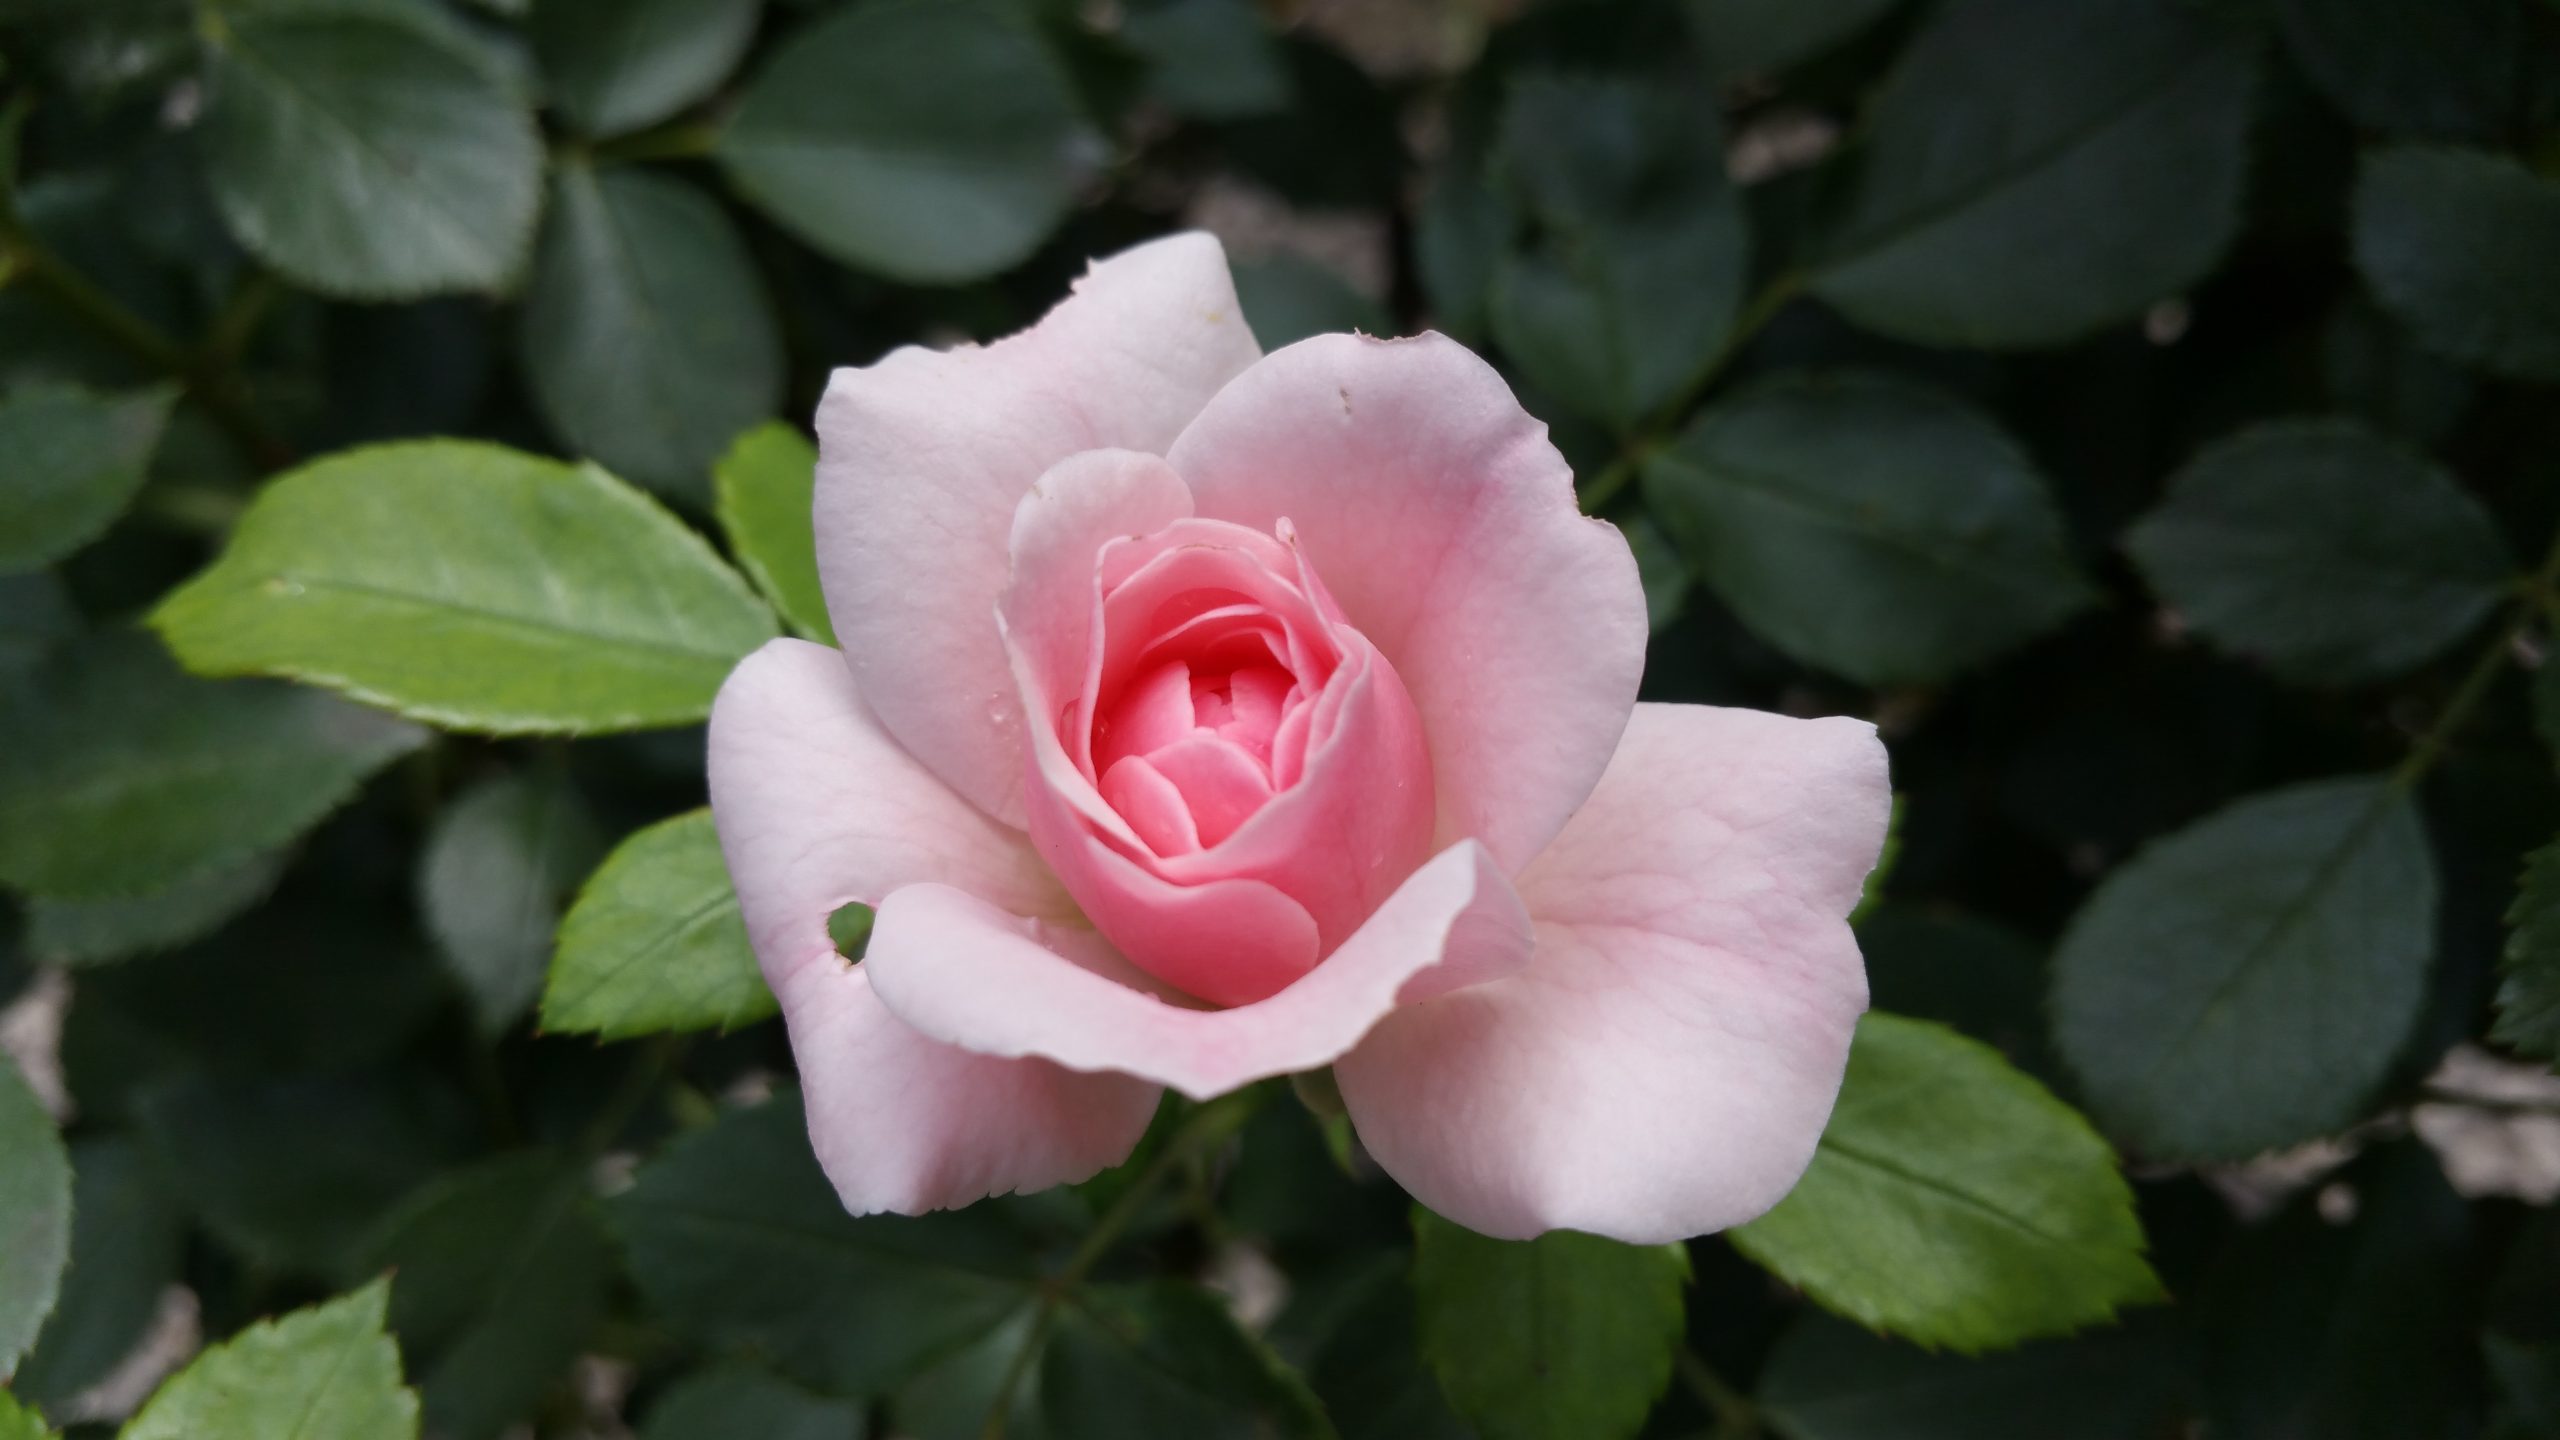
Everytime I stroll through our garden I have to admit that nature is simply amazing ………


The last few months I had quite a lot to do.
So I want to let you in on some of my work.
First of all the most important – at least to me:
I gave my logo a new look.
I thought I should give the whole thing a more personal touch.
And since I started painting with aquarelle and watercolor a few months ago I thought I give it a try……..
I wanna show you a few steps of how I painted the logo.

First I traced the design of a printout of the old logo I designed years ago on the computer to the aquarelle paper.
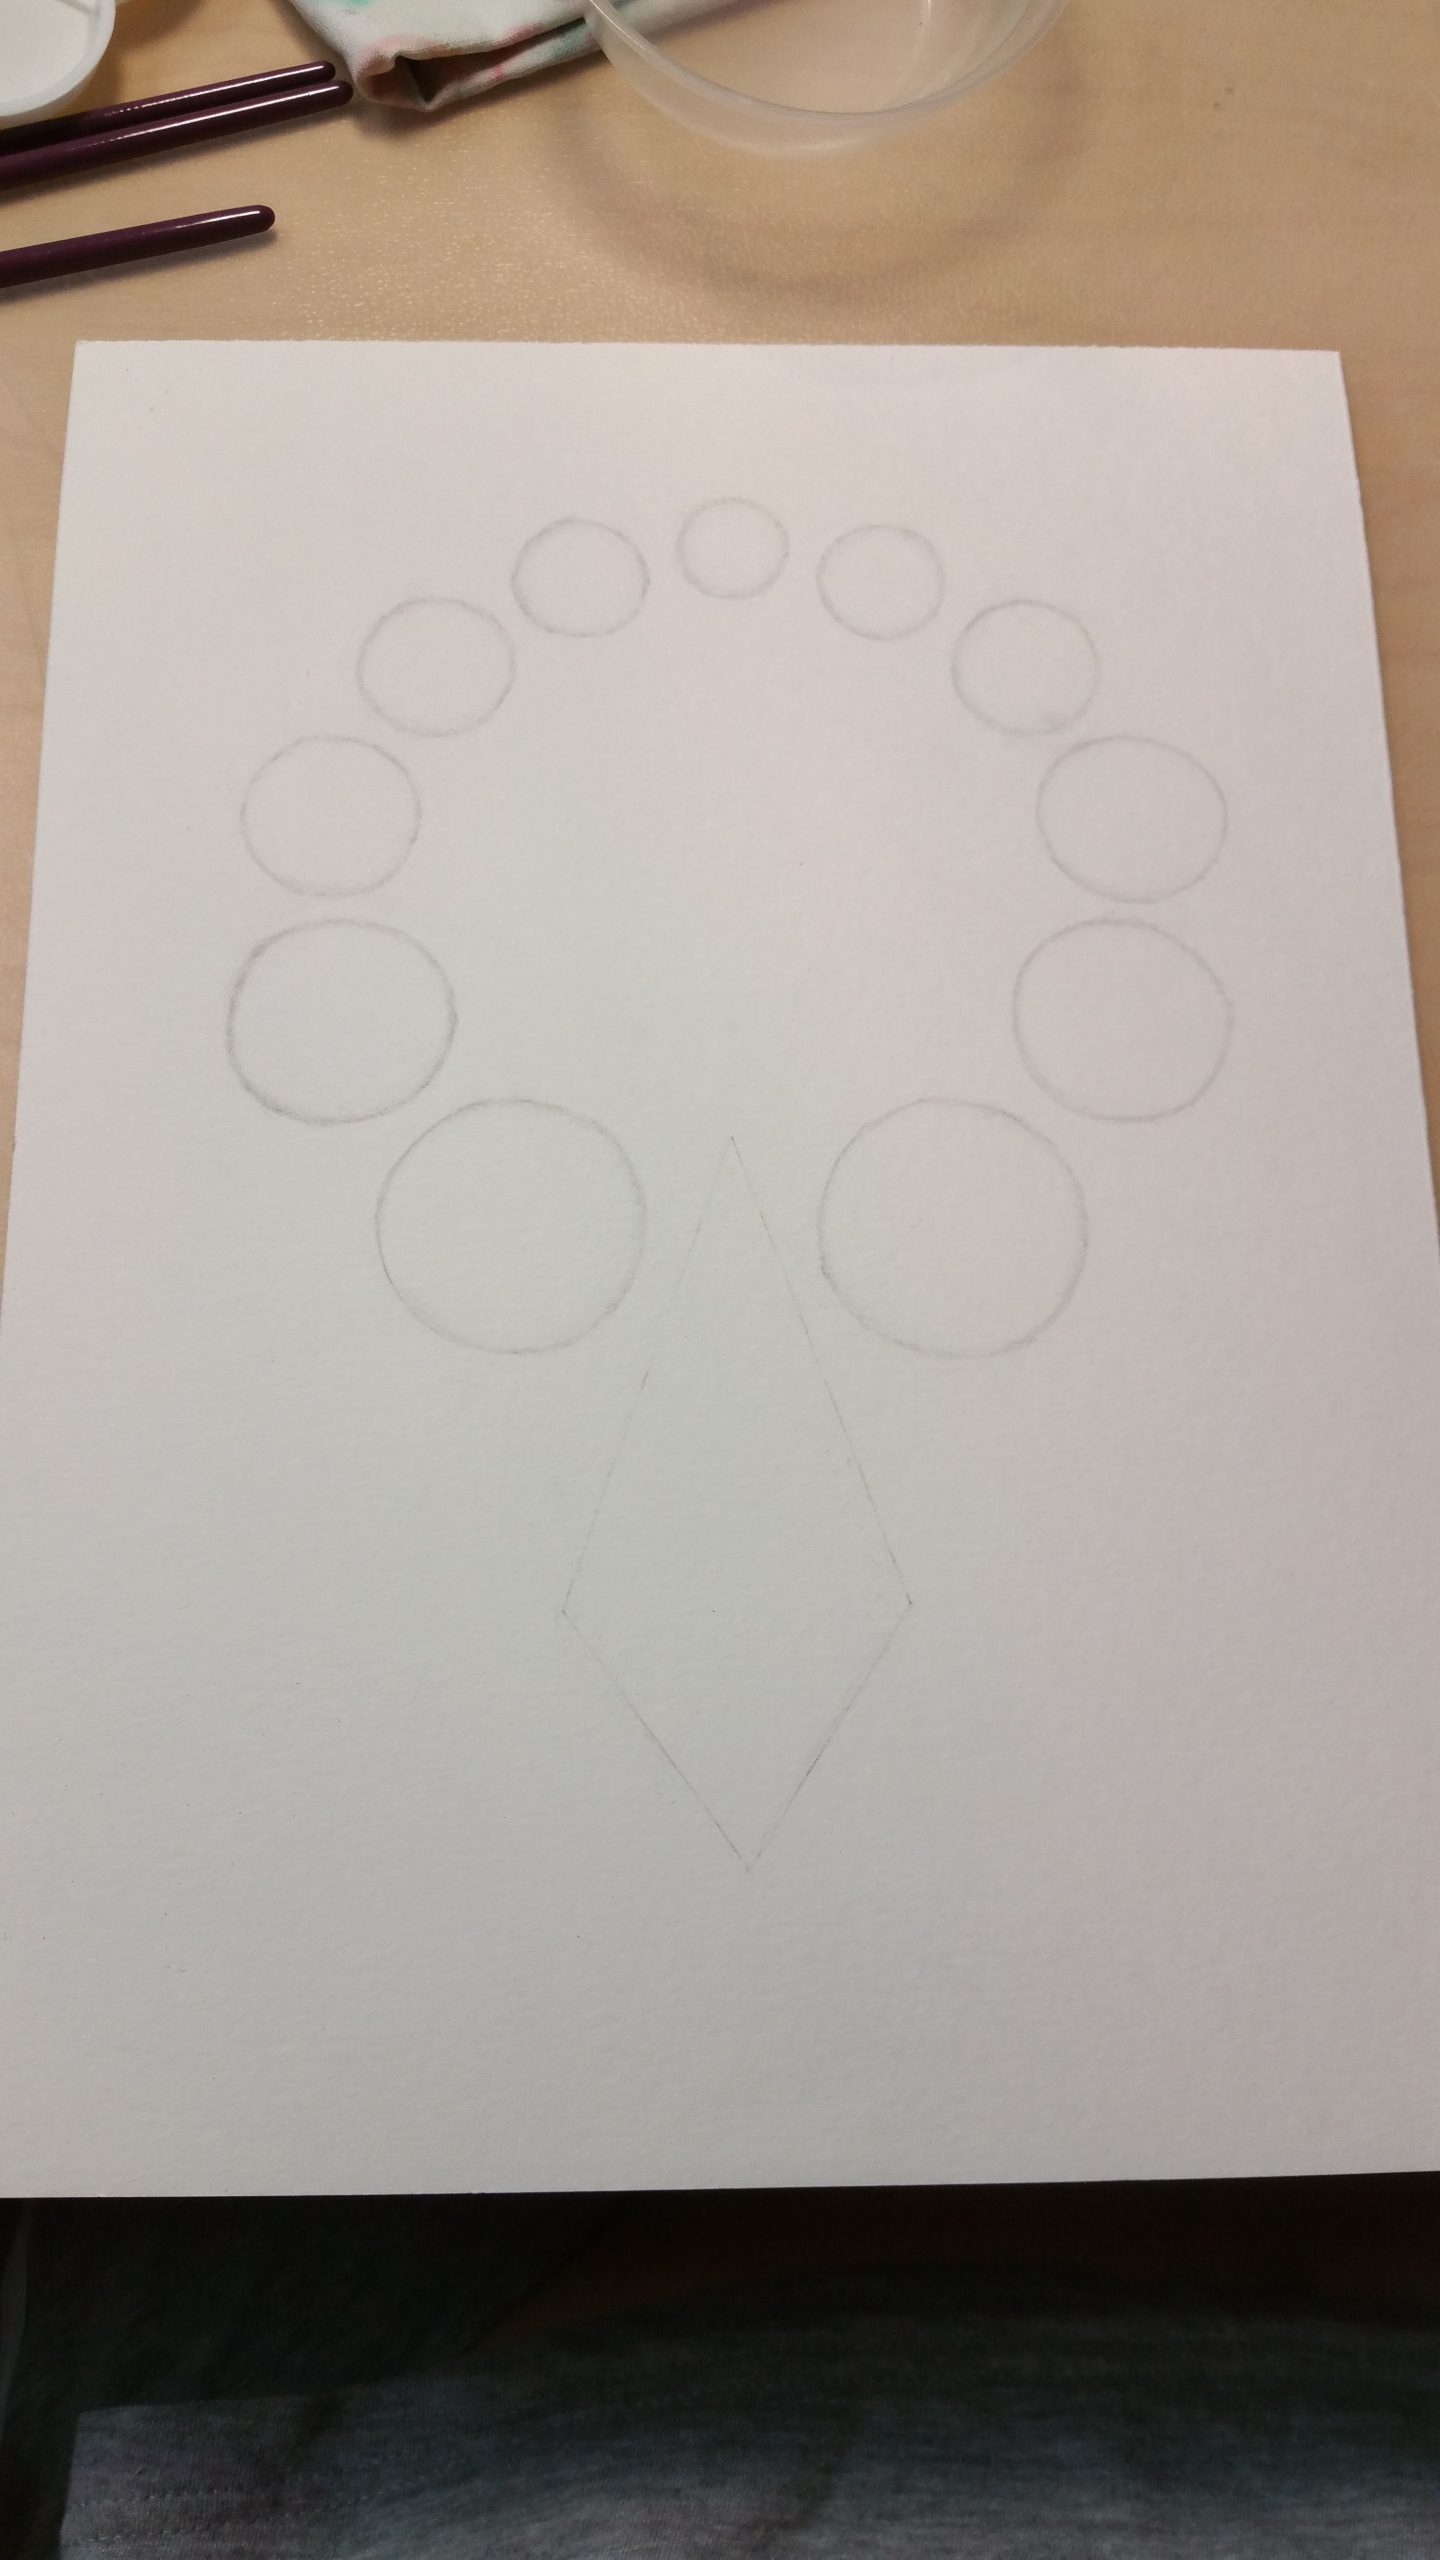
Then I smoothed the lines a bit……
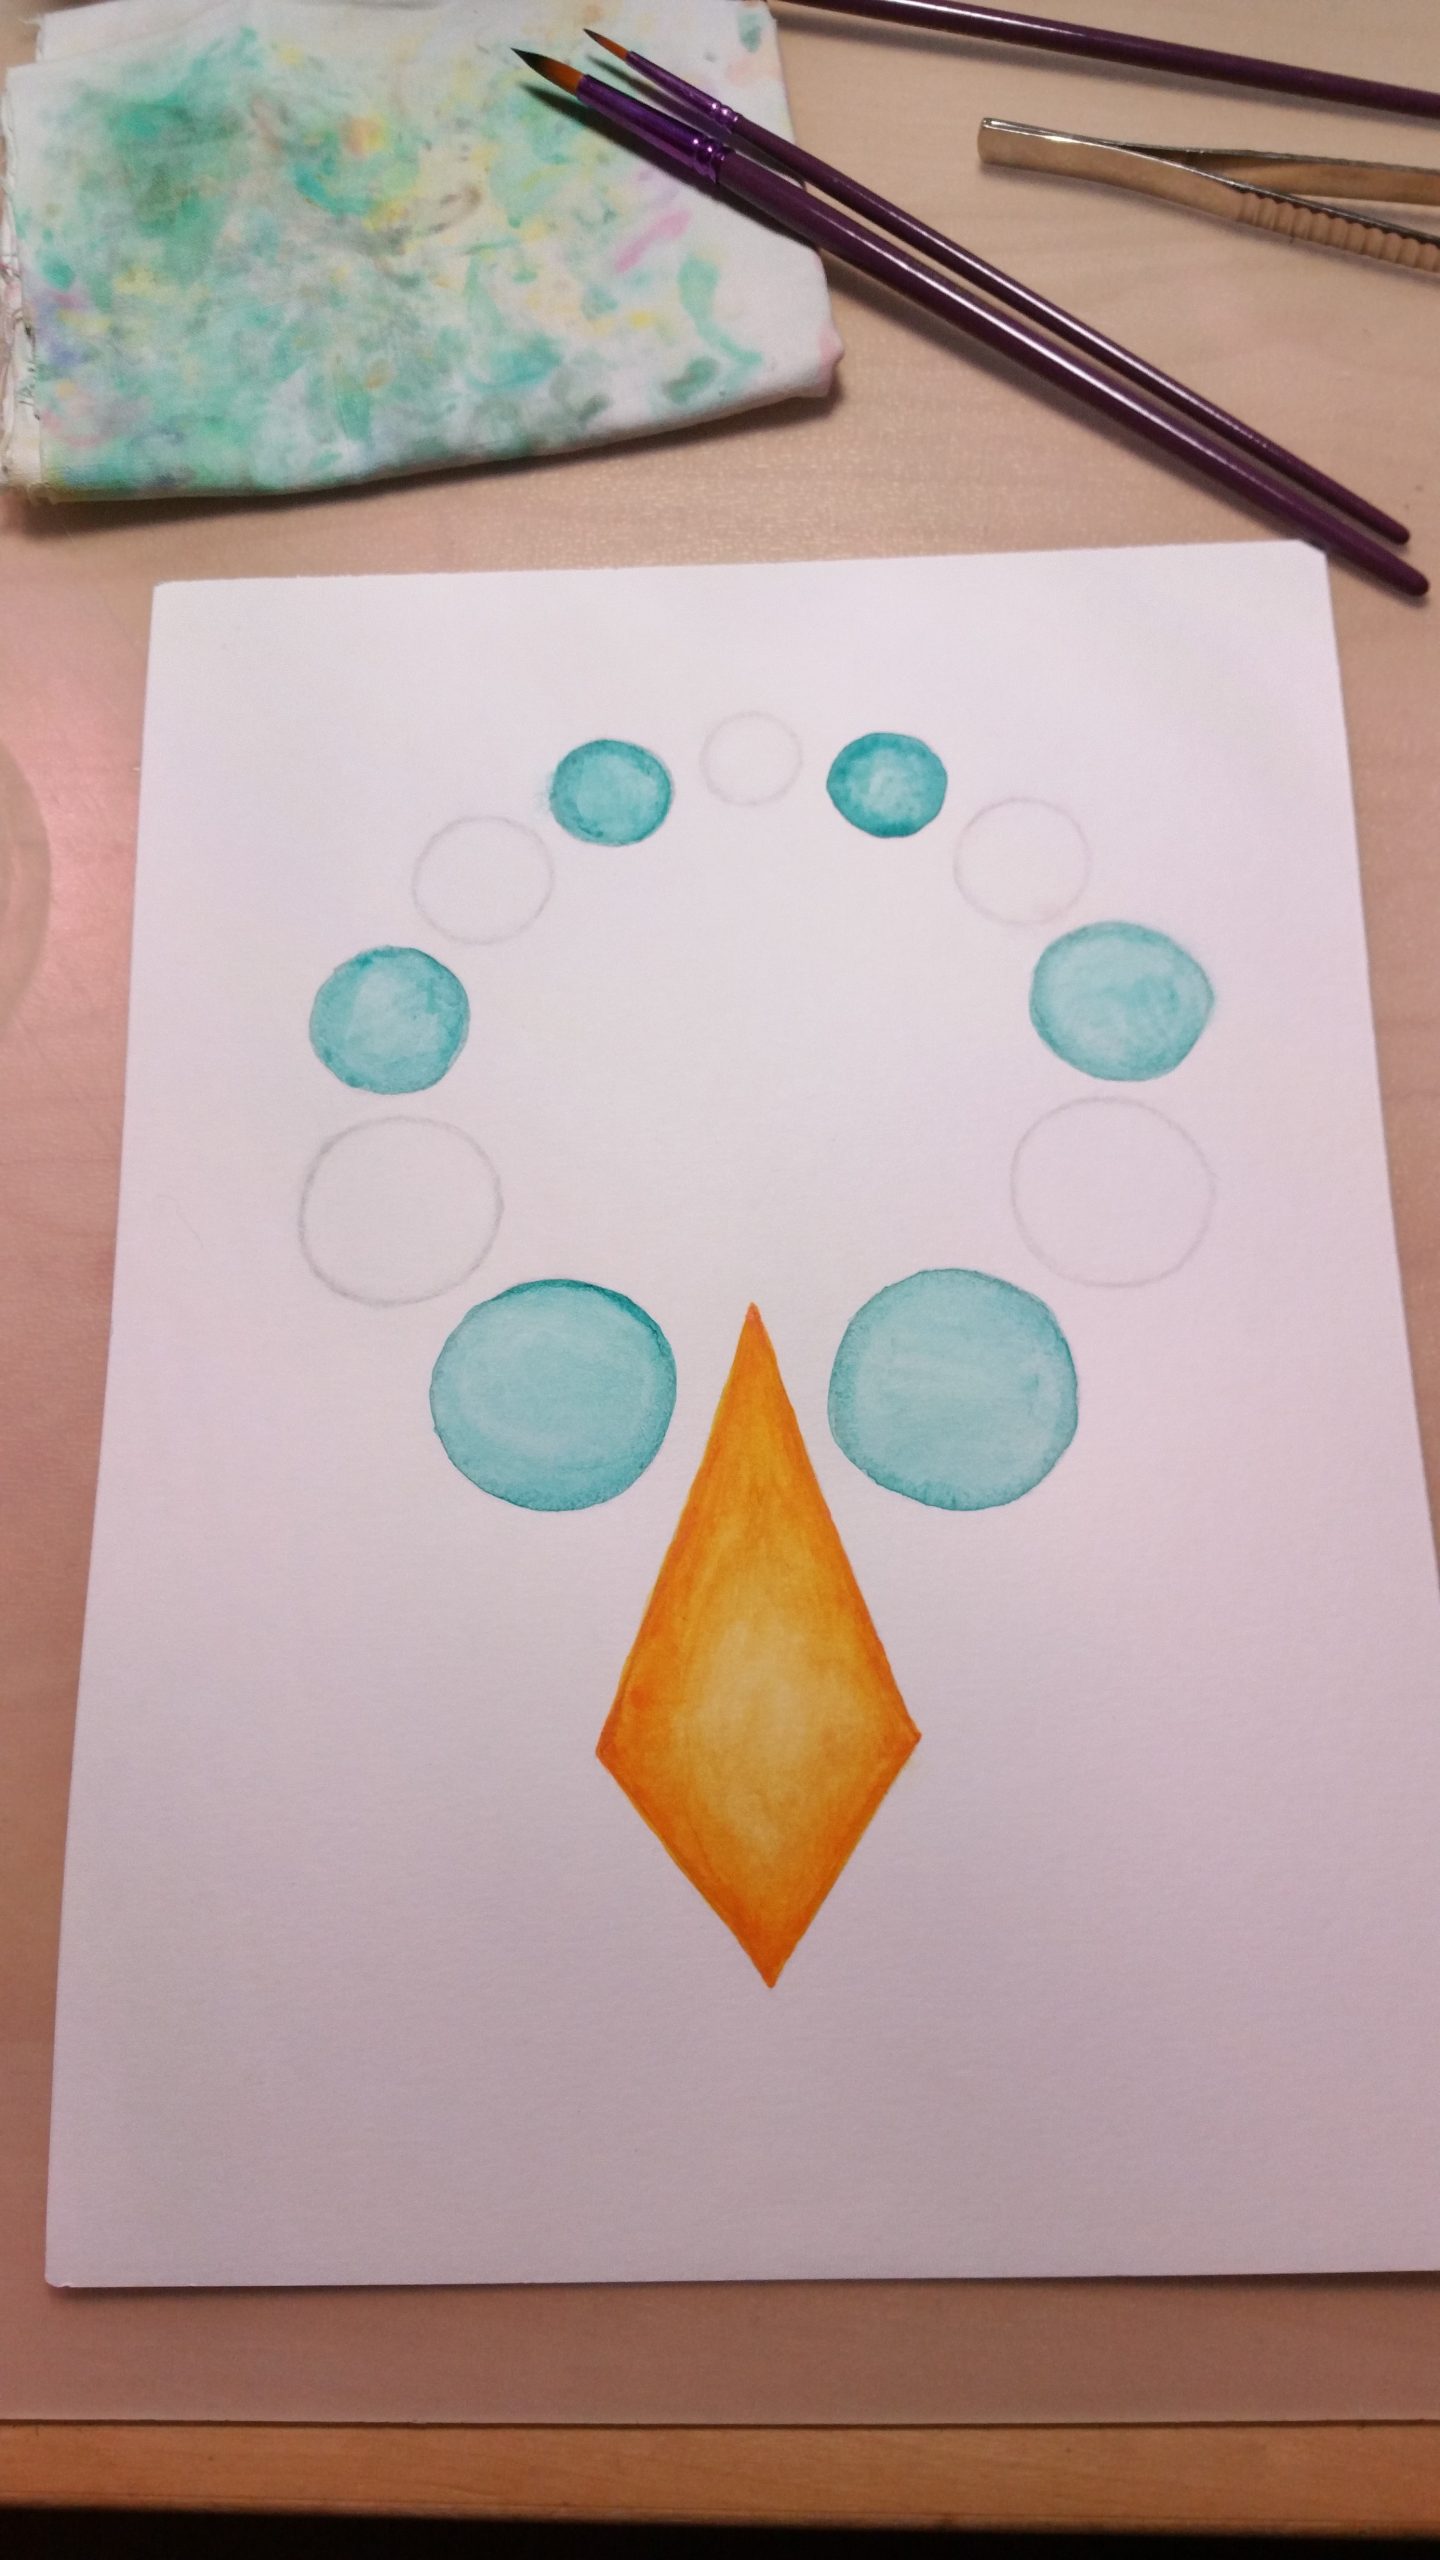
Then I started with the coloring….

First light areas – then darker edges.
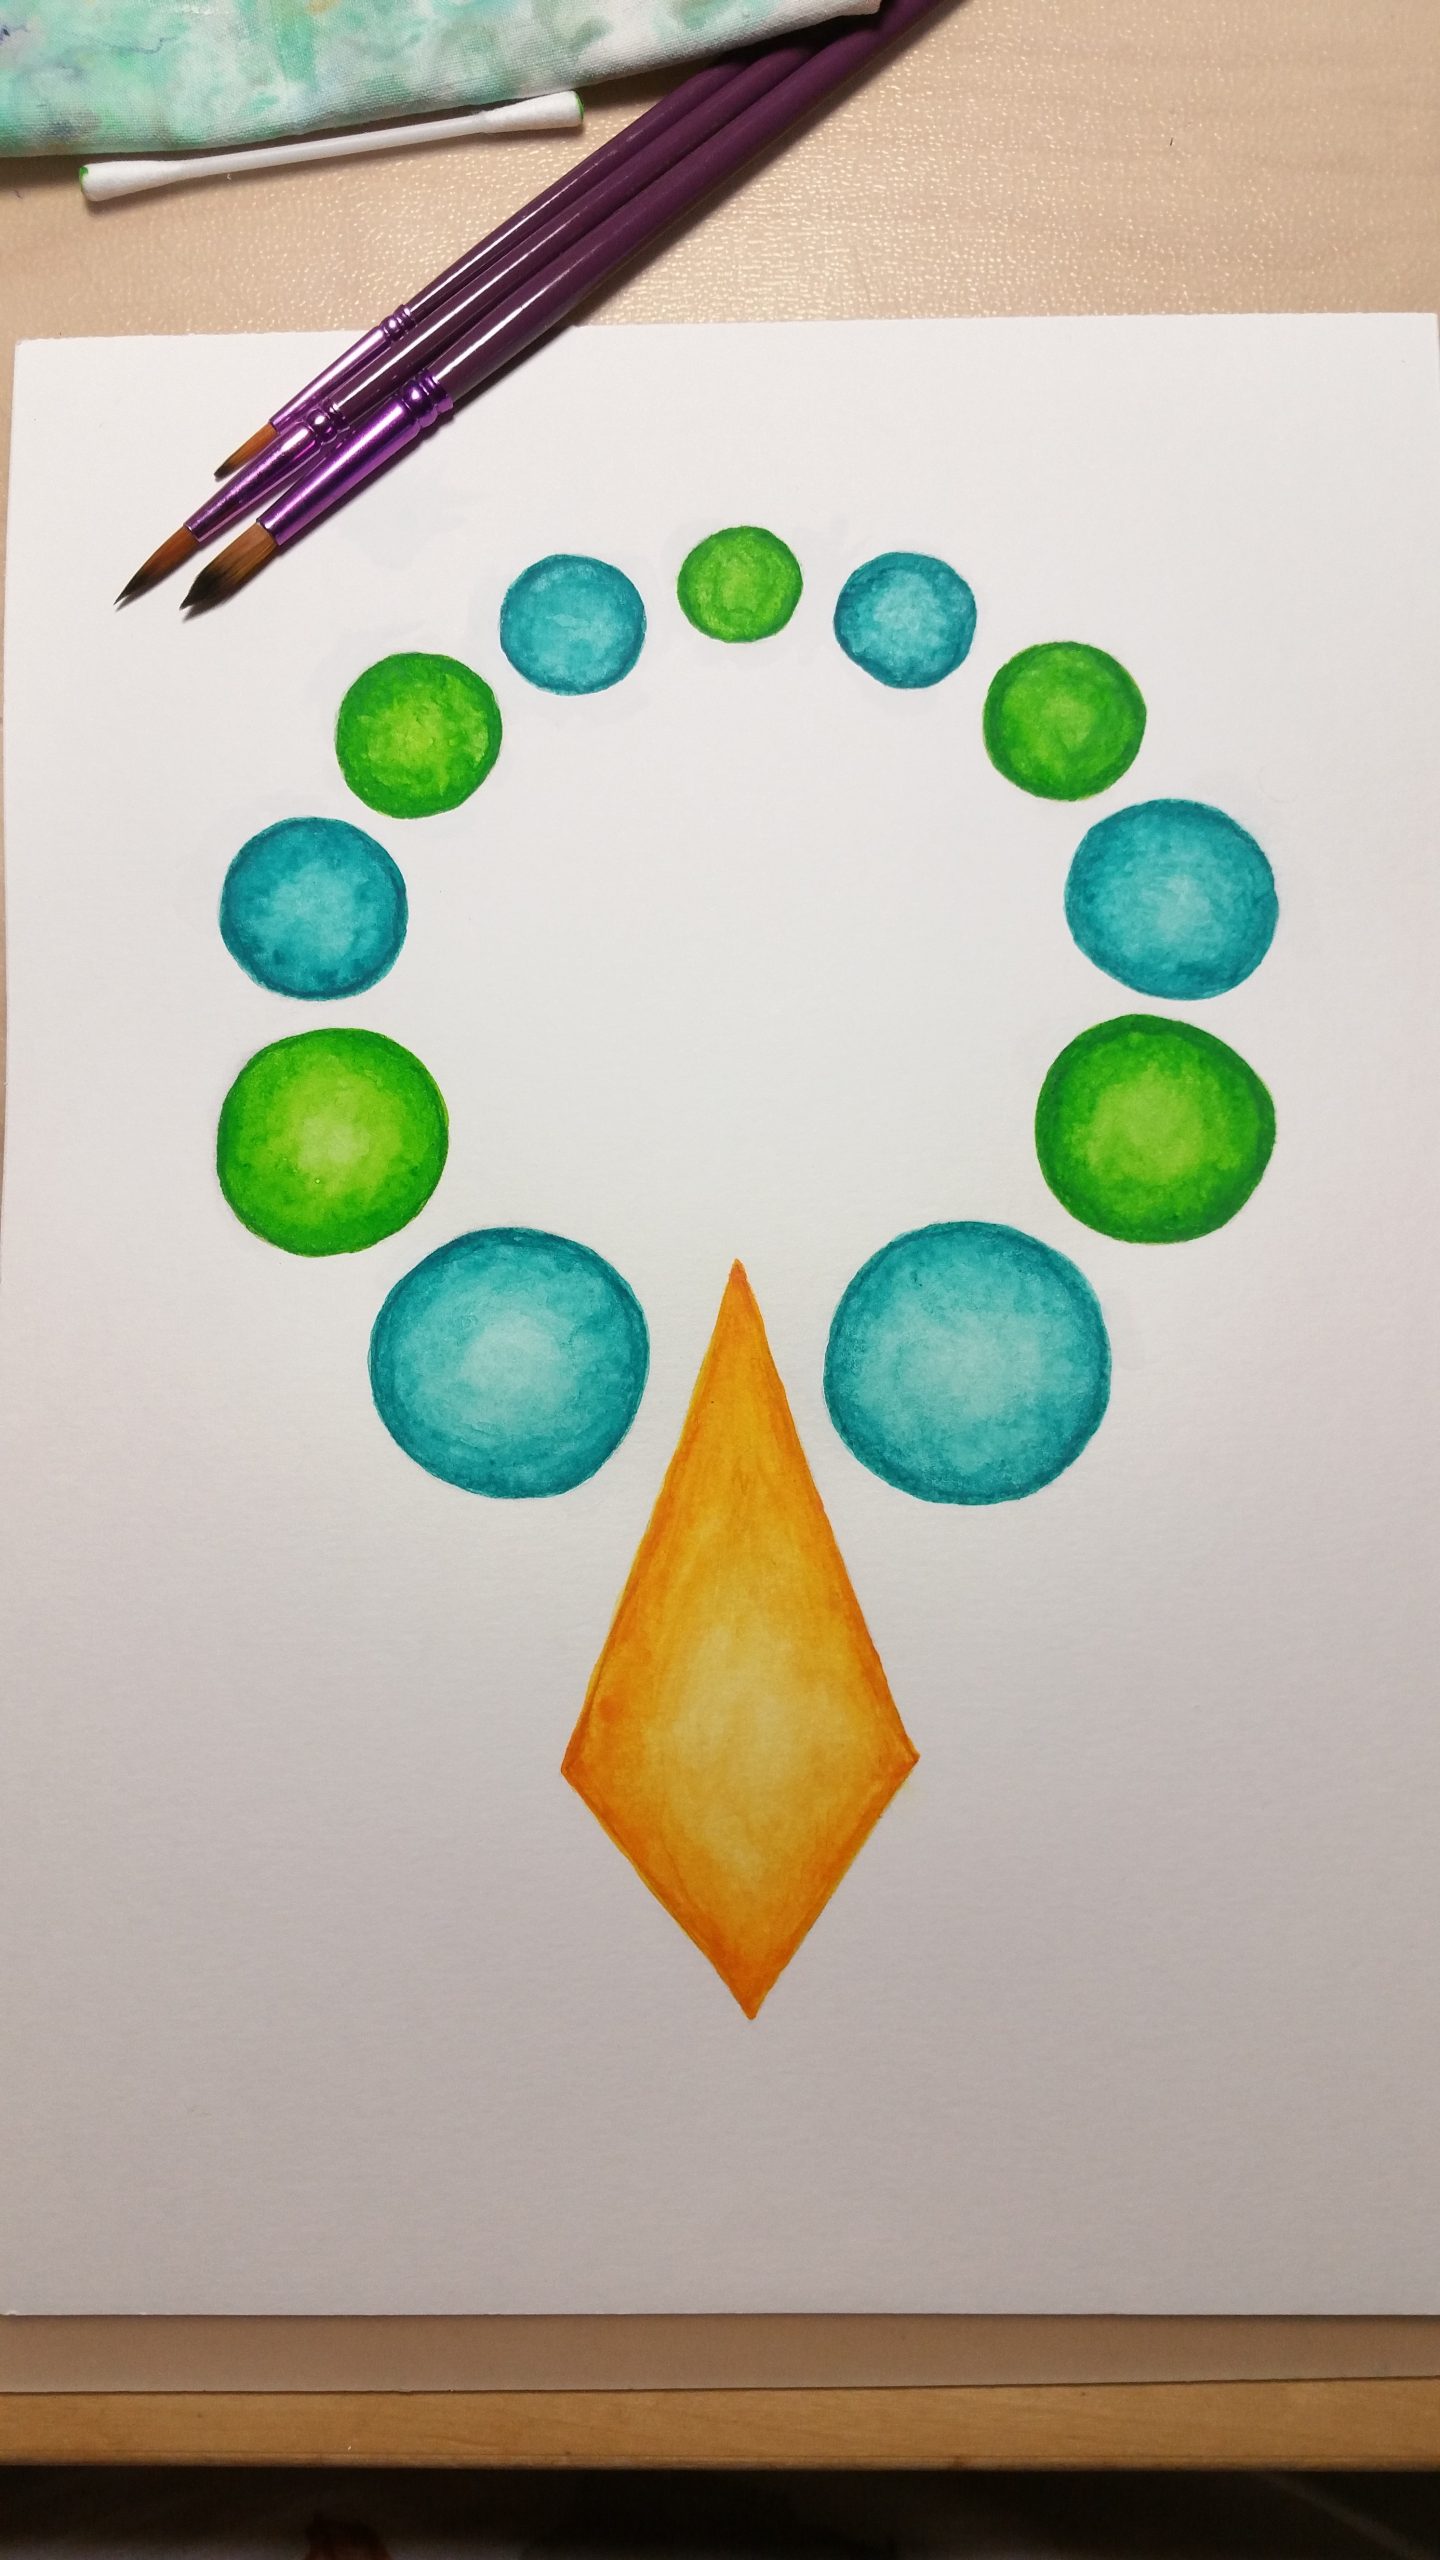
And now it is finished 🙂
I love the way it looks now.
Next step is to update all the stationary and all the internet files 🙂

The mexican holiday ‘Dia de Muertos’ – which translates to Day of the Dead – is getting more and more popular in other parts of the world.
In Anglophone Countries it is referred to ‘Dia de los Muertos’.
It is a multi-day holiday from October 31st to November 2nd and so coincides with the Western Christian holidays of All Saint’s Eve, All Saint’s Day and All Soul’s Day.
It involves family and friends.
They gather around to remember friends and family members who have died.
Traditions include building private altars honoring the deceased.
One symbol of the holiday is the skull. It is used in various ways and often decorated with flowers and other graphics.
(for more information on ‘Dia de Muertos’ take a look into Wikipedia)
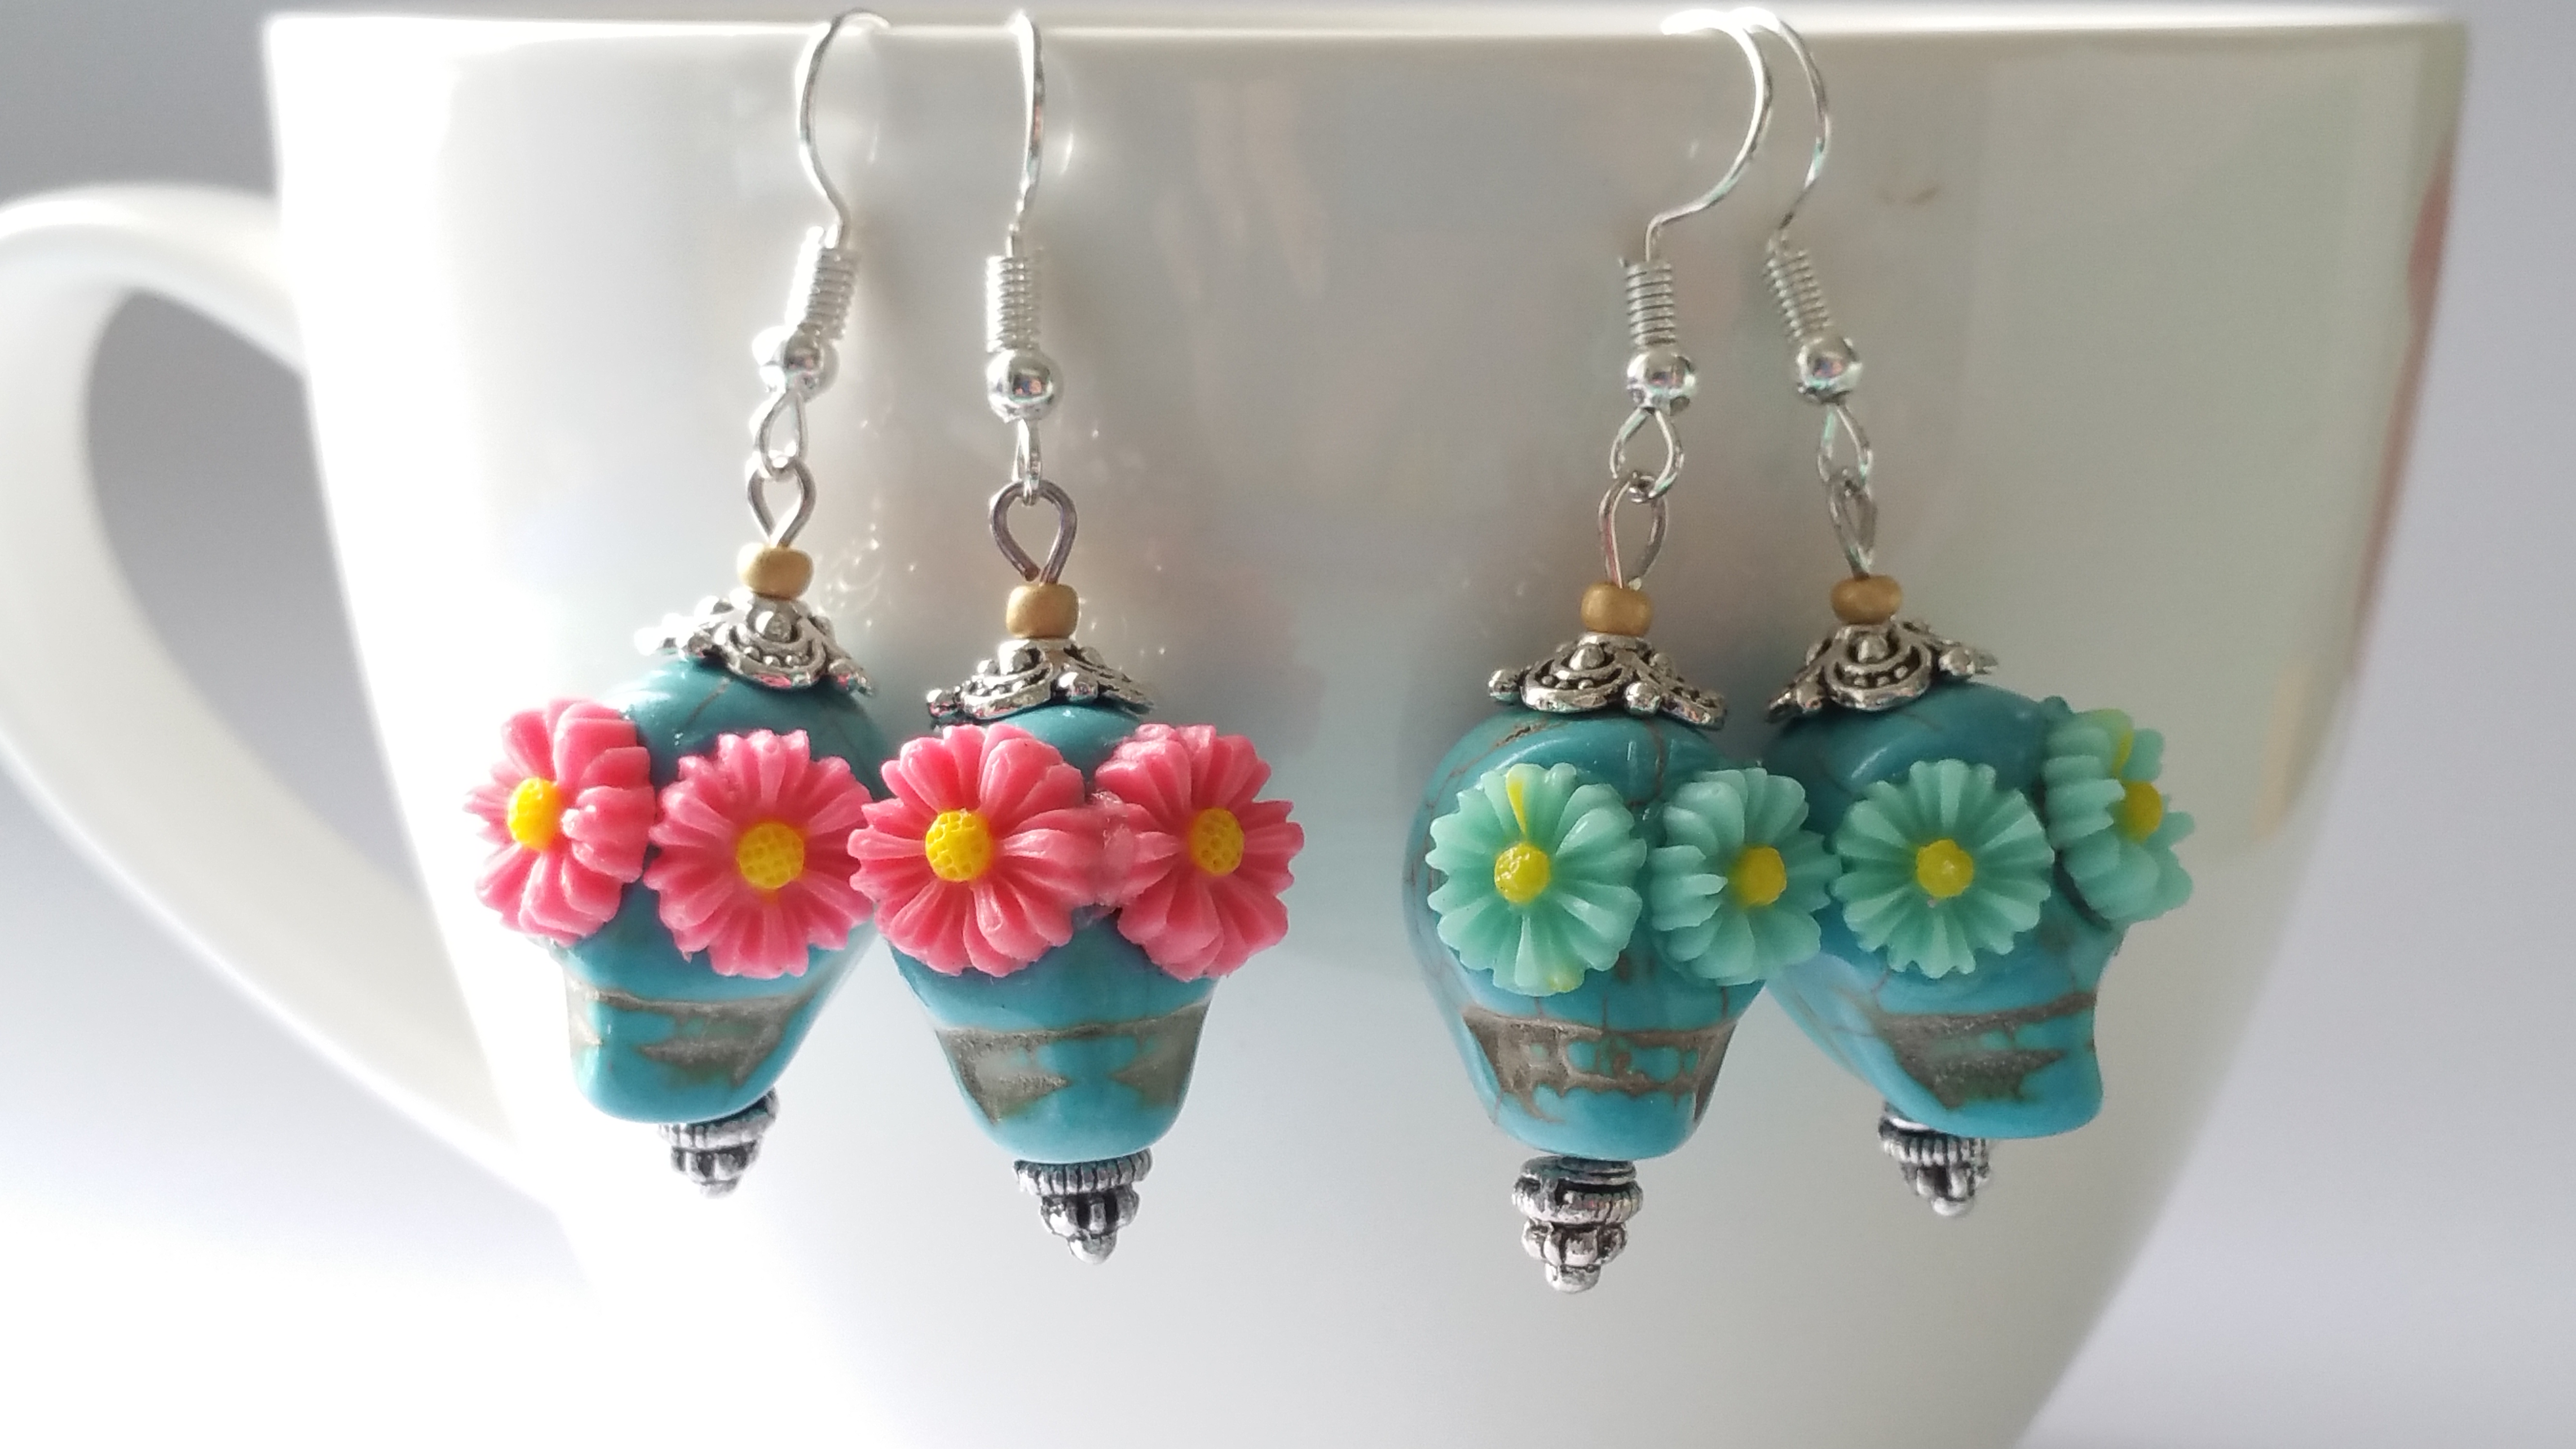
So I decided to decorate my turquoise skull beads with some resin flowers and turn them into earrings 😎

I used some resin flower cabochons that were small enough to fit the eye sockets.
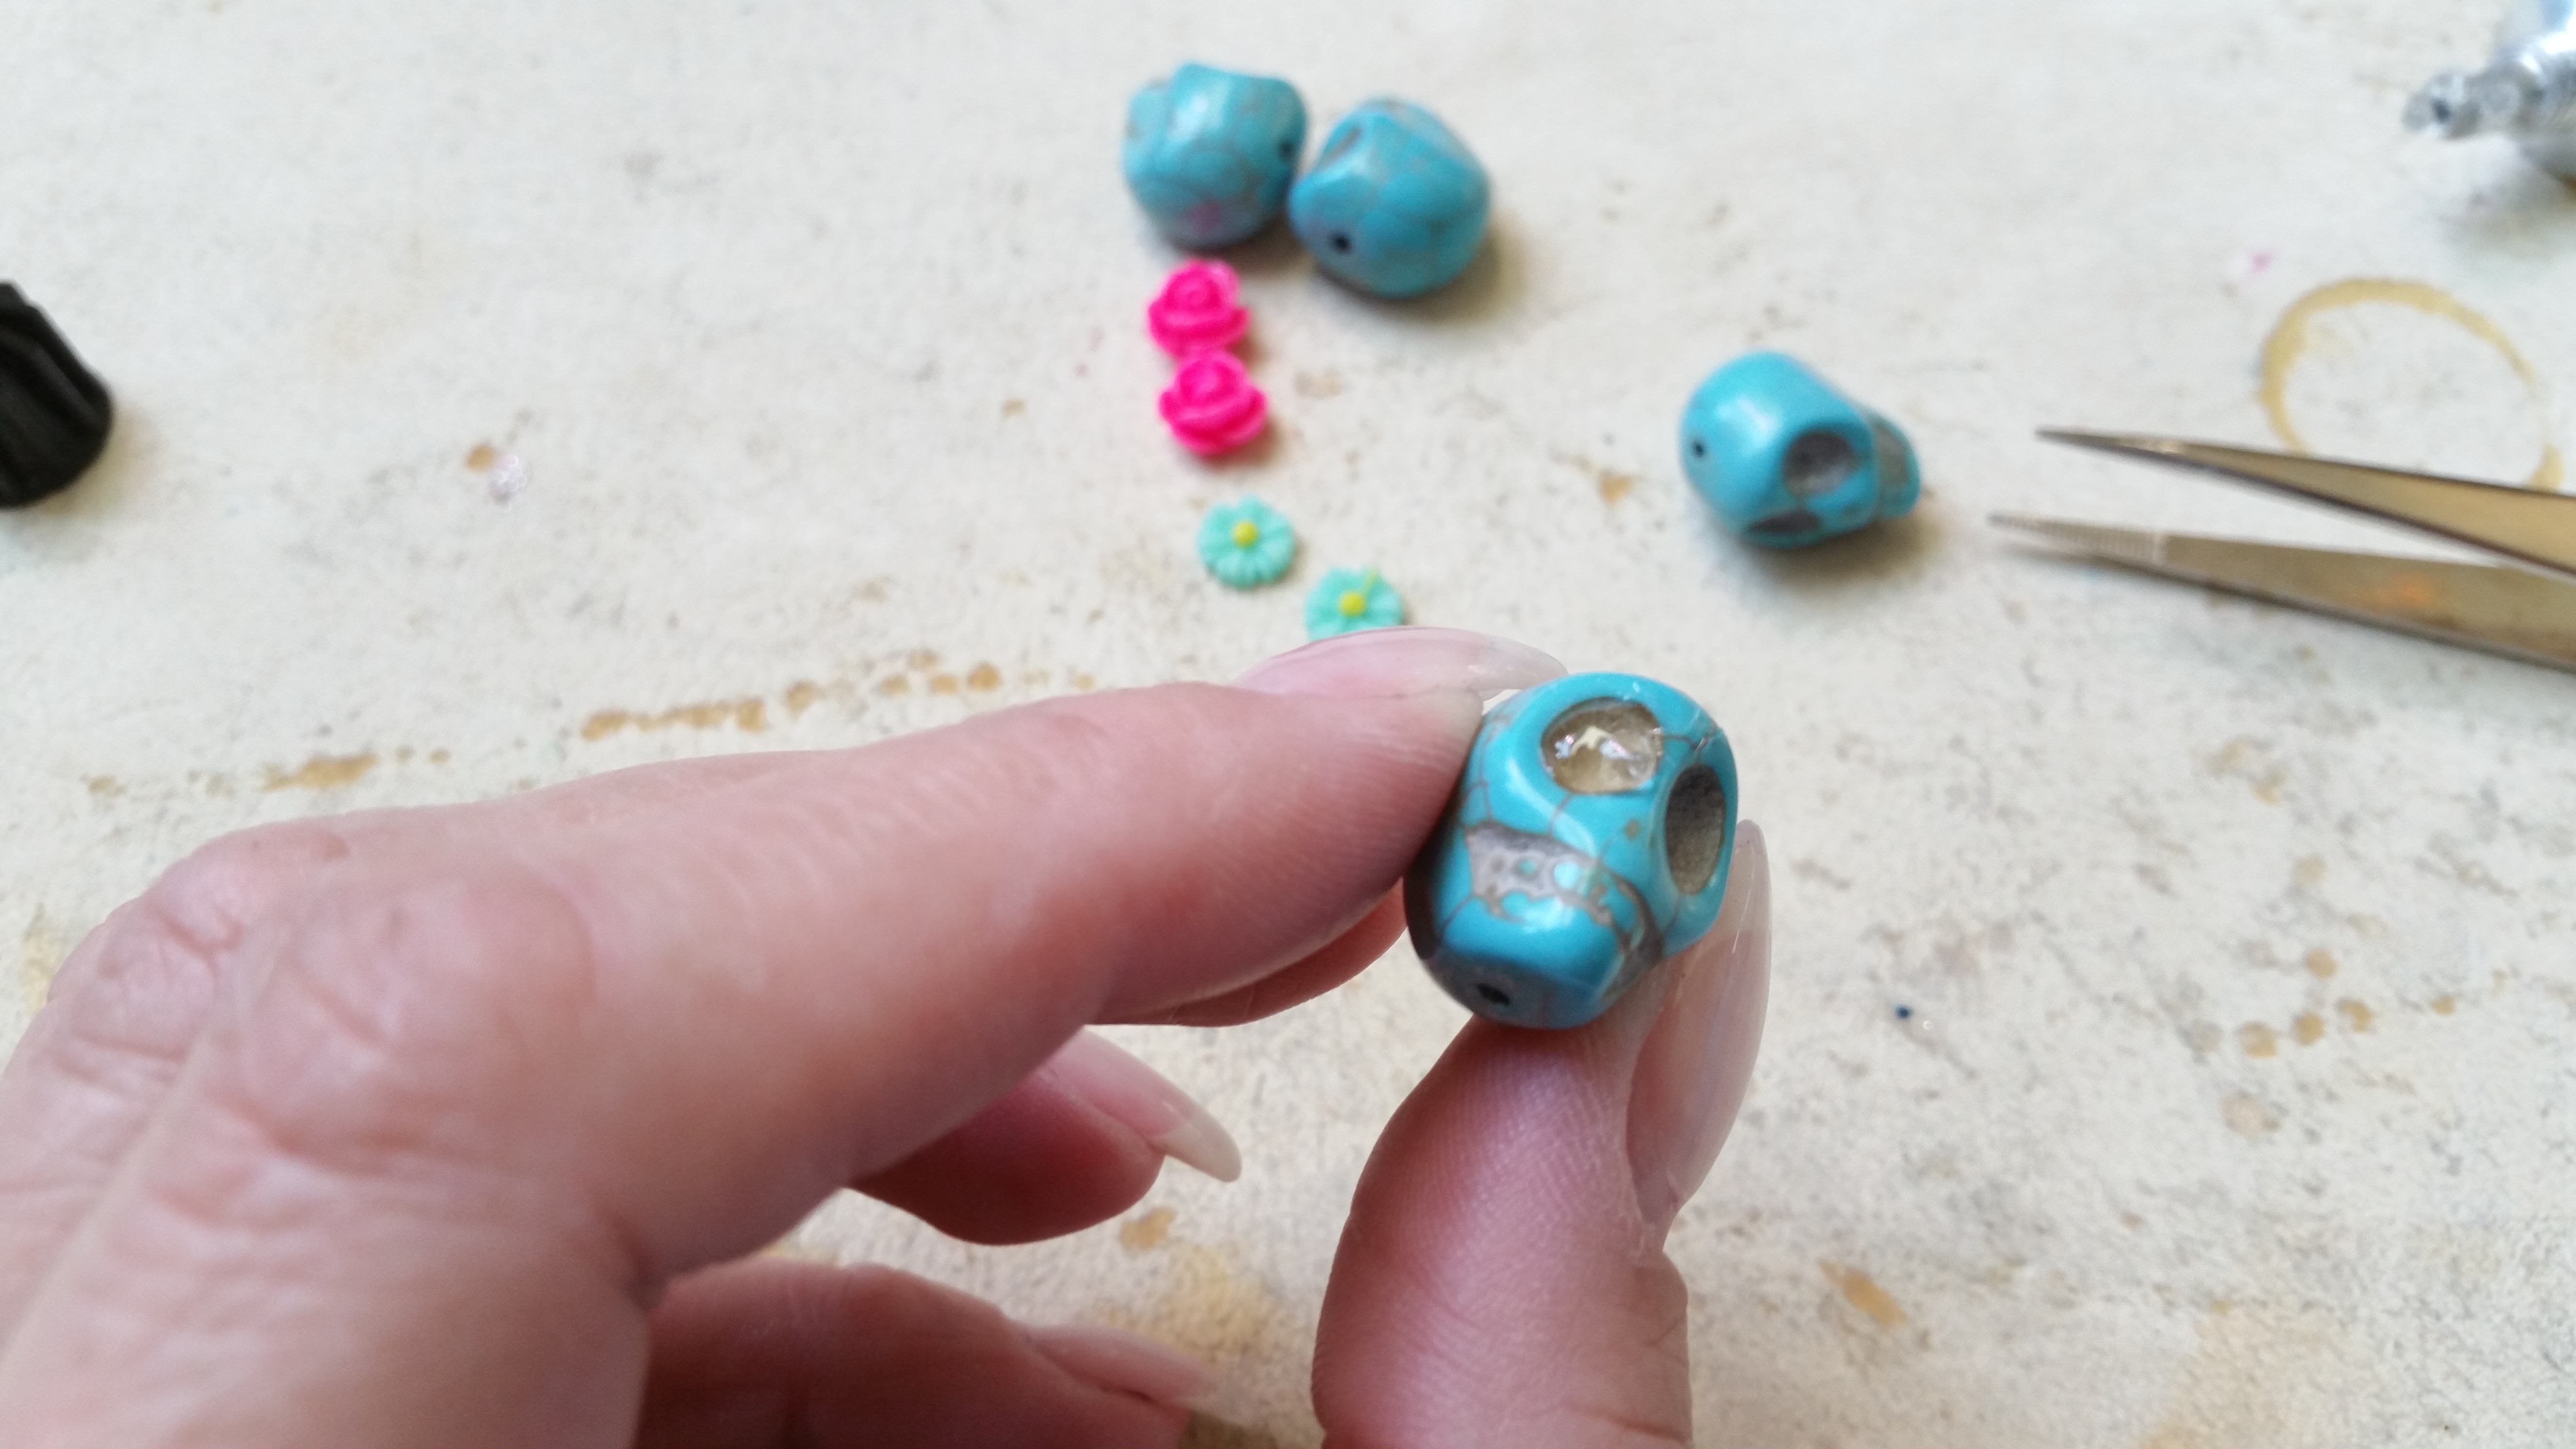
Fill the eye sockets of one side with glue and place the flower on the ball.
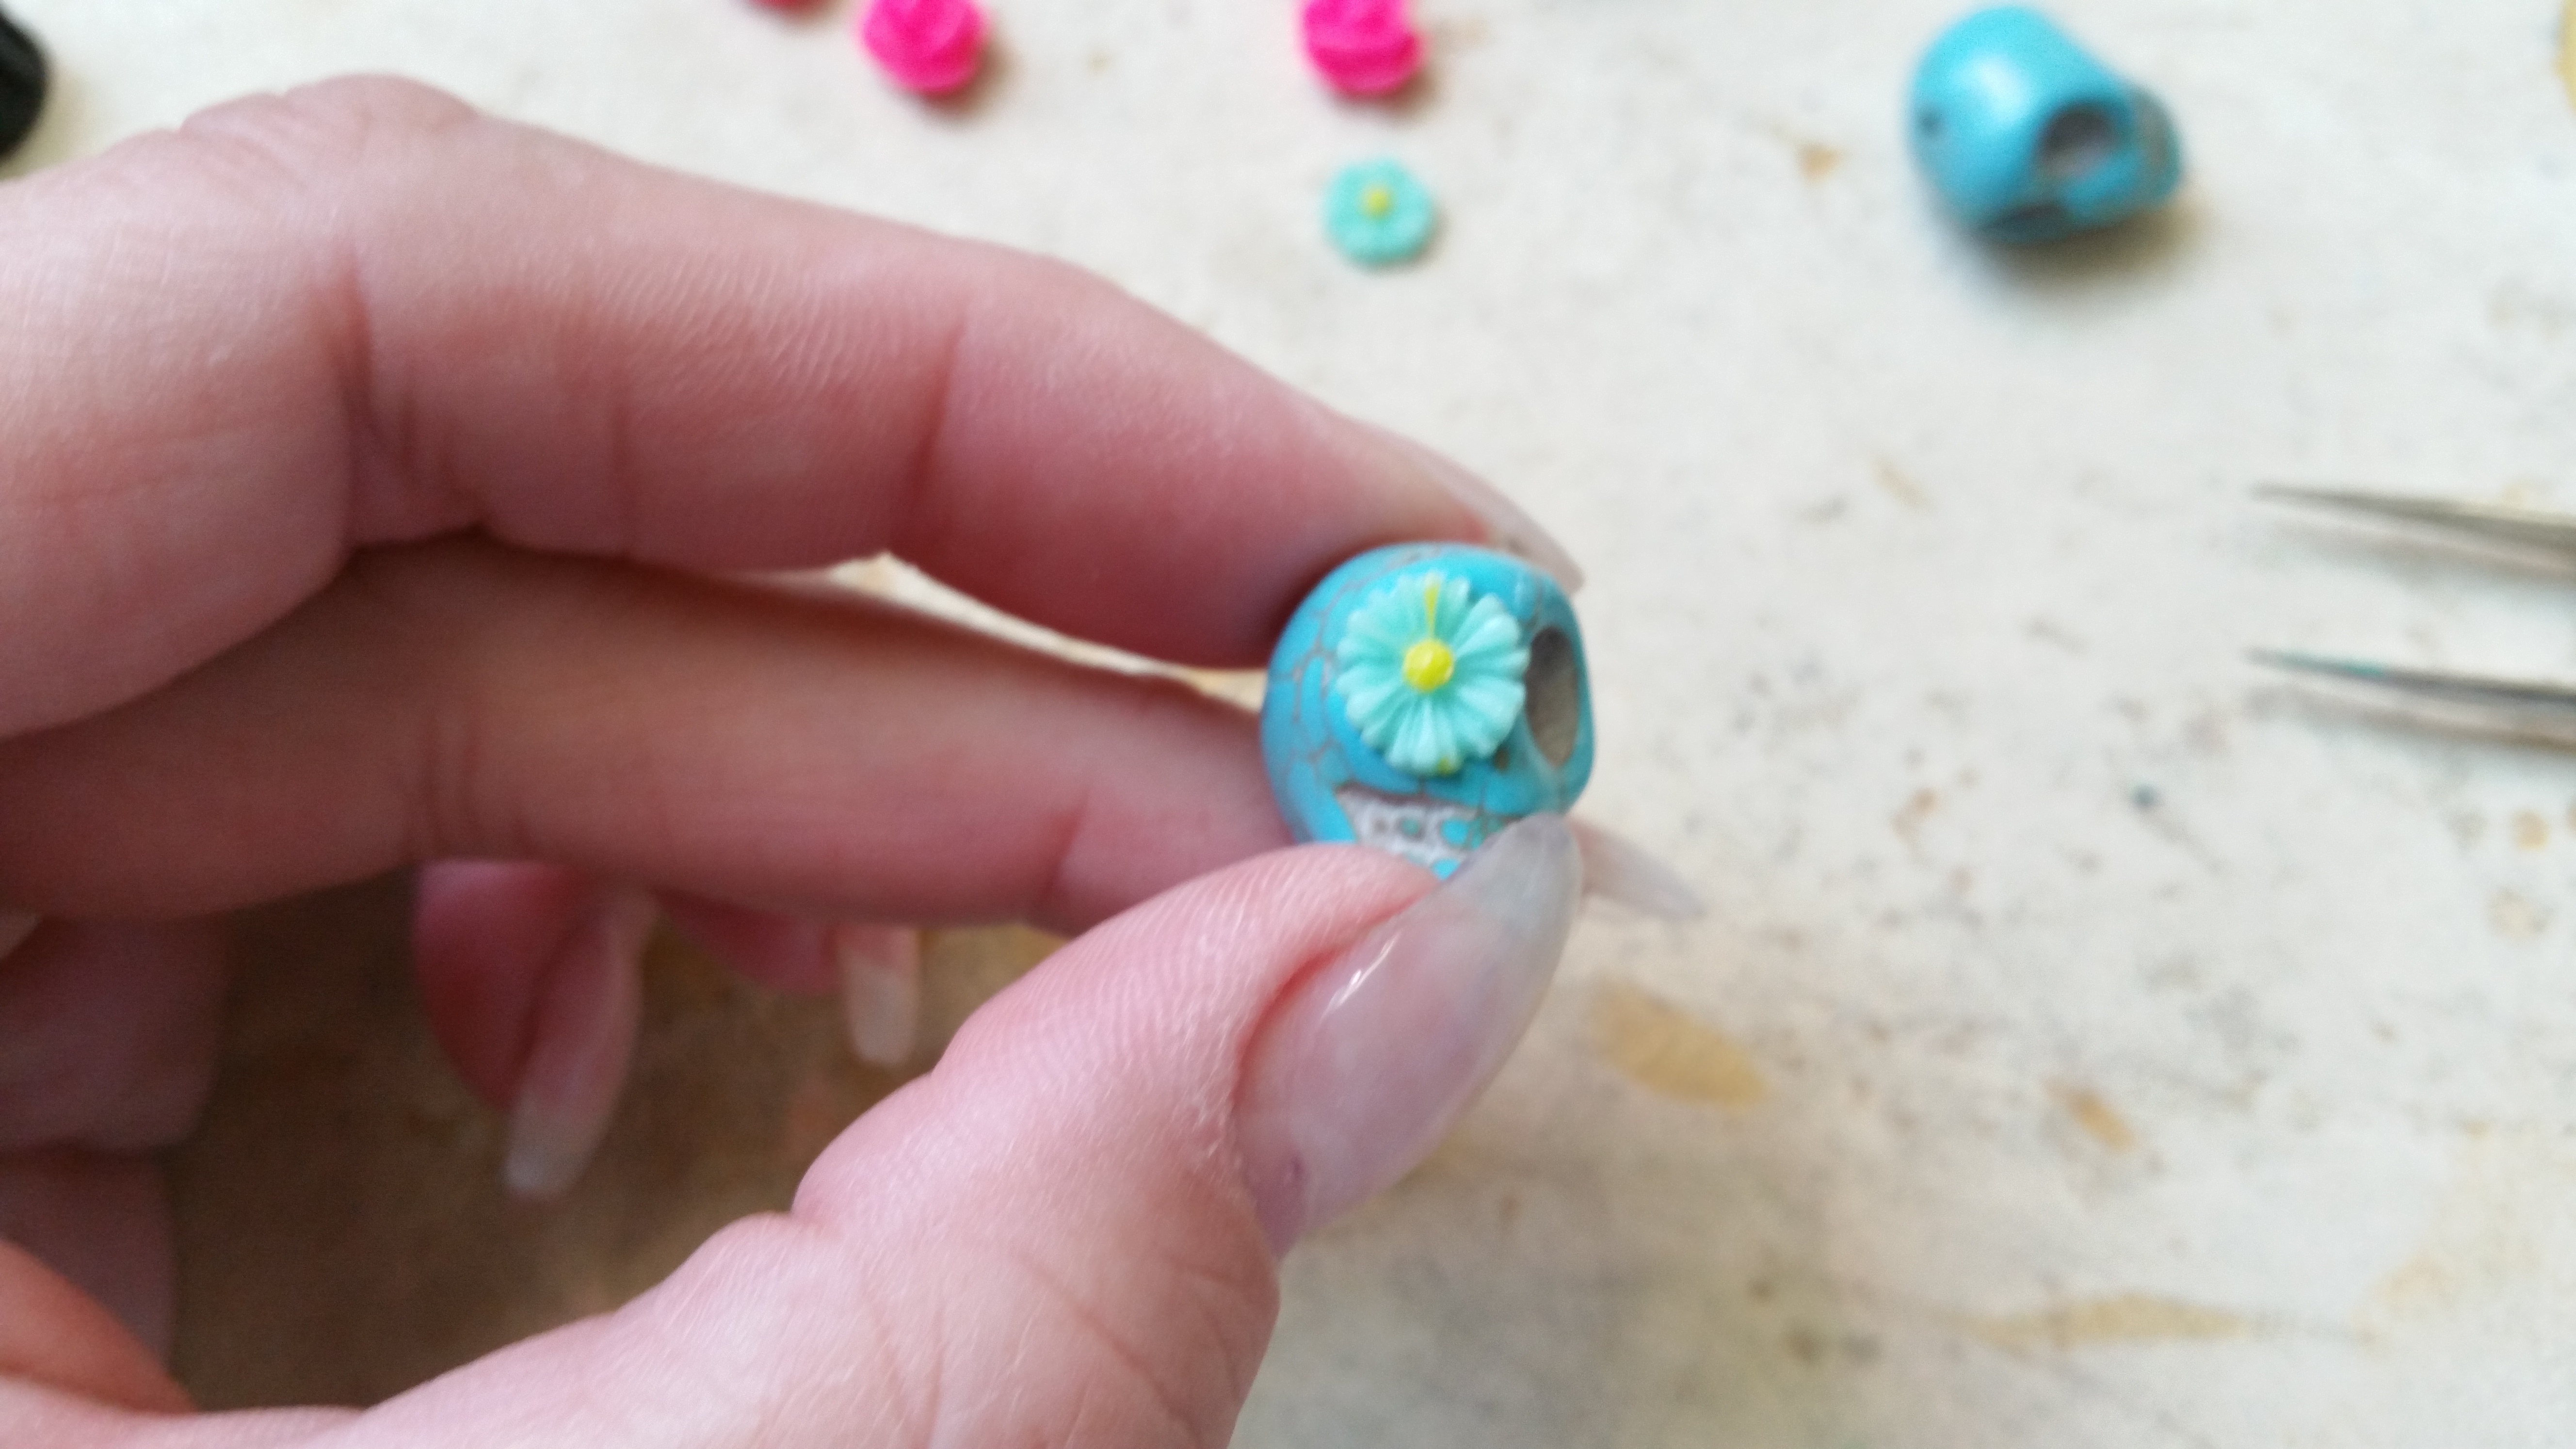
If the glue ball was too big and the glue wells out a bit take a cotton swab and clean it away.
Place the skull between two pens or similair that the flower lies on top during drying of the glue.
When this side has dried repeat the steps with the other side.

Now that the skulls are finished lets make earrings out of them.
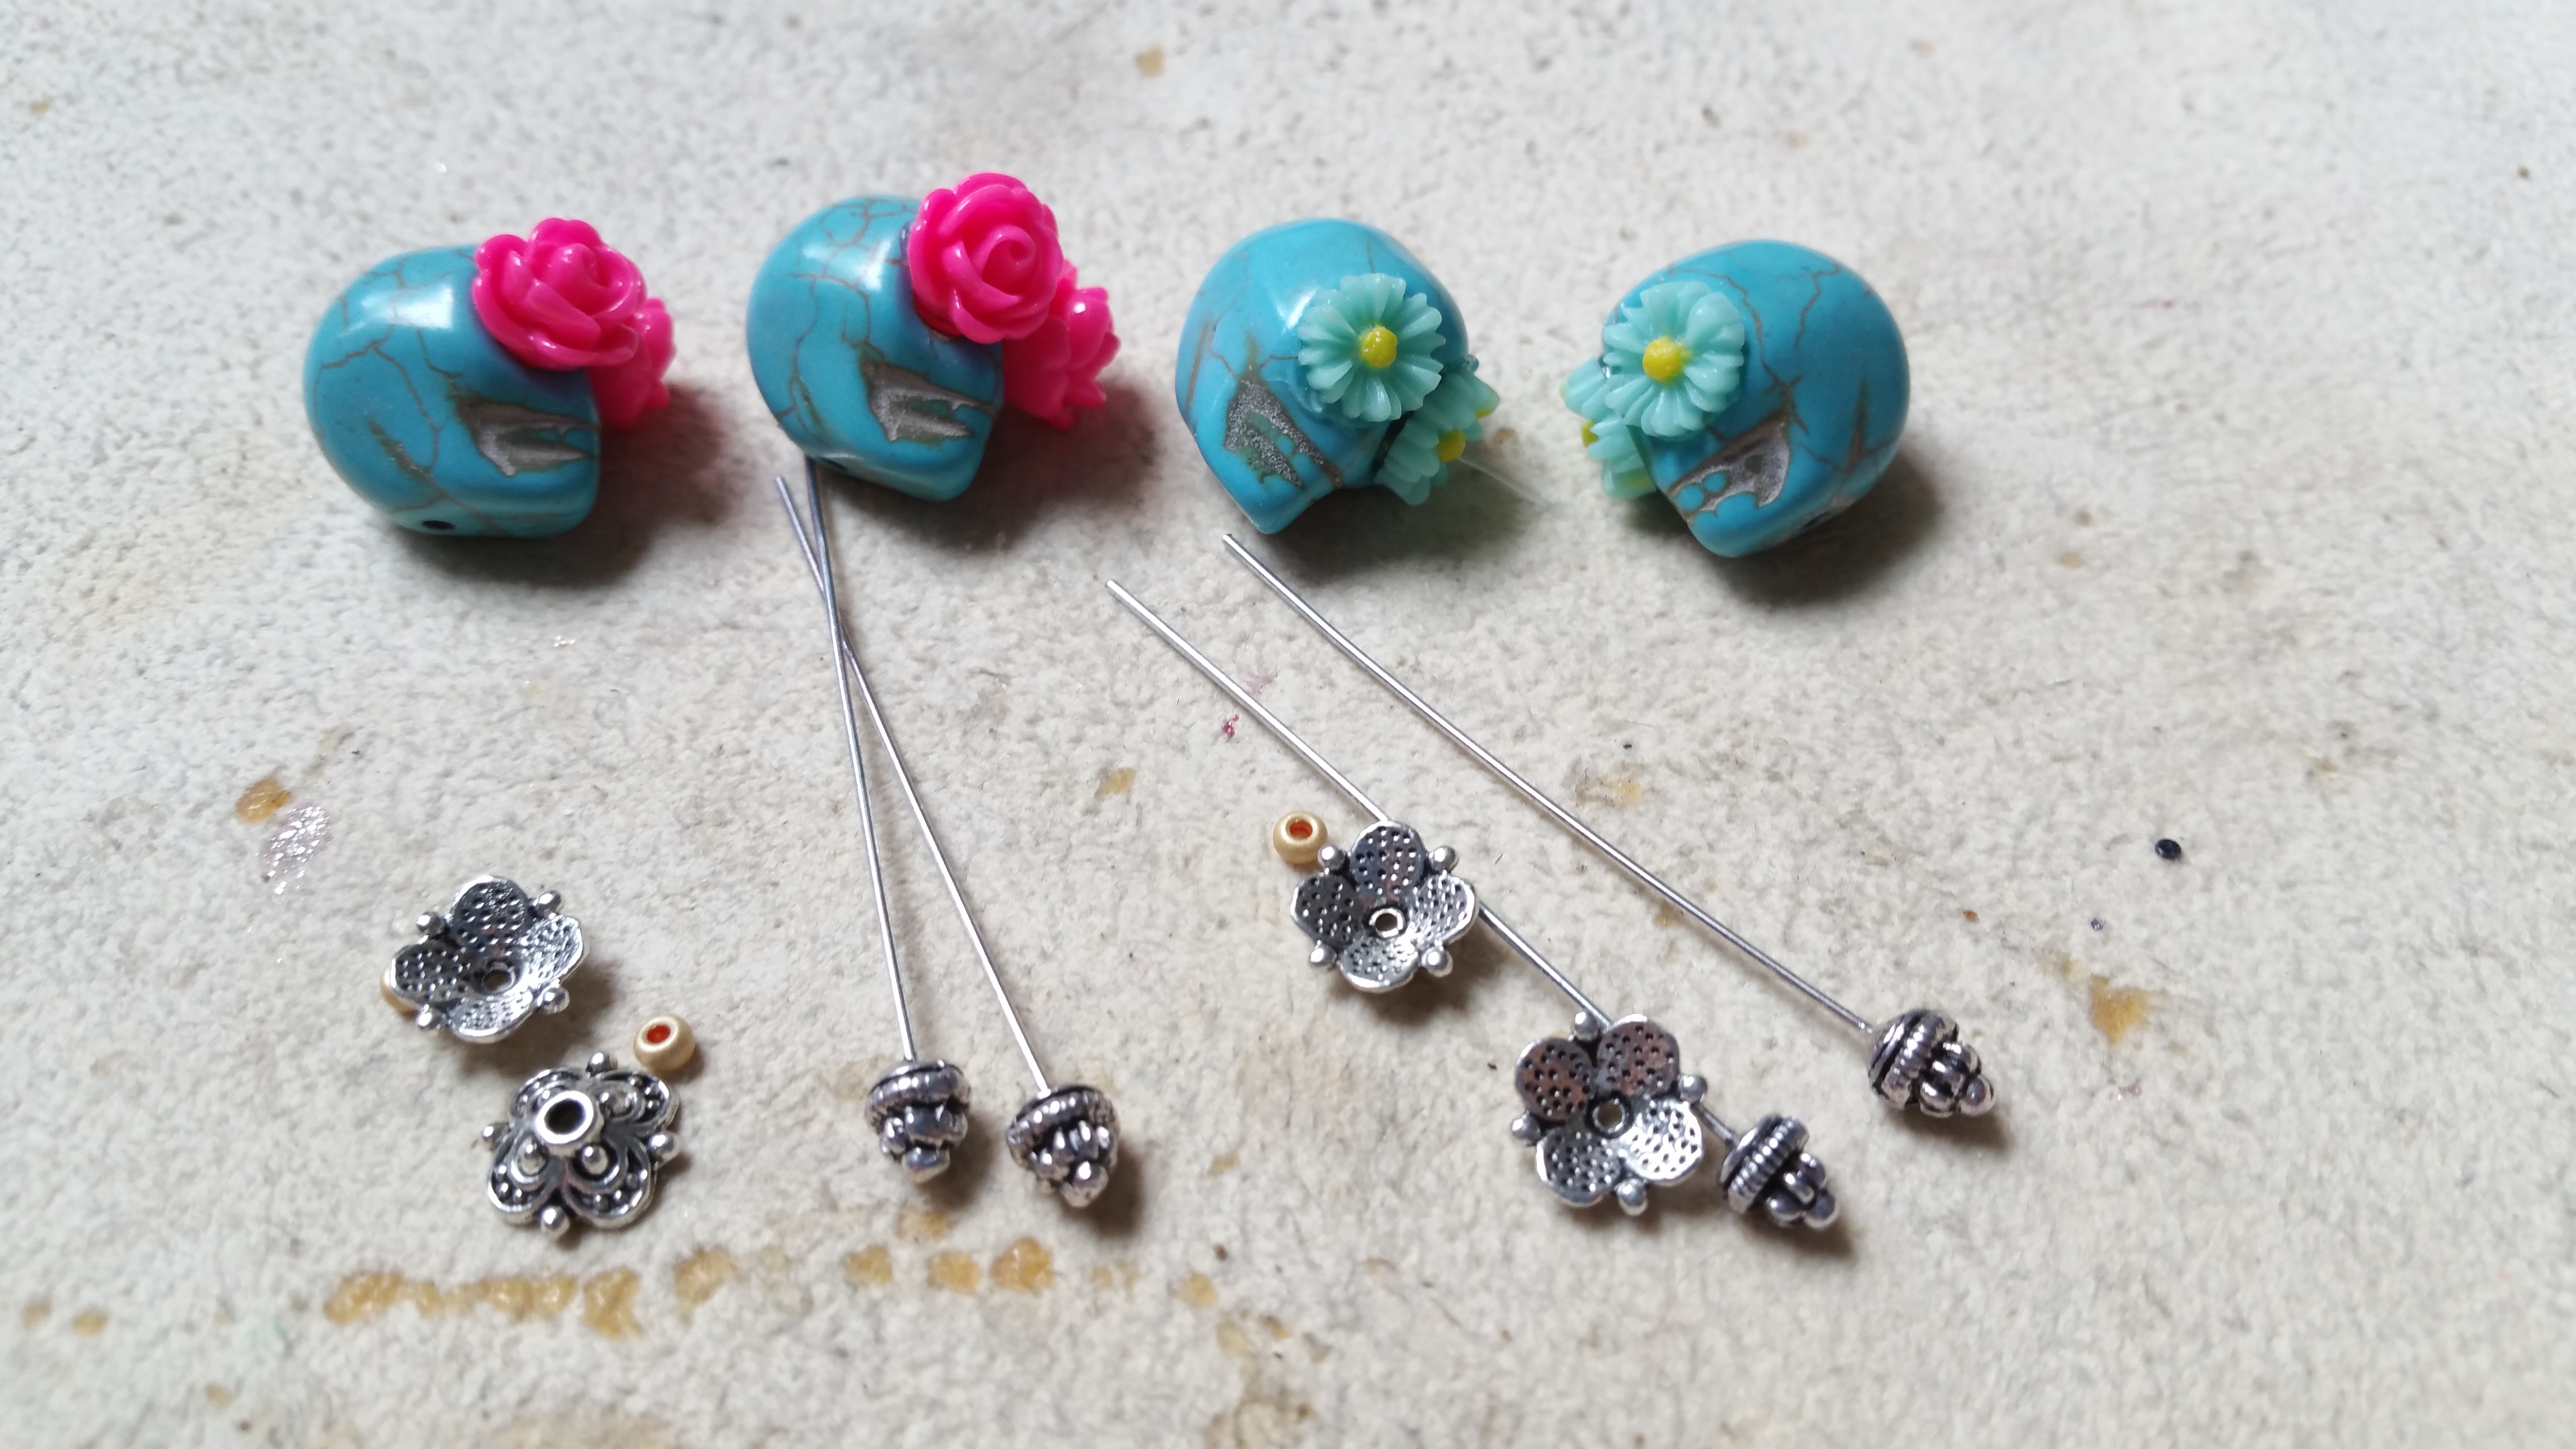
You’ll need – in addition to the skull beads the following items:
- head pins
- bead caps (optional)
- other beads (optional)
- round nose pliers
- flat nose pliers
- ear hooks

First put all the beads in the desired order onto the headpin.
I used one with an embellishment on the end.
You can also take a simple one and – if you want – use other beads underneath the skull or none at all.
It is all up to your liking.
I think the little “hat” I made with those bead caps and seedbeads look interesting. 🙂
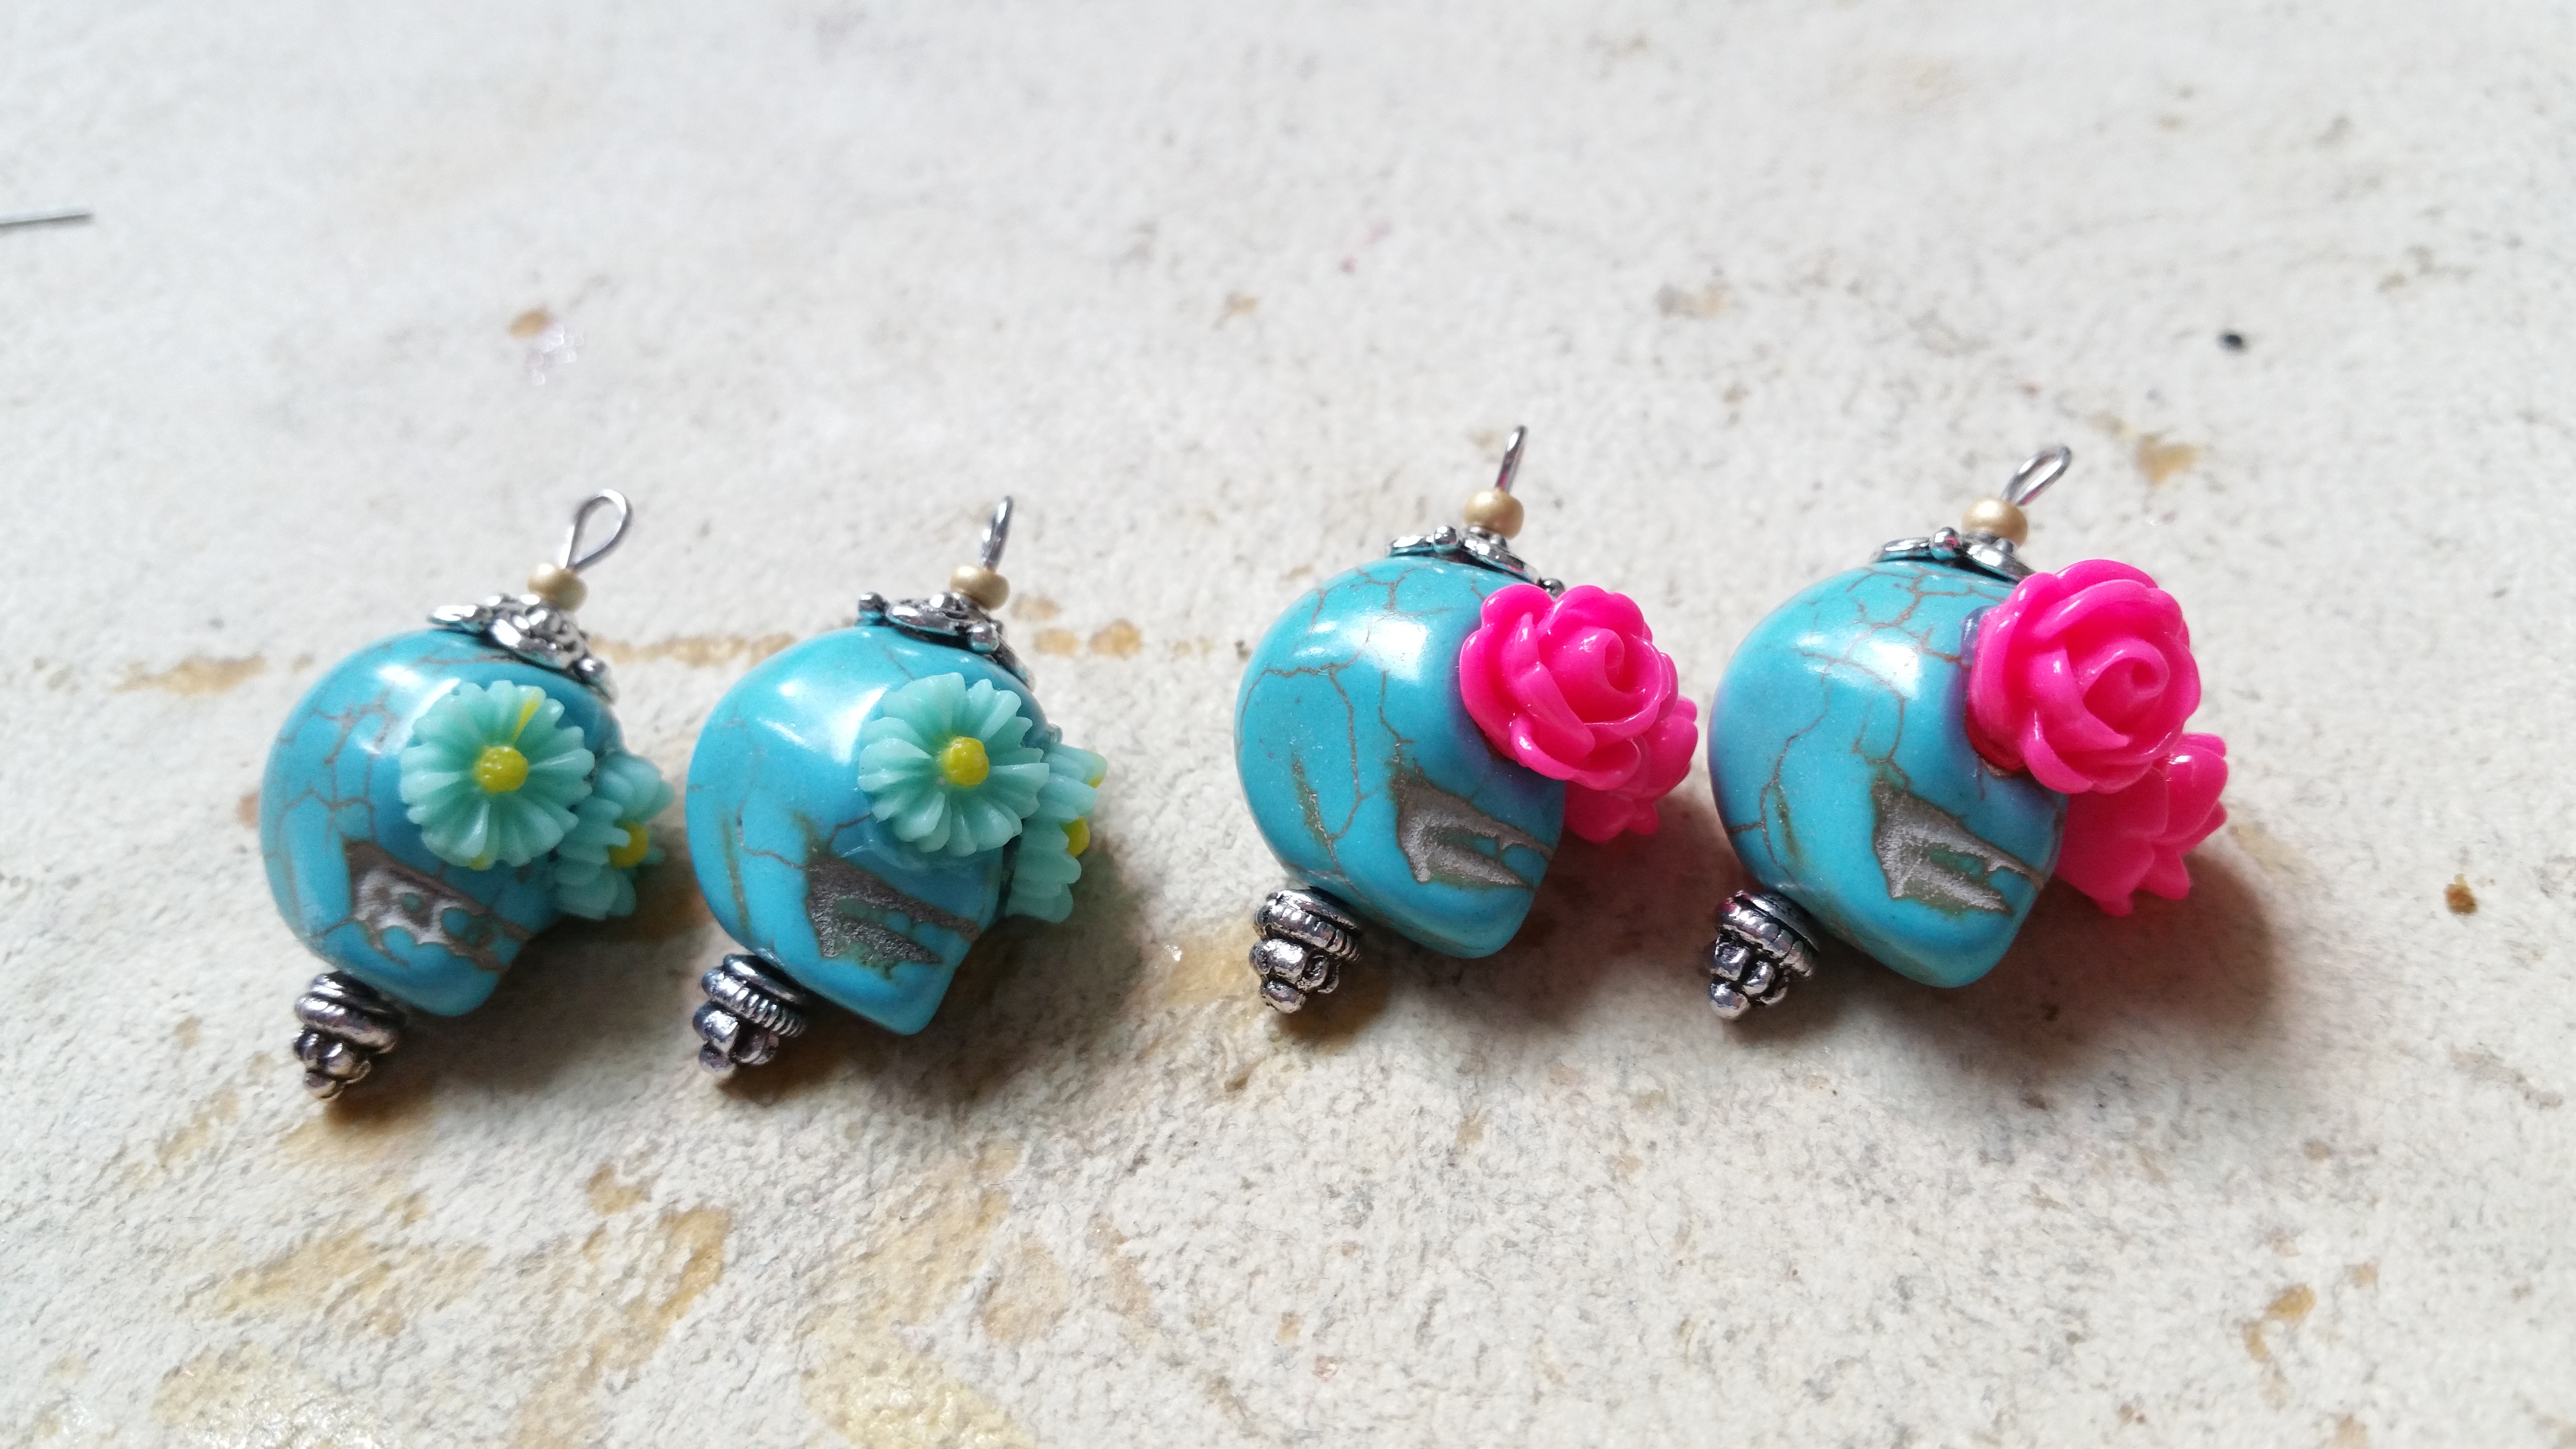
Now you need to make a loop with the head pin on top of the skull.

The last step is to hang the dangle into the ear hook – and you’re done!